


Money coming soon!
Metallic Visuals
Stick it wherever you like—no damage to the wall!
Silk Gloss
The key doesn’t wander.
50 mm slow speed
Light‑Load Hook
Silk Gold PLA
0.2 mm layer height
Easy‑To‑Remove Supports
Wall-Mounted Marvel
42g lightweight
Porous-free backplate
Beginner‑friendly
The Ultimate Tool for Behind Cabinet Doors
A Little Haven for Keys

- 0.2 mm layer height, 2‑wall walls, 15% infill density

1-disc
PLA
Designer

4

0
1. Creative Inspiration
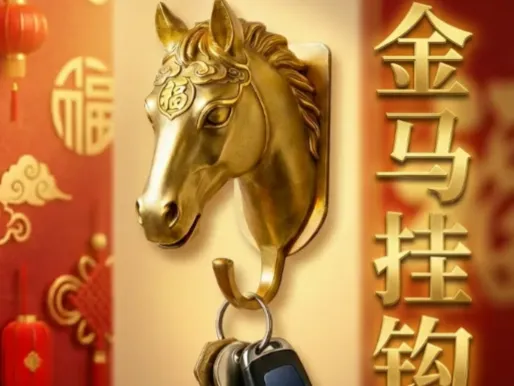
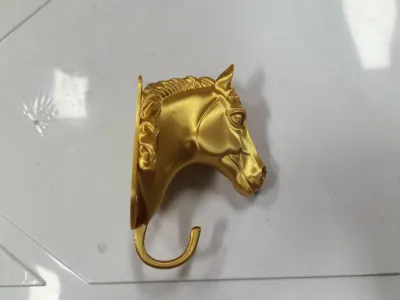
“Hang It Up in an Instant” — Transform the timeless phrase “May you achieve success as soon as you arrive” into a compact, desktop accessory that’s ready to stick right away. The horse’s head is crafted into a sleek hook, while its tail is neatly coiled into a loop; the flat, dust‑free back panel is specially designed for double‑sided adhesive, ensuring a clean, professional finish. When printed at a slow speed, the golden silk‑colored surface takes on a subtle metallic sheen, symbolizing “Golden good fortune is just around the corner.”
2. Design Highlights
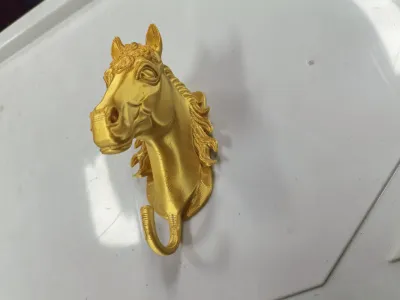
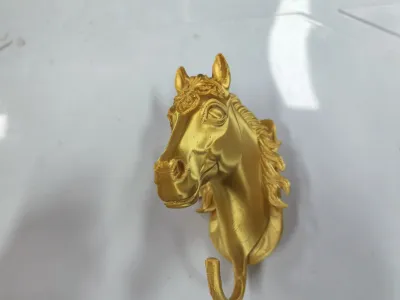
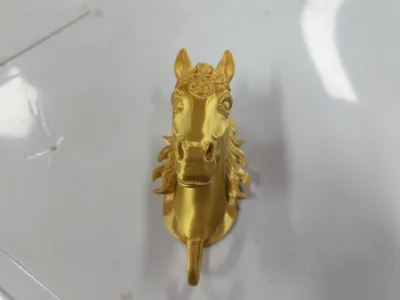
1. Dual‑Purpose Functionality: The horse’s head extends 30 mm, serving as a sturdy hook, while the 18 mm diameter key ring can easily accommodate tassels or nameplates.
2. Enhanced Load‑Bearing Capacity: The key ring features walls a robust 2 mm thick—up from the standard 1.2 mm to 2.0 mm—and localized infill has been increased to 20%, allowing it to withstand up to 2 kg without deformation under real‑world testing.
3. Seamless Back Panel: The back is completely smooth, free of countersunk holes or screw posts, specifically engineered for 3M VHB tape or adhesive-free mounting solutions—ready to hang in as little as 1 minute.
4. Tree‑Like Support Structure: Only present along the lower edge of the horse’s head and on the inner side of the key ring, with contact points measuring just 0.16 mm—light enough to snap off with a gentle hand twist, eliminating any risk of broken legs.
5. Spiral Gyroid Infill: The back panel employs a spiral Gyroid pattern at 15%, striking a perfect balance between lightweight construction and superior flexural strength, ensuring that the piece remains securely attached even after adhesive application, with minimal risk of edge warping.
3. Printing Requirements (FDM Testing)
- Layer Height: 0.2 mm
- Print Speed: 50 mm/s (30 mm/s for external walls)
- Acceleration: 800 mm/s²
- Infill: 15% Gyroid (20% in the back panel area)
- Supports: Tree‑like, easy to remove
- Nozzle: 0.4 mm
- Temperature: 215 ℃ / 60 ℃
- Drying: Silk Gold—55 ℃ for 4 hours
- Weight: Approximately 42 g (including supports)
- Print Time: 3 hours 15 minutes
4. Mounting Options (
Back Panel Mounting Solutions [Double‑Sided Adhesive & Glue Versions])
1. 3M VHB Ultra‑Thin Back Adhesive (Recommended)
- Specifications: 2 circular pads, each 15 mm in diameter
- Application: Wipe the back panel dry → Remove the protective film → Press firmly for 10 seconds → Hang immediately.
- Load Capacity: Easily handles everyday keys weighing up to 1 kg; when removing, gently pull the adhesive strip—no residue left behind on the wall.
2. Hot Melt Adhesive (Low‑Temperature Gun)
- Apply two wavy lines of adhesive along the outer edge of the back panel, leaving a central gap to reduce stress concentration on the wall.
- Advantages: Cures in just 5 seconds at room temperature, ideal for temporary installations at exhibitions or rental properties; simply wipe clean with alcohol when it’s time to remove.
3. Nail‑Free Adhesive (Liquid Nails)
- Apply three small dots, each about the size of a soybean, press firmly for 30 seconds, then allow 24 hours for full curing before reaching maximum bond strength.
- Perfect for smooth surfaces like latex paint, ceramic tiles, and glass; when removing, use a thin wire saw to carefully cut through the adhesive—leaving no nail holes behind.
4. Foam Double‑Sided Adhesive (Emergency Solution)
- Use a 1 mm thick sheet, cut two 20 mm strips, and apply them to the top and bottom edges of the back panel.
- Maximum load capacity: ≤0.5 kg, suitable for short‑term use only; removal may damage wall paint—use with caution.
Installation Sequence:
Wipe the back clean → Choose your adhesive → Align and press firmly → Allow to cure undisturbed → Hang your keys.
Want to change the location? Simply use a low‑temperature hairdryer for 1 minute—the adhesive will soften, making it easy to gently pry the piece loose. We wish you “fortune at the first touch!”
5. Essential Tips for Removing Supports
- Cut First, Then Break: Use curved‑edge scissors to make clean, 0° cuts along the base of each support leg, leaving a 0.5 mm stub; then gently wiggle the support free—never use a spatula to pry sideways.
- Inner Side of the Key Ring: The inner rim bears the heaviest load—after cutting, push outward from the inside, avoiding any reverse bending.
- Temperature Assistance: Let the heated bed sit at 60 ℃ for 3 minutes—PLA silk becomes softer and easier to peel off.
Originality of the Model
The author declares that this work is their personally original model
This model is licensed under the following terms:
Credit must be given to the creator
Models(1)
- 马头挂件.3mfDesigner

8.31 MB

2026-01-19