


The Idea Guy
action
dji
DJI
Micro Single

- 0.2 mm layer height, 2‑wall walls, 15% infill density

1-disc
PETG-CF
Designer5(1)

128

6
We recommend using FDM printing with PLA filament for this project (we won’t go into the wiring details here, as it involves soldering batteries—so please don’t attempt it if you lack experience).
(You’ll need to provide two magnetic connectors yourself; either the official ones or third-party alternatives will work.)
The following components are required for the replication:
Fill light:
One charging protection board
https://e.tb.cn/h.iSygyZxs6XZjVp3?tk=KLDr5b8oO24
One 18650 lithium battery
One 18650 battery holder
One toggle switch (stem height: 3 mm)
https://e.tb.cn/h.iiX3wG6hk4Nptel?tk=UoP35b8qszf
One small LED board measuring 13.5 mm × 64 mm (you can often find these at a bargain on Pinduoduo—they’re very inexpensive)
Twelve 6 mm × 2 mm magnets
Power supply base:
One fast-charging protection board for lithium batteries (make sure to choose the version with a USB-C port for fast charging)
https://e.tb.cn/h.iRVLPjxmlCHZzgQ?tk=u5XP5b8I2NJ
One 18650 battery (capacity is flexible)
Four M3 × 10 screws
Four M3 × 20 screws
A few points to note during replication:
For the fill light: keep the wiring as short as possible; otherwise, limited space will make routing difficult.
In my process, after all components are installed, I pour silicone resin over the LED board and then cure it in an oven.
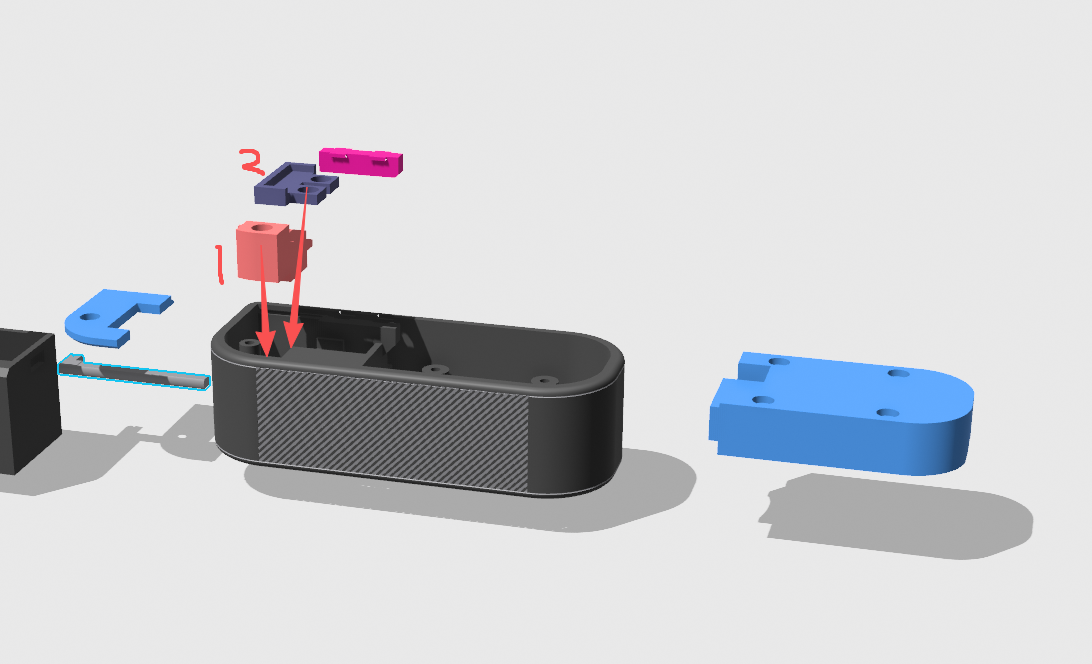
Installation sequence: place the 18650 battery in the battery holder, insert the battery downward into the fill-light housing, install the protection board, connect the charging port to the预留接口 on the housing, simultaneously link the battery’s negative terminal to both the protection board’s negative terminal and the LED board’s negative terminal, and connect the battery’s positive terminal to both the protection board’s positive terminal and pin 1 of the toggle switch. Then connect pin 2 of the toggle switch to the LED board, put on the cover, and you’re done.
For the power-supply base: simply solder the battery’s positive and negative terminals to the corresponding terminals on the protection board, aligning them properly before placing everything in position.
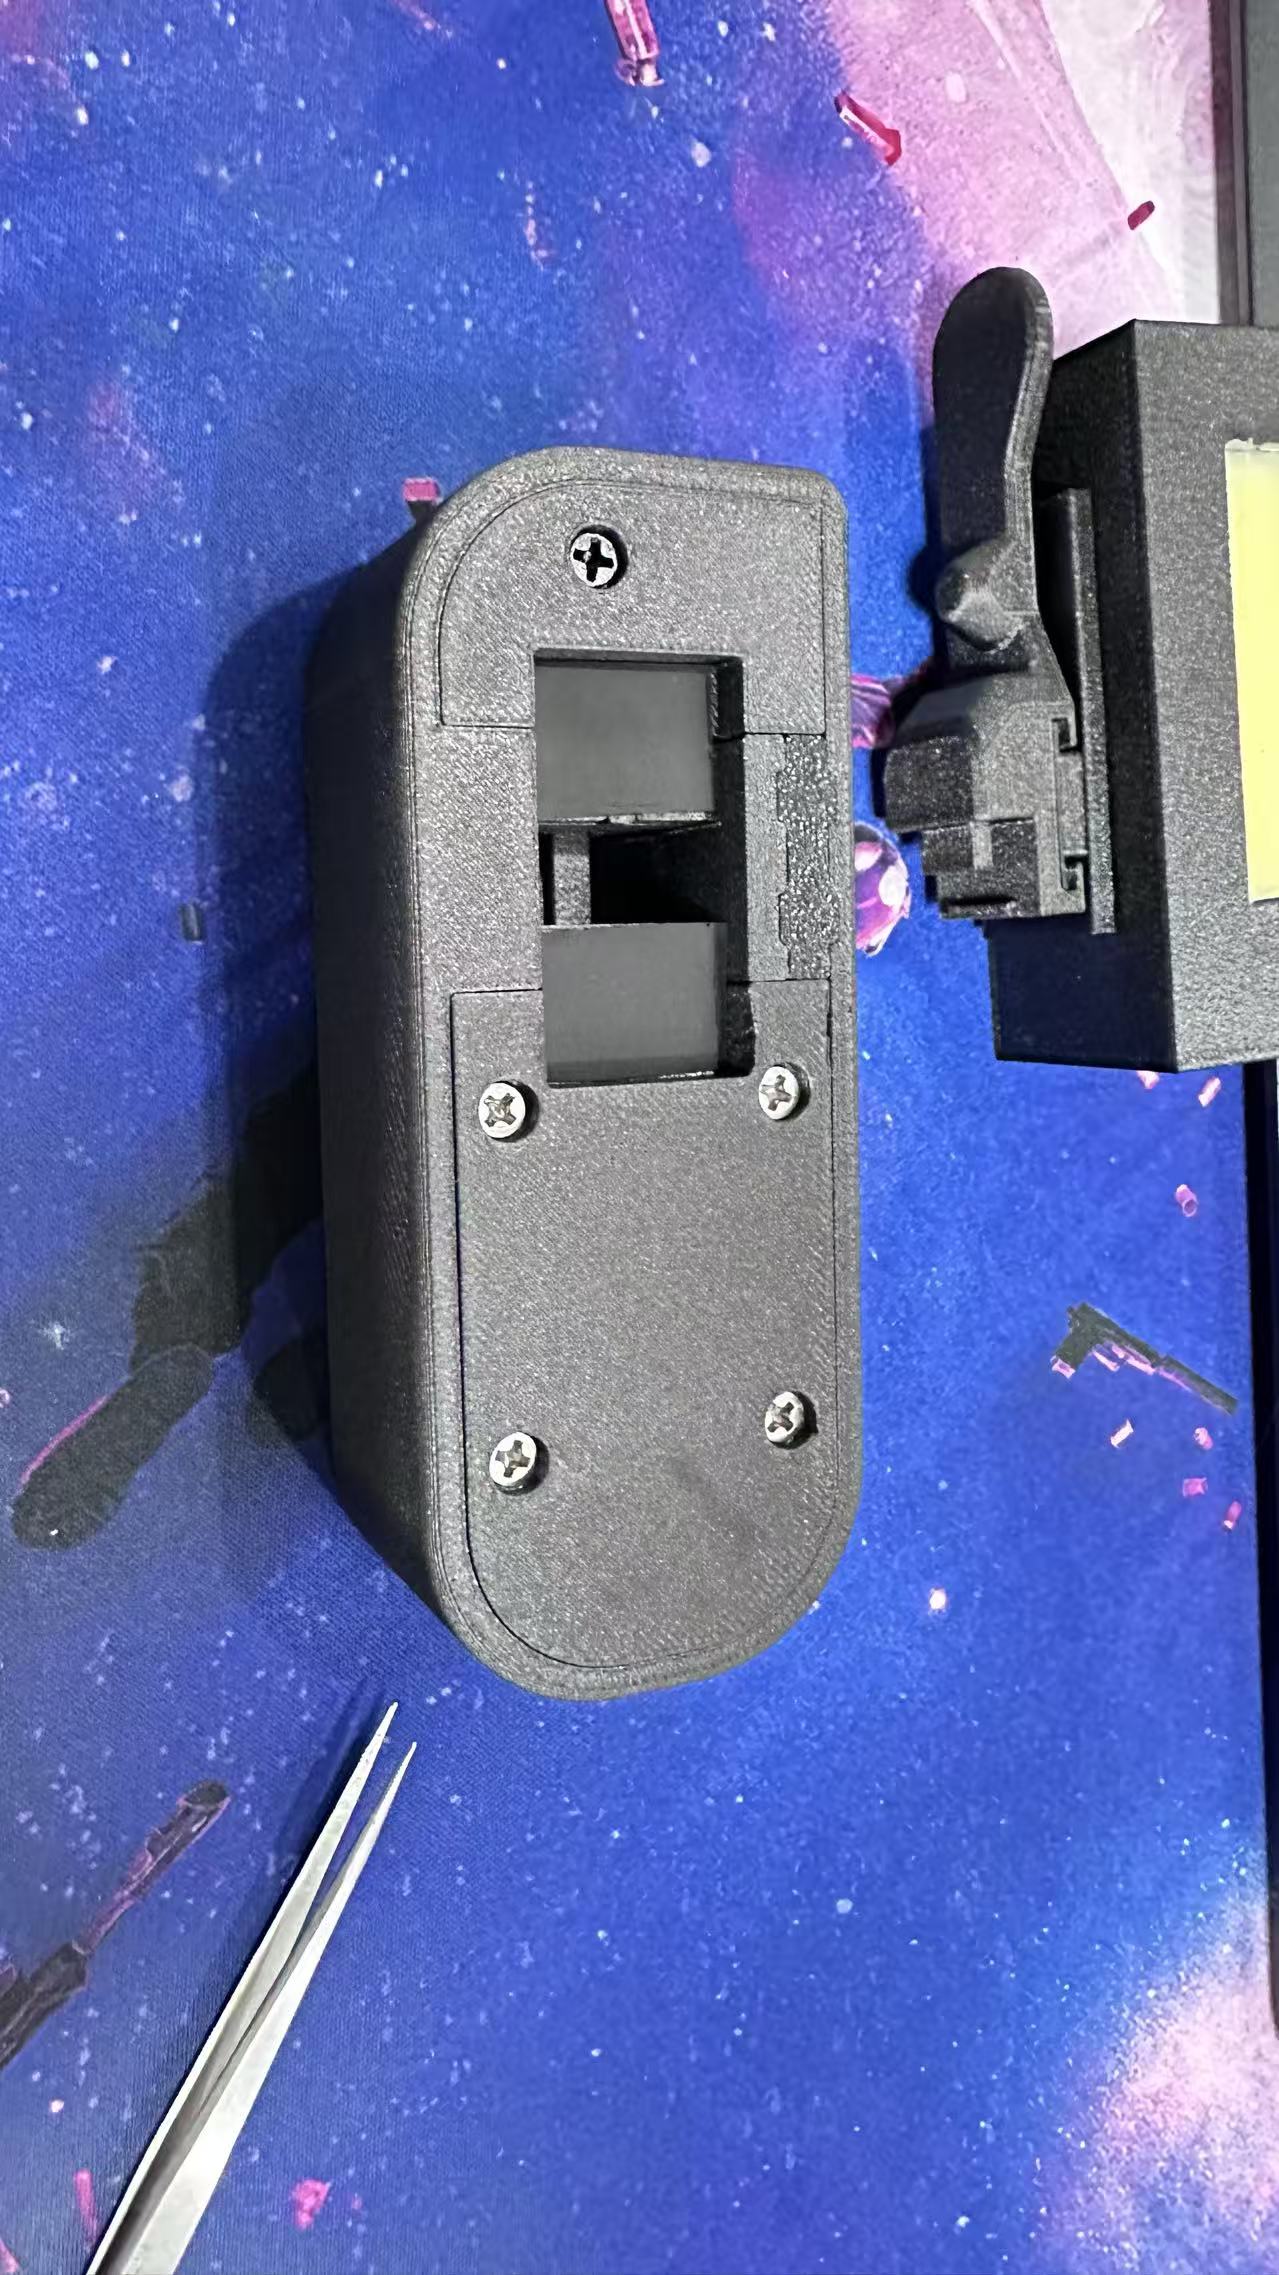
Installation sequence: first use a spot welder to attach a short section of pre-tinned nickel strip to the battery’s positive and negative terminals, then extend the wires from these nickel strips. Next, position the button, install the protection board, and place the 18650 battery. The wiring should be routed through the screw holes on top of the battery and secured between the battery and the housing. Finally, install the protection-board cover (part No. 1 in the diagram).
Screw in the M3 × 10 screws to secure part No. 2 (also M3 × 10).
This is what it looks like once installation is complete.
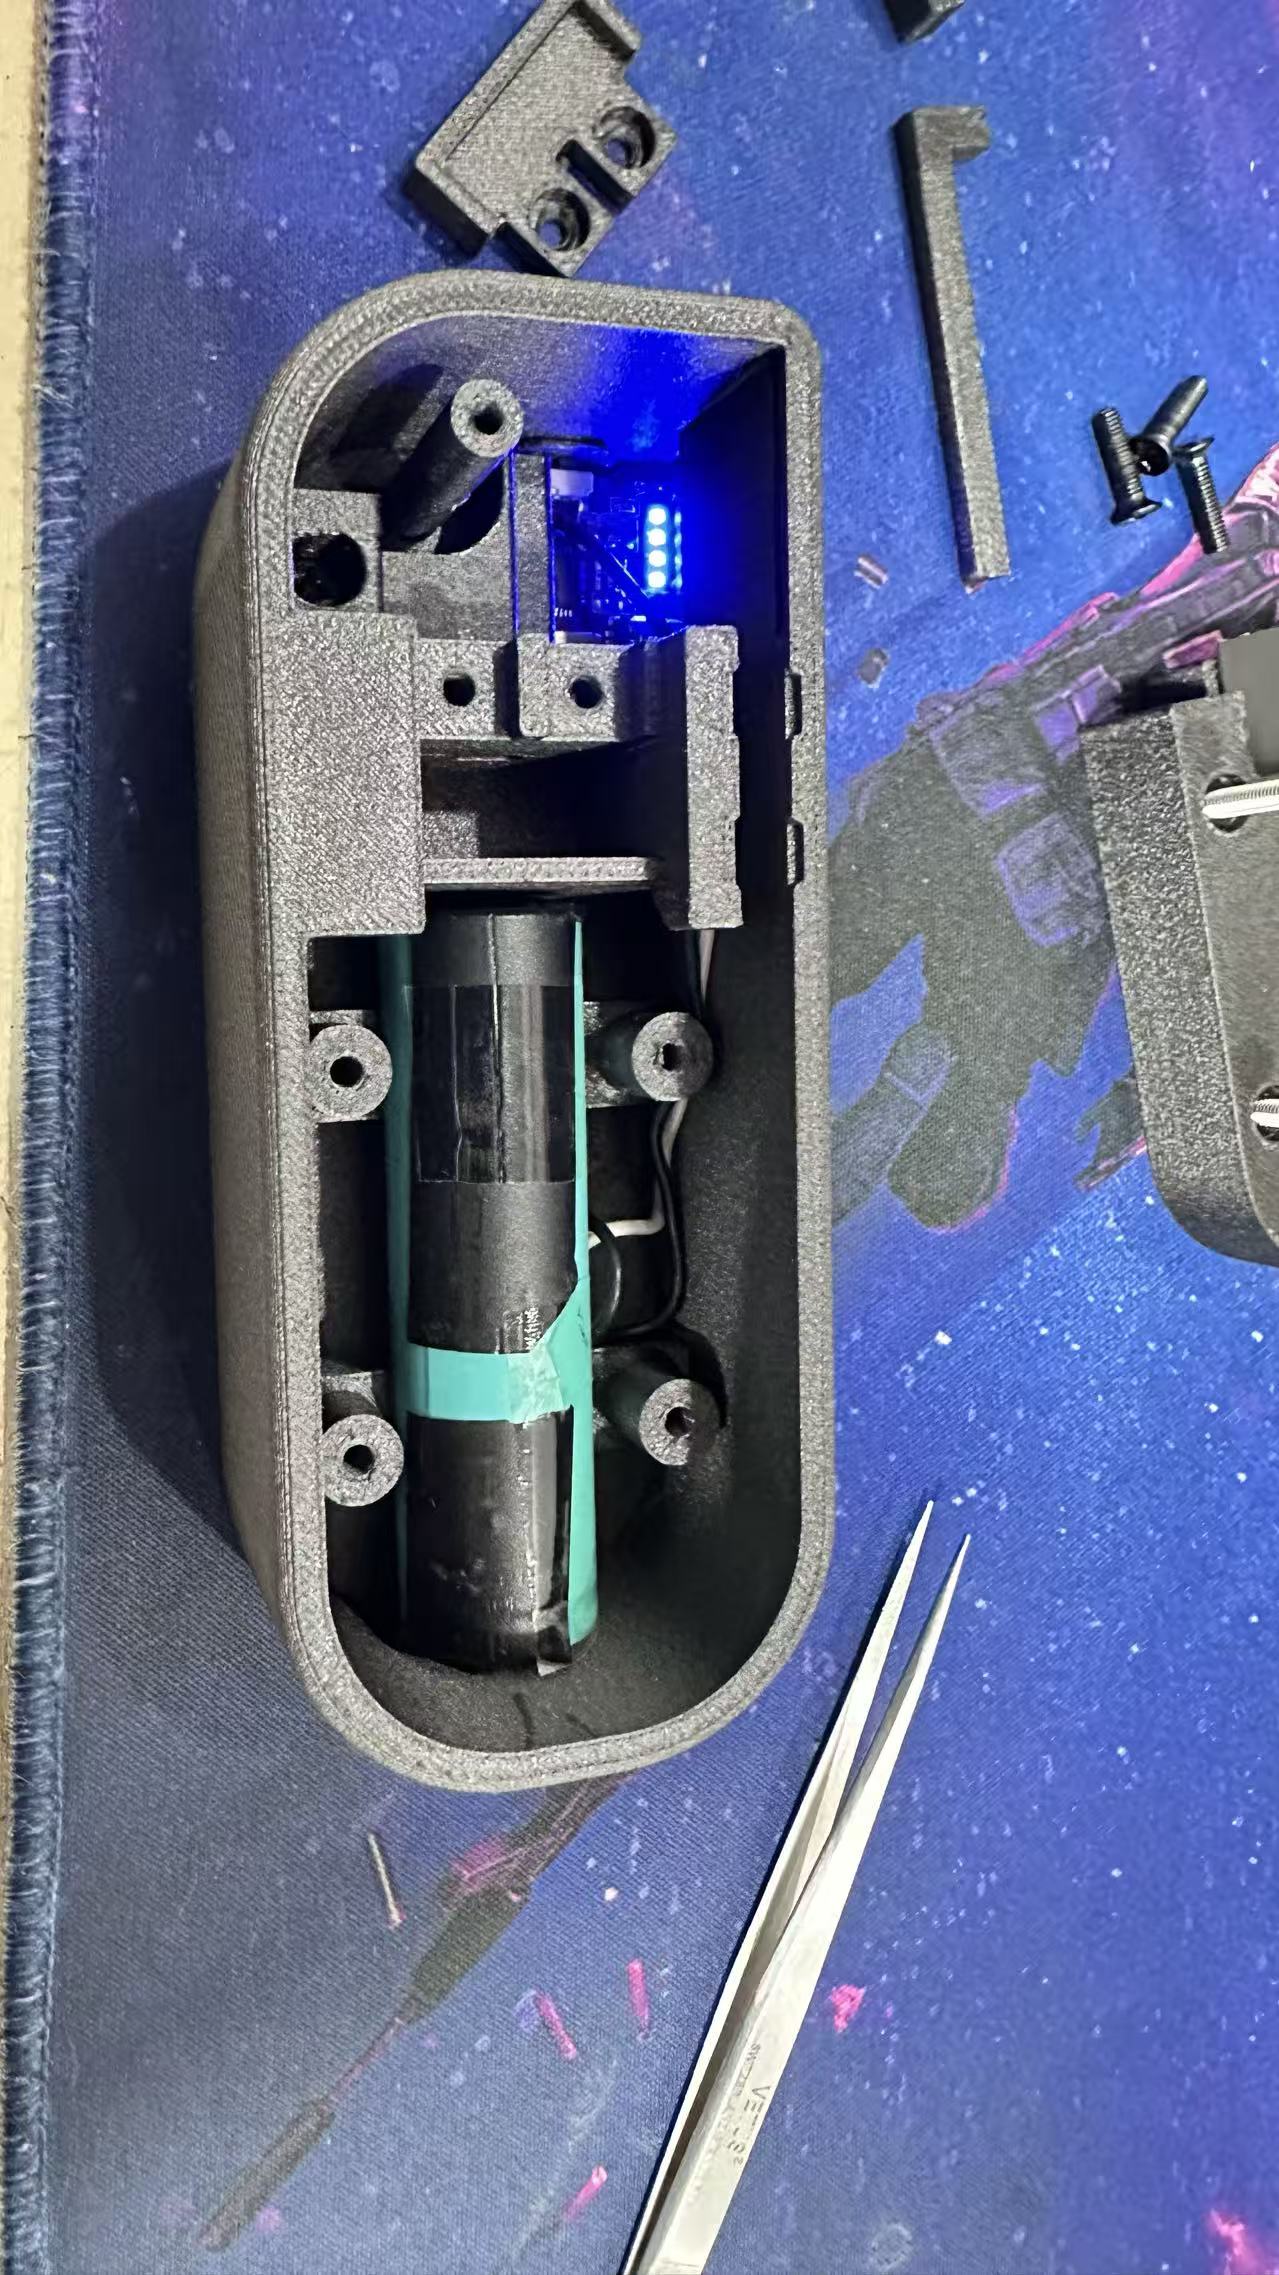
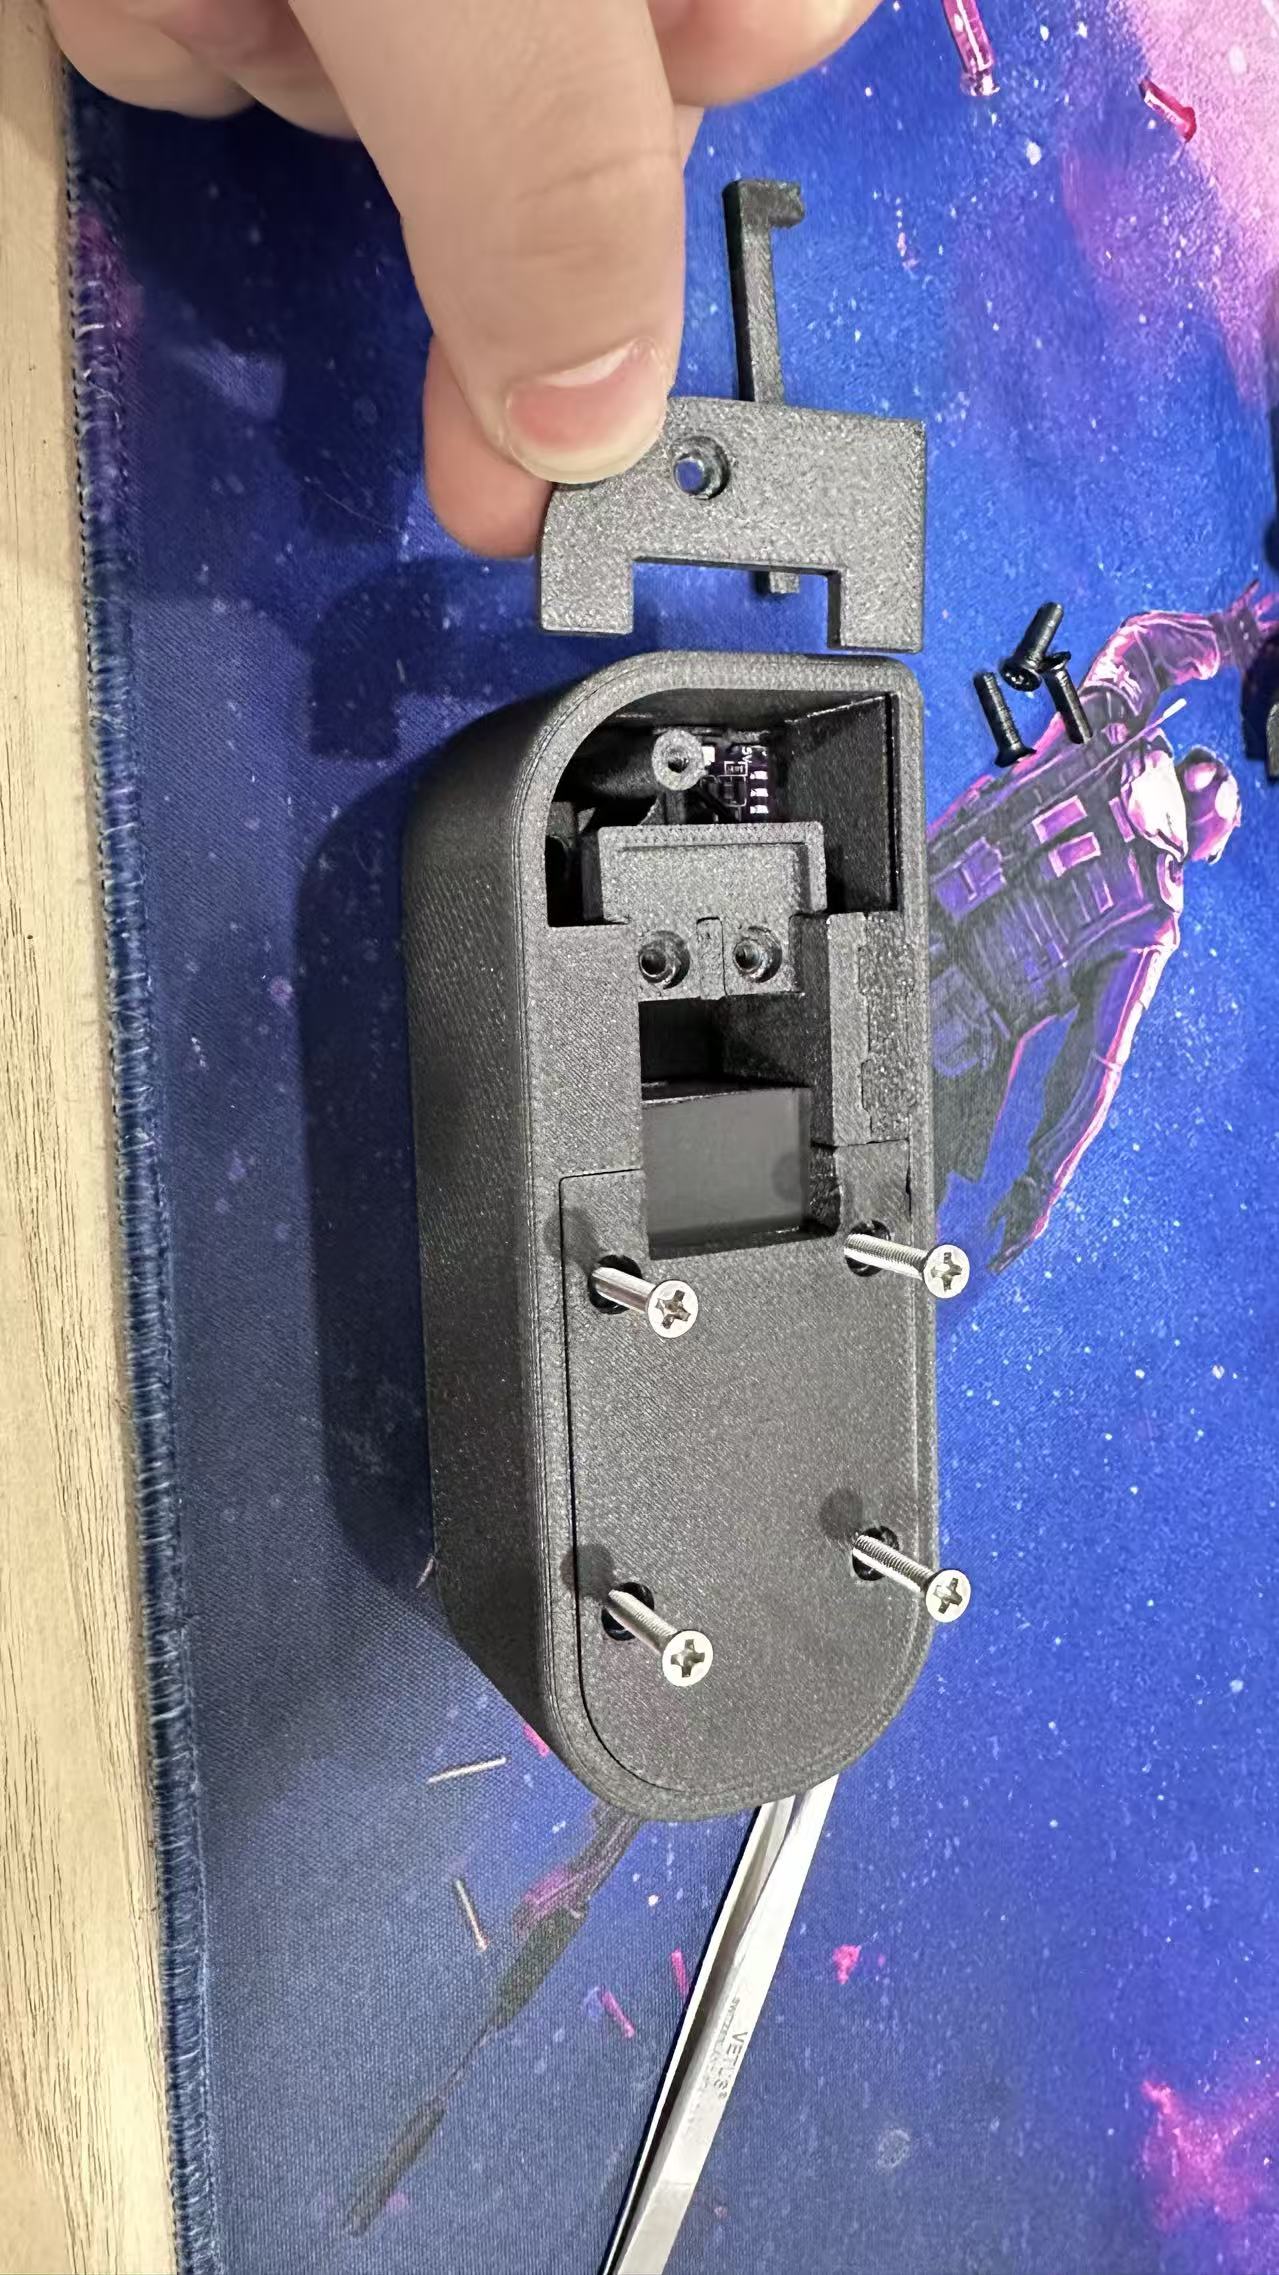
I’ve applied some cushioning foam here.
Finally, install the magnets: just press firmly on the bottom of the fill light and the cold-shoe interface, being careful to match the magnetic poles correctly.
As for the handle and shutter extension rod, simply search for model number 1692728 in the Tuzhu community to download the files.
(The 3MF slicing file uploaded on this page is already included.)
Here’s how to use and operate the device:
Originality of the Model
The author declares that this work is their personally original model
This model is licensed under the following terms:
This work is licensed under a Standard Digital File License. Digital files have a strict non-commercial, personal use only license.
You shall not share, sub-license, sell, rent, host, transfer, or distribute in any way the digital file or 3D printed versions of this object, nor any other derivative work of this object in its digital or physical format (including remixes of this object). You can not host these files on other digital platforms, web stores or cloud repositories. The objects may not be used in any way whatsoever in which you charge money, collect fees.
Models(1)
- action微单套装.3mfDesigner

3.79 MB

2026-04-01