


stencil
pcb
solder
paste
mount


26

2
for 20mm thickness stencils. Spacers included as these often come at 21-22mm thickness. Attach the spacers with a small drop of superglue.
The mounting holes have dimensions as following: center to back: 160mm, center to front: 30mm. Designed for M5 hex socket bolts. Screw this to a plywood board for accurate, large scale production. I also suggest making an alignment jig for the pcbs. This can be done with three spare PCBs at the same thickness. Tape these down in a U-shape so that your stenciling PCB can slot in the middle.
This is designed for 1.6mm PCBs. If modifying the design to accommodate thicker or thinner pcbs, set this distance to be ([your desired thickness] - 0.2)mm
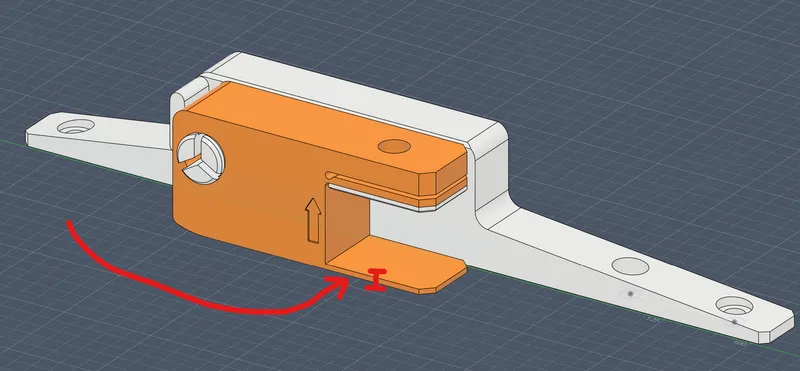
Also make sure to raise or lower the white stand too by the desired height to match the pivots.
This project requires 4x M5 heat-set inserts, and 5 M5 bolts. I recommend 15mm in length.
Print these parts in the following orientation. Use plenty of walls, a high infill and a strong rigid material. Ideally a carbon-fibre reinforced one. Otherwise these clips will bend under the clamping force.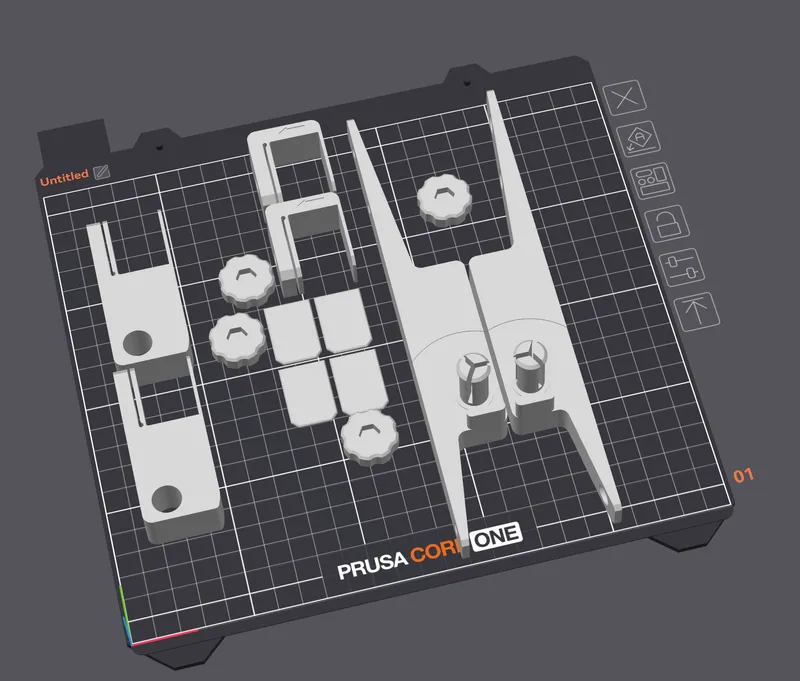
Originality of the Model
The author declares that this work is their personally original model
This model is licensed under the following terms:
Credit must be given to the creator
Models(8)
 lpivotjoint-16mm.stlDesigner
3.41 MB

2025-10-03
- lmount-16mm.stlDesigner
2.26 MB
2025-10-03
 rmount-16mm.stlDesigner
2.26 MB
2025-10-03
 jaw spacer.stlDesigner
1.64 KB
2025-10-03
 m5-bolt-cap.stlDesigner
481.23 KB
2025-10-03
 stencilholder-v9.stepDesigner
577.40 KB
2025-10-03
- LandREnd clip-1.6mm.stlDesigner
3.55 MB
2025-10-03
- rpivotjoint-16mm.stlDesigner
3.41 MB
2025-10-03
View all(8)