


Mech Ram Head
Cyberpunk
Decorative Ornament
OnePiece
Mechanical
Decor
Fragile Structure
PostProcessing
Metallic Texture
Prevention
Bed Calibration
SciFi Ornament
Wild Mecha
Spiral Antenna
Reinforcement Tips
Interactive Prop
Material Selection

- 0.2 mm layer height, 3‑layer walls, 15% infill density

1-disc
PLA
Designer

2

0
💡 1. Printing Inspiration
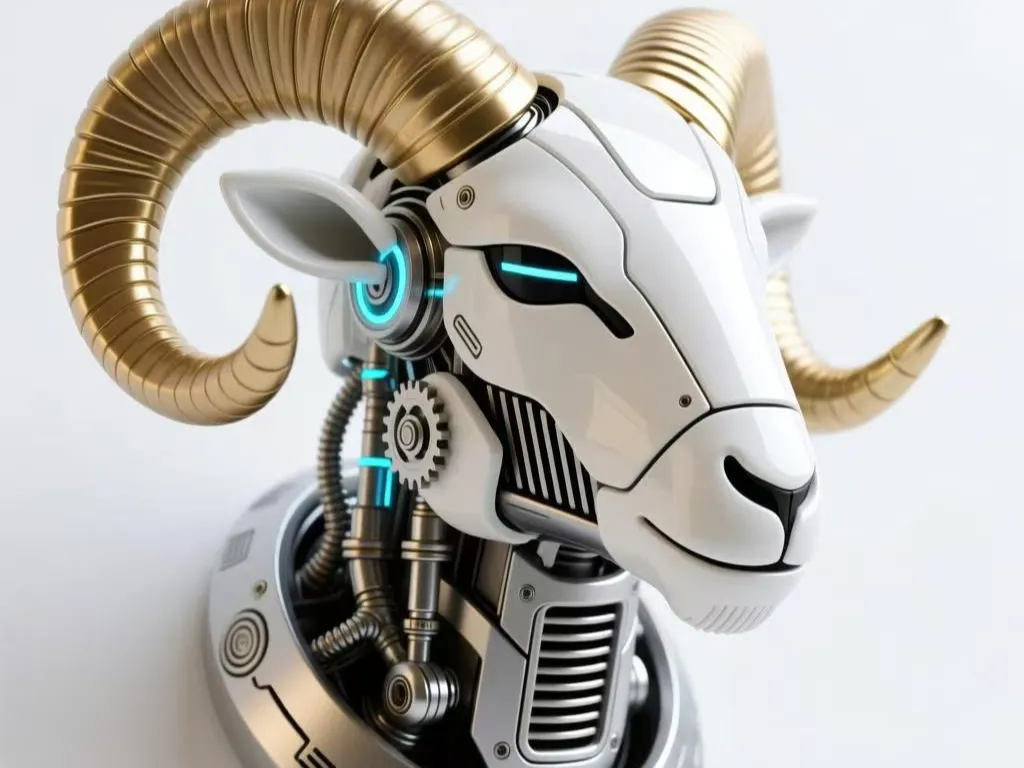
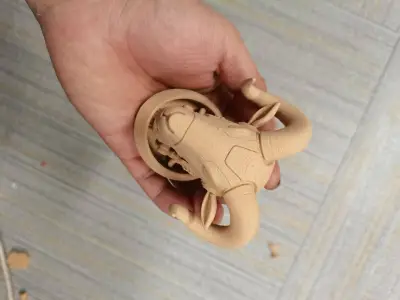
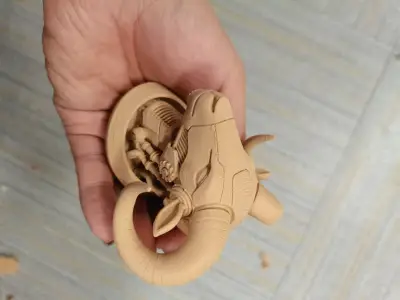
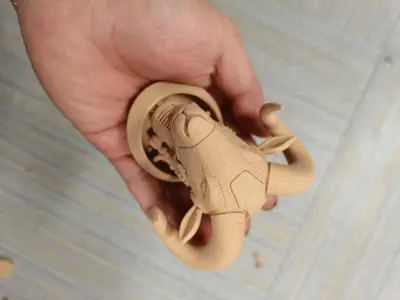
The design draws inspiration from the fusion of cyberpunk and futuristic mecha aesthetics, blending the primal power of a ram with the precision of machinery. The iconic spiraled horns are reimagined as energy conduits, while the facial gears and tubing simulate a mecha’s power core. This juxtaposition retains the raw, untamed spirit of the ram while infusing it with the cold, calculated edge of future technology. The result is a piece that works equally well as a standalone desk ornament or as a central component in a larger sci-fi diorama.
📋 2. Printing Requirements & Recommendations
Printing Technology
- Process: Fused Deposition Modeling (FDM) 3D Printing
Recommended Materials
- PLA: Ideal for static displays due to its ease of printing and low cost. However, it is relatively brittle, so extra care is needed when removing supports from fragile areas like horns.
- PETG: Offers superior toughness and impact resistance, making it a better choice for models that will be handled frequently or used as interactive props.
Print Settings
- Layer Height: 0.2mm (balances detail and speed). For ultra-fine details, reduce to 0.15mm.
- Infill Density: 20–30% for the main body to maintain strength while keeping weight low. Increase to 40% locally for high-stress areas like the horn bases and jaw.
- Temperature Settings:
- Nozzle: 200–210°C (PLA) / 230–240°C (PETG)
- Bed: 60°C (PLA) / 80°C (PETG)
- Print Speed: 40–60mm/s for general areas. Slow to 20–30mm/s for the spiraled horns and fine facial details to prevent layer separation and warping.
- Cooling Fan: Full power for PLA printing. For PETG, adjust based on ambient temperature to prevent warping.
🛠️ 3. Assembly & Post-Processing Instructions
Assembly
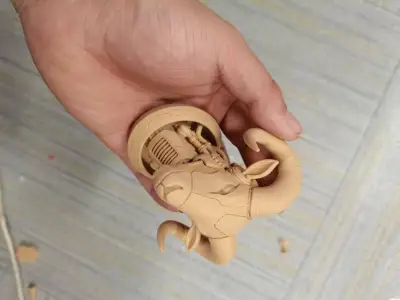
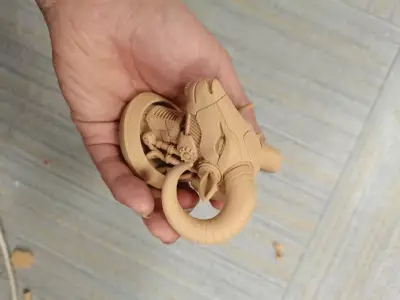
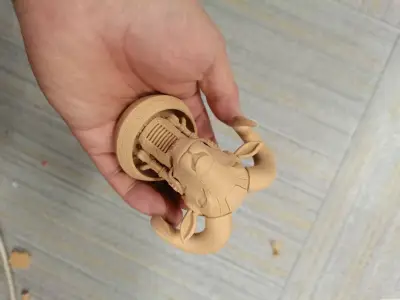
- One-Piece Construction: The model is designed to print as a single unit, so no assembly is required. Once the print finishes and supports are removed, it is ready for display.
Support Removal
1. Horns: Use flush cutters or a hobby knife to carefully snip supports at their base. For stubborn areas, apply gentle heat with a heat gun (set to low) to soften the plastic before peeling.
2. Facial Cutouts: Clear internal supports first, then use a small file or sandpaper to smooth the edges of the cutouts.
Post-Processing
- Sanding: Start with 400-grit sandpaper to remove support marks and layer lines, then progress to 2000-grit for a smooth finish. For a mirror-like sheen, use a polishing compound.
- Painting:
- Base coat: Use a primer, then apply metallic or matte paints to emulate the look of metal plating.
- Accents: Highlight the horns with fluorescent or glow-in-the-dark paint for a futuristic touch. Fill the gear and tubing details with contrasting metallic paints to enhance depth.
- Weathering: Add subtle washes or dry brushing to simulate wear and tear, giving the model a battle-worn, lived-in appearance.
⚠️ 4. Special Considerations & Safety Notes
Fragile Area Reinforcement
The spiraled horns and jaw are the most fragile parts. For added durability:
- Increase the wall thickness or infill density in these areas during slicing.
- After printing, reinforce the base of the horns with a thin layer of epoxy resin.
Bed Calibration
The circular base is sensitive to bed leveling. Before printing, perform a first-layer calibration test to ensure the bed is perfectly level. This prevents warping, lifting, or a failed print.
Safety
- Always wear safety glasses when removing supports to protect against flying plastic shavings.
- Use sharp tools carefully to avoid cuts.
- When using a heat gun, keep it moving and at a safe distance to prevent overheating and warping the model.
Originality of the Model
The author declares that this work is their personally original model
This model is licensed under the following terms:
Credit must be given to the creator
Models(1)
- 机械山羊头.3mfDesigner

21.11 MB

2026-02-19