






2

1
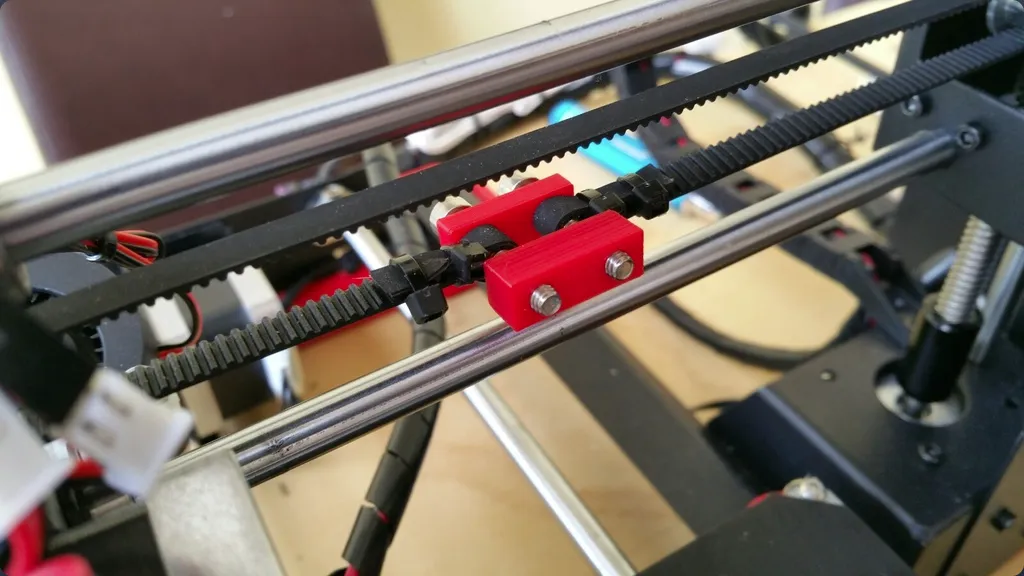
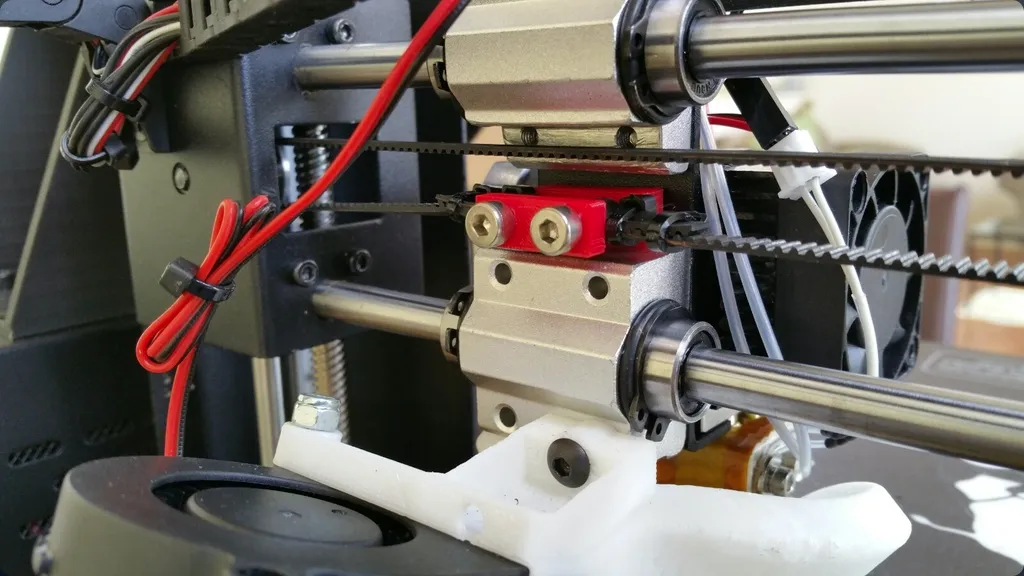
After I ditched the factory belt tensioner spring I found it hard to install the X-axis belt without rounding off the screw attachment holes a bit getting them on. This is because you have to pre-tension and stretch the belt a tiny bit and get the screw aligned in a very small space. The added bonus with these braces is that this supports the screws in operation and puts less stress on the attachment holes. You will need 5mm longer screws, the stocks are 4mm x 20mm so you'll need two replacements which are 4mm x 25mm.
Instructions:
1) There are two pieces, the thinner one goes on the screws first.
2) Then put the belts on next, tension on the belt should require you angle the bolts out a very tiny bit to get the belts on. Tiestrap heads should be pointing towards the front of the printer.
3) install the thicker support brace next. This will pull the screws together back parallel and the belt should be perfectly tensioned.
4) move the whole assembly together over the screw holes on the printer and screw them down so the belts line up vertically with the belt above it.
Originality of the Model
The author declares that this work is their personally shared model

This model is licensed under the following terms:
Credit must be given to the creator
Models(1)
 wanhao_x-axis_belt_brace.stl
11.70 KB

2025-07-16


