


'%3e%3cpath%20id='Rectangle%20995'%20d='M0%200H24C26.2091%200%2028%201.79086%2028%204V52C28%2054.2091%2026.2091%2056%2024%2056H0V0Z'%20fill='black'%20fill-opacity='0.2'/%3e%3cpath%20id='Vector'%20d='M17%2022L11%2028L17%2034'%20stroke='white'%20stroke-opacity='0.85'%20stroke-width='1.5'%20stroke-linecap='round'%20stroke-linejoin='round'/%3e%3c/g%3e%3cdefs%3e%3cclipPath%20id='clip0_1639_4805'%3e%3crect%20width='28'%20height='56'%20fill='white'/%3e%3c/clipPath%3e%3c/defs%3e%3c/svg%3e)
'%3e%3cpath%20id='Rectangle%20995'%20d='M0%204C0%201.79086%201.79086%200%204%200H28V56H4C1.79086%2056%200%2054.2091%200%2052V4Z'%20fill='black'%20fill-opacity='0.2'/%3e%3cpath%20id='Vector'%20d='M11%2022L17%2028L11%2034'%20stroke='white'%20stroke-opacity='0.85'%20stroke-width='1.5'%20stroke-linecap='round'%20stroke-linejoin='round'/%3e%3c/g%3e%3cdefs%3e%3cclipPath%20id='clip0_1639_4802'%3e%3crect%20width='28'%20height='56'%20fill='white'/%3e%3c/clipPath%3e%3c/defs%3e%3c/svg%3e)
toy
fidget
fidget spinner
infinity
infinity cube
cube
fidget-toy
Fidget Toy
Spinner Toy
Fidgetspinner
fidget hand Spinner
makerbot


184

81
Summary
EDIT
I created this design as a fun toy and as an introductory tutorial for implementing a full design in Fusion 360 for my engineering students. With that being said, this design is published under the Creative Commons - Attribution license. In the interest of getting out in front of the multiple emails and messages I receive per week, you may sell this design with attribution. The goal was to share this design and the knowledge of how to create this design with everyone. However, if you would like to sell it, that is fine. If you would like to support the work I put into this design and tutorial, it would be greatly appreciated especially if you are making money off it. The link to do so is below. Thanks!
Support me here: https://www.buymeacoffee.com/mjdargen
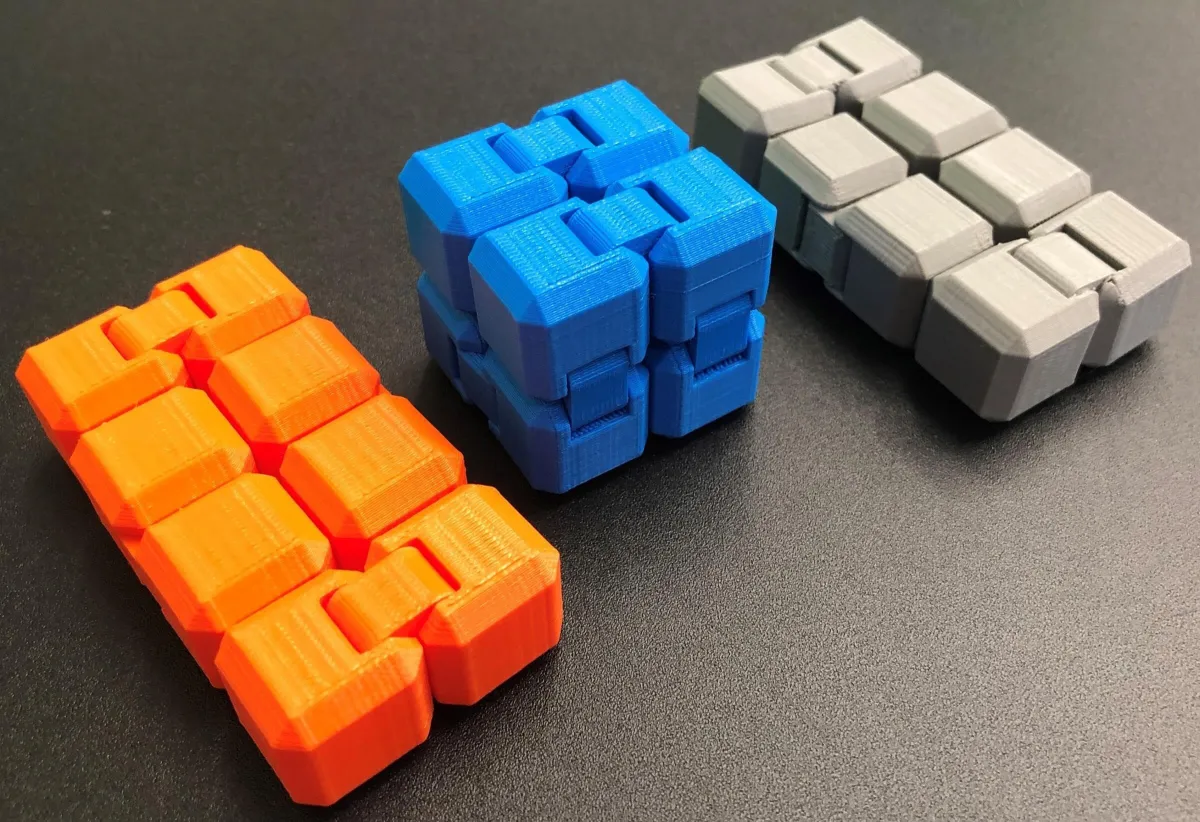
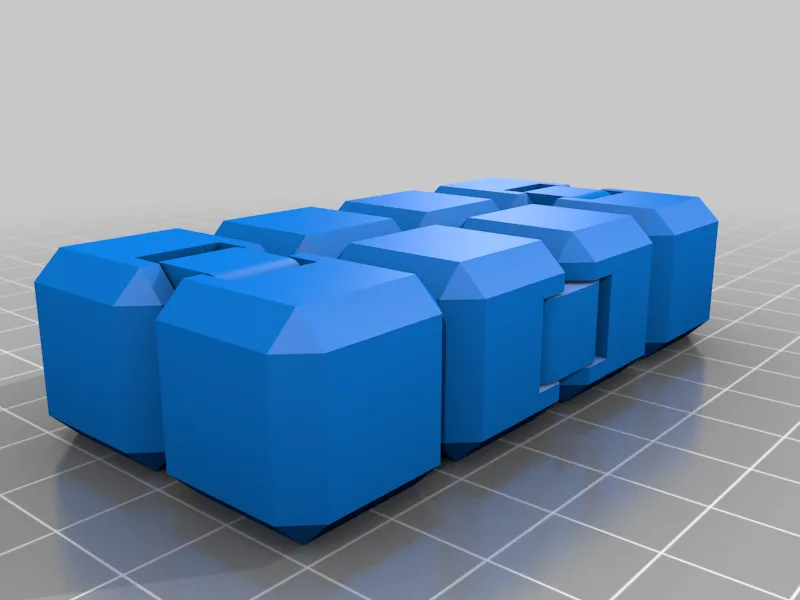
Infinity cubes have become a popular fidget gadget. They are typically an interlocking set of eight cubes that fold over onto themselves infinitely. This design is optimized for most printers and will print in place without supports.
There are several existing designs on Thingiverse; however, they don't provide the design files for customization. I will walk you through the design process and provide the design files and STL files for you to modify and print your own customized design!
Video Demo of Cube: https://www.youtube.com/watch?v=gpM8QhBmqXA
Complete Video Tutorial: https://www.youtube.com/watch?v=UlSd0zvG-_E
Instructable How-To Guide: https://www.instructables.com/Infinity-Cube-in-Fusion-360/
Hackster How-To Guide: https://www.hackster.io/mjdargen/infinity-cube-in-fusion-360-cfe43b
Support me here: https://www.buymeacoffee.com/mjdargen
Print Settings
Resolution:
0.2 mm
Print Settings
Resolution:
0.2 mm
Infill:
10%
Notes:
The .STL file was generated with a Z-up configuration. The design was optimized to be printed with a 0.2 mm layer height and a 0.4 mm nozzle width.
It was designed to be printed with a 10% infill; however, you can increase the infill as much as you want if you want the cube to have a bit more weight. 10% infill is more than sufficient to withstand regular use and the occasional drop.
On a Makerbot Replicator+ with default settings, it took about ~2.5 hours to print and required ~30 grams of PLA filament (including a raft). A raft is not necessary; however, our printer is older and has poor adhesion so they were printed with a raft.
If using Ultimaker Cura to slice your file, be sure to set "Fill Gaps Between Walls" to "Nowhere" under the Wall settings to prevent the hinges/cubes from welding together.
Post-Printing
The design contains interlocking pins and sockets on the cubes/hinges. It should move freely right off the build plate but it will require some working in to loosen up the joints completely, particularly the two hinges that print vertically.
How I Designed This
This infinity cube was designed in Fusion 360. Since print-in-place parts can be tricky to perfect, there ended up being a few different revisions for this design. At first, the cubes had a rod that traveled all the way through the hinge. These rods ended up restricting the movement too much and would wear down over time. I then proceeded to try pairs of interlocking rounded pins. Eventually, I determined that creating conical pins and sockets on the hinge and cube would provide the most freedom of movement without sacrificing the strength or durability of the assembly.
I have provided the STL file along with the F3D Fusion 360 design file for you to customize your own design. If you are interested, you can also follow along with this complete walk-through tutorial: https://www.youtube.com/watch?v=UlSd0zvG-_E
Originality of the Model
The author declares that this work is their personally shared model

This model is licensed under the following terms:
Credit must be given to the creator
Models(2)
 infinity_cube.f3d
'%3e%3cpath%20id='Vector'%20d='M13.6663%201.33331H2.33301C1.78072%201.33331%201.33301%201.78103%201.33301%202.33331V13.6666C1.33301%2014.2189%201.78072%2014.6666%202.33301%2014.6666H13.6663C14.2186%2014.6666%2014.6663%2014.2189%2014.6663%2013.6666V2.33331C14.6663%201.78103%2014.2186%201.33331%2013.6663%201.33331Z'%20stroke='%23808080'%20stroke-linejoin='round'/%3e%3cpath%20id='Vector_2'%20d='M11.3333%201.33331V7.33331H5V1.33331H11.3333Z'%20stroke='%23808080'%20stroke-linejoin='round'/%3e%3cpath%20id='Vector_3'%20d='M9.66699%203.66669V5.00002'%20stroke='%23808080'%20stroke-linejoin='round'/%3e%3c/g%3e%3cdefs%3e%3cclipPath%20id='clip0_3212_168684'%3e%3crect%20width='16'%20height='16'%20fill='white'/%3e%3c/clipPath%3e%3c/defs%3e%3c/svg%3e)
393.25 KB
'%3e%3cpath%20id='Vector'%20d='M7.99967%2014.6666C11.6816%2014.6666%2014.6663%2011.6819%2014.6663%207.99998C14.6663%204.31808%2011.6816%201.33331%207.99967%201.33331C4.31777%201.33331%201.33301%204.31808%201.33301%207.99998C1.33301%2011.6819%204.31777%2014.6666%207.99967%2014.6666Z'%20stroke='black'%20stroke-opacity='0.49'%20stroke-linejoin='round'/%3e%3cpath%20id='Vector_2'%20d='M8.00235%204.00006L8.00195%208.00299L10.8284%2010.8295'%20stroke='black'%20stroke-opacity='0.49'%20stroke-linecap='round'%20stroke-linejoin='round'/%3e%3c/g%3e%3cdefs%3e%3cclipPath%20id='clip0_1890_13189'%3e%3crect%20width='16'%20height='16'%20fill='white'/%3e%3c/clipPath%3e%3c/defs%3e%3c/svg%3e)
2025-03-18
- infinity_cube.stl
507.89 KB
2025-03-18


