


Tools
Hook
Storage
Fold
Foldable Hook
Hook-based storage

- 0.28 mm layer height, 2-wall structure, 15% infill density

1-disc
PLA
Designer

6

0
Introduction
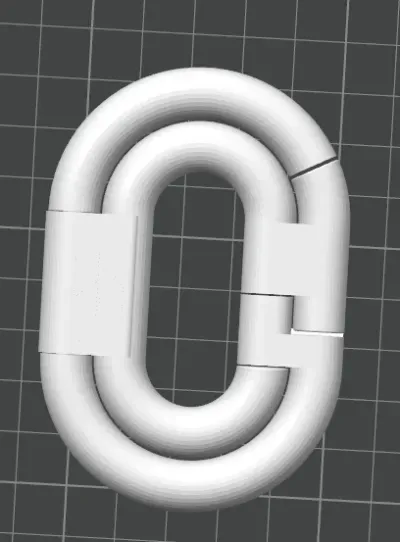
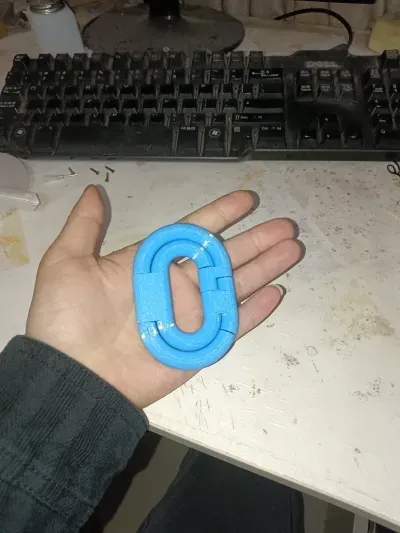
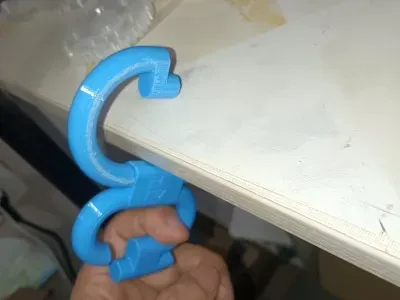
A portable, all-in-one, foldable hook that requires no hardware—simply print the entire part and it’s ready to use. Featuring an in-situ, integrated printing design with a built-in precision hinge, it effortlessly switches between folded and unfolded states. When folded, it’s only about 13 mm thick, making it easy to slip into a pocket, side pocket of a bag, or storage box; when unfolded, it transforms into a sturdy hook suitable for desktop edges, door panels, backpack straps, pegboards, and many other applications. Truly “print and use—just hang it up whenever you need it.”
🚀 Key Highlights
In-situ, integrated printing: All components are printed in one go, requiring no assembly or supports—ready to use straight out of the printer.
Precision folding hinge: The articulated joint design allows the hook to rotate 90° when needed and collapse into a flat, compact form when not in use.
Compact and portable: Less than 1.5 cm thick when folded, easily fitting into a pocket, backpack side pocket, or storage box—no burden to carry around.
Zero hardware: No screws, springs, or magnets—purely 3D-printed construction. Download the file, print it, and use it right away.
Multi-scenario versatility: Can be hung on desks, door panels, pegboards, backpack straps, railings, and more, meeting both everyday storage and temporary hanging needs.
🛠️ Printing Notes
Recommended material: PETG is preferred. It offers better toughness, making the hinge less prone to breakage and strong enough to support everyday items.
Print settings: Layer height of 0.2 mm, 3 wall layers, and infill of 20–30% are sufficient. The hinge joints have a tolerance of only 0.2 mm, so ensure the printer’s flow rate is properly calibrated; otherwise, parts may stick together or the hinge could fracture.
Orientation and supports: Print according to the original orientation set in the slicer—no supports are needed.
Nozzle recommendation: A 0.4 mm nozzle is ideal, as it provides tighter tolerances and easier control.
Cooling after printing: After printing, be sure to wait until the model is completely cooled (at least one hour, or even overnight) before attempting to move the hinge. Forcing the hinge to fold while the model is still warm creates significant resistance and can even cause the hinge to break.
🧩 Assembly Steps
No assembly required. After printing, follow these steps:
Remove burrs: Take out the printed part and inspect the hinge and all joints. Use a craft knife to gently remove any small burrs or stringy filaments along the edges.
Wait for complete cooling: Ensure the model has fully cooled to room temperature (recommended to let it sit for at least one hour).
First hinge adjustment: Hold both ends of the hook with your hands and apply gentle, slow pressure in the opening and closing direction, gradually working the hinge until it rotates smoothly through 90°.
It’s normal to feel some resistance during the initial adjustment—this is due to the tight fit created by the precise tolerances. With repeated opening and closing, the movement will gradually become smoother.
Ready for use: Once the hinge moves freely, the hook is ready for regular use.
⚡ Frequently Asked Questions
The hook won’t open after printing (severe sticking)
This usually happens when the printer isn’t properly calibrated, resulting in insufficient tolerances, or when the model is forced to move before it has fully cooled. First, wait until the model is completely cool before trying again; if it still won’t open, try prying it open slightly and then carefully filing or trimming the hinge contact surfaces with a file or craft knife, or reprint with larger tolerances (e.g., a version with 0.4 mm clearance).The hinge feels too loose and spins back when you hang something
Some designs are intentionally slightly looser at first, but this is meant to allow the plastic to deform slightly over time, tightening the hinge naturally. If the looseness is obvious, try applying a small drop of alcohol or lubricant into the hinge gap and repeatedly moving the hinge, or adjust the model’s scaling before printing.What should I do if the hinge breaks?
The most common cause is forcing the hinge to fold while it’s not fully cooled. Reprint the part and make sure to wait until it’s completely cooled before moving the hinge. During printing, consider increasing the wall thickness or using a sturdier print configuration (e.g., 7 wall layers, 70% infill).How much weight can it hold?
It depends mainly on the printing material, infill percentage, and wall thickness. PLA+ or PETG with 3 wall layers and 30% infill is sufficient for hanging light everyday items like schoolbags, hats, and keys. For heavier loads, we recommend a stronger version with 7 wall layers and 70% infill. Hanging heavy items like coats is not recommended-.What can I print it on?
It’s suitable for desk edges, pegboards, door panel edges, backpack straps, study shelves, railings, kitchen towel hooks, key holders, and more—serving as a desktop organizer hook, a portable hook, or a travel hook.
Originality of the Model
The author declares that this work is their personally original model
This model is licensed under the following terms:
Credit must be given to the creator
Models(1)
- 折叠卡扣.3mfDesigner

290.87 KB

2026-04-23