
'%3e%3cpath%20id='Rectangle%20995'%20d='M0%200H24C26.2091%200%2028%201.79086%2028%204V52C28%2054.2091%2026.2091%2056%2024%2056H0V0Z'%20fill='black'%20fill-opacity='0.2'/%3e%3cpath%20id='Vector'%20d='M17%2022L11%2028L17%2034'%20stroke='white'%20stroke-opacity='0.85'%20stroke-width='1.5'%20stroke-linecap='round'%20stroke-linejoin='round'/%3e%3c/g%3e%3cdefs%3e%3cclipPath%20id='clip0_1639_4805'%3e%3crect%20width='28'%20height='56'%20fill='white'/%3e%3c/clipPath%3e%3c/defs%3e%3c/svg%3e)


'%3e%3cpath%20id='Rectangle%20995'%20d='M0%204C0%201.79086%201.79086%200%204%200H28V56H4C1.79086%2056%200%2054.2091%200%2052V4Z'%20fill='black'%20fill-opacity='0.2'/%3e%3cpath%20id='Vector'%20d='M11%2022L17%2028L11%2034'%20stroke='white'%20stroke-opacity='0.85'%20stroke-width='1.5'%20stroke-linecap='round'%20stroke-linejoin='round'/%3e%3c/g%3e%3cdefs%3e%3cclipPath%20id='clip0_1639_4802'%3e%3crect%20width='28'%20height='56'%20fill='white'/%3e%3c/clipPath%3e%3c/defs%3e%3c/svg%3e)
Model Visualization
Cyberpunk
Steampunk
Tech-Infused Aesthetic
Industrial Style
Hardcore Mechanics
Functional Style
Custom Printing
Cyber Machinery
Mechanical Head Sculpt
Unpainted Model
Technology Creates Objects
3D Modeling
Model Forging
Figure modeling materials

- 0.2 mm layer height, 3‑layer walls, 15% infill density
'%20fill='%23B3B3B3'/%3e%3crect%20id='Rectangle%201051'%20x='8'%20y='2'%20width='12'%20height='0.5'%20transform='rotate(90%208%202)'%20fill='%23D9D9D9'/%3e%3crect%20id='Rectangle%201052'%20x='11'%20y='2'%20width='12'%20height='0.5'%20transform='rotate(90%2011%202)'%20fill='%23B3B3B3'/%3e%3cpath%20id='Rectangle%201048'%20d='M2%202H14V14H11L10.5%2014.5H8H5.5L5%2014H2V2Z'%20stroke='%23828282'%20stroke-linejoin='round'/%3e%3c/g%3e%3c/g%3e%3c/svg%3e)
1-disc
PLA
Designer

6

1
1. Design Inspiration
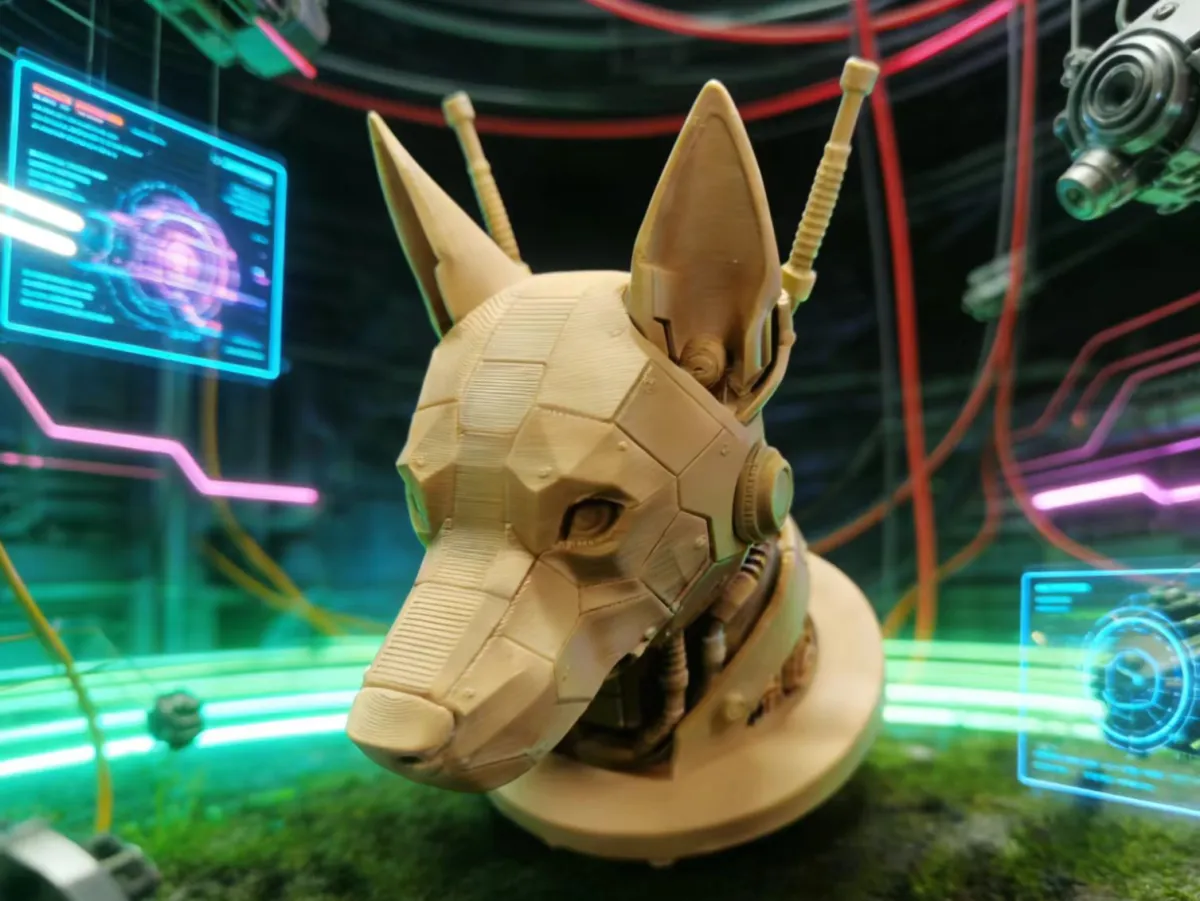
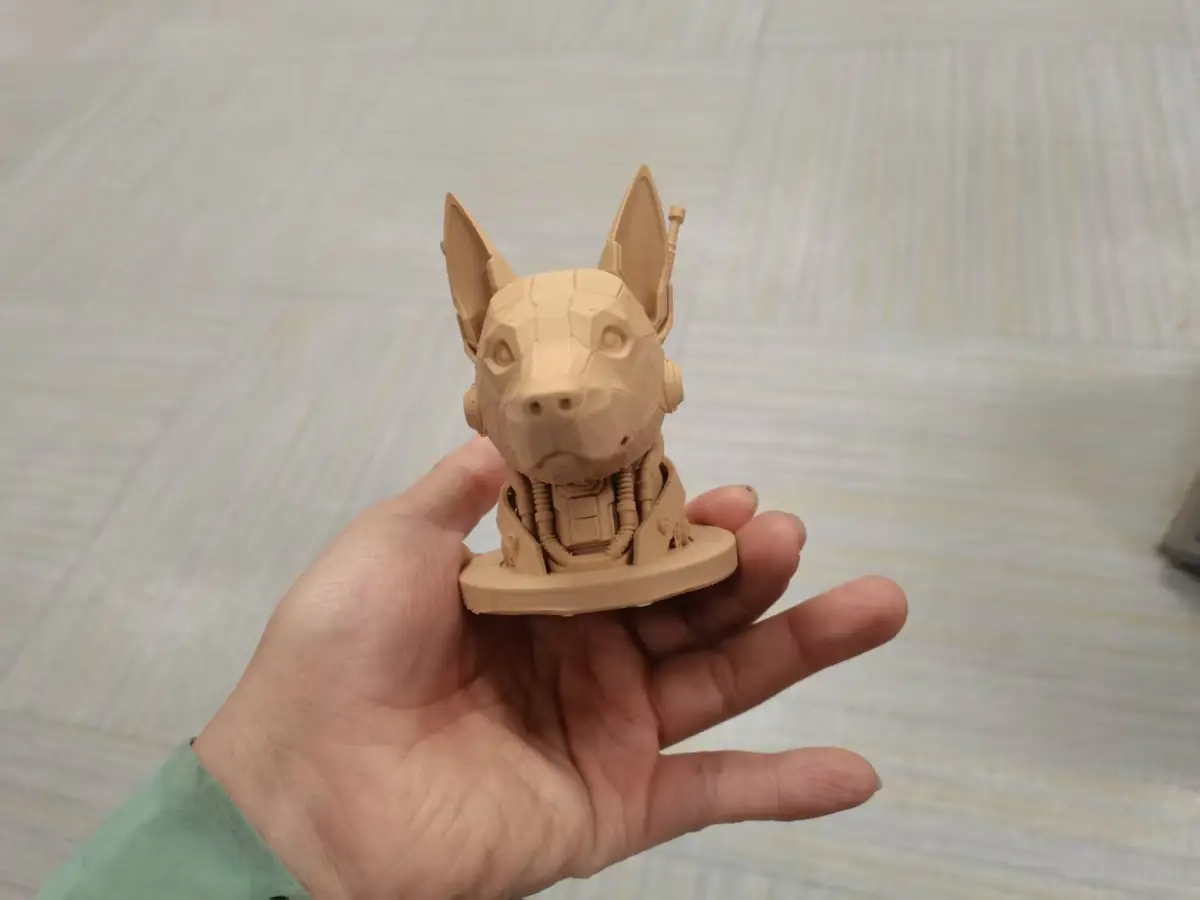
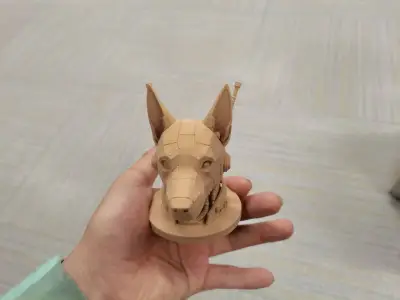
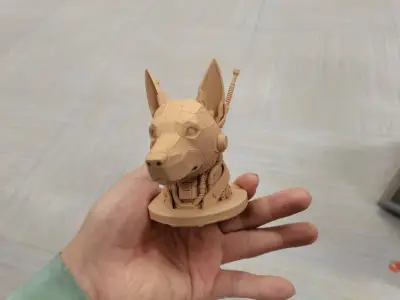
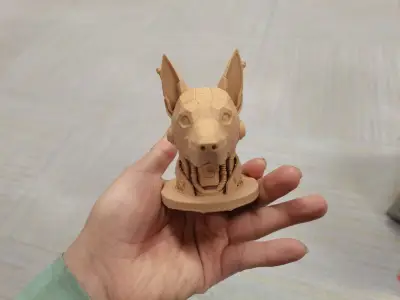
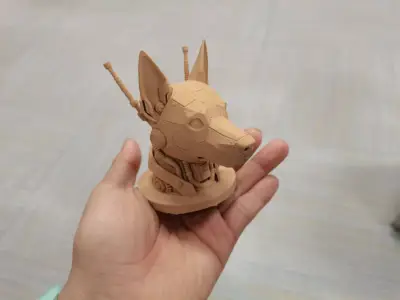
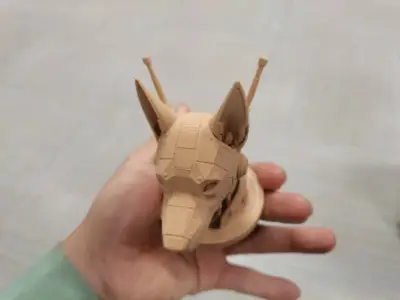
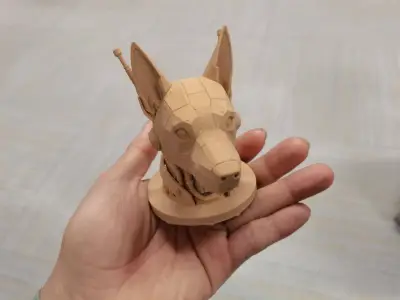
The creative inspiration behind this mechanical dog head model stems from the fusion of “industrial design aesthetics” and “cyberpunk functional style.” Drawing on the skeletal structure of a canine head, the design strips away biological textures and reimagines the form through mechanical gears, alloy armor, and exposed wiring—simulating an industrial forging process that transforms raw materials into something both dynamic and refined. Much like working in a precision workshop where cold metal is shaped through welding, grinding, and assembly, the final form gradually acquires fluid, organic contours. At the heart of the design lies the pursuit of “unfinished sophistication”: retaining the raw lines of the mechanical structure without excessive embellishment, perfectly echoing the visual theme of welded fabrication—conveying the powerful, crafted essence of industrial manufacturing while subtly deconstructing and reimagining biological forms.
2. Core 3D Printing Requirements
1. Basic Parameter Standards
- Filament Selection: Prioritize PLA+ (enhanced polylactic acid) or PETG. PLA+ offers stable layer adhesion and easy post‑processing, while PETG provides superior toughness, ideal for capturing intricate mechanical details. For an industrial aesthetic, opt for neutral base colors such as gray or black—these hues naturally complement the unfinished, machined texture without requiring additional coloring.
- Layer Height: Set the layer height to 0.15–0.2 mm to strike a balance between print accuracy and efficiency; for critical areas like gear textures and antenna details, reduce the layer height to 0.1 mm to ensure crisp, well-defined structures.
- Infill Density: Maintain a 25–30% infill for the main body to ensure structural integrity; increase the infill density to 35% for small, protruding features such as ears and antennas to prevent breakage during printing.
- Print Speed: Keep the overall print speed at 50–60 mm/s, reducing the first-layer speed to 30–40 mm/s to enhance bed adhesion; use a print speed of 40 mm/s for the outer shell to minimize layer lines and surface imperfections.
2. Key Structural Printing Requirements
- Support System: Enable tree‑like supports across the entire model, with particular emphasis on supporting the base of the antenna (for over‑5 mm‑long overhangs), the area beneath the ears (where the tilt angle exceeds 45°), and the junction between the chin and neck. Set support contact points to 0.2 mm in diameter and maintain a support density of 18%, ensuring easy removal after printing while minimizing damage to the model’s surface.
- Skirt Settings: Activate a single skirt layer, set to a width of 12 mm, to verify extrusion flow and platform flatness, preventing filament breakage or edge warping during the first layer.
- Temperature Control: For PLA+ filaments, set the nozzle temperature to 200–210°C and the bed temperature to 60–65°C; for PETG filaments, adjust the nozzle temperature to 220–230°C and the bed temperature to 70–75°C. Throughout the print, keep the cooling fans running at 70–80% fan speed to prevent softening and deformation of delicate structures.
3. Post‑Processing Requirements
- After removing supports, use 120‑grit sandpaper to smooth out any residual support marks, paying special attention to areas prone to visible traces, such as the antenna bases and ear edges;
- Use a black marker to outline mechanical joints and gear textures, enhancing the industrial aesthetic—no need for full‑scale coloring; instead, preserve the original filament color and print texture to align with the “in‑process” design theme.
3. Essential Printing Equipment Overview
1. Core Printing Hardware
- 3D Printer: We recommend high‑precision FDM printers such as the Creality Ender 3 V3 SE or Prusa Mini+, featuring a 0.4 mm nozzle diameter, support for tree‑like support generation, and a build volume of at least 150 × 150 × 150 mm—ideal for accommodating standard model proportions. If you’re aiming for even finer mechanical details, consider using a resin-based printer like the Anycubic Photon M5, which delivers higher dimensional accuracy.
- Printing Platform: Prefer PEI‑coated platforms or glass platforms, paired with solid glue or specialized 3D printing adhesives such as Magigoo, to boost first‑layer adhesion and prevent warping. Glass platforms should be preheated to the appropriate bed temperature to ensure uniform heating across the surface.
2. Auxiliary Tools and Materials
- Basic Tools: Diagonal pliers for removing supports, 120–400 grit sandpaper for graded smoothing, tweezers for cleaning up fine residue, and markers for detailing;
- Auxiliary Materials: Printing filaments (1 kg packs of PLA+ or PETG), support remover (optional, for quick dissolution of residual supports), and anti‑slip mats to stabilize the printer and reduce layer line artifacts caused by print vibrations;
- Optimization Accessories: To further enhance print stability, consider adding silent upgrade components such as a quiet drive board or a heat gun for gentle adjustments to the model’s shape—perfect for refining details and achieving a more polished finish.
Originality of the Model
The author declares that this work is their personally original model
This model is licensed under the following terms:
Credit must be given to the creator
Models(1)
- 机甲狗头.3mfDesigner
'%3e%3cpath%20id='Vector'%20d='M13.6663%201.33331H2.33301C1.78072%201.33331%201.33301%201.78103%201.33301%202.33331V13.6666C1.33301%2014.2189%201.78072%2014.6666%202.33301%2014.6666H13.6663C14.2186%2014.6666%2014.6663%2014.2189%2014.6663%2013.6666V2.33331C14.6663%201.78103%2014.2186%201.33331%2013.6663%201.33331Z'%20stroke='%23808080'%20stroke-linejoin='round'/%3e%3cpath%20id='Vector_2'%20d='M11.3333%201.33331V7.33331H5V1.33331H11.3333Z'%20stroke='%23808080'%20stroke-linejoin='round'/%3e%3cpath%20id='Vector_3'%20d='M9.66699%203.66669V5.00002'%20stroke='%23808080'%20stroke-linejoin='round'/%3e%3c/g%3e%3cdefs%3e%3cclipPath%20id='clip0_3212_168684'%3e%3crect%20width='16'%20height='16'%20fill='white'/%3e%3c/clipPath%3e%3c/defs%3e%3c/svg%3e)
17.47 MB
'%3e%3cpath%20id='Vector'%20d='M7.99967%2014.6666C11.6816%2014.6666%2014.6663%2011.6819%2014.6663%207.99998C14.6663%204.31808%2011.6816%201.33331%207.99967%201.33331C4.31777%201.33331%201.33301%204.31808%201.33301%207.99998C1.33301%2011.6819%204.31777%2014.6666%207.99967%2014.6666Z'%20stroke='black'%20stroke-opacity='0.49'%20stroke-linejoin='round'/%3e%3cpath%20id='Vector_2'%20d='M8.00235%204.00006L8.00195%208.00299L10.8284%2010.8295'%20stroke='black'%20stroke-opacity='0.49'%20stroke-linecap='round'%20stroke-linejoin='round'/%3e%3c/g%3e%3cdefs%3e%3cclipPath%20id='clip0_1890_13189'%3e%3crect%20width='16'%20height='16'%20fill='white'/%3e%3c/clipPath%3e%3c/defs%3e%3c/svg%3e)
2026-02-07


