


Gun
Toys
Unboxing toys
Model
bb

- 0.28 mm layer height, 2-wall structure, 15% infill density

1-disc
PLA
Designer

13

3
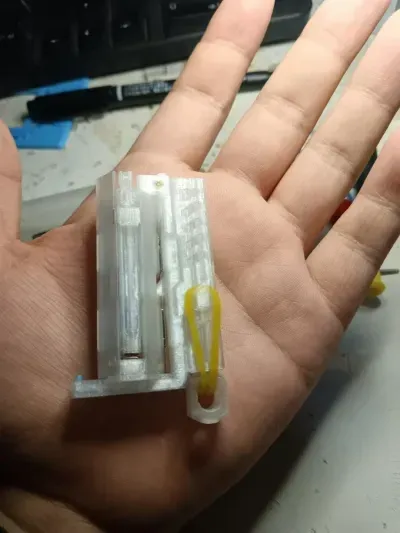
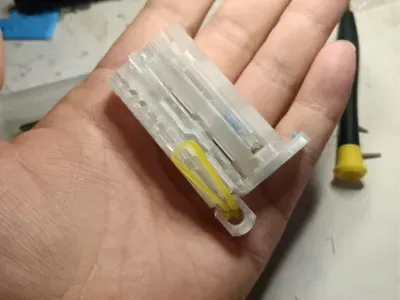
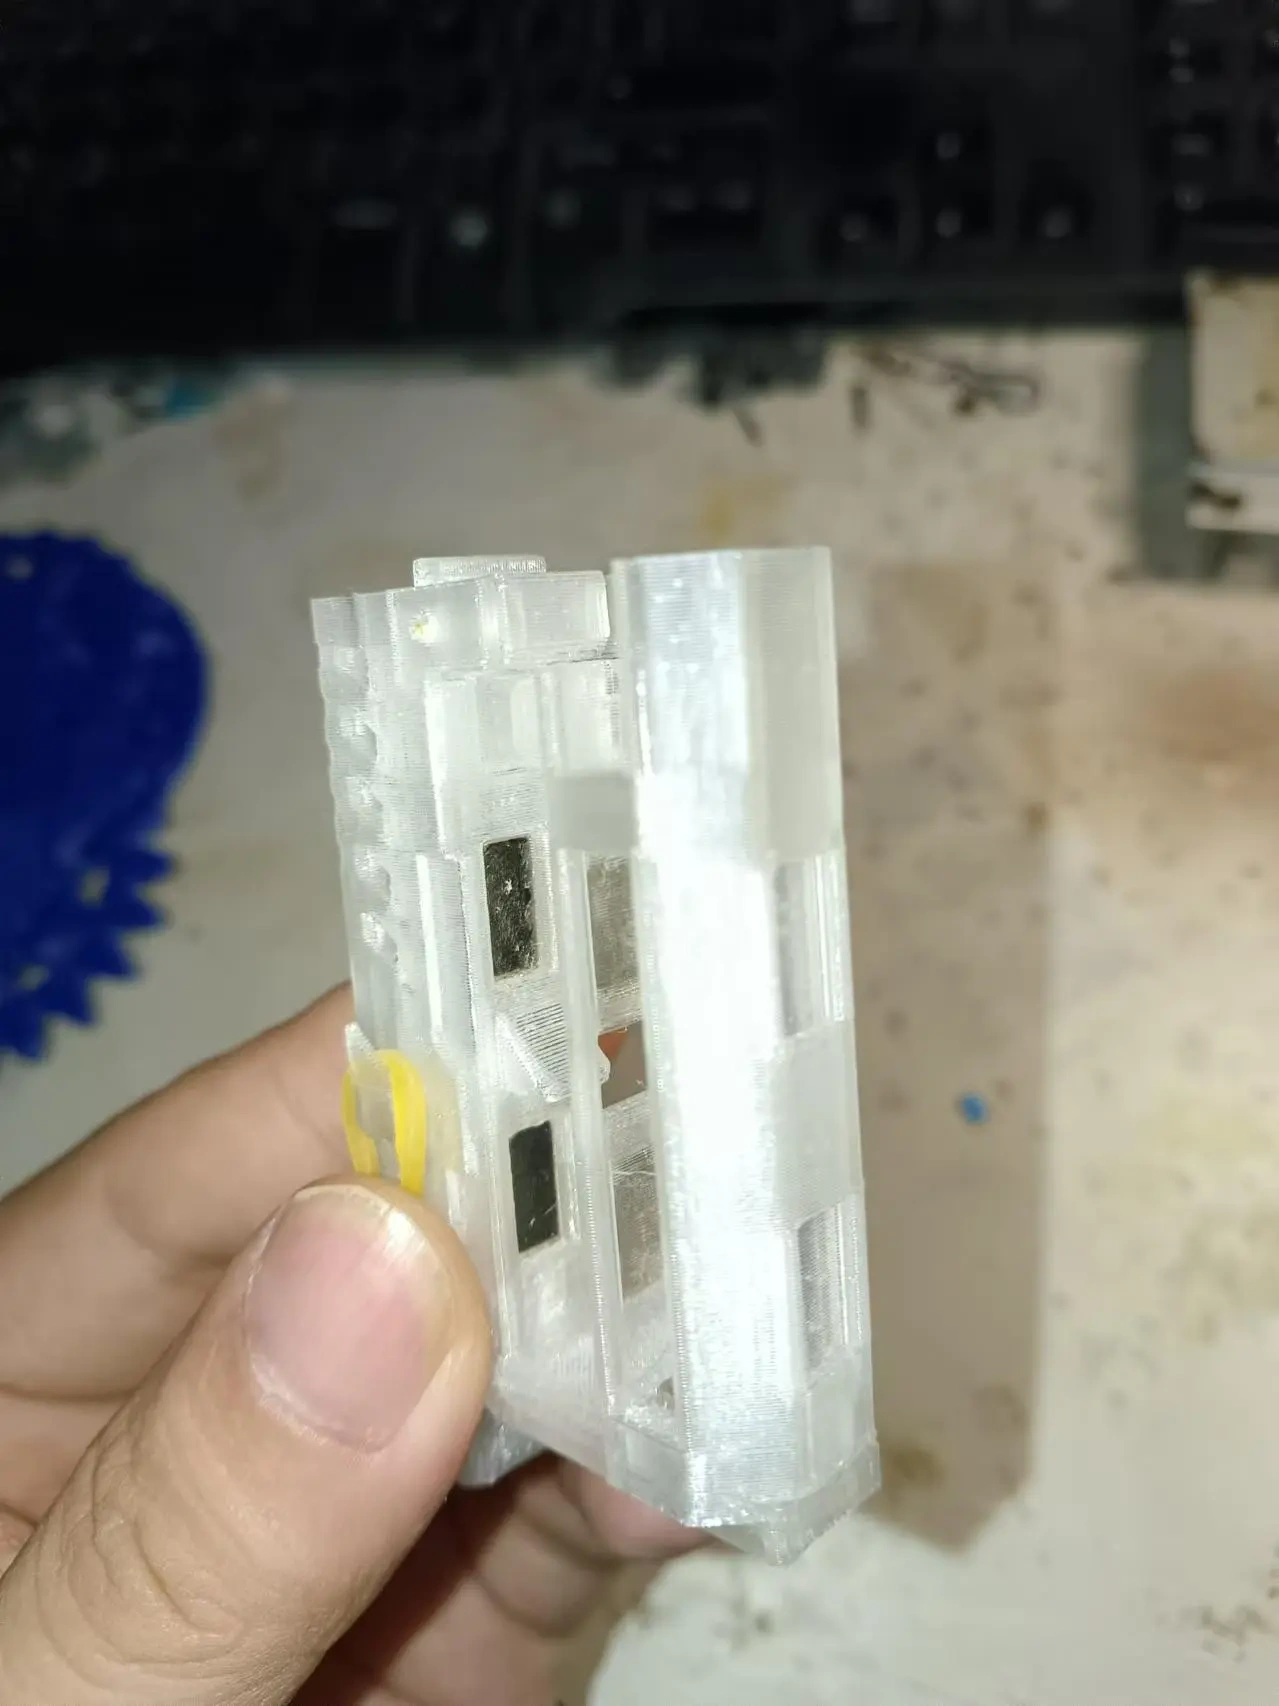
This is a card-sized BB egg launcher, powered by rubber-band energy storage for firing, and the entire device can be conveniently stored in a pocket or card holder. The required accessories include neodymium magnets (two 9×3×3 pieces and four 9×4×2 pieces), one rubber band, one roll of double-sided tape, and a trimmed toothpick. Assembly is straightforward and requires no complicated tools, making it an ideal fun desktop toy or party prop.
🚀 Key Highlights
Card-sized, ultra-portable: The overall dimensions are comparable to a bank card, with a thickness of only about 5–8 mm, easily fitting into a wallet, card case, or pocket.
Rubber-band propulsion, clean and efficient: Powered by the elastic potential of rubber bands, it operates without batteries or gunpowder, making it safe, environmentally friendly, and reusable.
Magnetic attachment, quick disassembly and reassembly: Multiple neodymium magnets (9×3×3 and 9×4×2) are used to magnetically secure the top and bottom covers; no tools are needed for assembly or disassembly, allowing for easy replacement of the rubber band or cleaning of the mechanism.
Easy-to-obtain, low-cost components: Only common magnets, rubber bands, double-sided tape, and a single toothpick are required; all other parts can be 3D-printed.
Fun interactive experience: Perfect for simple shooting games at parties—just be sure to use it in a safe environment.
🛠️ Printing Notes
Recommended materials: PETG or PETG+ is sufficient, balancing strength and surface quality.
Printing settings: Layer height of 0.2 mm, 3 wall layers, and 20% infill. No supports are required (though this depends on the specific model design; if the structure includes overhanging bridges, a small amount of support may be necessary—always check the slicing settings accordingly).
Dimensional control: The overall design is card-sized (approximately 85.6 mm × 54 mm). Ensure that the printer’s tolerances are tight enough to prevent the magnet slots or rubber-band slots from being too tight or too loose.
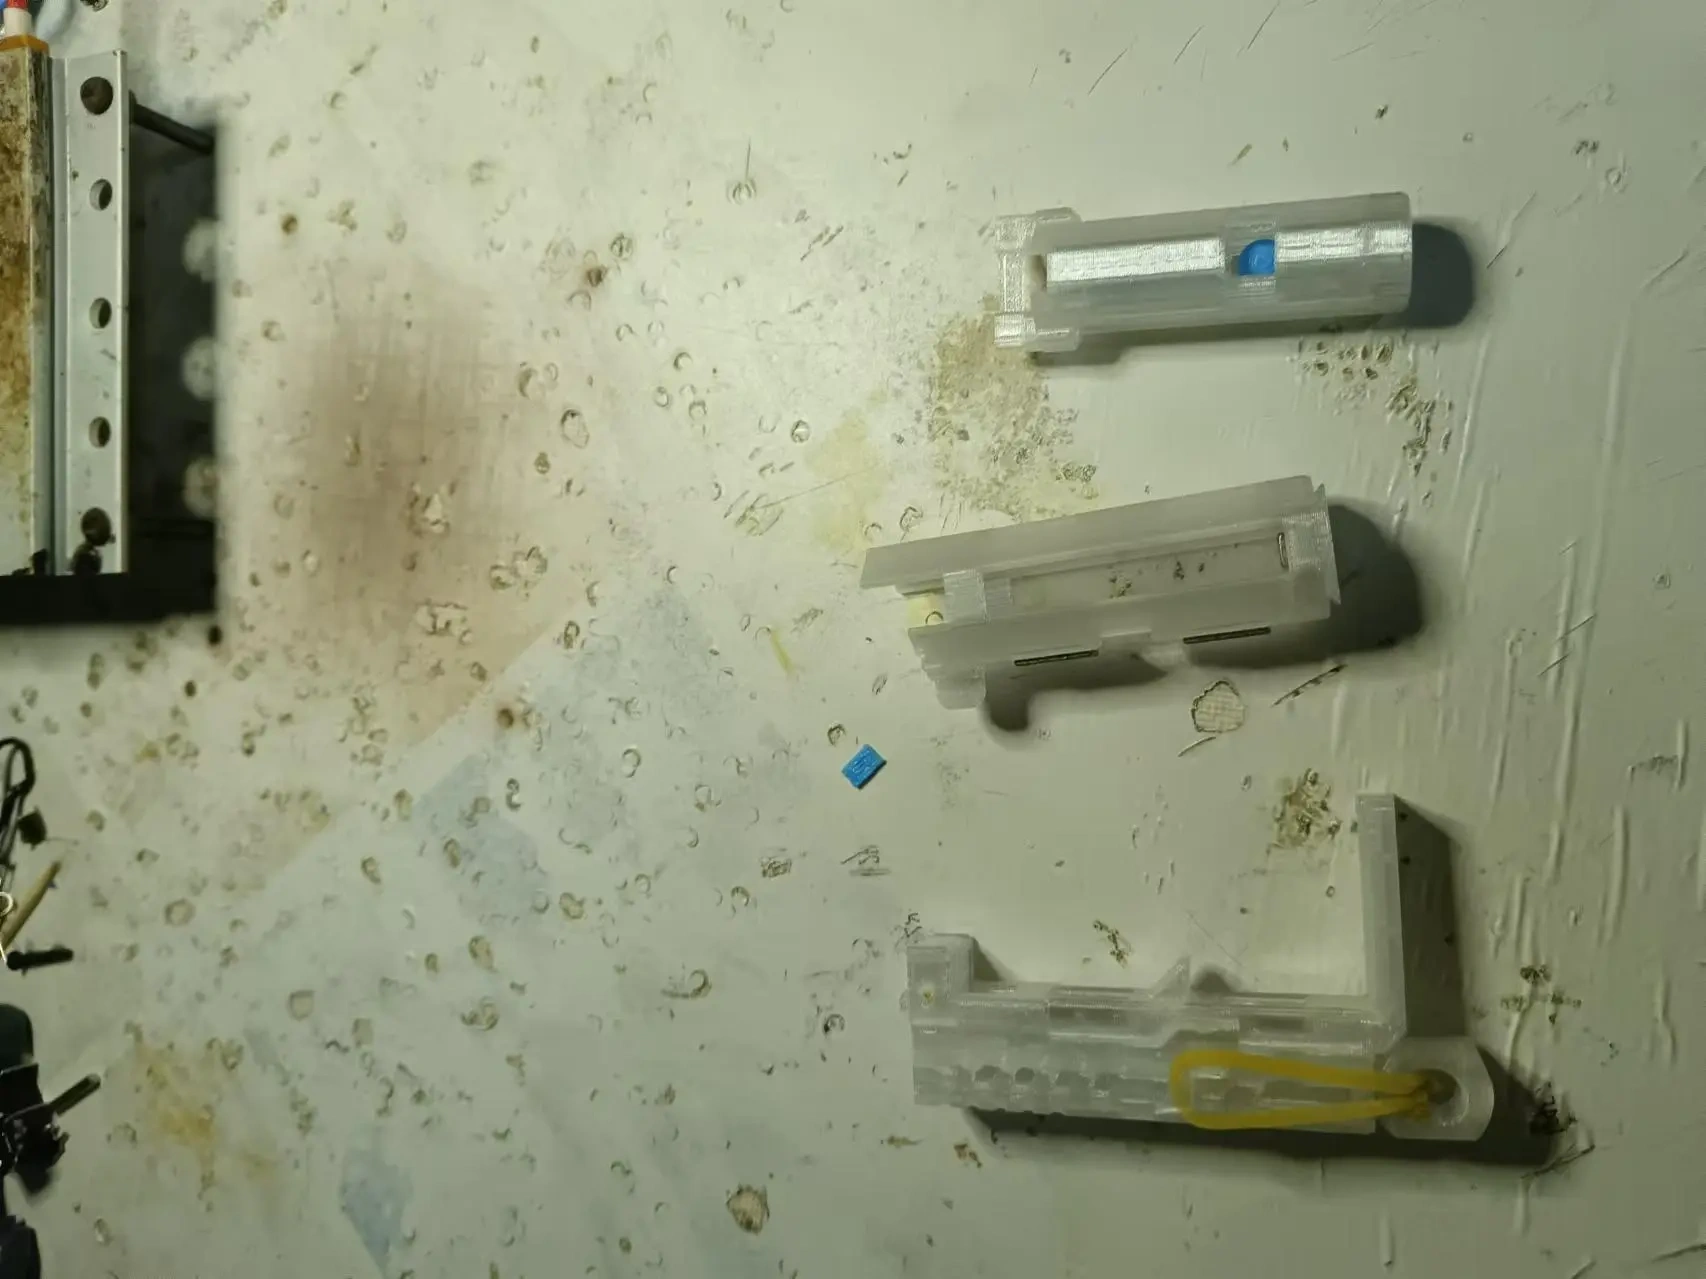
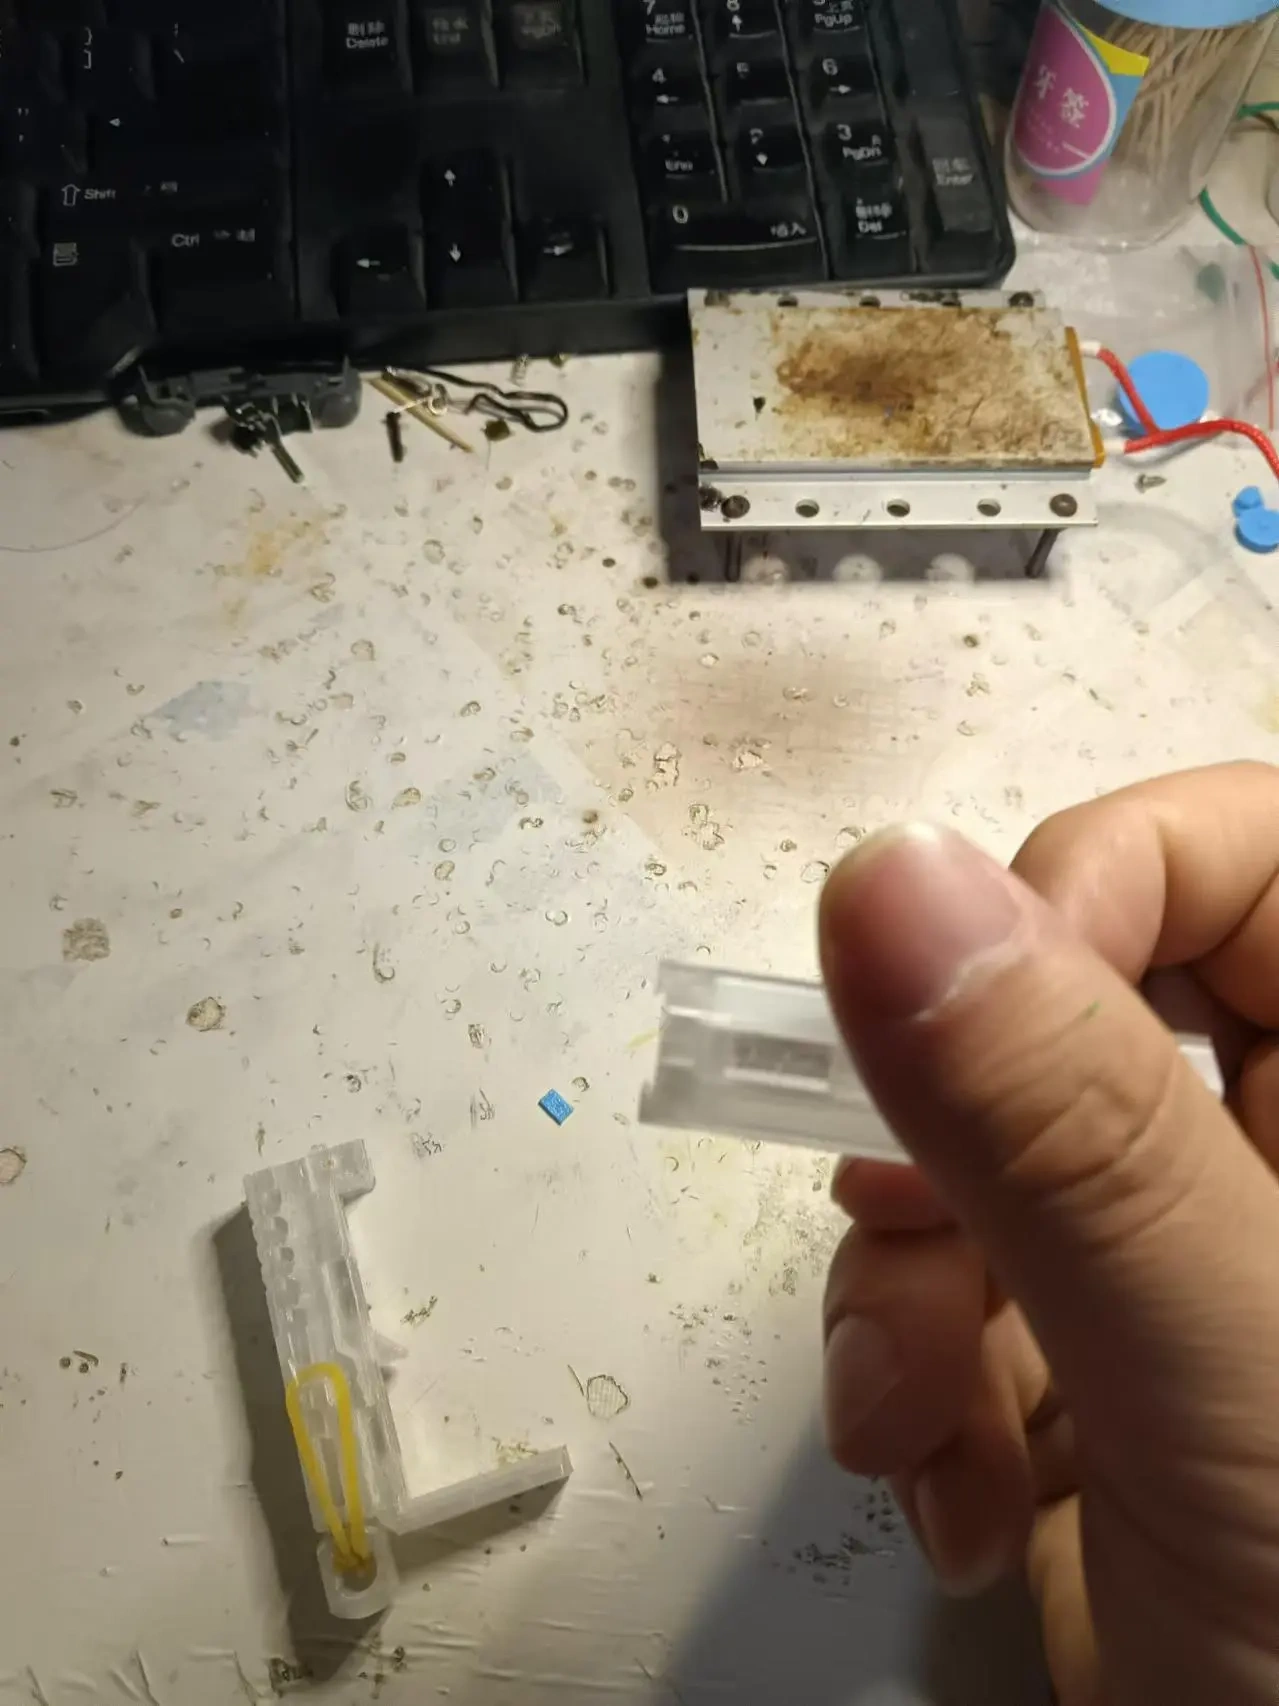
One-piece vs. multi-part printing: Typically, the parts are printed separately (top cover, bottom cover, trigger/hammer slide, etc.), so print each file individually.
🧩 Assembly Steps
Prepare the components:
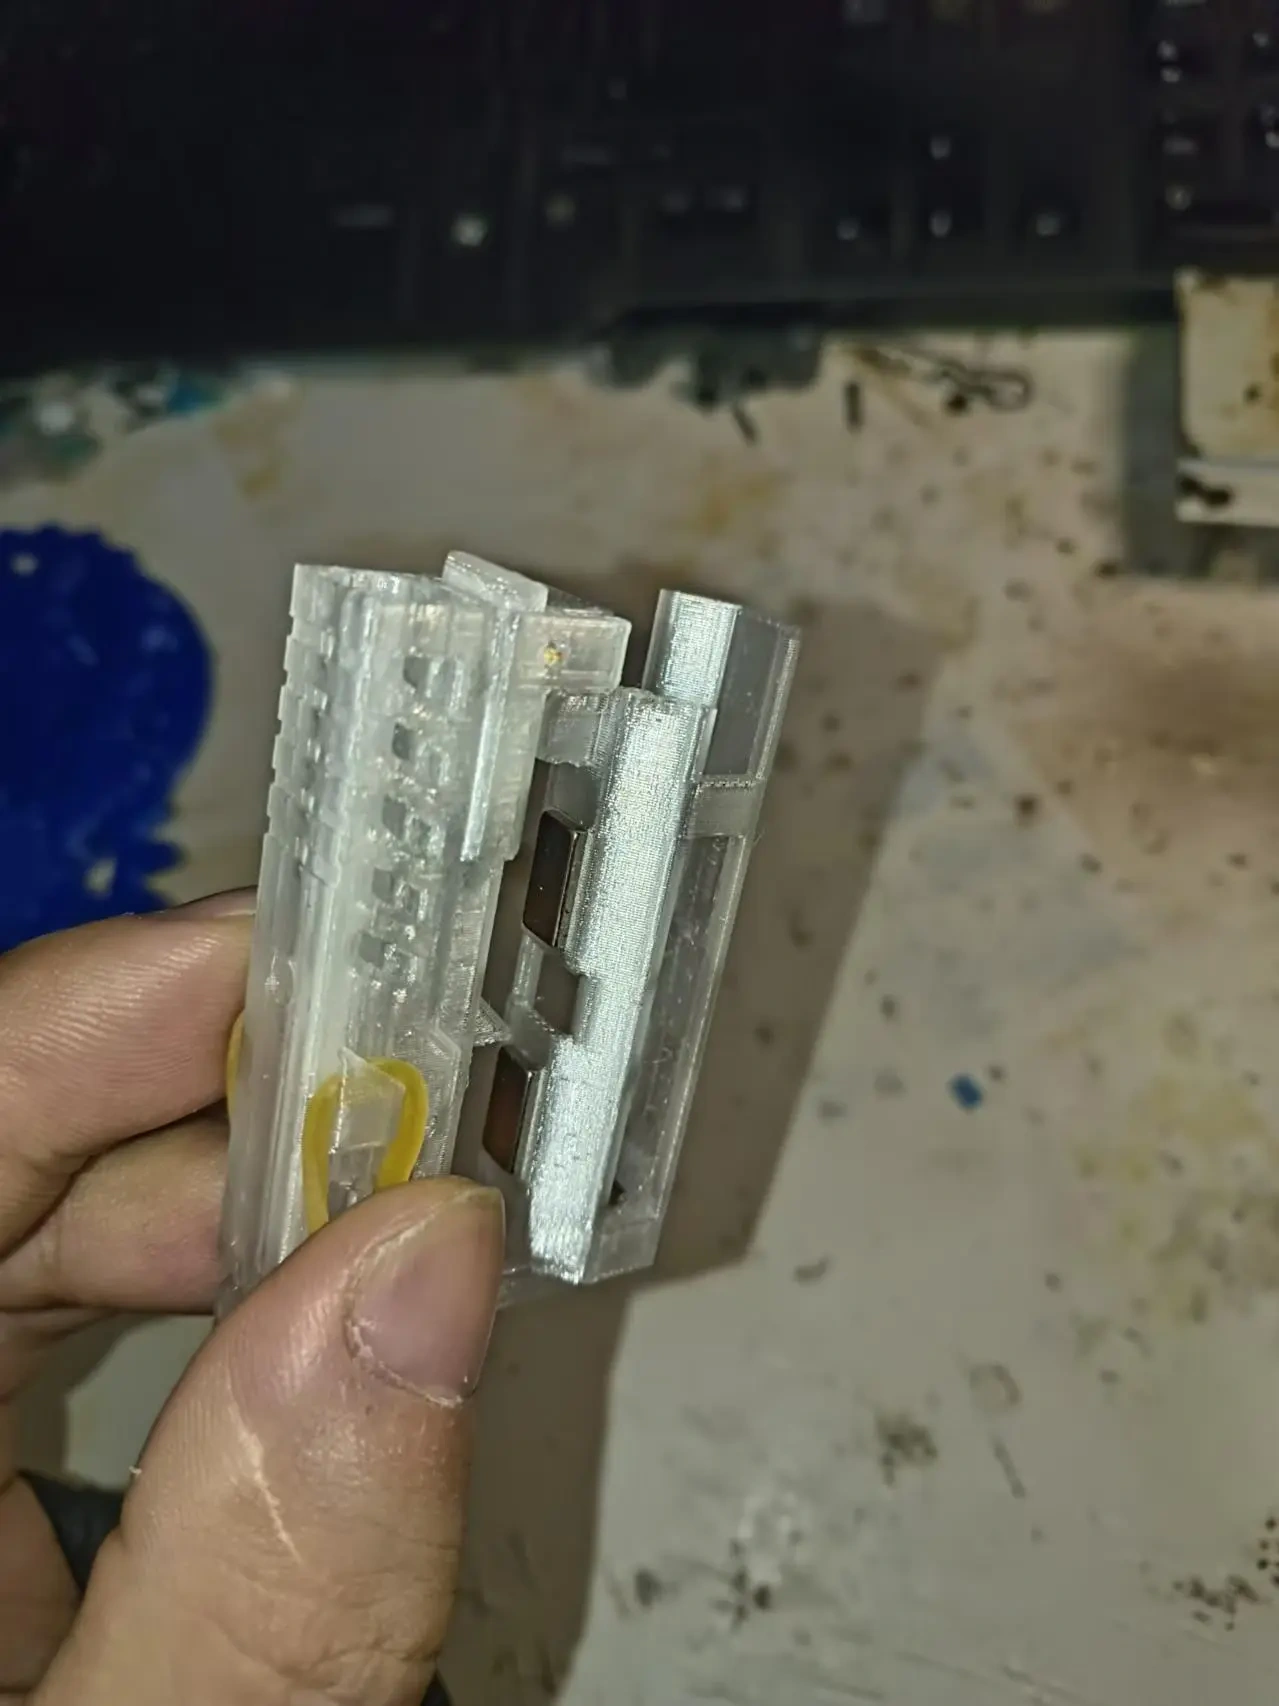
Magnets: two 9×3×3 (usually for the front magnetic attraction) and four 9×4×2 (for the rear or trigger area).
Rubber band: one standard rubber band (a thin, round band, such as 1.5 mm thick, is recommended).
Double-sided tape: one roll (thin type).
Toothpick: one, trimmed to an appropriate length (about 2 cm), used to secure the rubber band or serve as a stop pin.
Install the magnets:
Press the magnets into their respective slots on the printed parts, matching the correct sizes. Pay attention to polarity: Ensure that the magnets on the top and bottom covers have opposite polarities (so they attract correctly). You can mark the exposed surfaces of the magnets with a marker.
If the slots are slightly loose, apply a tiny drop of instant glue or a small piece of double-sided tape to help secure them.
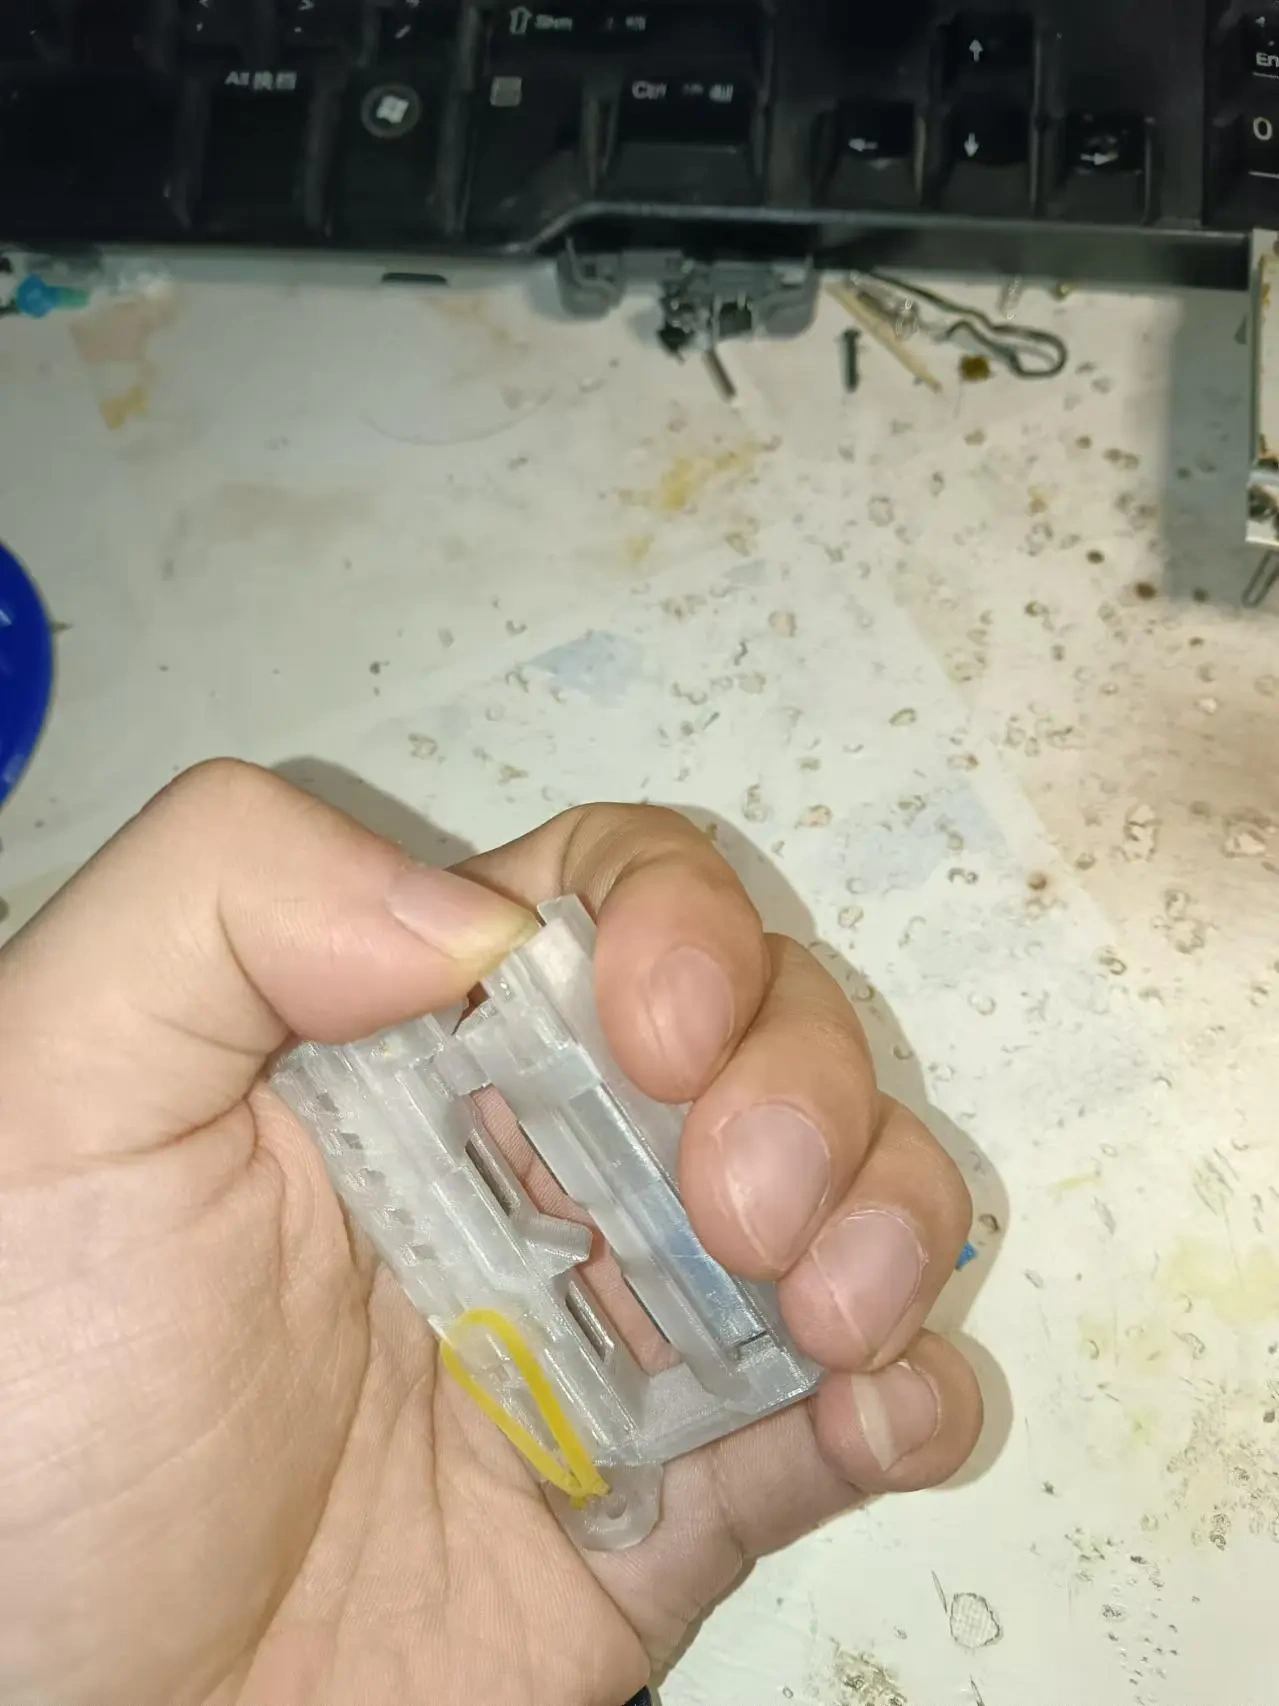
Install the rubber band and toothpick:
Hook one end of the rubber band onto the hook slot or post at the front of the launcher.
Pull the other end into the slot on the hammer slide (the trigger linkage component).
The role of the toothpick: The trimmed toothpick acts as a temporary pin or rubber-band stopper; insert it into the corresponding small hole according to the model design to prevent the rubber band from slipping out.
Apply the double-sided tape:
Apply a thin layer of double-sided tape to the mating surfaces of the top and bottom covers (away from the magnet areas) to improve sealing and reduce wobbling. There’s no need to remove the release liner on the other side—this tape can temporarily hold things in place or secure both ends of the toothpick.
Close the covers:
Check that the internal moving parts (trigger/hammer slide) operate smoothly.
Align the top and bottom covers, relying on the magnetic attraction to close them automatically. If the design includes snap-fit features, press firmly to lock them in place.
Test the device:
Insert the accompanying soft BB eggs (not included; please provide your own).
Pull the hammer slide or trigger to wind up the rubber band, aim in a safe direction (never point it at people or objects), and then fire.
Note: Always remove the rubber band after each use to extend its lifespan.
⚡ Frequently Asked Questions
What if the magnets are installed backward?
Use a heated soldering iron tip or a metal sheet to gently warm the side of the magnet, softening the adhesive before carefully prying it out; alternatively, wrap strong adhesive tape around the magnet and pull it out. Be sure to verify the polarity when reinstalling.Weak or jammed rubber-band propulsion?
Check whether the rubber band has lost its elasticity (replace it with a new one).
Inspect the movement path of the hammer slide or trigger for burrs or sticky residue, and smooth it out with sandpaper.
Make sure the toothpick isn’t obstructing the rubber band’s recoil.
Consider increasing the number of rubber-band strands (you can run two thin bands side by side).
Insufficient magnetic attraction causing the covers to pop open during firing?
Ensure you’re using neodymium magnets (N35 or higher); ordinary ferrite magnets don’t provide enough holding force.
Check that the magnets are fully seated in their slots; you can add a tiny drop of fast-drying glue to raise them by 0.2 mm and increase contact pressure.
Add extra double-sided tape between the top and bottom covers (remove the release liner and let the tape bond directly) to reinforce the connection.
Is the toothpick prone to falling out?
When trimming the toothpick, leave a slightly larger head than the hole diameter; or wrap one end of the toothpick with double-sided tape before inserting it.
You can also replace the toothpick with a short piece of 3D-printed filament (1.75 mm).
BB eggs won’t launch?
Check whether the inner diameter of the launch tube matches the diameter of the BB eggs (typically 6 mm or 7.5 mm).
Make sure the rubber band accurately strikes the back of the BB egg upon recoil; you can adjust the position of the rubber-band hook accordingly.
Are the magnet-slot dimensions inaccurate during printing?
It’s recommended to first print a small test part with the magnet slots, then scale the model up or down based on the actual fit (e.g., enlarge by 101% or shrink by 99%).Safety warning: This is a toy—do not aim it at eyes or animals. Children must use it under adult supervision, and never modify it to increase its power.
Follow the steps:
Some parts require assembly.
Step 1: The bottom of the egg shell has a slot (insert the lower part); inside the egg shell, attach the magnets.
Step 2: Insert the egg shell into the rectangular body (make sure to align the magnets on the body and the egg shell so that they repel each other first).
Step 4: The magnets on the bottom of the launcher repel the magnets inside the egg shell; once assembled, press the launcher firmly into place.
Originality of the Model
The author declares that this work is their personally original model
This model is licensed under the following terms:
Credit must be given to the creator
Models(1)
- 虎克工业一键弹出bb枪.3mfDesigner

297.56 KB

2026-04-23