




mold
christmas
silicone
log
noël
yule
moule
buche
- Elegoo Centauri Carbon - 0.2mm layer, 2 walls, 15% infill

2-disc
PLA
Designer

32

2
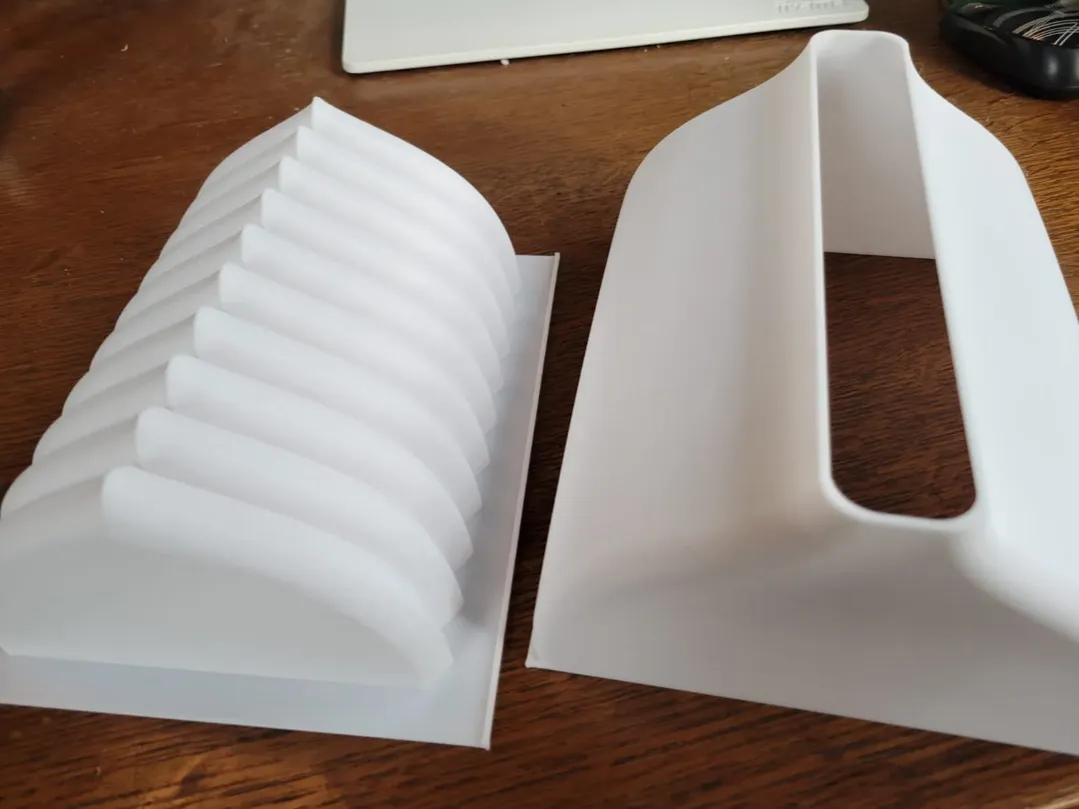
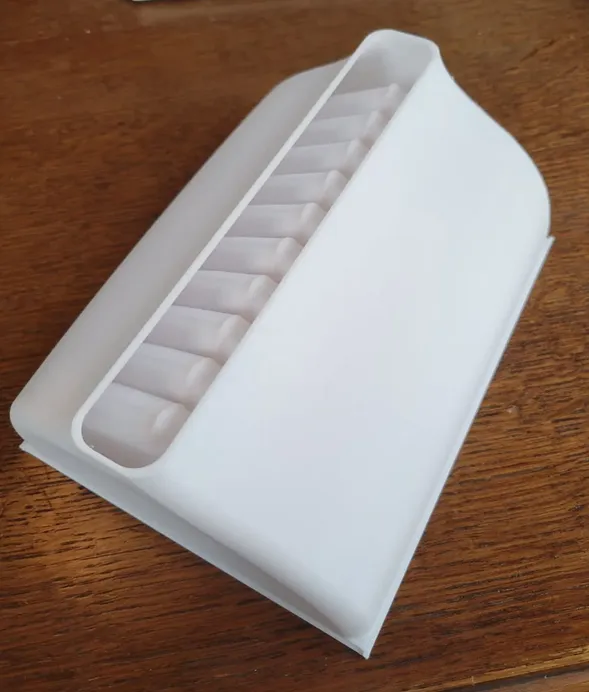
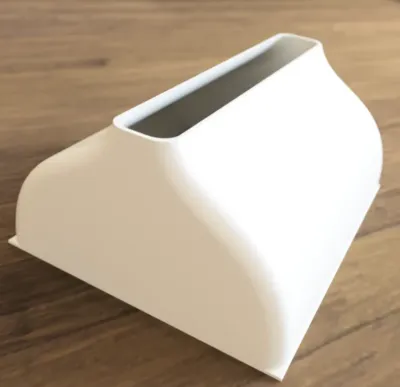
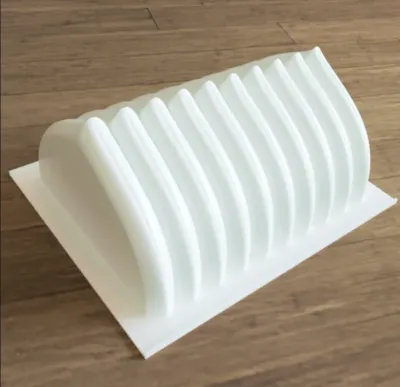
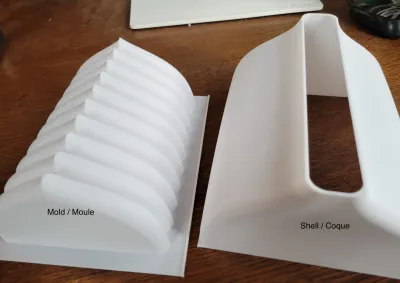
Here's a two-piece silicone mold you can use to create an icy Yule log.

Printing
- Both parts can be printed in PLA in 0,2mm without support
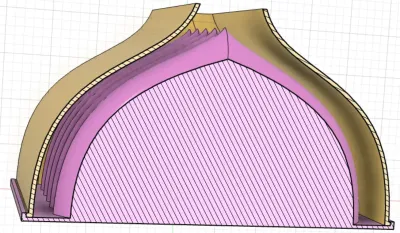
- The mold part can be printed with 20% Lightning filling, which will leave the part virtually empty while ensuring a good surface finish.
- On an Ender 3, you'll need to reduce the model to 90%, or use your slicer's cutting functions to print each part in two parts.
Moulding
As this is a food-grade mold, we recommend choosing a food-grade silicone with a Shore rating of around 30A.
Silicone is not supposed to adhere to PLA once dry. If this is not the case, you can treat the mold surface with a release spray.
- Assemble the two part
- Secure the assembly with line of liquid glue at the junction.
- The aim is to ensure that the assembly doesn't leak or move once the silicone has been poured, while it dries (several hours depending on the type of silicone you're using).
- Pour your silicone until it reaches the top of the shell. You'll need 800mL
- Once the silicone is dry and unmolded, clean it with soapy water.
Now all you have to do is cook!
____________________
Voici, en deux pièces, de quoi créer un moule silicone qui vous servira à préparer une bûche de Noël glacée.
Impression
- Les deux pièces sont imprimables en PLA, 0.2mm, sans support, à plat.
- La partie moule peut être imprimée avec un remplissage Lightning à 20% qui laissera la pièce quasiment vide tout en assurant un bon état de surface.
- Sur une Ender 3, il faudra réduire le modèle à 90%, ou utiliser les fonctions de découpe de votre slicer pour imprimer chaque pièce en deux parties.
Moulage
S’agissant d’un moule alimentaire, il est recommandé de choisir un silicone compatible alimentaire et avec un Shore autour du 30A.
Le silicone n’est pas supposé adhérer au PLA une fois sec. Dans le cas contraire, vous pouvez traiter la surface du moule avec un spray de démoulage.
- Assemblez les deux parties entre elles
- Consolidez l’ensemble avec un trait de colle liquide au niveau de la jonction.
- L’objectif est que l’ensemble ne fuit pas, et ne bouge plus une fois le silicone coulé, le temps du séchage (plusieurs heures selon le modèle de silicone que vous utilisez)
- Coulez votre silicone jusqu'à atteindre le haut de la coque : vous aurez besoin d'environ 800mL
- Une fois le silicone sec et démoulé, nettoyez le avec de l’eau savonneuse.
Y a plus qu'à cuisiner !
Originality of the Model
The author declares that this work is their personally original model
This model is licensed under the following terms:
Credit must be given to the creator
Only noncommercial uses of the work are permitted
Remixes must be shared under the same license
Models(3)
 coque buche v11.stepDesigner
446.52 KB

2025-08-10
- moule buche v17.stepDesigner
788.57 KB
2025-08-10
- coque buche Elegoo CC.3mfDesigner
8.71 MB
2025-08-10
View all(3)


