


LED
Aura
Goku
son goku
super saiyan
funko pop
funko pop stand
funko pop display
diorama
WLED

- 0.2mm layer, 2 walls, 15% infill

7-disc
PLA
Designer

15

2
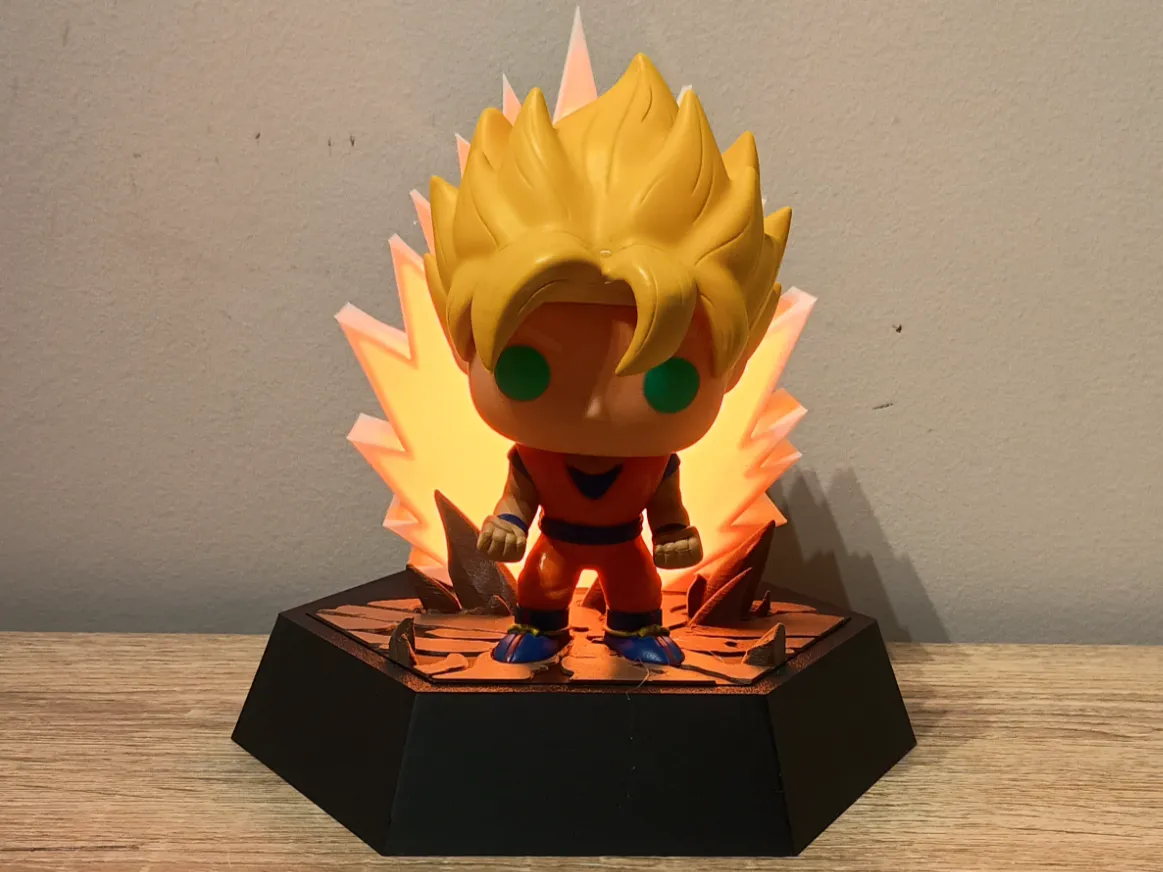
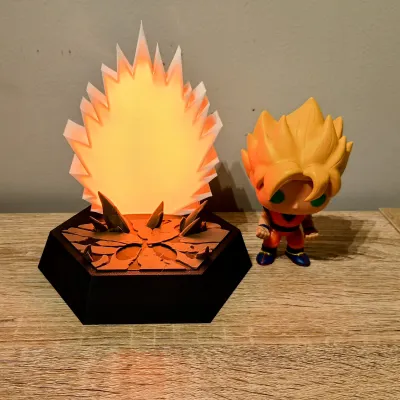
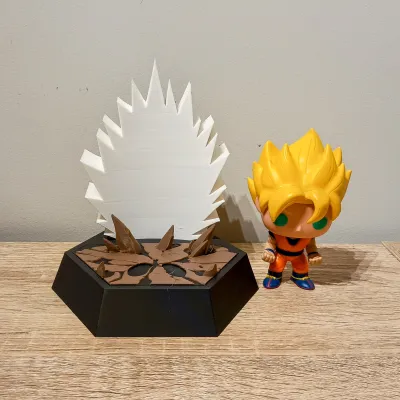
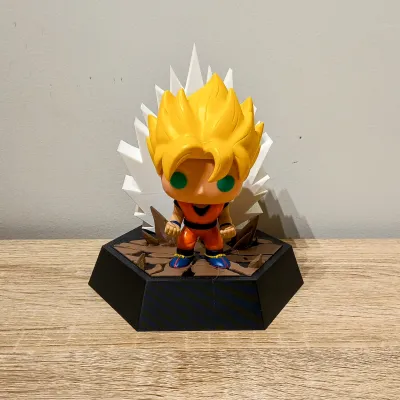
Unleash the power of a true Super Saiyan with this dynamic light-up display base designed specifically for Goku Super Saiyan Funko Pop #14 – though it works great with other DBZ characters too!
This 3D-printed base features:
A cracked ground effect to simulate a powerful energy charge-up
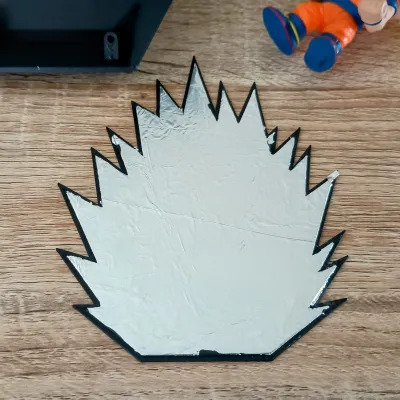
A stylized aura backdrop printed in white to diffuse light beautifully
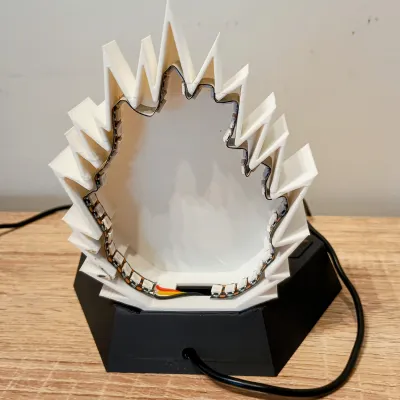
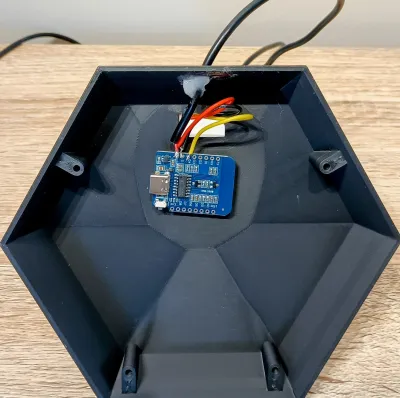
A compartment in the base to house a D1 Mini running WLED
Use WS2812B RGB LEDs to make the aura pulse, radiate, or flicker with raw power using WLED patterns
The inside of the aura cover lined with aluminum foil to reflect more light forward and enhance the glowing effect
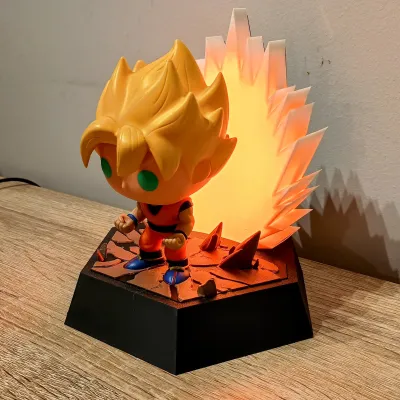
Two base options:
▸ A plain base, or
▸ A display base with a cutout slot for the included DBZ logo
Both the cracked ground and DBZ logo are designed to work with filament color changes at layer height—no AMS required! For the cracked ground, start in black and swap to brown. For the logo, swap colors as desired during print for a clean multicolor finish.
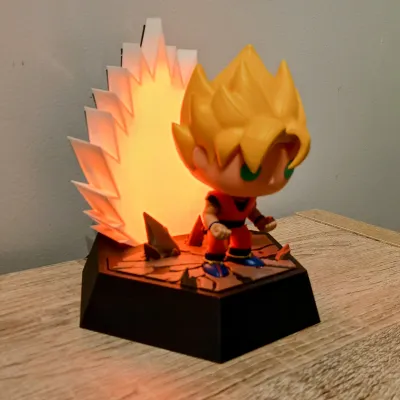
Perfect for adding life to your DBZ collection or creating an eye-catching shelf display! The design allows easy access for wiring and electronics while keeping everything neat and focused on the glow.
Assembly Notes:
Designed for 5V WS2812B LED strips
Print the aura in white PLA for best diffusion
Add aluminum foil inside the rear aura cover to boost brightness
Fits Funko Pop Goku Super Saiyan #14 by default
Compatible with other DBZ Funko Pops or similarly sized figures
Connect your LEDs to a D1 Mini and use WLED to customize lighting effects
Bill of Materials (Electronics & Assembly)
| Item | Quantity | Link |
|---|---|---|
| D1 Mini (ESP8266) | 1 | https://www.aliexpress.com/item/1005006235653025.html |
| WS2812B LED Strip 1M 144 IP30 | 1M | https://www.aliexpress.com/item/4001331197520.html |
| USB Cable (Male) 100cm | 1 | https://www.aliexpress.com/item/1005008045179029.html |
| Aluminum Foil | Small piece | Find in your kitchen |
| Super Glue (CA Glue) | As needed | https://www.aliexpress.com/item/1005003643576389.html |
| Jumper Wires / Wire 26 AWG | As needed | https://www.aliexpress.com/item/4001283806251.html |
| Soldering Iron | 1 | https://www.aliexpress.com/item/1005007099216072.html |
| Solder | As needed | https://www.aliexpress.com/item/1005008695639704.html |
| Double Sided Tape/VHB | https://www.aliexpress.com/item/1005008305877251.html | |
| M3 10mm to 20mm Screw/Bolt | 4 | https://www.aliexpress.com/item/32810852732.html |
🛠️ Quick Assembly Guide – Super Saiyan Aura Display Base
1. Flash WLED onto the D1 Mini
Plug the D1 Mini into your computer using a data USB cable (not just a charging cable).
Visit https://install.wled.me.
From the dropdown, select version 0.14.0 – this version is the most stable for the D1 Mini.
Click Install and wait a few minutes for it to complete.
Once done, connect the D1 Mini to your Wi-Fi network, and it will load into the WLED web GUI.
2. Prepare and Install the LED Strip
Cut the desired number of LEDs (I used 50 from a 144 LED/m strip, but feel free to use more or less).
Solder three 10–15cm wires to the LED strip:
Red = 5V (Positive)
Yellow = Data (Signal)
Black = GND (Ground)
Make sure you're soldering to the input end of the strip (look for "DI" or an arrow pointing toward the rest of the strip).
Stick the strip inside the aura using the LED strip’s adhesive backing, carefully bending it to follow the aura’s shape/spikes.
Glue Aura to Base and thread the wires through the cutout in the aura and base.
3. Wire and Mount the D1 Mini
Thread the USB cable through the back of the base.
Strip and tin the ends of the wires:
Twist the red wire from the USB cable and red wire from the LED strip together.
Do the same for the black wires.
Solder:
Red (5V) pair to the 5V pin
Black (GND) pair to the GND pin
Yellow (Data) wire to D4 pin (right next to 5V and GND)
Make sure there are no shorts on your solder joints.
Stick the D1 Mini to the base using VHB/double-sided tape on the back of the Wi-Fi chip.
4. Power Up and Configure WLED
Plug the USB cable into a phone charger, power bank, or laptop.
The first ~30 LEDs should light up orange by default.
Use the WLED GUI to:
Set the number of LEDs
Adjust colors, brightness, and effects
Configure Wi-Fi name and password
(If you're unsure how to do this, there are lots of WLED tutorials on YouTube.)
5. Final Assembly
Glue aluminum foil to the inside of the aura’s back cover to reflect more light forward.
Screw the base cover on using M3 screws.
Glue on the cracked ground plate.
✅ That’s it! Power it on and explore WLED’s epic effects to bring your Super Saiyan display to life! 🔥⚡
Originality of the Model
The author declares that this work is their personally original model
This model is licensed under the following terms:
This work is licensed under a Standard Digital File License. Digital files have a strict non-commercial, personal use only license.
You shall not share, sub-license, sell, rent, host, transfer, or distribute in any way the digital file or 3D printed versions of this object, nor any other derivative work of this object in its digital or physical format (including remixes of this object). You can not host these files on other digital platforms, web stores or cloud repositories. The objects may not be used in any way whatsoever in which you charge money, collect fees.
Models(1)
- Pop+Funko+Goku+Aura+Base.3mfDesigner

5.93 MB

2026-06-04