


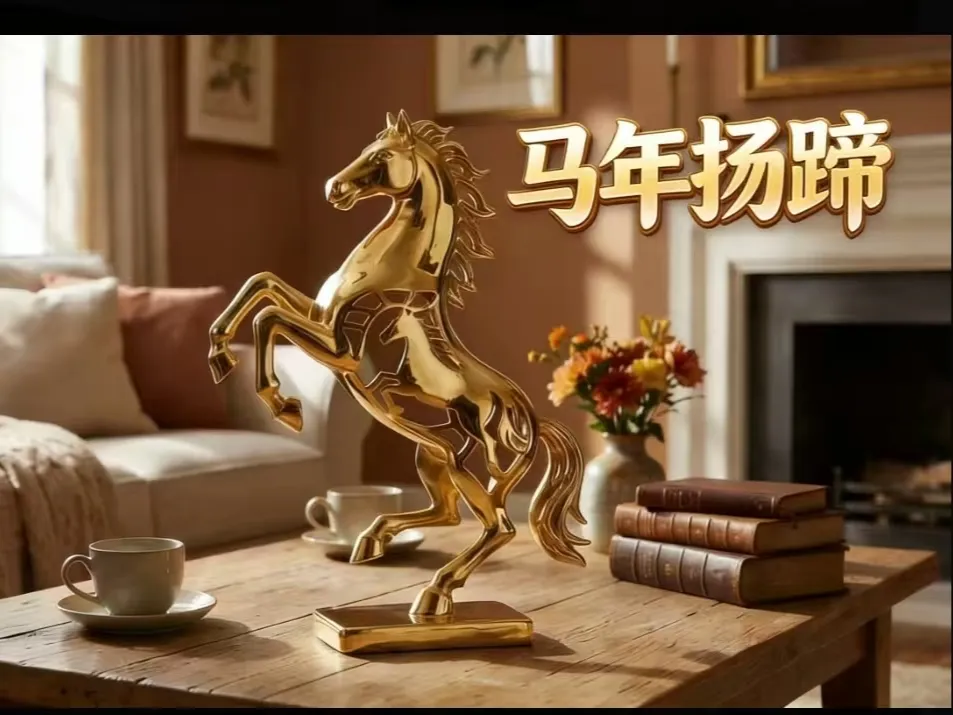
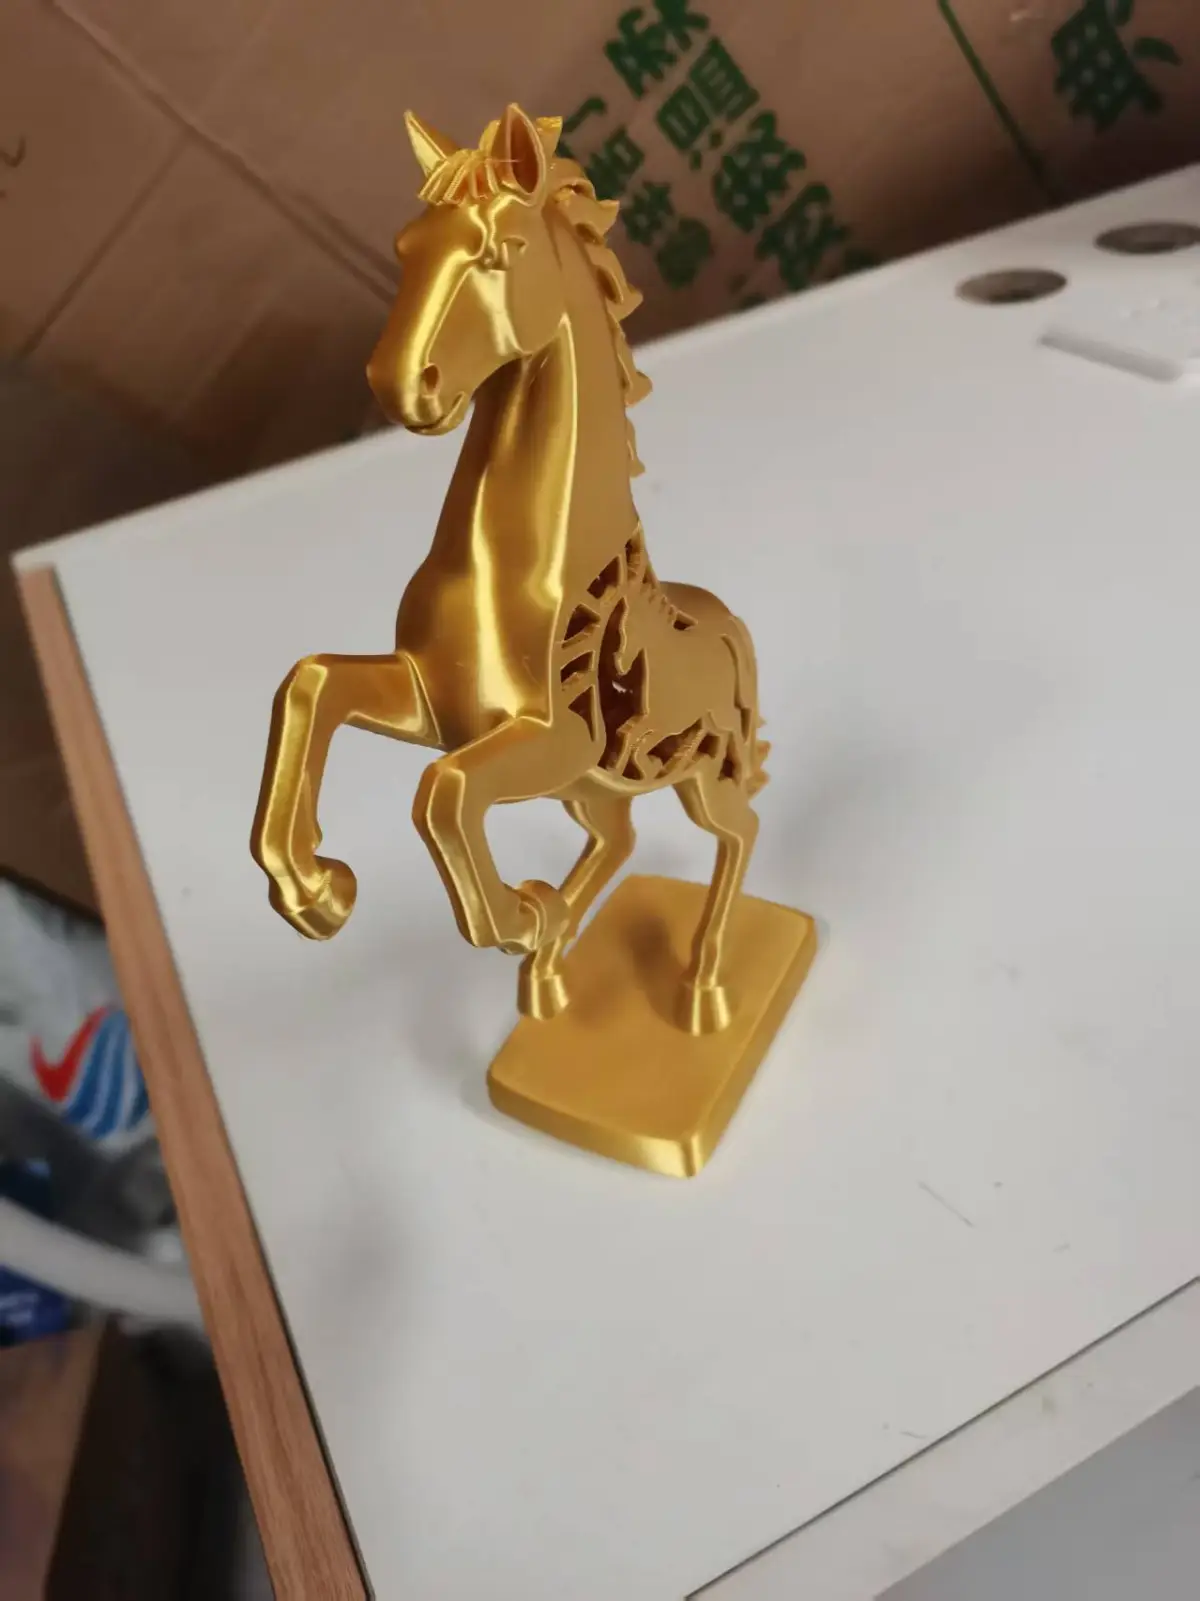

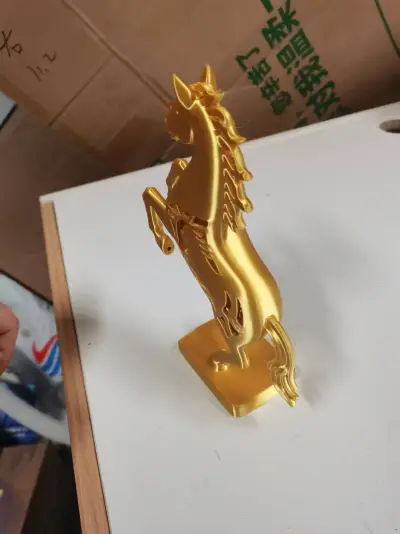
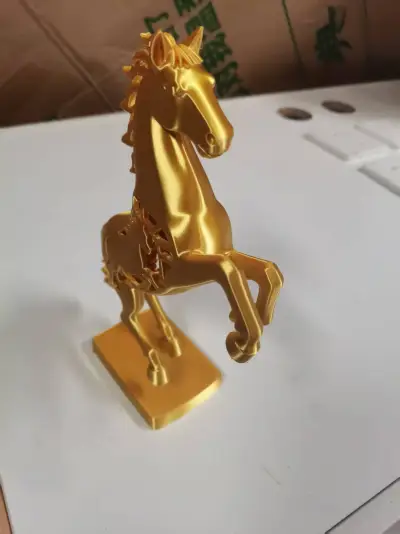
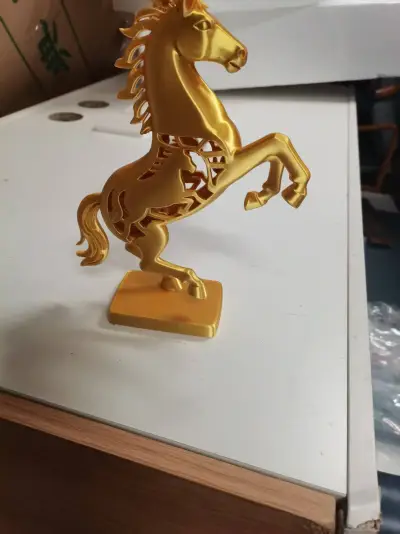
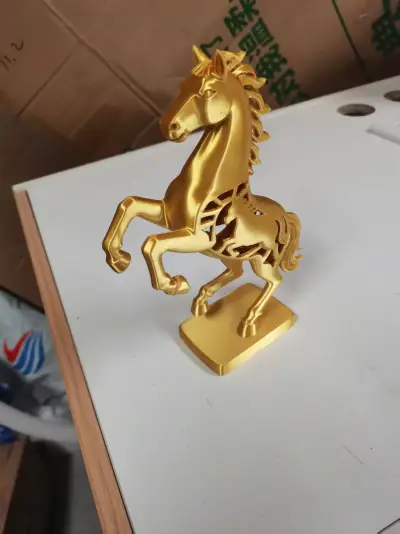

Horse Year Galloping Stallion Ornament
Support‑Free 3D Printed Parts
Desktop Horse Figurine
Lucky Ornaments for the Year of the Horse
Horse-Ready Desktop Decorations
Year of the Horse – Exclusive Decorative Ornaments
3D‑printed home decor ornaments
Traditional auspicious motif horse model
Desktop Luxurious Zodiac Horse Figurine
Print a glue-free Arabian horse model
Minimalist, Realistic Horse Rearing Its Hooves

- 0.2 mm layer height, 2‑wall walls, 15% infill density

1-disc
PLA
Designer

6

0
1. Sources of Design Inspiration
This model draws its inspiration from the cultural essence of the Year of the Horse—marked by “spirited advancement and boundless good fortune”—blending traditional zodiac aesthetics with the unique capabilities of modern 3D printing technology. In Chinese culture, the horse symbolizes “success at the first attempt and relentless drive,” while the “rearing” pose subtly conveys the auspicious meaning of “leaping forward with soaring wealth and prosperity,” perfectly aligning with the 2026 Year of the Fire Horse’s cosmic energy: “fiery vitality fuels momentum, paving the way for grand aspirations.”
The design adheres to the principle of balancing realism with artistic expression—capturing the dynamic tension of a galloping horse with fluid, well-defined muscle lines, upright and powerful limbs, and flowing manes and tails that exude an air of unbridled vigor. At the same time, traditional auspicious motifs are woven into the design: delicate cloud patterns are rendered in low-relief on both sides of the horse’s body, echoing the timeless wish for “blessings and good fortune to accompany you.” To ensure structural integrity during 3D printing, the model’s overhanging sections—such as the hooves and underbelly—are engineered with a 45° build angle, striking a balance between aesthetic appeal and printability. This approach not only enhances visual impact but also simplifies the printing process, making the model ideal for a wide range of applications, including home decor, office accents, and thoughtful gifts for the Year of the Horse.
2. Key Model Specifications
1. Overall Dimensions and Form
- Finished Size: 18 cm (L) × 8 cm (W) × 22 cm (H), including the height of the rearing hoof—a harmonious proportion perfect for tabletop display;
- Form and Structure: The horse adopts a dynamic pose with the front hooves raised and the hind hooves firmly planted on the ground. The head is slightly tilted upward, with a resolute gaze; the mane flows naturally to either side, while the tail arches gracefully upward, creating a sense of rhythm and movement throughout the piece;
- Material Compatibility: PLA is the preferred material due to its ease of printing and warm, smooth finish, though PETG can also be used for added strength and long-term durability when needed.
2. Highlighted Design Details
- Muscle and Contour: The horse’s muscular form features gradual, sculpted ridges that follow the natural anatomy of the equine, with full, rounded shoulders and legs that closely mirror the horse’s physiological structure. With no harsh edges or abrupt transitions, the model achieves a seamless, polished look straight out of the printer—requiring minimal post‑printing finishing.
- Decorative Motifs: Simple cloud patterns are carved in low relief along both sides of the horse’s body and across its back (with a relief height of 0.8 mm). These motifs extend from the neck down to the hips, complementing the rearing posture and symbolizing “clouds cradling the horse, bringing blessings and prosperity to soar.”
- Structural Optimization: All overhanging sections—including the front hooves and the area beneath the horse’s belly—are designed with an incline of at least 45°, allowing them to be supported by tree‑like structures while maintaining stability and preventing hollow layers. The leg walls are reinforced to 2.4 mm, and the hoof region is filled at a rate of 30%, ensuring structural integrity even after support removal.
- Surface Finish: The model’s surface incorporates a subtle matte texture, providing a smooth, tactile feel without the need for additional polishing after printing. For intricate details—such as the mane and hoof textures—layer‑by‑layer printing ensures crisp, clear results.
3. Part Separation and Assembly Logic
- Model Type: The design is fully integrated, with no separate components—no complex assembly required; simply remove supports after printing to reveal the finished piece.
- Built‑In Interfaces: A circular base with a diameter of 10 cm is incorporated at the bottom, featuring a 3 mm anti‑slip groove around the edge. This base can be paired with rubber anti‑slip pads—either printed separately or purchased independently—to enhance stability when placed on surfaces.
- Expandable Mounting Options: Four small 2 mm diameter holes are reserved on the back of the base, ready for wall mounting using screws (sold separately), opening up additional usage scenarios.
3. Core 3D Printing Requirements (Glue-Free, Easy‑Removal Support Version)
1. Basic Print Settings
- Print Orientation: Position the model at a fixed 45° angle, with overhanging areas such as the front hooves and belly facing the print bed. Utilize layered support to minimize the amount of support material needed.
- Layer Height: Opt for a fine layer height of 0.12 mm for maximum detail, a balanced setting of 0.16 mm for a trade‑off between speed and surface quality, and avoid exceeding 0.2 mm to prevent rough layer lines.
- Fill Density and Wall Thickness: Maintain a main body fill density of 20–25%, increase the fill rate to 30% for the legs, hooves, and base, and ensure an overall wall thickness of 2.0–2.4 mm (print at least 3 layers to guarantee structural rigidity).
- Print Speed: Set the outer walls and detailed areas—such as the mane, decorative patterns, and hooves—to 25–35 mm/s; fill areas should be printed at 50–60 mm/s; and support structures should be printed at 40–50 mm/s to avoid misalignment in fine details or overly dense support buildup.
2. Specialized Support Configuration (Easy‑Removal, Non‑Damaging Supports)
- Support Type: Add tree‑like supports only at critical overhanging areas—avoid linear or grid supports—and keep support density between 10% and 15% to reduce removal difficulty.
- Contact Point Design: Ensure support contact points are no larger than 1.2 mm in diameter, enable the “easy‑peel” support mode, and leave a 0.1 mm gap between the support and the model to minimize adhesion.
- Precise Support Placement:
1. Front Hoof Area: Add 1–2 independent tree‑like supports to the underside of both the left and right front hooves, keeping the support height below one‑third of the hoof’s height to avoid obstructing the leg’s natural lines.
2. Underneath the Horse’s Belly: Apply just one support point to the tiny overhanging section where the belly meets the front leg—roughly a 2 cm² area—eliminating the need for extensive support coverage.
3. Base Edge: Add a 5 mm wide brim support around the entire base perimeter to prevent warping and ensure the model can be removed cleanly without damaging the main structure.
- Support Angle Threshold: Set the support angle to 40°—slightly lower than the print orientation—generating supports only for extremely small overhangs with angles less than 40°, thereby avoiding unnecessary supports that could complicate removal.
3. Filament and Temperature Control
- Filament Selection: PLA is the preferred material (we recommend red, gold, or deep brown tones to match the festive spirit of the Year of the Horse), offering moderate toughness and easy support removal. For enhanced durability, PETG can be used—but be sure to adjust print parameters accordingly.
- Temperature Settings:
- PLA: Set the nozzle temperature to 200–210°C, the heated bed to 60–65°C, and keep the cooling fan running at 100% throughout the print.
- PETG: Set the nozzle temperature to 230–240°C, the heated bed to 70–75°C, and run the cooling fan at 50% during the first 5 layers, then increase to 80% for the remaining layers.
- Filament Requirements: Use 1.75 mm diameter filaments, and dry the filaments before printing—PLA at 40°C for 2 hours, PETG at 60°C for 4 hours—to prevent bubbles that can cause filament breakage.
4. Printer Compatibility and Calibration
- Compatible Printers: This model works with Top Series 3D printers (P1P, P1S, X1C, etc.) and mainstream desktop FDM printers, requiring a print volume of at least 20 cm × 10 cm × 25 cm.
- Pre‑Print Calibration: Be sure to complete automatic bed leveling and extruder flow calibration. We recommend performing XYZ axis compensation to ensure precise nozzle positioning, minimizing filament breakage or misalignment in delicate areas like the legs and mane.
- Test Prints: Start with a 1:4 scale test print to evaluate support removal performance and detail accuracy. Once you’ve confirmed that all settings are correct, proceed with full‑size printing.
5. Assembly and Post‑Processing Instructions
1. Assembly Process (Integrated Model, No Complex Assembly Required)
- Step 1: After printing, allow the model to cool to room temperature—about 30 minutes—before removing it from the print bed. Avoid applying stress to the model while it’s still hot, as this could lead to deformation.
- Step 2: Inspect the base’s anti‑slip grooves. If you plan to install an anti‑slip pad, simply insert a round rubber pad (1 cm in diameter, 3 mm thick) into the groove—no glue is needed, as the pad’s inherent friction will ensure a secure fit.
- Step 3: For wall mounting, align the small holes on the back of the base with pre‑drilled screws on the wall and gently press to secure the model. Use screws no larger than 2 mm in diameter to avoid damaging the base.
2. Support Removal Techniques (Key Steps to Prevent Damage)
- Tools Needed: Fine‑tipped tweezers, a craft knife (with a dull edge to avoid scratching the model), and small needle‑nose pliers (to help pry loose thicker support structures).
- Removal Order: Begin by removing the front hoof supports, then move on to the supports under the horse’s belly, and finally detach the brim support at the base. Gently pry from the base of each support, leveraging the “reserved gap between support and model” to peel away the support layer by layer—never pull forcefully.
- Handling Tough Areas: If the support is tightly bonded to the hoof or leg, use the blade of a craft knife to carefully slide along the contact point, separating the support from the model. Then, use tweezers to carefully remove any remaining support debris, taking care not to scratch the model’s surface.
3. Post‑Processing Optimization (Enhancing Texture and Finish)
- Sanding and Finishing: Lightly sand any residual support marks with 400‑grit sandpaper, followed by polishing with 800‑grit sandpaper. Focus on high‑visibility areas like the hooves and legs, then use a polishing cloth to buff the surface for a glossy finish.
- Detail Enhancement: To amplify the festive atmosphere, outline cloud patterns and the edges of the horse’s hooves with golden acrylic paint, or apply a light coat of clear lacquer (choose matte or gloss finish) to specific areas of the model—enhancing its resistance to dirt and adding a refined touch.
- Repairing Imperfections: Should minor bubbles or small gaps appear after printing, simply fill them with PLA repair filler, smooth the surface with sanding, and the imperfections will be virtually undetectable, preserving the model’s overall aesthetic appeal.
6. Usage and Maintenance Guidelines
- Placement: Ideal for dry, well‑ventilated spaces such as desks, bookshelves, or entryway cabinets—avoid direct sunlight to prevent yellowing of PLA materials due to UV exposure.
- Cleaning: Wipe dust from the surface with a soft, dry cloth. For stubborn stains, lightly dab with a small amount of alcohol—but never rinse or soak the model in water.
- Maintenance Tips: Avoid dropping or colliding with the model—especially the rearing hooves, which, despite reinforced wall thickness, remain a delicate structure. When not in use for extended periods, store the model in a sealed bag to prevent dust accumulation.
Originality of the Model
The author declares that this work is their personally original model
This model is licensed under the following terms:
Credit must be given to the creator
Models(1)
- 马年扬蹄.3mfDesigner

5.63 MB

2026-01-28


