


Build Up Momentum
One-handed
Clockwork toys
Clockwork
Fidget Spinner
Spinning Top

- 0.28 mm layer height, 2-wall structure, 15% infill density

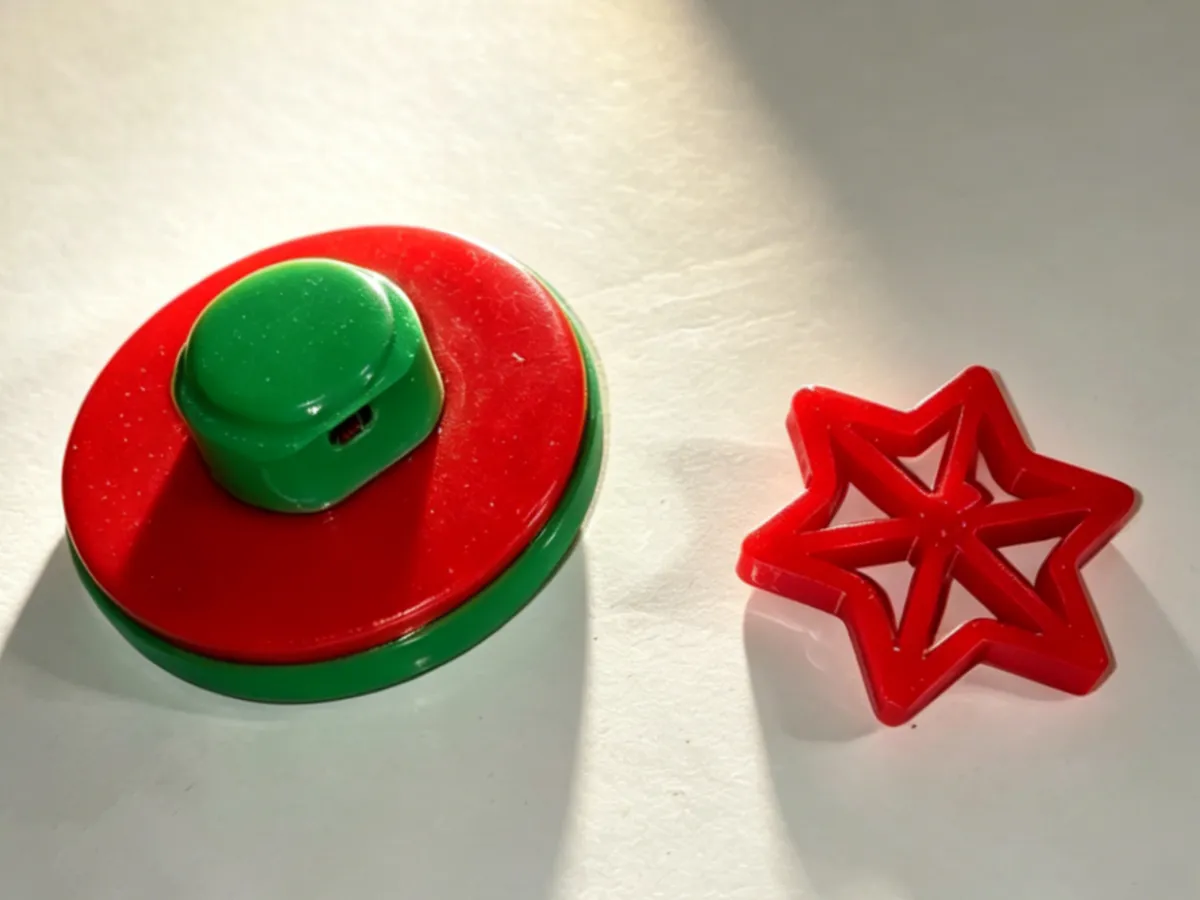
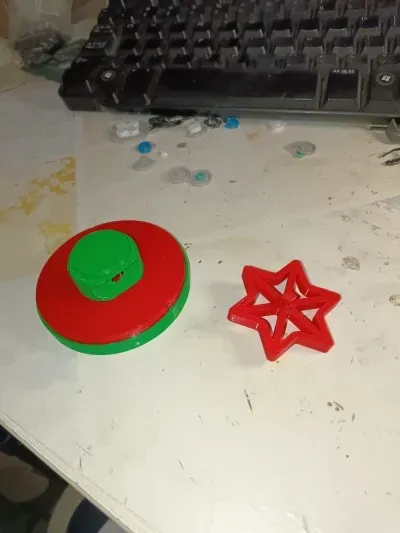
1-disc
PLA
Designer

1

0
Power-Up Spinning Top—Single-Hand Operation
As a child, I always admired the skilled performers on TV who could make a spinning top spin at breakneck speed with a simple flick of their palm. Now, you don’t need to spend years mastering some secret technique—just give it a gentle pull, and the top will whirr across the table at high speed. This small 3D-printed device is more than just a toy; it’s also a hands-on, engaging introduction to mechanical principles.
🚀 Key Highlights
Single-Hand Operation, Spin-and-Wind Up: Say goodbye to complicated maneuvers—simply wind up the top with one hand, and it’s ready to go. The operation is intuitive and loads of fun.
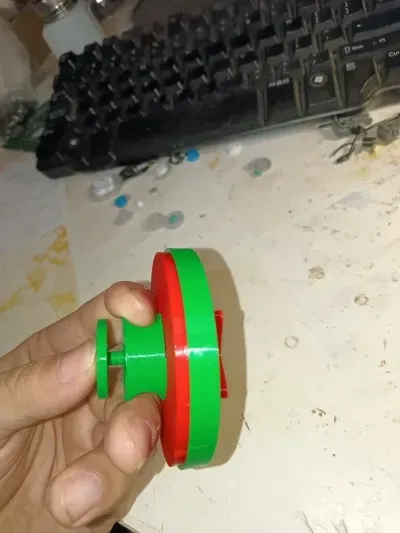
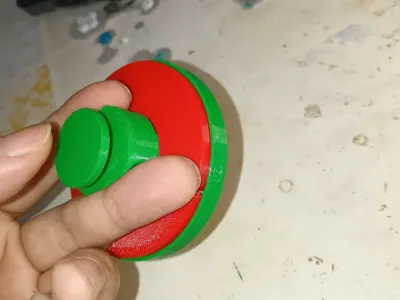
Gear-and-Rack Drive, Purely Mechanical Design: At its core, this design uses a classic gear-and-rack transmission system. No batteries or glue are required, so kids can directly experience how gears mesh and power is transmitted as they play.
Multiple Play Modes, Enduring Battles: You can add steel balls to reduce friction or swap out the launcher for a special version. Some users have even tested tops that can keep spinning for over 2 minutes. It’s perfect for friendly competitions to see whose top spins the longest.
All-in-One Printing, Quick to Get Started: The model is typically designed with no supports or only minimal support, so once printing is complete, it’s easy to assemble and start playing right away.
🛠️ Printing Notes
Recommended Materials: PETG (we recommend PETG for gears and load-bearing parts to ensure durability); some versions can also use PLA with good results.
Printing Parameters: Layer height 0.2–0.28 mm, 2 wall layers, 10–15% infill; for the main body of the top, you can increase the infill to 80%.
Estimated Print Time: About 1–2 hours (depending on the specific configuration).
Precautions:
The launcher and the top are designed with a clearance fit, so avoid applying excessive force during assembly.
If you want to add a 6-mm steel ball, we recommend using a concave base with a 5-cm diameter.
If you’re using a magnetic launch mechanism, prepare 4-mm × 2-mm round magnets and pay attention to the orientation of the magnetic poles.
🧩 Assembly Guide
Remove the Parts: Carefully detach the launcher and the top body from the print bed, and use a tool to clean any small burrs from the moving parts.
Install the Top (if needed): If the design is split into separate parts, follow the assembly instructions to join the upper and lower sections using pins; if necessary, apply a small amount of glue for extra reinforcement.
Put It Together and Test: Gently snap the top into the launcher’s slot, then pull the rack—the launcher should smoothly drive the top to spin, and the two should separate cleanly at the moment of launch.
Originality of the Model
The author declares that this work is their personally original model
This model is licensed under the following terms:
Credit must be given to the creator
Models(1)
- 单手蓄力陀螺.3mfDesigner

971.19 KB

2026-04-22