


rig
camera rig
video
phone
cmf
cmf phone 1
cmf phone 2 pro
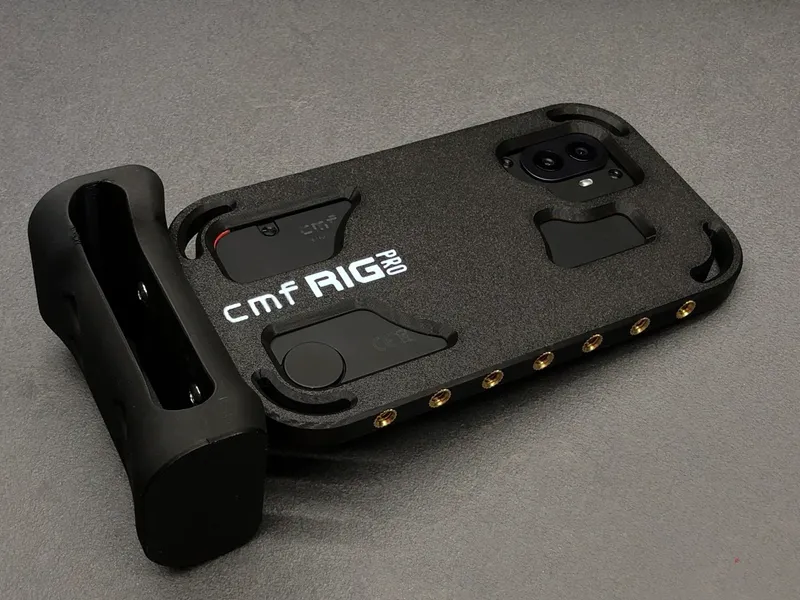
cmf phone case
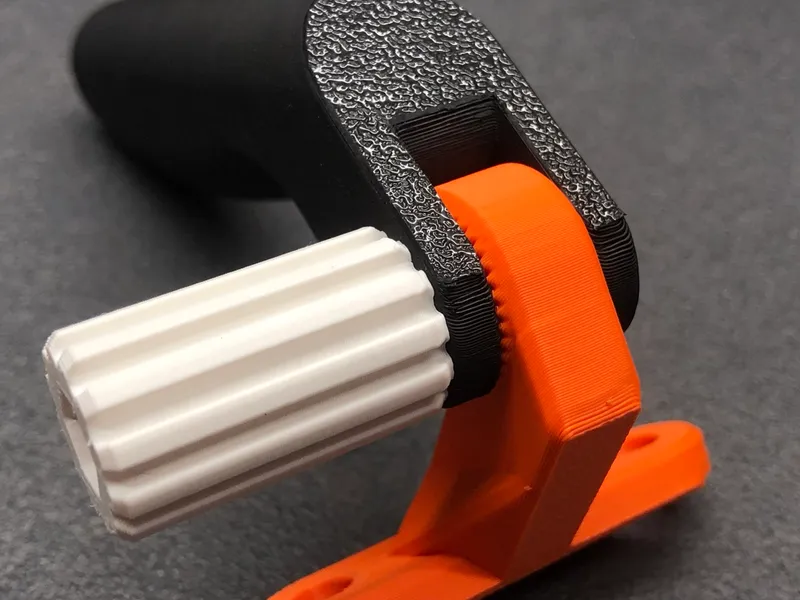
cage

- [PETG-TPU] 0.2mm layer, 3 walls, 50% infill

12-disc
PETG/TPU
Designer

466

35
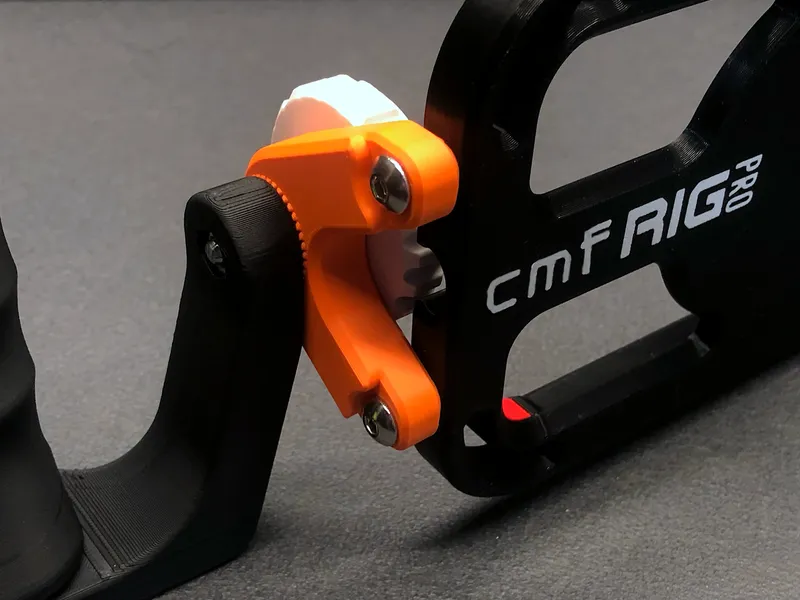
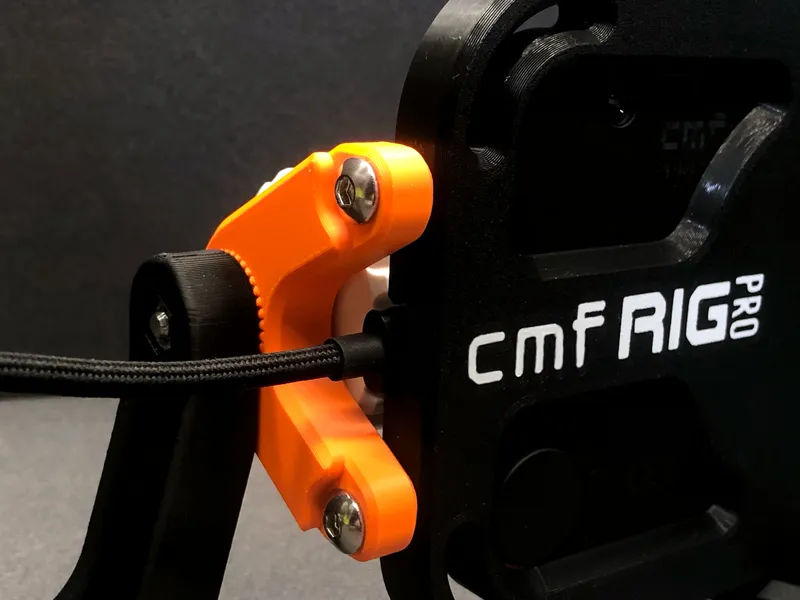
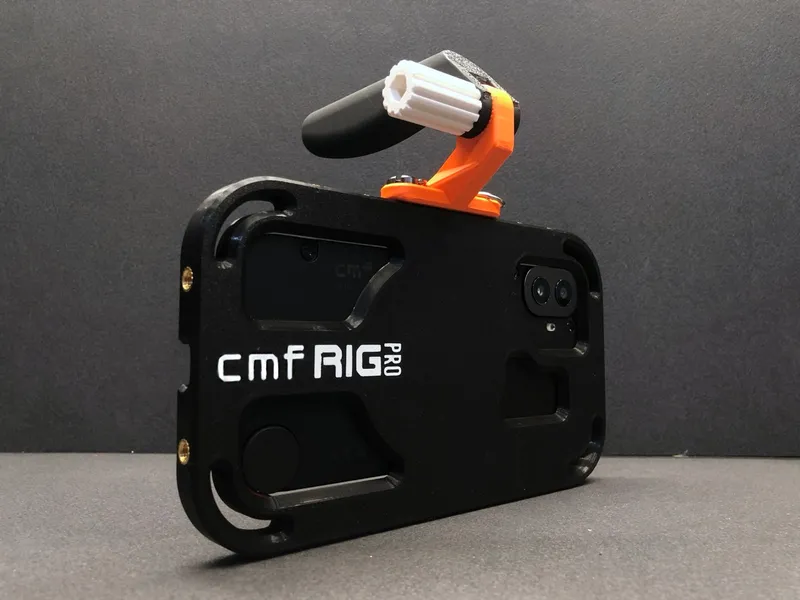
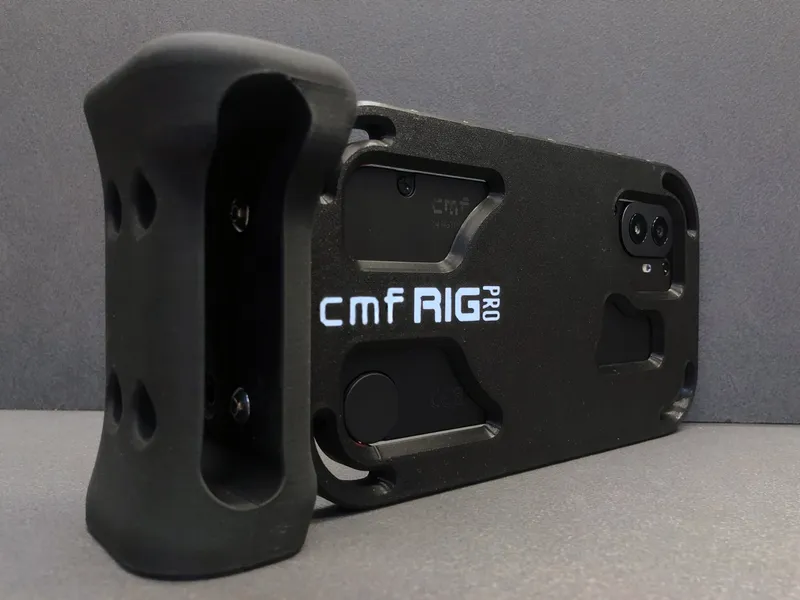
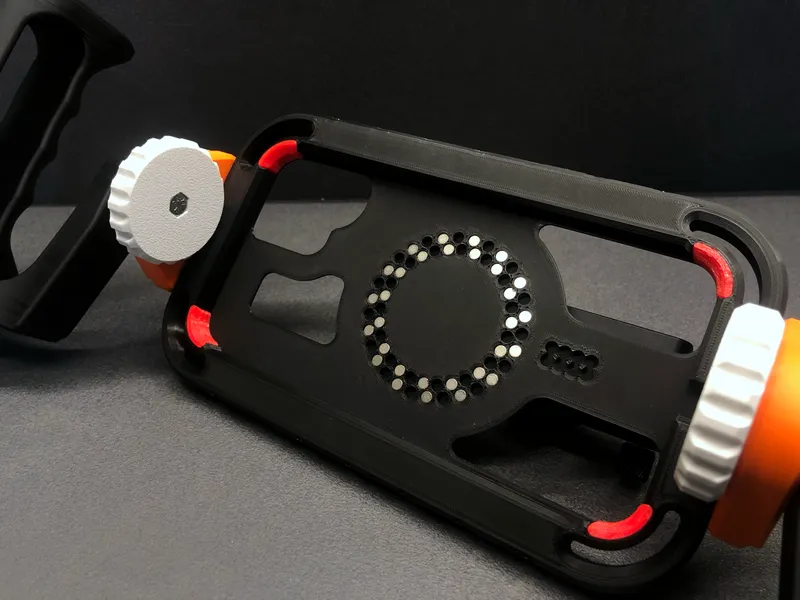
CMF RIG PRO – Magnetic Camera Cage for CMF Phone 2 PRO

Unleash the full cinematic potential of your smartphone with CMF RIG PRO - a professional-grade modular cage system designed specifically for the CMF Phone 2 PRO. Whether you’re a mobile filmmaker, content creator, or vlogger, this cage transforms your phone into a powerful video production tool.
🔧 Key Features:
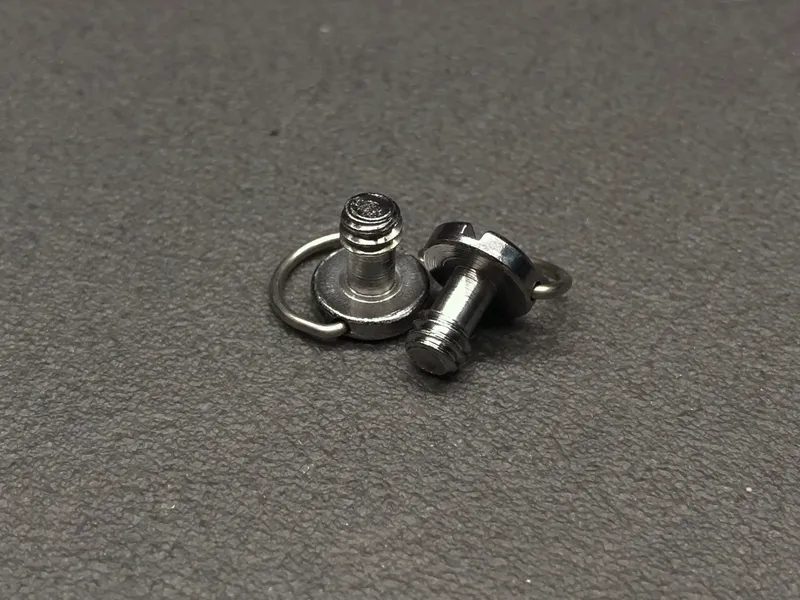
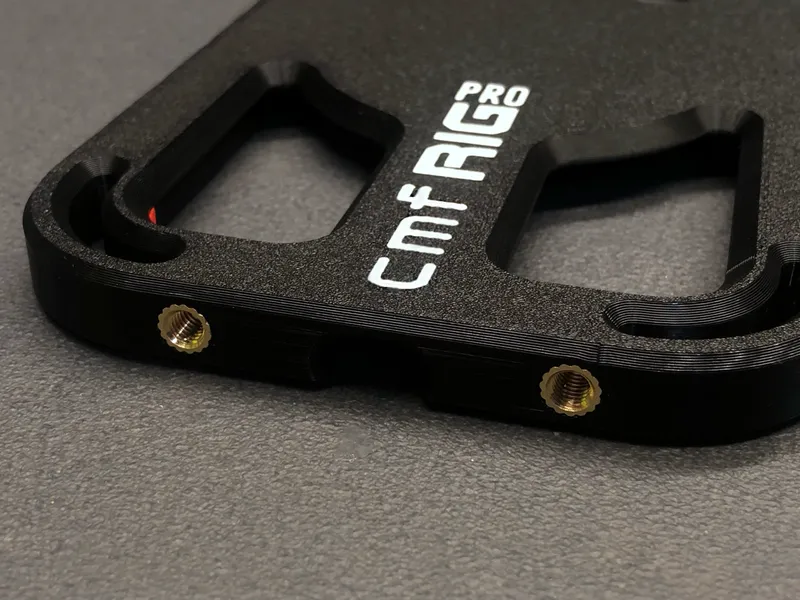
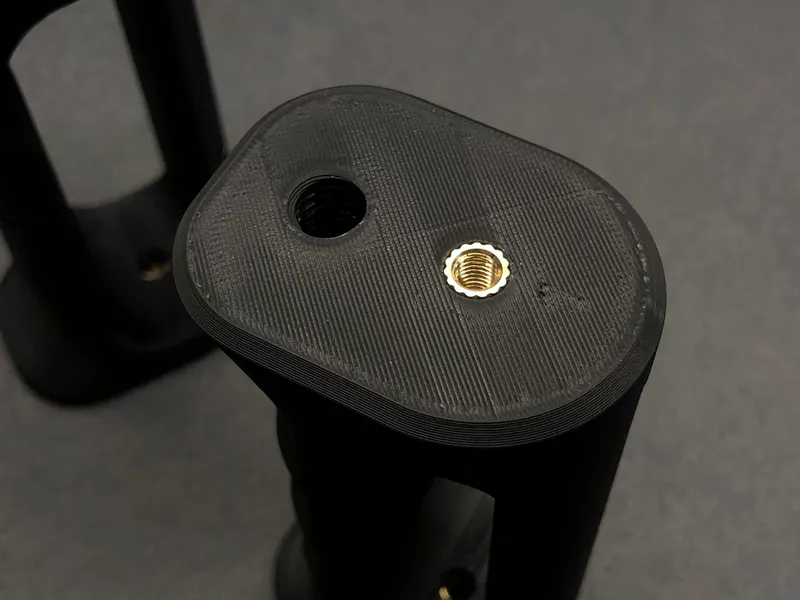
- Universal 1/4-20 threading: Easily mount accessories like microphones, LED lights, wireless receivers, or power banks.
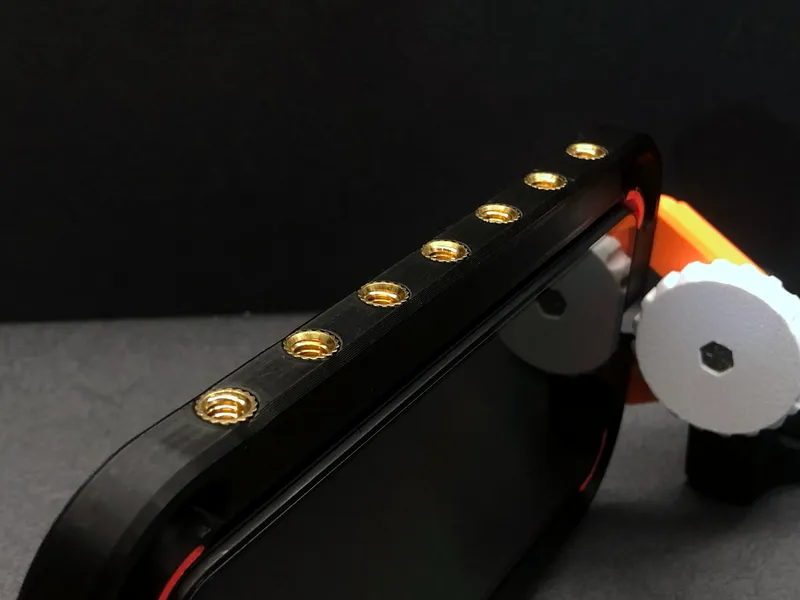
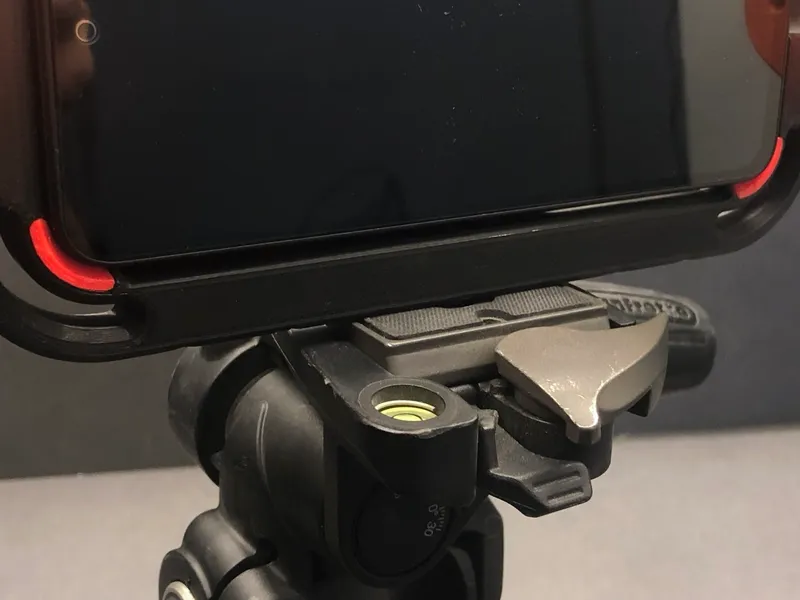
By removing the side arms of the cage, the 1/4” threaded inserts become essential for mounting the phone onto professional tripods. This allows for a secure and stable setup during static shots, and ensures smooth and fluid camera movements when using tripods with fluid heads, perfect for studio-style video production.

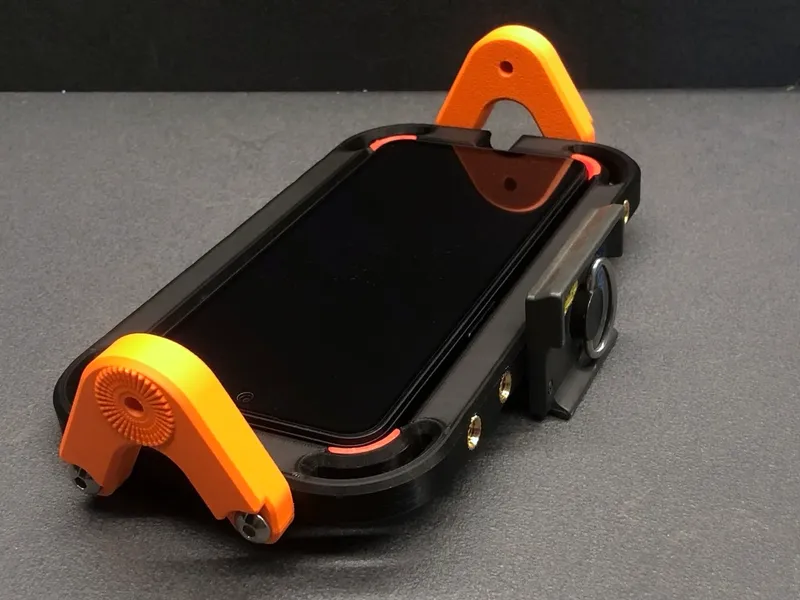
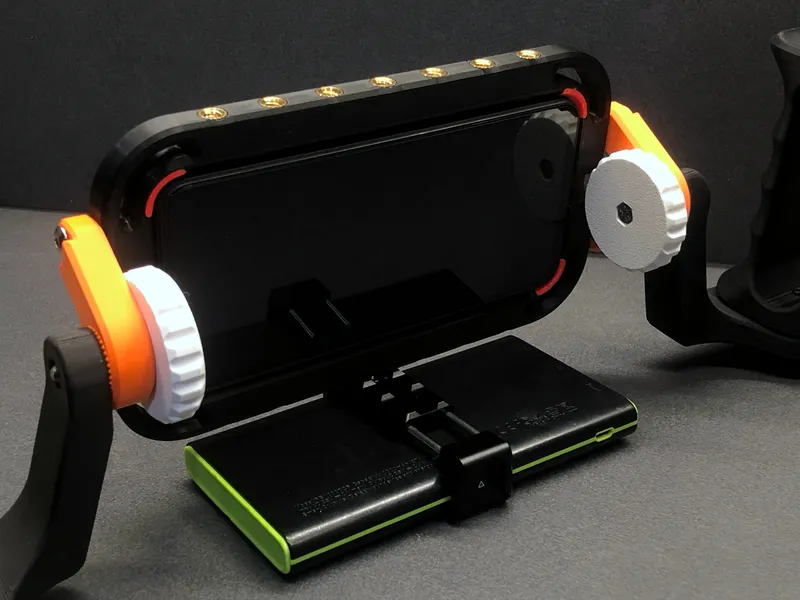
- Dual phone mounting system:
- Magnetic mount with a robust array of 60+8 alignment magnets for secure, precise snap-in placement.
- Friction-fit mode with TPU rubber pads for perfect grip without magnets.

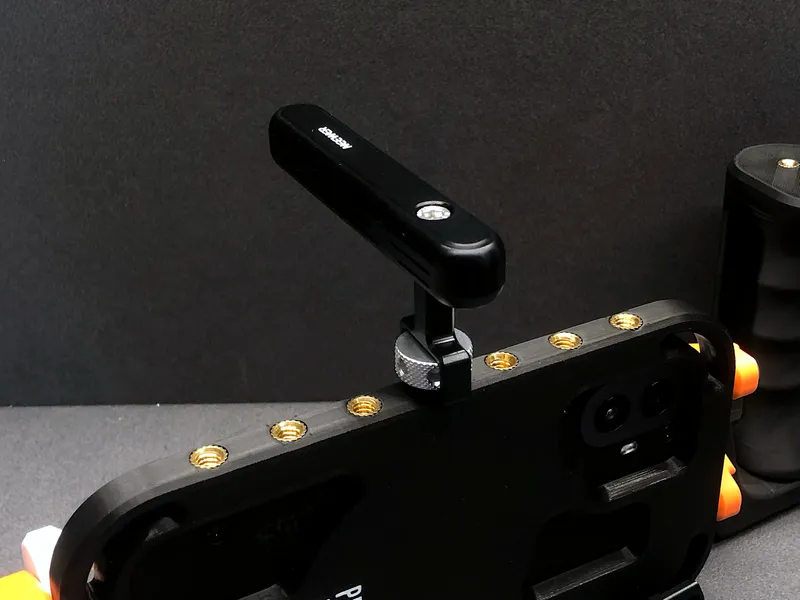
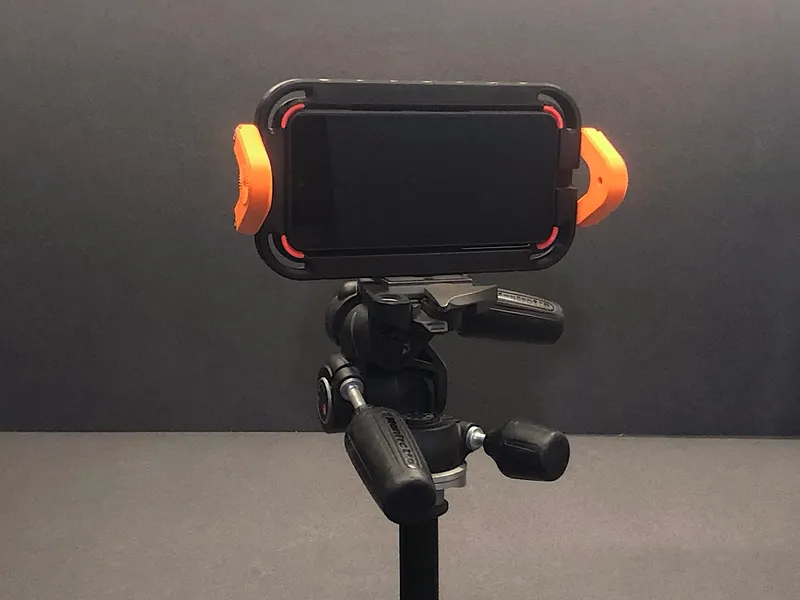
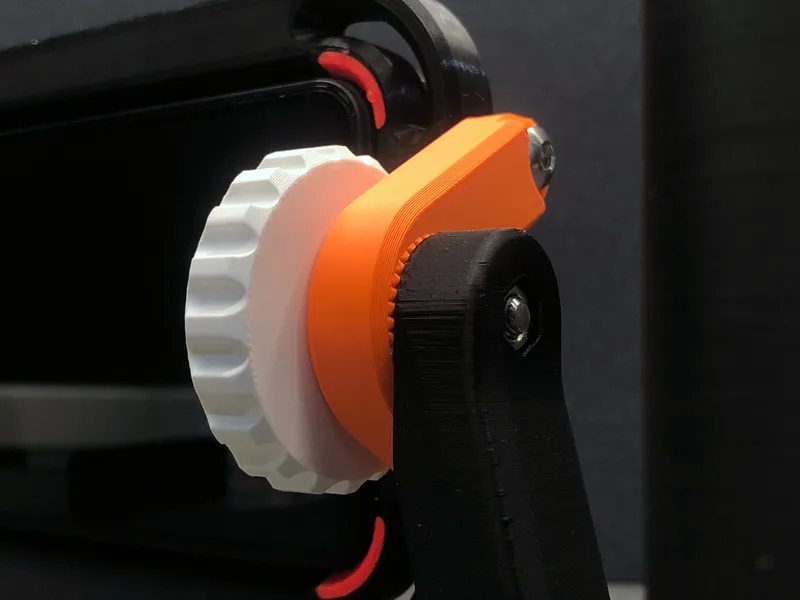
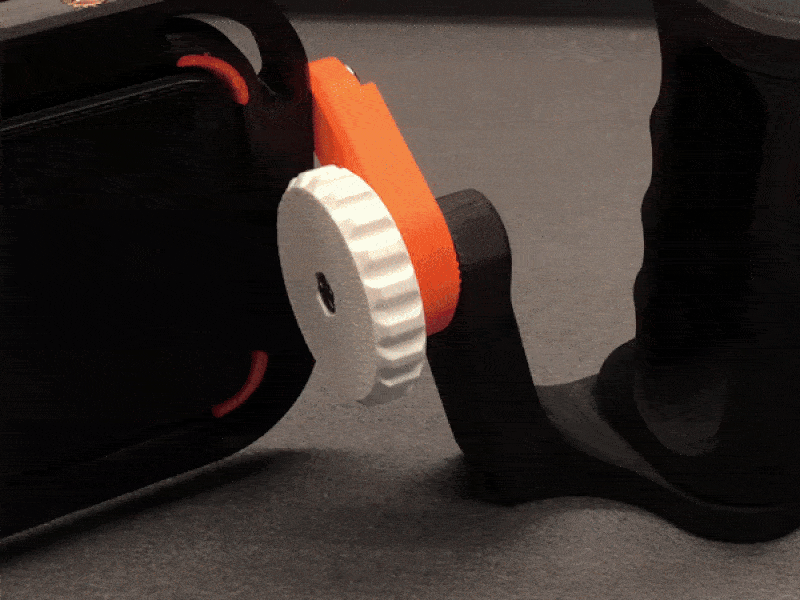
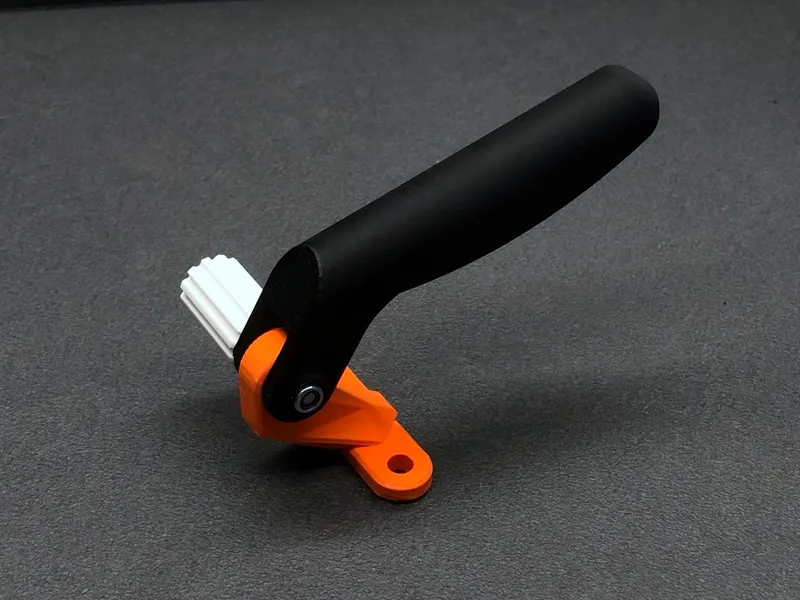
- Rosette Lock Handles: Ergonomic and adjustable side handles featuring a secure rosette locking system for optimal stability and control.
- Open USB-C Port Access: Keep your phone powered throughout long shooting sessions without removing it from the cage.
🔀 Despite being optimized for the CMF Phone 2 PRO, the CMF RIG PRO is also compatible with the CMF Phone 1, using the rubber pad grip method (without magnetic mounting).
Level up your mobile videography setup with CMF RIG PRO – sleek, modular, and designed to meet the demands of modern filmmakers.
❇ Additional Accessories:

I’ve developed a series of new accessories and variations based on the original design, to improve ergonomics and expand functionality. These include:
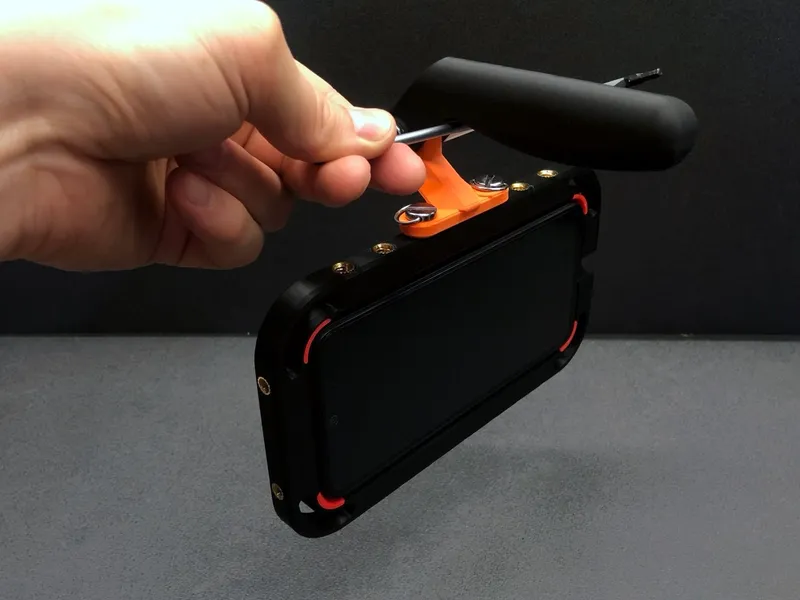
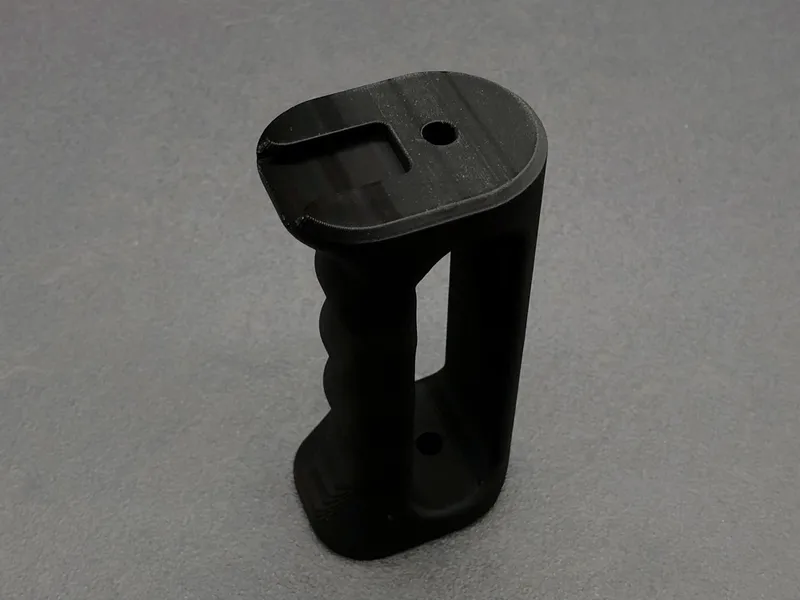
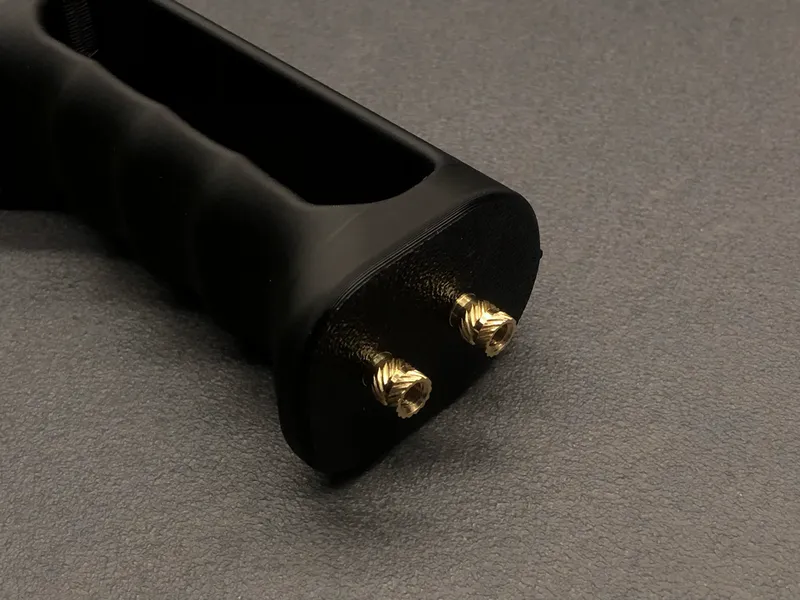
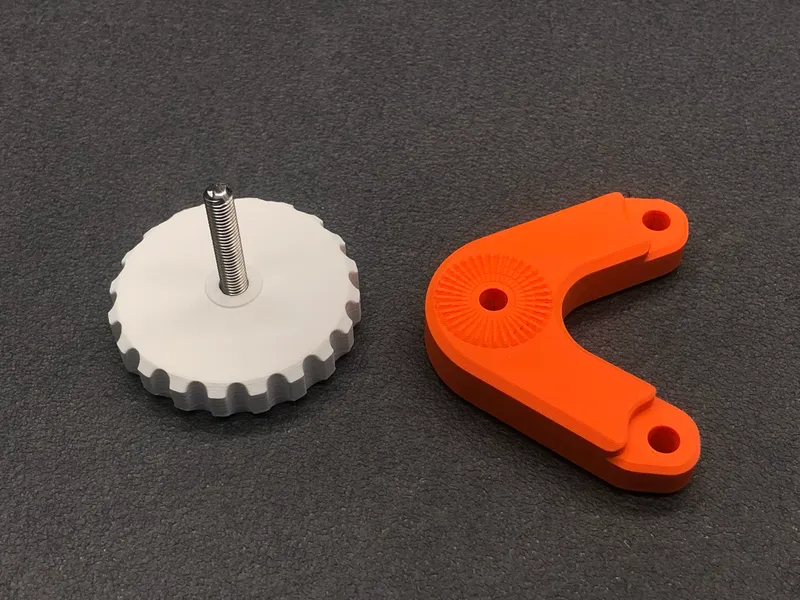
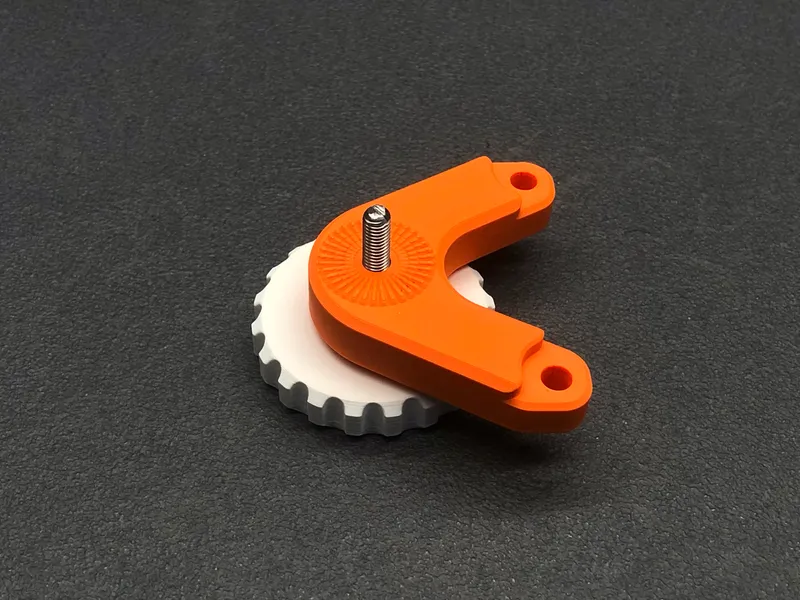
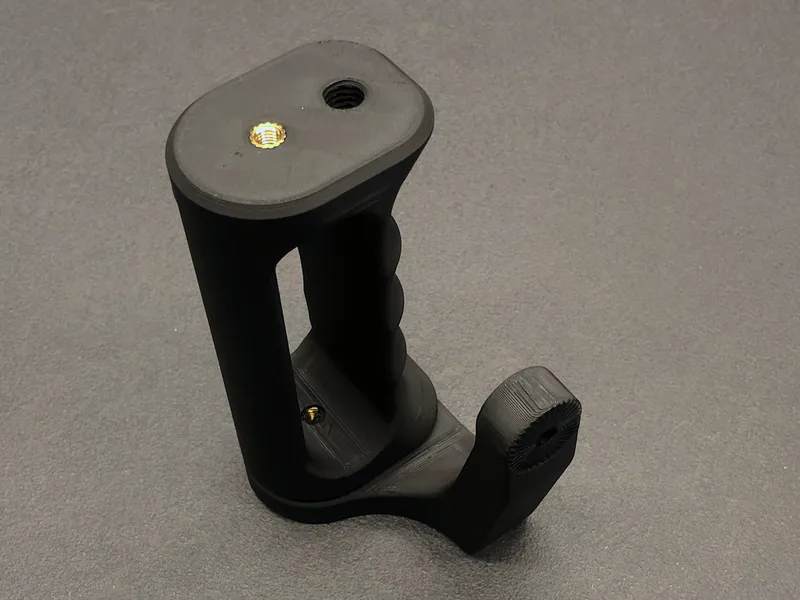
Balanced Ergonomic Top Handle
This balanced handle attaches to the cage using two standard ¼” photo screws and can be mounted on either of the long sides of the cage.
The kit includes 3 parts: the handle itself, the mounting base, and the tightening knob.
It also features a Rosette Lock system for secure and adjustable positioning.
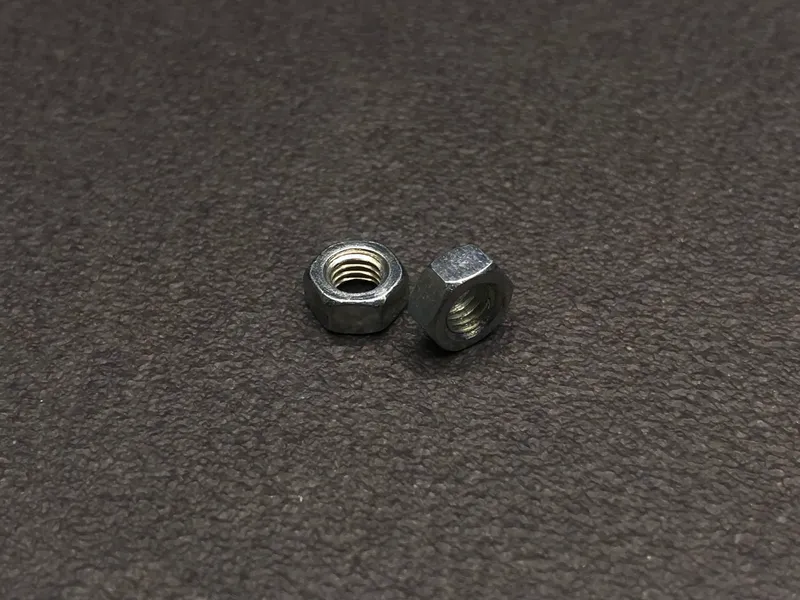
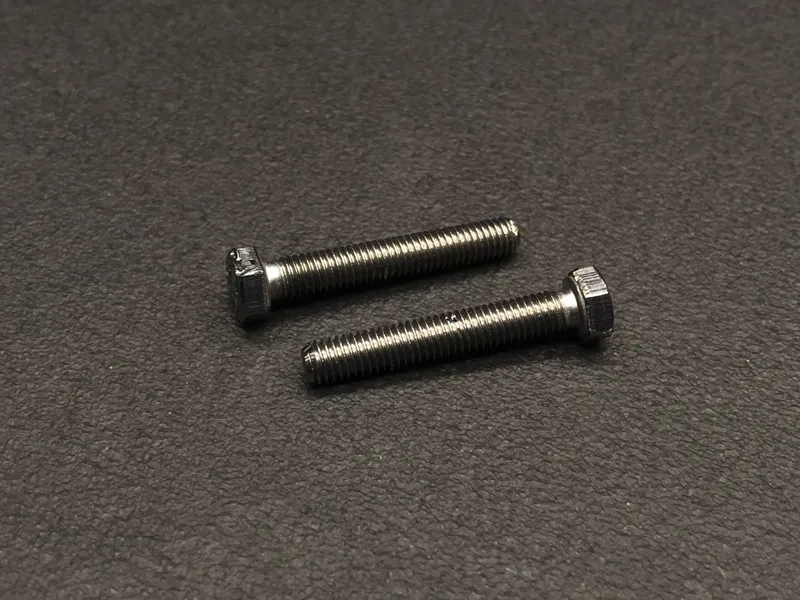
To assemble the knob, you’ll need 2 x ¼” photographic screws, 1 x M5 nut and 1 x M5x30 hex-head screw.
This handle is perfect for dynamic shooting or when working in tight spaces.
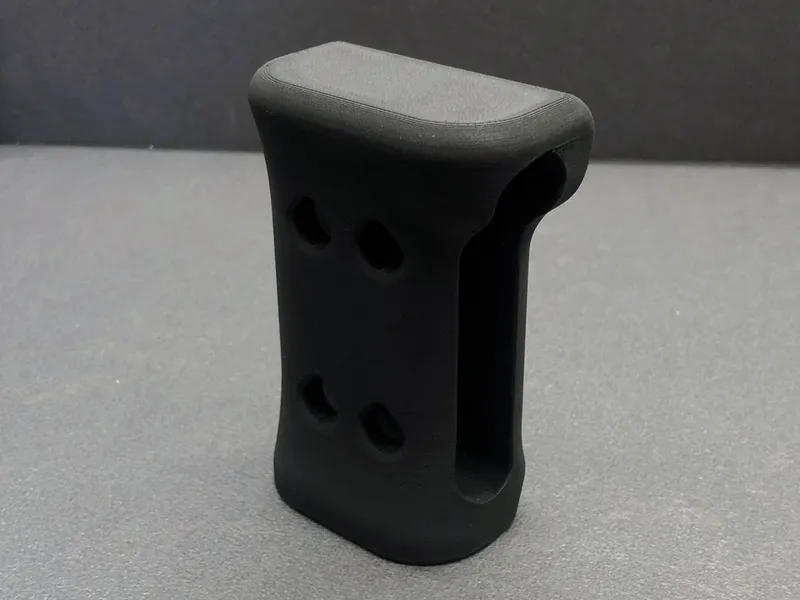
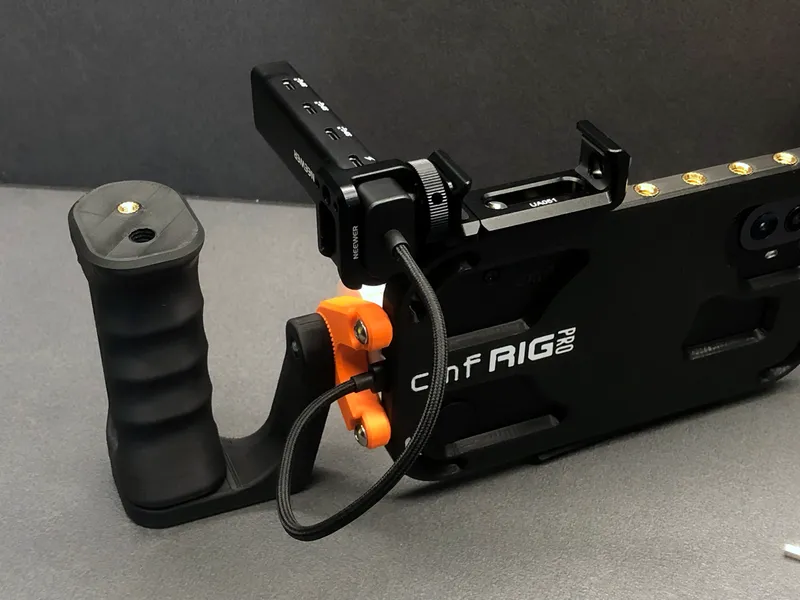
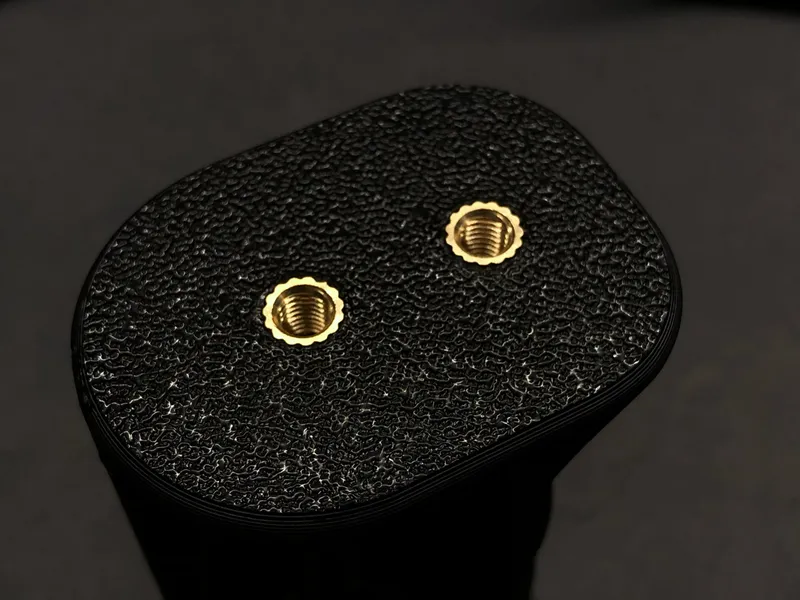
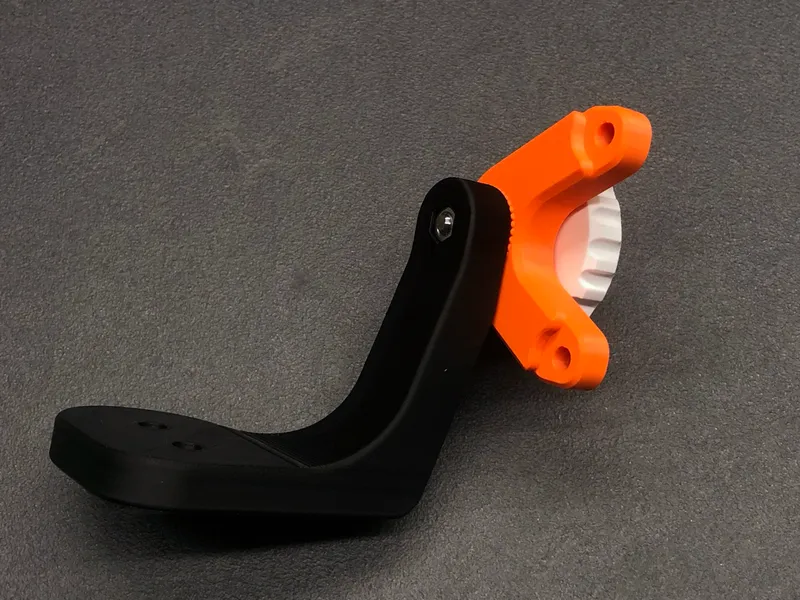
Photo Grip Handle
This grip mounts directly to the cage with two M5x14 screws . It’s designed to be attached only to the right side of the cage to avoid blocking the phone’s cameras.
There are two mounting positions – forward or backward – for personal preference.
The top part features an open zone that can be remixed or customized to integrate a Bluetooth trigger for easier photo capturing.
⚠ Note: When using this grip, you won’t be able to access the phone’s charging port simultaneously.
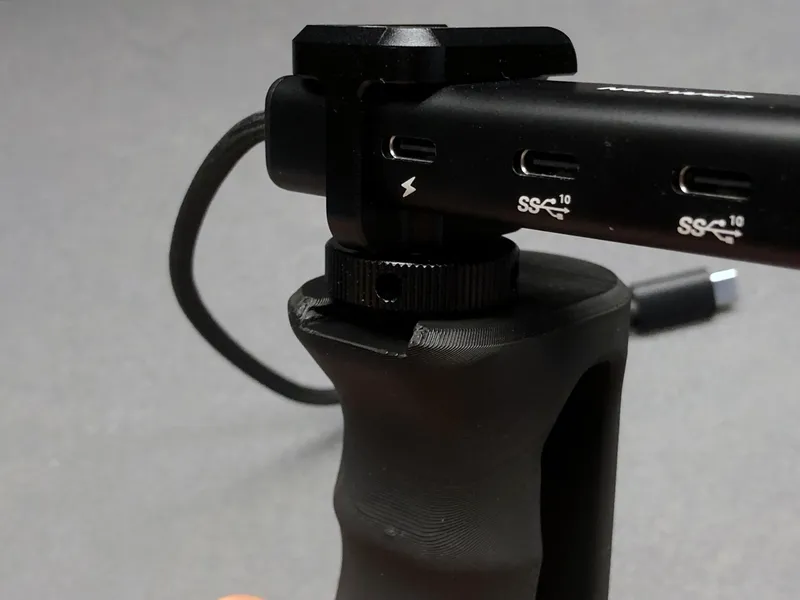
Ergonomic Handle with Cold Shoe Mount
This is a variation of the standard ergonomic handle, now featuring a cold shoe slot on top for mounting accessories like microphones, LED lights, or flashes. A compact and handy solution for creators!
🖨 Print Files & Quantities
Printable Files:
1× Cage
2× Side Bracket
1× Left Arm (L)
1× Right Arm (R)
2× Ergonomic Handle
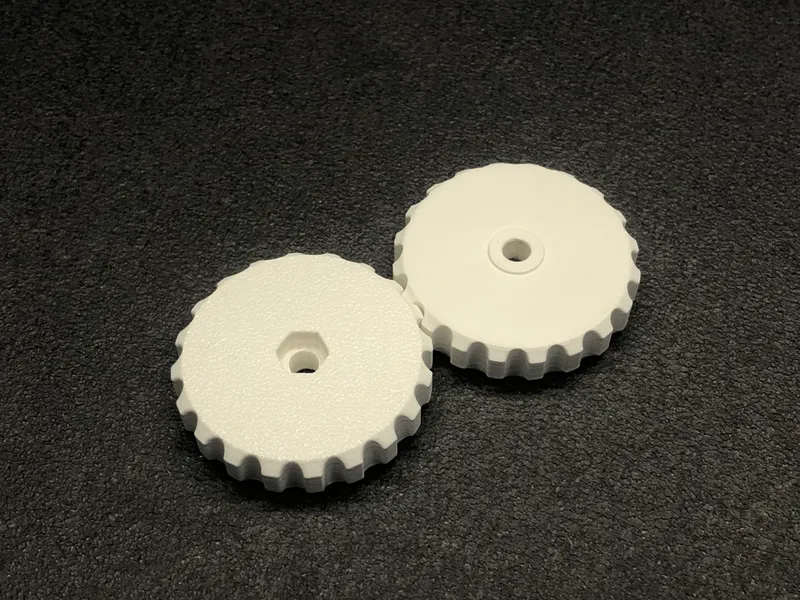
2× Knob
🔩 Hardware
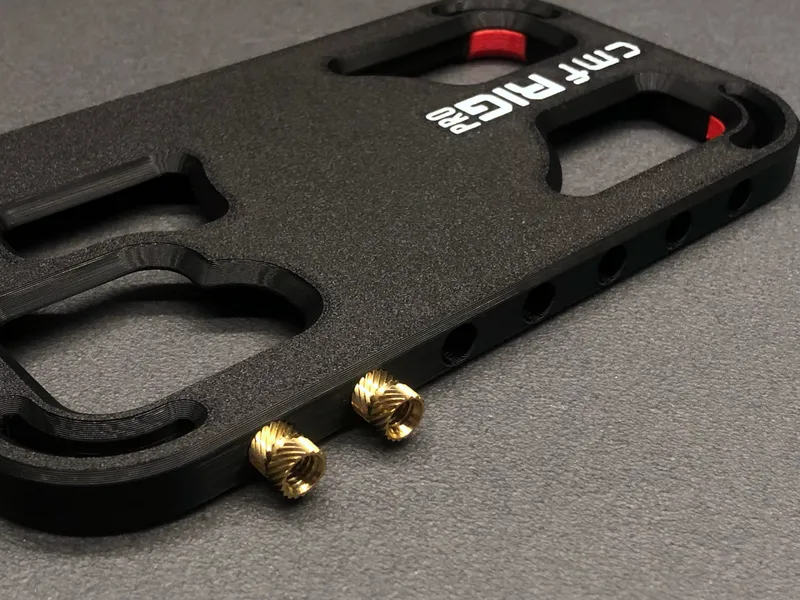
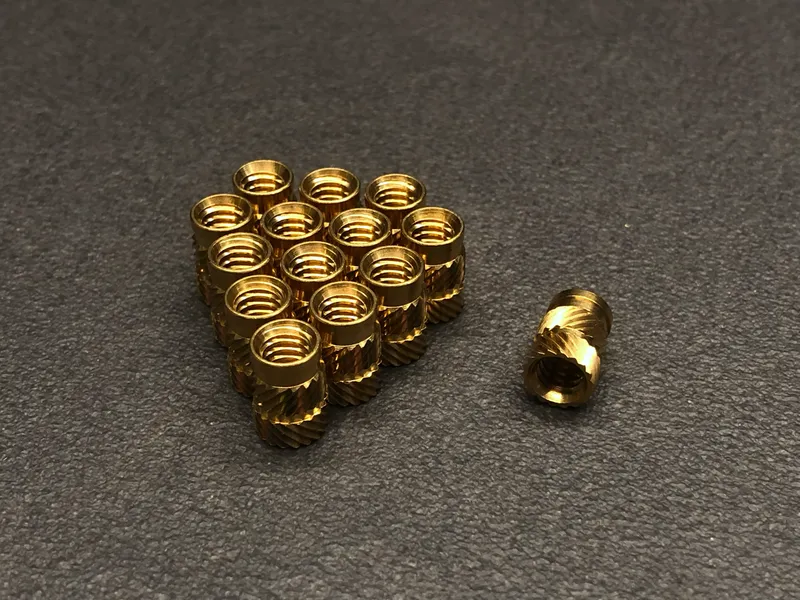
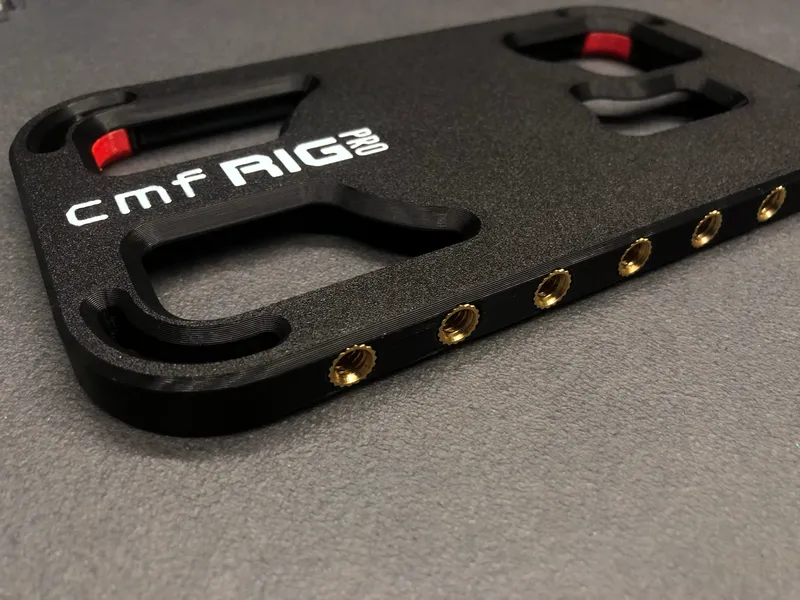
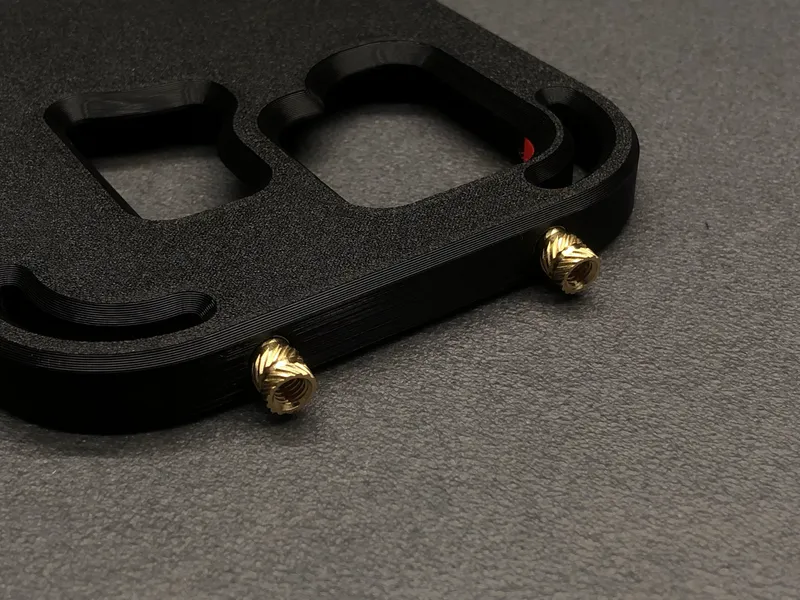
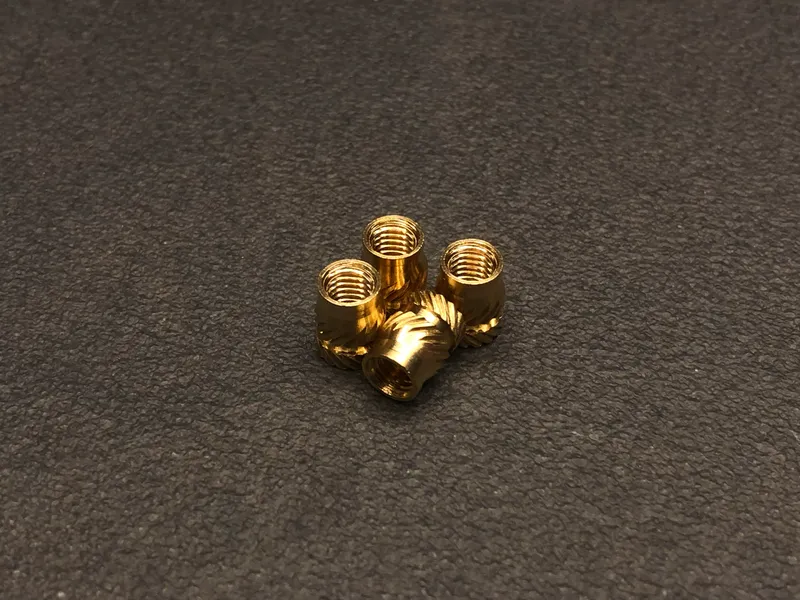
14× ¼” x 12,7 Threaded Inserts
2× M5 Nuts
8× M5×14 Screws (Button/Socket Head)
2× M5×30 Screws (Hex Head)
68× 4×2mm Round Magnet (Optional)
Additional Accessories Hardware:
Top Handle:
1× M5 Nuts
1× M5×30 Screws (Hex Head)
2× ¼” Photographic Screws
Photo Grip Handle:
2× M5×14 Screws (Button/Socket Head)
Handle with Cold Shoe Mount:
No additional hardware required if this version is printed instead of the base ergonomic handle.
⚙ Slicer Settings
Material: PETG + TPU (for rubber pads)
Layer Height: 0.2 mm
Infill: 50%
Supports: Yes (on Knobs and Ergonomic Handle)
🛠 Assembly Guide
1. Insert the Threaded Inserts
Once all parts are printed, begin by inserting the threaded inserts into the main cage body:
On the top and bottom edges, insert the 1/4”-20 inserts.
On the short sides, insert the M5 threaded inserts.
Then insert the M5 inserts into the three holes on each ergonomic handle.
2. Assemble the Handle Units
Start by inserting an M5×30 hex head screw into the knob, placing it into the dedicated slot.
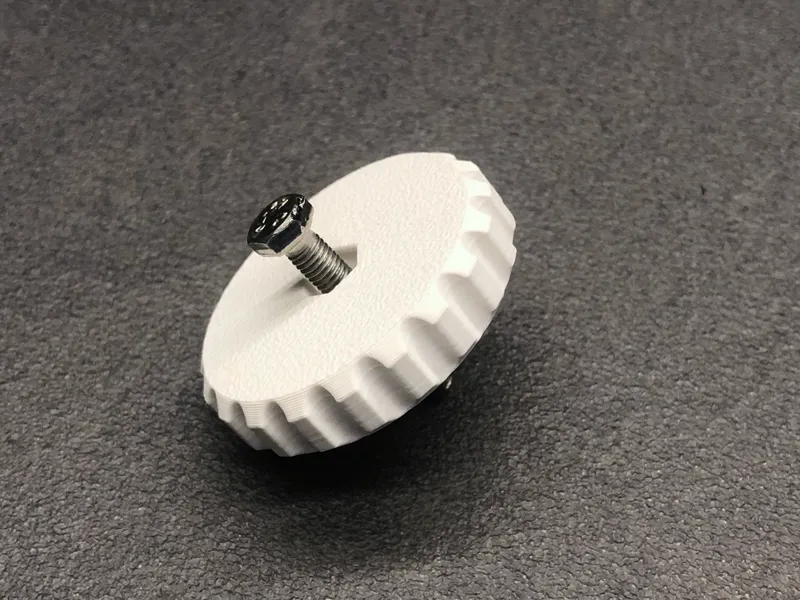
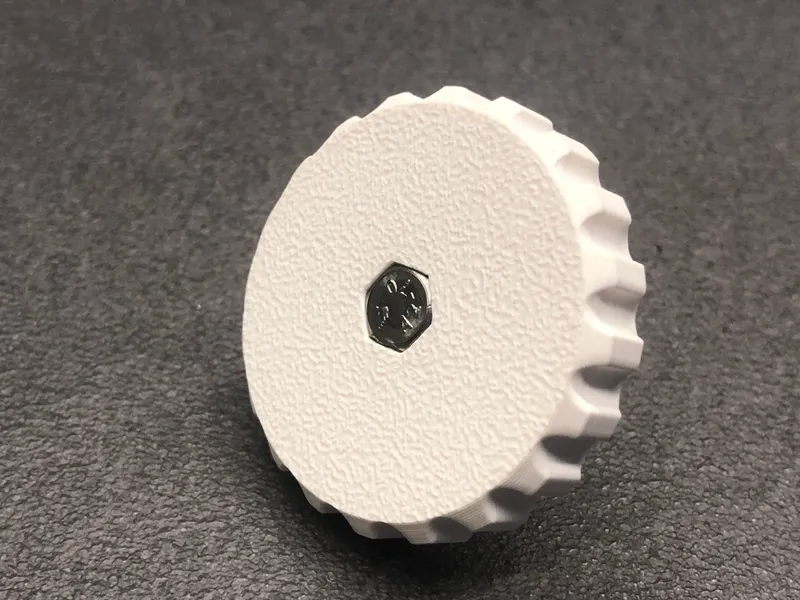
Next, place an M5 nut into the matching slot on the arm (note: left and right arms are different).
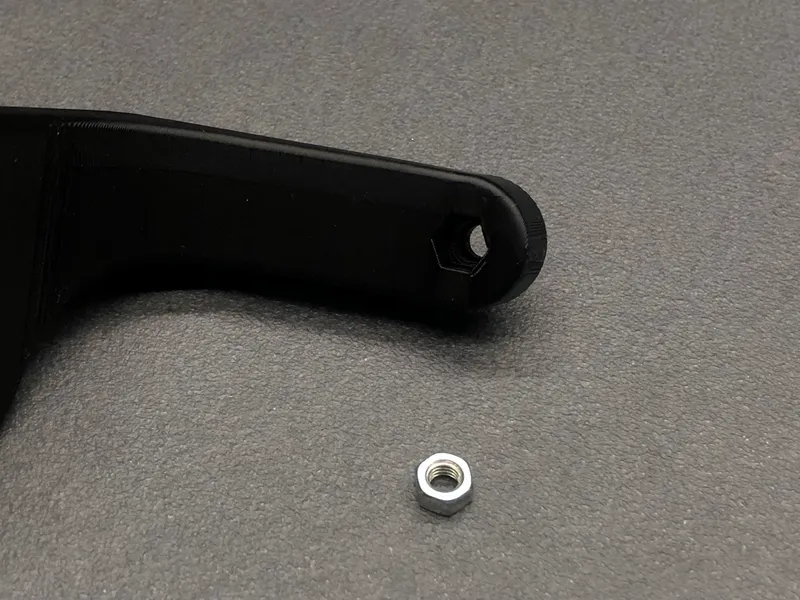
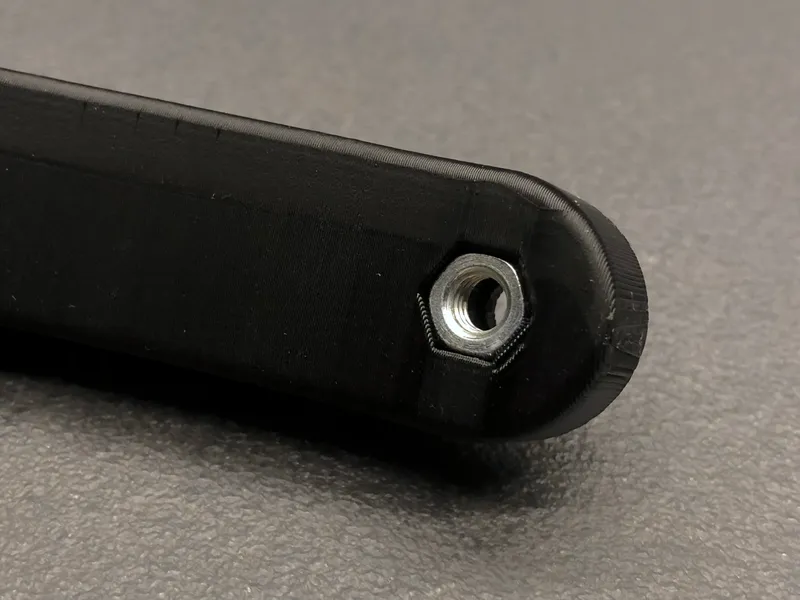

Screw the knob into the arm and side bracket, securing the mechanism.
⚠ Make sure that once assembled, the handle is positioned behind the phone, this ensures the arm does not obstruct the camera.
Mount the ergonomic handle onto the arm using 2× M5×18 screws.
Repeat the process for the opposite arm.

3. Attach the Arms to the Cage
Fix both arms to the cage body using 4× M5×18 screws (2 for each arm).

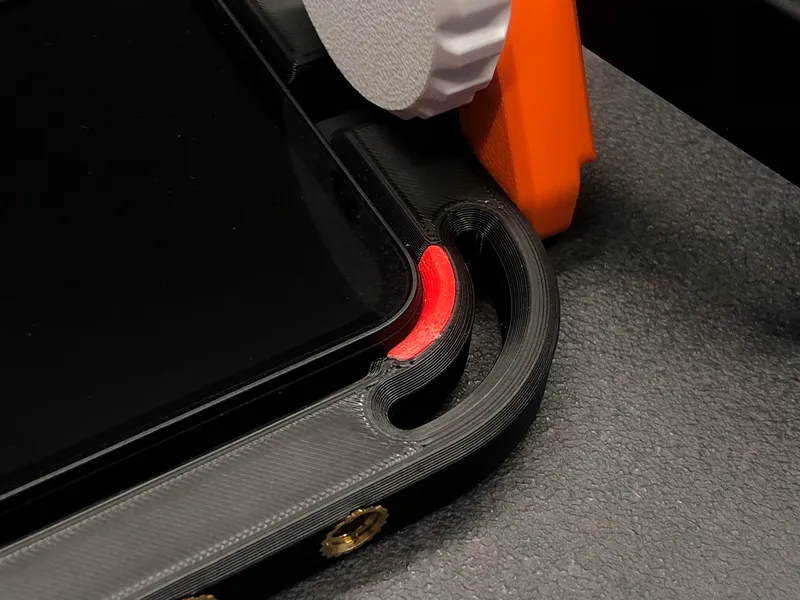
4. (Optional) Magnet Installation
The CMF Phone 2 Pro uses a magnetic pattern similar to MagSafe.
To find the correct orientation, place the magnets directly on the phone to identify the polarity and arrangement.
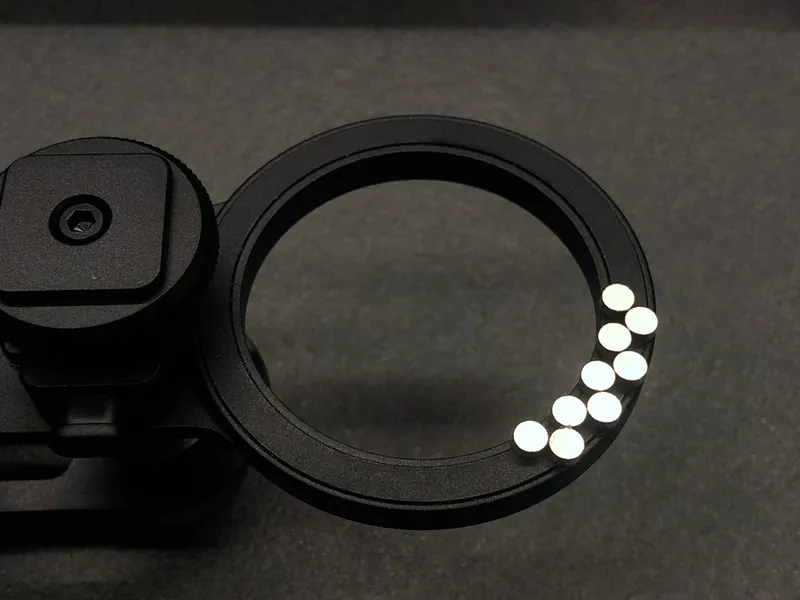
Once identified, insert the magnets into the dedicated slots in the cage, following the same pattern.
⚠ Important: The face of the magnet that was touching the phone should remain visible when placed in the cage.
🐾 Follow for More
Don’t forget to follow 3D KIMBA for more projects, creative ideas, and helpful tools for makers!

Bill of materials
- NameQuantityNotes
- 1¼” x 12,7 Threaded Inserts14
- 2M5 Threaded Inserts10
- 3M5 Nuts3
- 4M5×14 Screws (Button/Socket Head)10
- 5M5×30 Screws (Hex Head)3
- 6Optional - 68× 4×2mm Round Magnet68
- 7¼” Photographic Screws2
Originality of the Model
The author declares that this work is their personally original model
This model is licensed under the following terms:
Credit must be given to the creator
Models(1)
- CMF-RIG-PRO_C.3mfDesigner

2.38 MB

2026-03-15