


🐾Paws & Prints
cat
cats
cat tower
tower
castle tower
minecraft
minecraft animals
minecraft creeper
minecraft figures
pet
pets
pet accessories
dog
dogs
paw
paws
paw print

- 0.2mm layer, 2 walls, 5% infill

10-disc
PLA
Designer

102

12
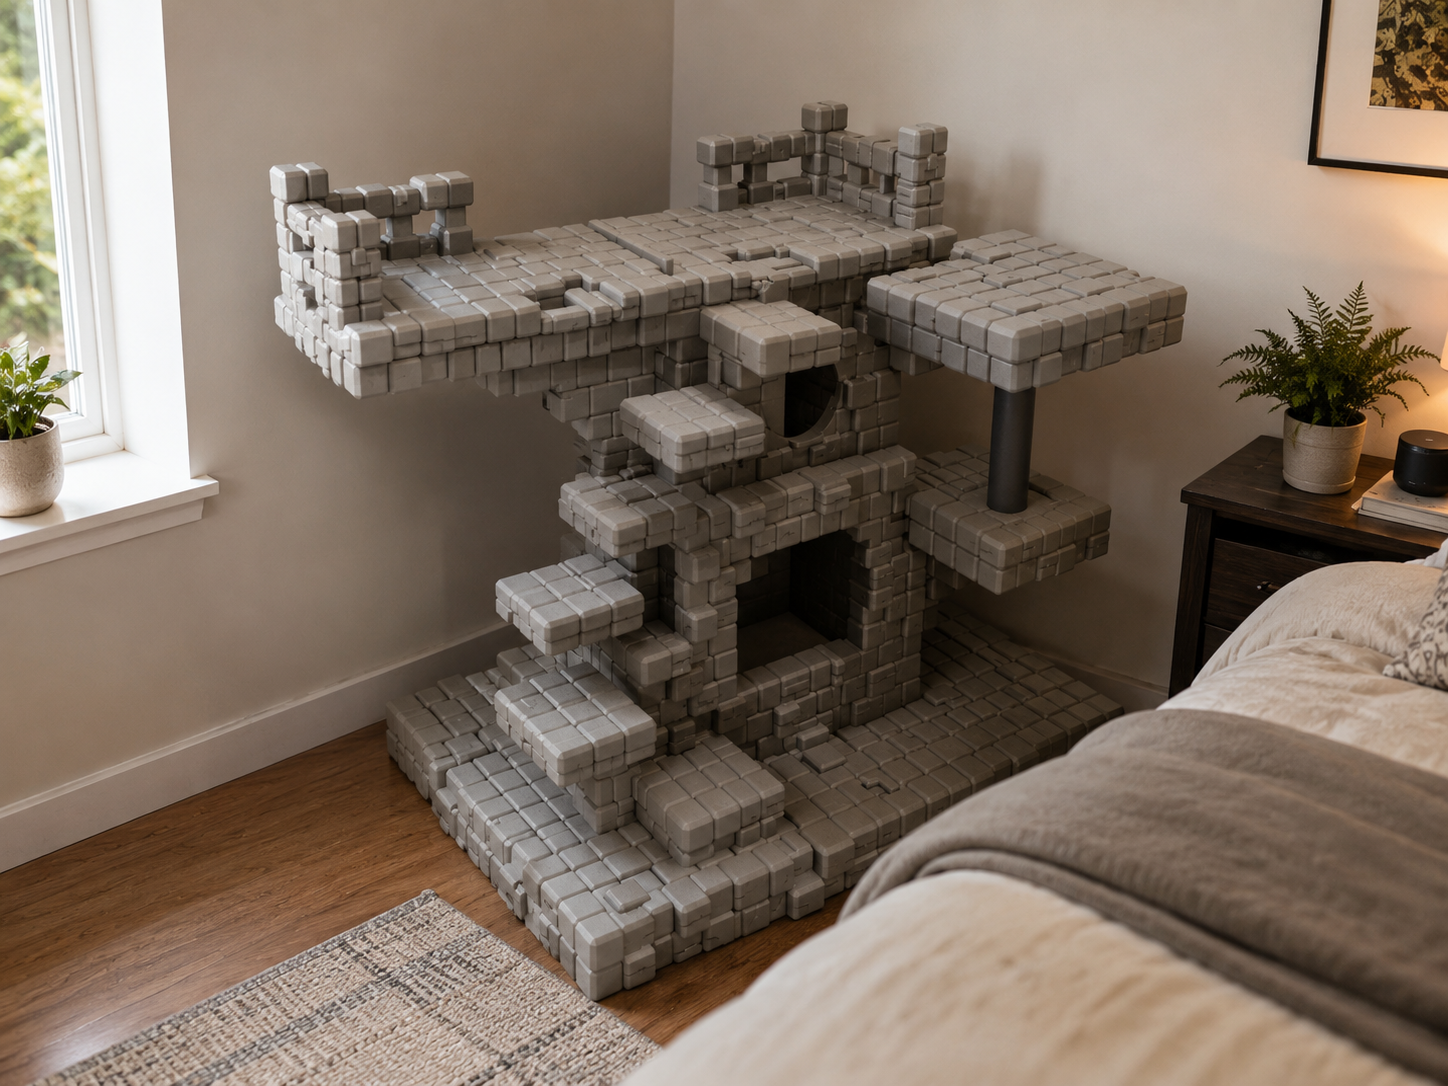
Minecraft Tree Cat Tower -
Modular Fully 3D Printed Gigantic Cat Tower
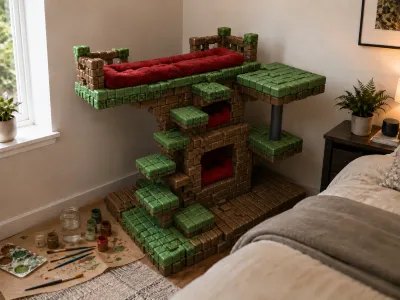
I designed this Minecraft-style cat tower for my two cats, Lilly and Derek. I wanted it to feel less like a normal pet product and more like a playable little world for them - something that looks like it came out of a blocky forest, but is still functional as a real cat tower.
The whole design is built with a voxel / pixel-block language, inspired by a Minecraft tree. The structure has layered platforms, chunky block surfaces, small climbing steps, enclosed resting areas, and open lounging zones. Once assembled, I painted mine to look like a Minecraft-themed tree, with bark-style brown blocks, leafy green blocks, and darker shading between the cubes. You can keep it single-color, paint it like a tree, or use your own pixel-art theme.
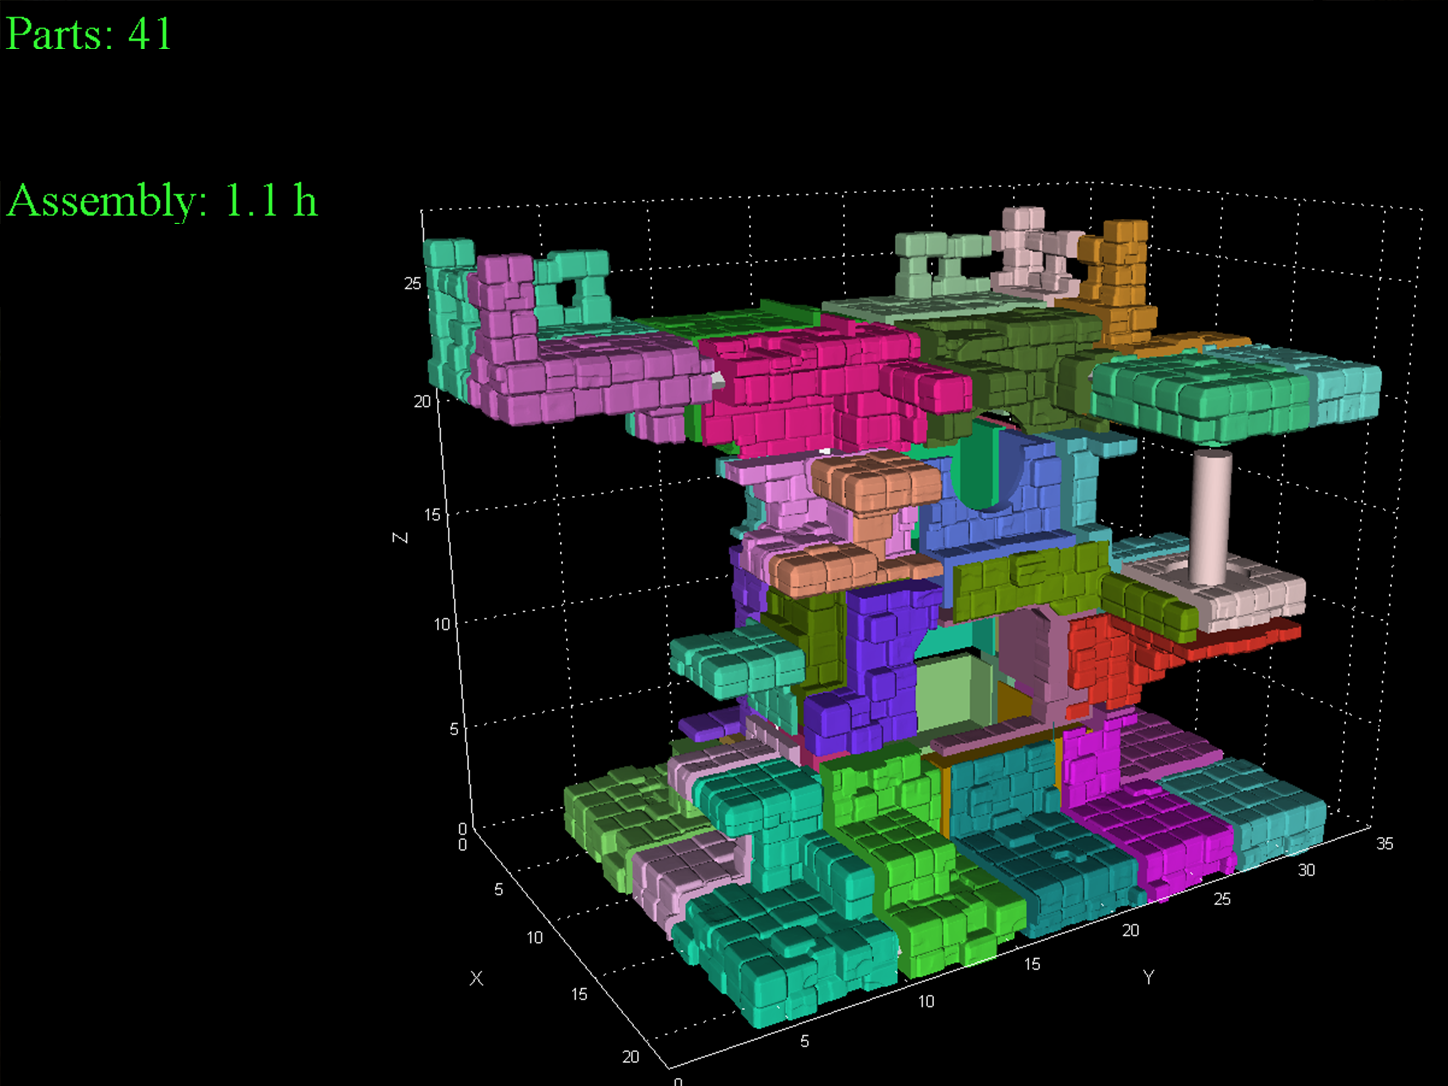
Pieces: 41
All pieces are already arranged and provided in the print profile. Refer to the Assembly Instructions for reference.
Design Details
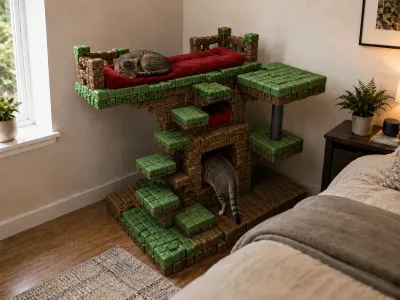
This cat tower has multiple levels for climbing, sleeping, scratching, and hiding. The bottom platform acts as a broad foundation, while the raised sections create different paths for cats to move up and around the tower.
There are two main holes / resting spaces built into the tower:
The lower opening is a larger square-style hideout, giving your cat a more enclosed chill space inside the structure.
The upper opening has a smaller circular entrance, creating a cozy cubby area that feels more tucked away and private.
The top section has a long elevated lounging area with plenty of room for cats to stretch, curl up, or sit like they own the entire house. I made this especially with Lilly and Derek in mind because one of them loves hiding inside things, while the other always wants the highest spot in the room.
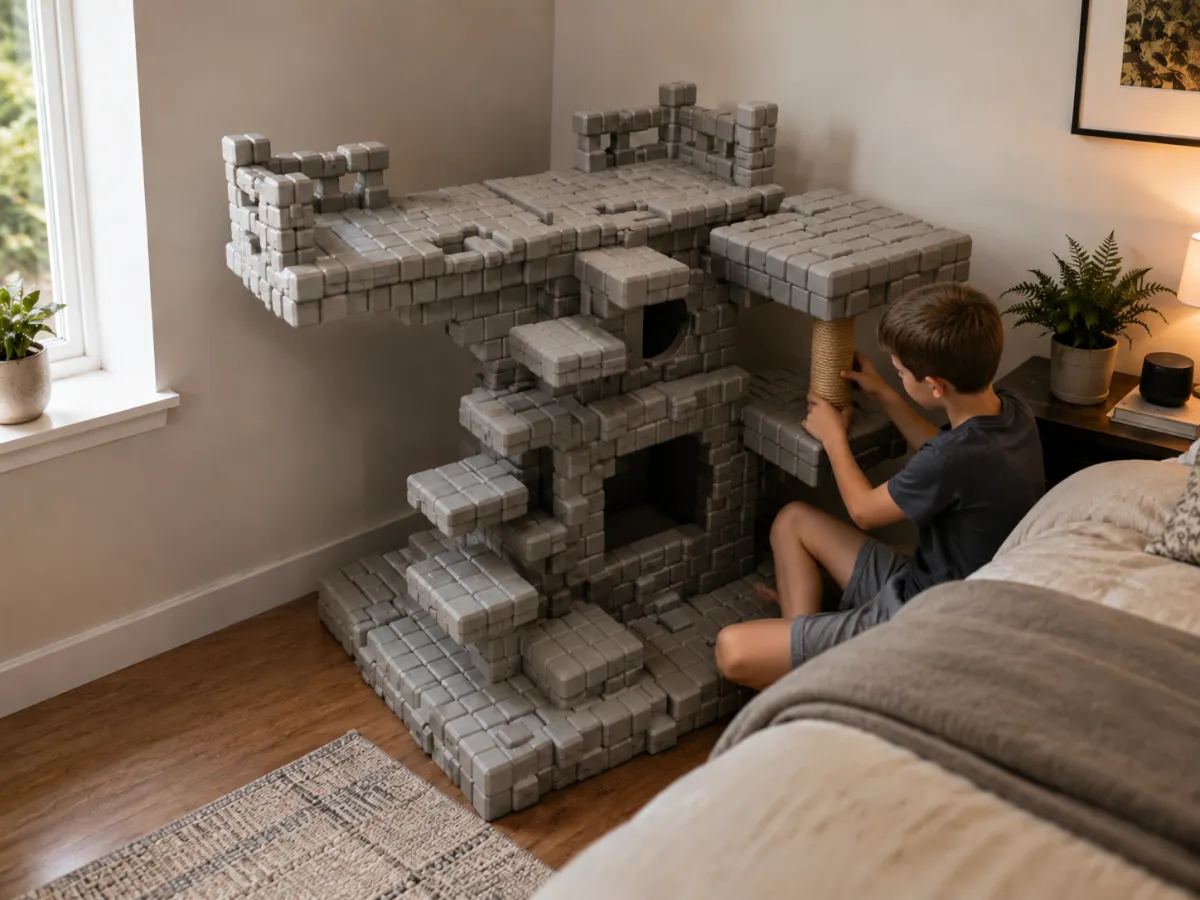
There is also a scratch pole section included in the design. You can wrap it with jute, sisal rope, or another cat-safe scratching material after printing. This helps make the tower more useful as an everyday cat furniture piece, not just a display object.
Assembly
The model is split into multiple printable pieces for easier printing and assembly. Each piece also has a number engraved onto it for ease of assembly. The print profile already has the pieces arranged, so you can print them directly from the provided setup. The design uses square dowels, which are also provided, to help align and connect the parts together. The dowels make the assembly cleaner and help the blocks line up properly.
General assembly process:
- Print all parts from the provided profile
- Test-fit the pieces before gluing.
- Insert the square dowels into the matching connection points.
- Use superglue to permanently attach the sections.
- Press the parts together firmly and let the glue fully cure.
- Assemble the main base first, then build upward level by level.
- Attach the scratch pole section and wrap it if desired.
For assembly, follow these steps and refer to the piece number:
Each printed part has its part number engraved directly onto it. Use those engraved numbers to identify and match the parts during assembly. The model is assembled in small sub-sections first, then those sub-sections are joined into larger groups.
Step 1: Build the Small Pair Sections
Connect the following pairs first:
(1) + (2)
(4) + (5)
(6) + (7)
(18) + (19)
(20) + (21)
(22) + (23)
(24) + (25)
(31) + (32)
Let these smaller glued pairs set before moving to the next step.
Step 2: Extend the First Sub-Assemblies
Now add the next matching parts to the pairs you just made:
(1 to 2) + (3)
(4 to 5) + (6 to 7)
(10) + (11)
(18 to 19) + (20 to 21)
(22 to 23) + (24 to 25)
(26) + (27)
(28) + (29)
(30) + (31 to 32)
At this stage, you will start seeing the model form into larger blocks and platform sections.
Step 3: Combine the Mid-Size Sections
Continue joining the numbered assemblies in this order:
(1 to 3) + (4 to 7)
(8) + (9)
(10 to 11) + (12)
(18 to 21) + (22 to 25)
(26 to 27) + (28 to 29)
(30 to 32) + (33)
(34) + (35)
(36) + (37)
(38) + (39)
Use the square dowels wherever provided. They help keep the sections aligned and prevent the block pattern from shifting while the glue cures.
Step 4: Build the Larger Main Sections
Now combine the larger groups:
(1 to 7) + (8 to 9)
(10 to 12) + (13)
(14) + (15)
(16) + (17)
(18 to 25) + (26 to 29)
(30 to 33) + (34 to 35)
(36 to 37) + (38 to 39)
(40) + (41)
At this point, you should have several large structural sections ready for final assembly.
Step 5: Form the Main Left and Right Assemblies
Join the larger assemblies as follows:
(1 to 9) + (10 to 13)
(14 to 15) + (16 to 17)
(18 to 29) + (30 to 35)
(36 to 39) + (40 to 41)
Check that all mating faces sit flat and that the square dowels are fully seated before gluing.
Step 6: Create the Two Major Halves
Now combine the main groups into two large assemblies:
(1 to 13) + (14 to 17)
(18 to 35) + (36 to 41)
Let these two large halves cure properly before the final connection.
Step 7: Final Assembly
Connect the two major assemblies together:
(1 to 17) + (18 to 41)
This completes the full cat tower structure.
Painting and Finishing
After assembling mine, I painted it to give it the look of a Minecraft-themed tree. The blocky geometry makes it very easy to paint because each cube can become its own pixel. For the best finish, paint the base colors first, then dry-brush darker tones into the gaps and edges to make the cubes look more dimensional. A matte clear coat can help protect the painted surface. Use pet-safe paints and sealers, and let everything fully dry and air out before use.

Optional Comfort Add-ons
You can add soft beds, cushions, felt pads, or small blankets inside the two holes and on the top lounging area. I used red cushion-style beds in the concept because they contrast nicely against the Minecraft tree colors and make the tower look warmer. For a cleaner removable setup, you can use fabric pads with Velcro strips instead of permanently gluing the beds down. This makes them easier to wash or replace later.
NOTE: This is a large decorative and functional cat tower, so take your time with assembly. Superglue is recommended for connecting the printed sections, and the square dowels should be used to align and reinforce the connections. For active or heavier cats, place the finished tower against a wall or in a corner for extra stability. You can also add non-slip pads under the base. This design started as a fun idea for Lilly and Derek, but it became a full blocky cat playground - part cat tower, part Minecraft tree, part tiny architecture project.
Originality of the Model
The author declares that this work is their personally original model
This model is licensed under the following terms:
This work is licensed under a Standard Digital File License. Digital files have a strict non-commercial, personal use only license.
You shall not share, sub-license, sell, rent, host, transfer, or distribute in any way the digital file or 3D printed versions of this object, nor any other derivative work of this object in its digital or physical format (including remixes of this object). You can not host these files on other digital platforms, web stores or cloud repositories. The objects may not be used in any way whatsoever in which you charge money, collect fees.
Models(1)
- all sliced bigger.3mfDesigner

15.74 MB

2026-06-20