







8

2
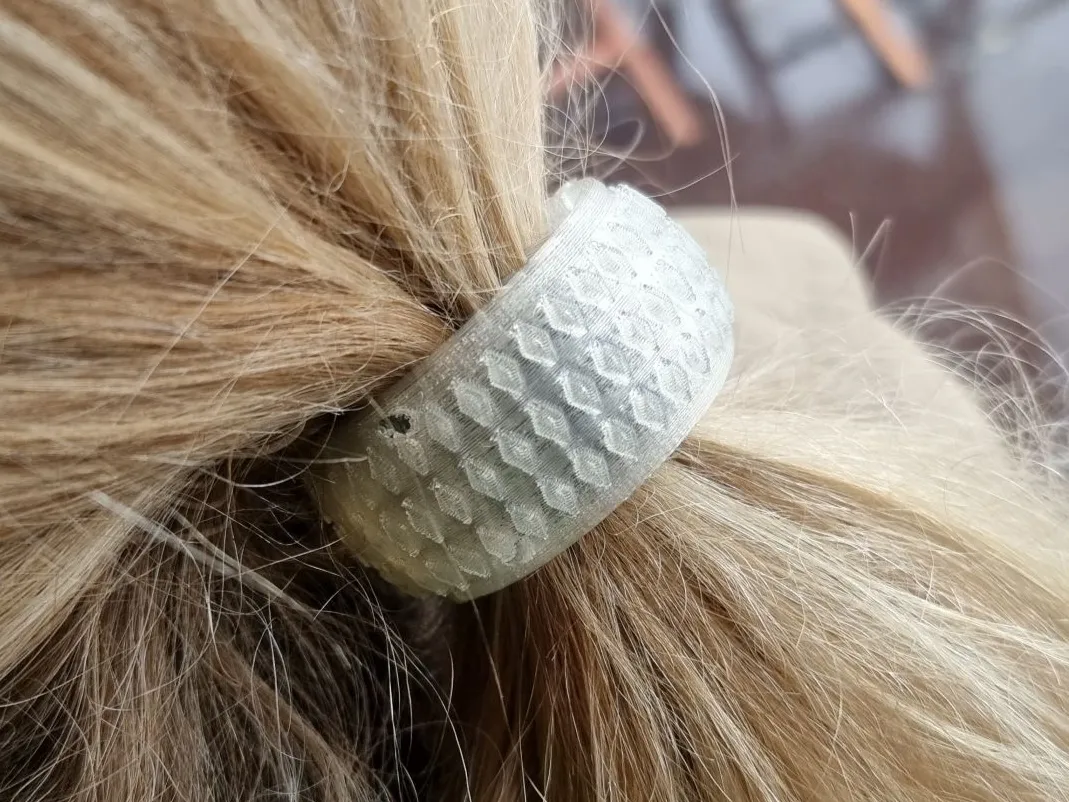
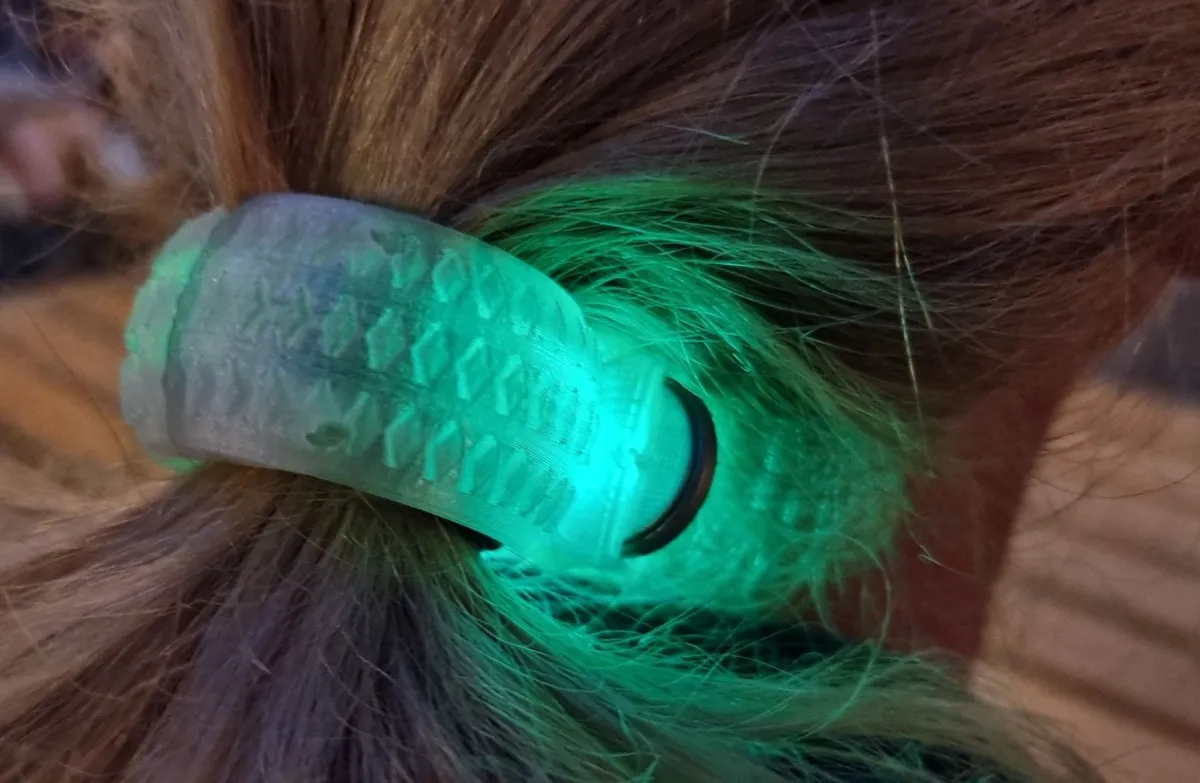
This is a ring to hide a hair tie (e.g. a rubber band). It locks magnetically around the hair and hair tie. You still need the rubber band, otherwise the ring may slip off.
Depending on the headdress of yourself or your loved one(s) you may have to select (see .stl files) or adapt (see OpenSCAD source file) the diameter.
Apart from printing you will need
- One or two Neodyme magnets 4 mm diameter x 10 mm long
- One or two screws M3 x 8
And as tools
- M3 thread cutter
- 1.8 mm drill
- 2.0 mm drill
- 4.0 mm drill
- Plastic glue (e.g. Revell Contacta Professional) or a small soldering iron
- Superglue
After printing
- Remove supports.
- Carefully drill the two hinges of the female part to 1.8 mm. Drill slowly by hand (!!!) in order not to heat e.g. PLA above 50 degrees Celsius. Withdraw the drill often to empty the cut material in its grooves.
- Drill the hinge of the male part to 2.0 mm.
- Drill the magnet holes to 4 mm, but only 10 mm deep. Do not drill through. The small trough-holes serve to help you reposition or remove the magnet if required.
- Cut the screw holes to M3 thread. Here you should cut through the holes' full length. Withdraw the cutter often in order to empty the cut material in its grooves.
- Align male and female parts at the hinge, insert some pinnacled 1.75 mm filament into the hinge and secure it on the outer face of the female parts with glue or melt it there with a soldering iron.
- Insert the M3 screw(s).
- Insert the magnet(s). One magnet may be sufficient, but you have the option to insert two of them. Make sure that both magnets are actually touching the screw head. The locking force will be much smaller if there is an air gap between (one of the) the magnets and the screw. There should be a small air gap between the 3D printed parts across the lock while locked.
- Apply superglue through the small holes at the back of magnets and screws to secure them, but only after final assembly and alignment as explained above.
The 2 x 3 teeth keep the ring from slipping off. Position them between the head and the hairtie, not downwards from the hairtie.
I include the OpenSCAD source file for you to improve or to print unsupported diameters. Proceed as follows to modify the design and create your own .stl variant:
- Download and install OpenSCAD from https://www.openscad.org
- Launch OpenSCAD and open the enclosed OpenSCAD source file (/File/Open).
- Modify (e.g. amend the parameters at the top of the file).
- Save your changes (/File/Save).
- Render the design (/Design/Render). This may take a minute or so, depending on your PC. Observe the progress bar.
- Export the rendered design e.g. as a .stl file (/File/Export/Export as STL).
- Slice and print.
Visit my other designs:
https://www.thingiverse.com/thinger13/designs
Originality of the Model
The author declares that this work is their personally original model
This model is licensed under the following terms:
Credit must be given to the creator
Models(16)
 220502_Ring_25mm.stlDesigner
1.84 MB

2026-03-25
 220502_Ring_30mm.stlDesigner
1.73 MB
2026-03-25
 220502_Ring_35mm.stlDesigner
1.69 MB
2026-03-25
 220502_Ring_40mm.stlDesigner
1.62 MB
2026-03-25
 220502_Ring_50mm.stlDesigner
1.54 MB
2026-03-25
 220510_Ring.scadDesigner
8.87 KB
2026-03-25
 220510_Ring_25mm_LED.stlDesigner
2.86 MB
2026-03-25
 220510_Ring_30mm_LED.stlDesigner
2.75 MB
2026-03-25
 220510_Ring_35mm_LED.stlDesigner
2.72 MB
2026-03-25
 220510_Ring_40mm_LED.stlDesigner
2.67 MB
2026-03-25
- 220510_Ring_50mm_LED.stlDesigner
2.60 MB
2026-03-25
- 220515_Ring.scadDesigner
11.01 KB
2026-03-25
- 220515_Ring_LED_30mm.stlDesigner
2.10 MB
2026-03-25
- 220515_Ring_LED_35mm.stlDesigner
2.07 MB
2026-03-25
- 220515_Ring_LED_40mm.stlDesigner
2.04 MB
2026-03-25
 220515_Ring_LED_50mm.stlDesigner
1.97 MB
2026-03-25
View all(16)


