




Predator
The Predator
Predator 2
Predator Weapon
Plasma Caster
Shoulder Cannon
Predator Should Cannon
Prey
Movie Prop
SciFi
Cosplay
3D Printed Prop
WLED
D1 Mini
esp8266
LED
Laser
Predator Cosplau
Aliens vs Predator

- 0.2mm layer, 2 walls, 15% infill

5-disc
PLA
Designer

61

15
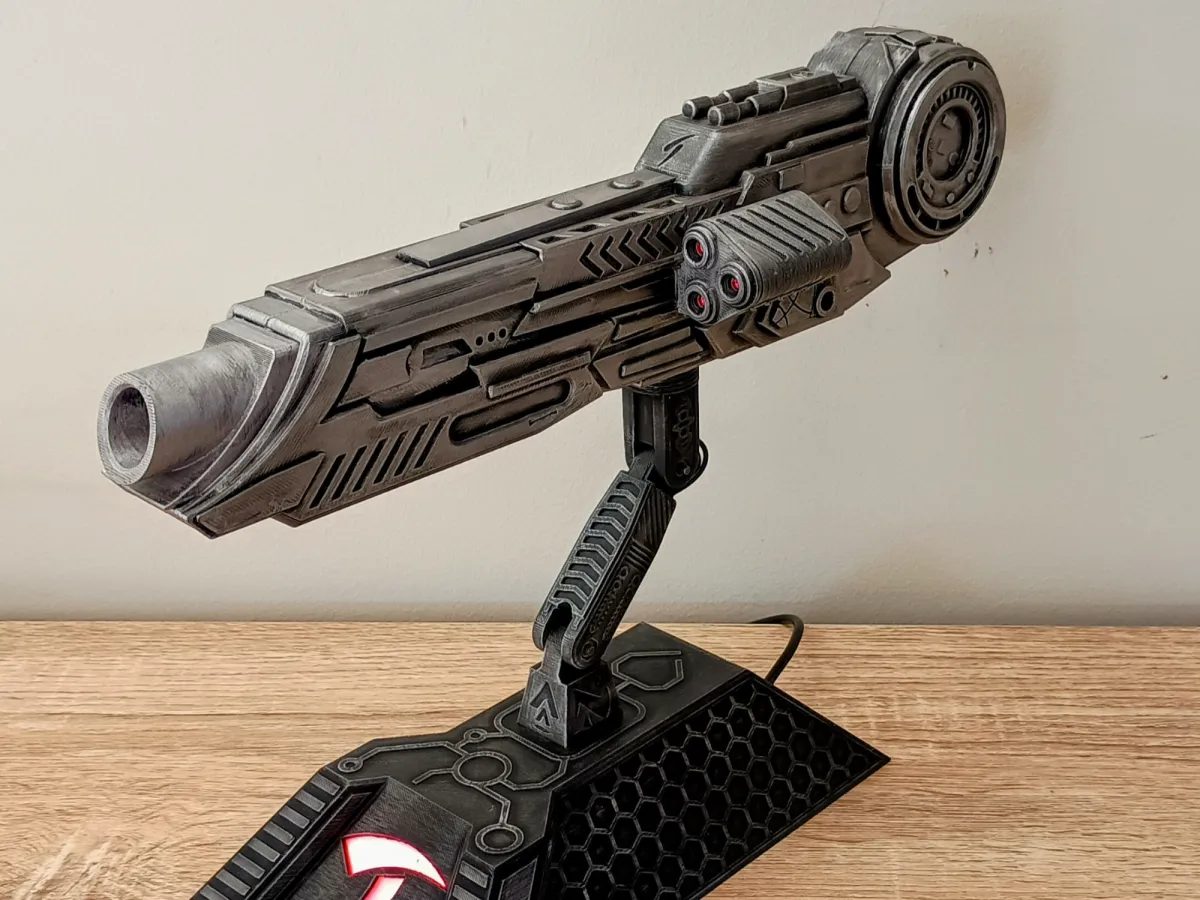
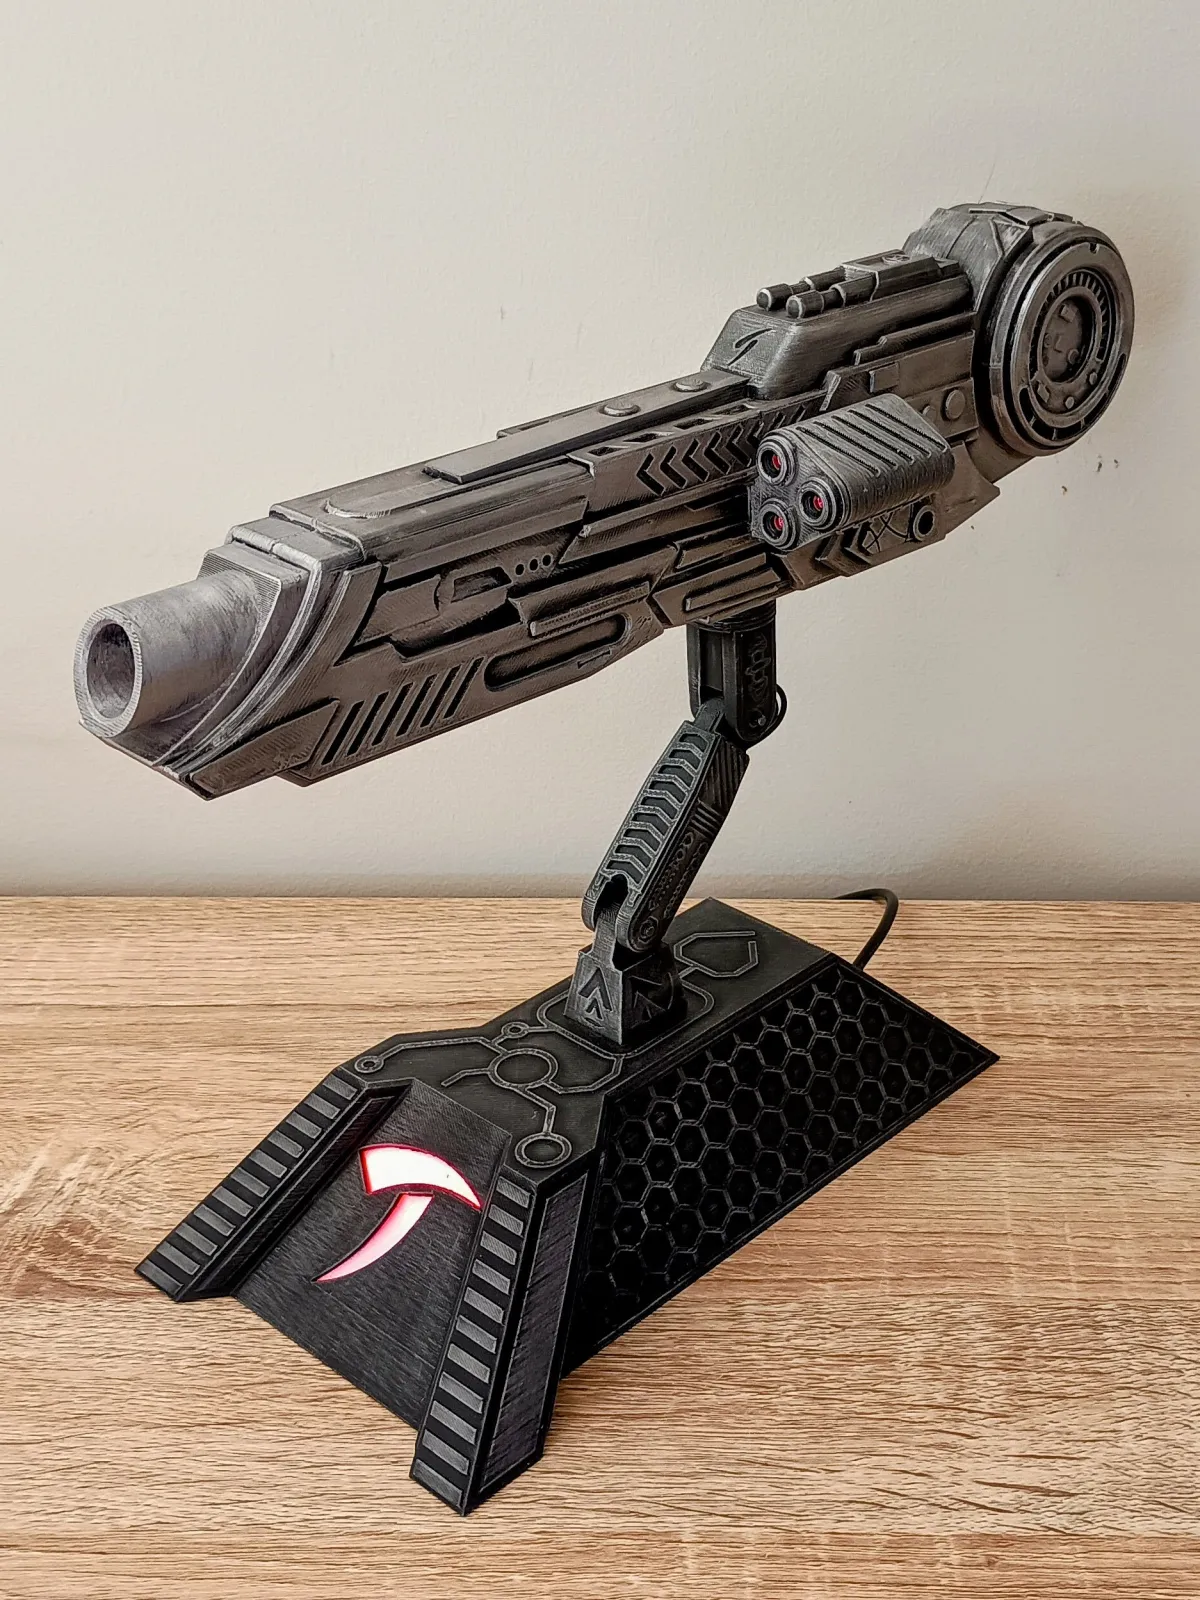
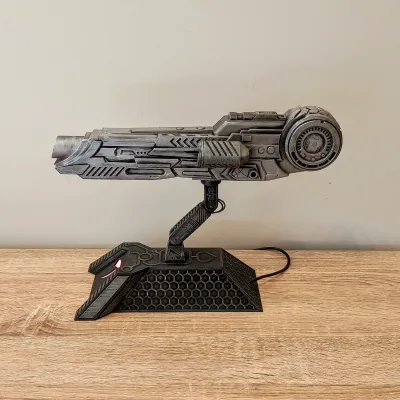
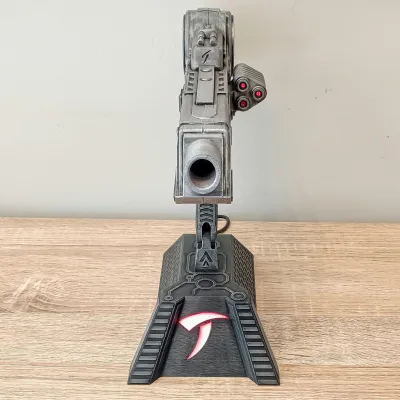
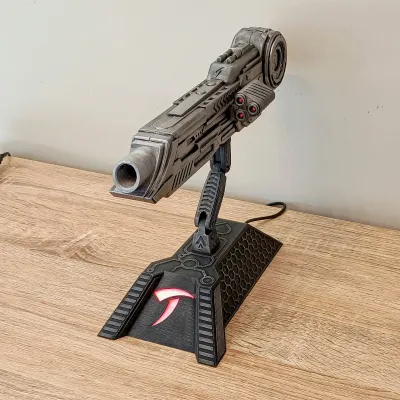
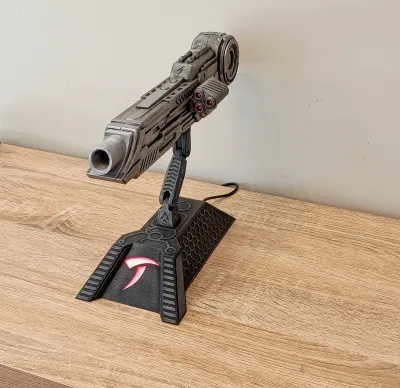
This is a remixed version of martin.taichl's incredible Predator Plasma Caster model — now upgraded with integrated electronics, laser modules, and LED lighting, all controlled via WLED. I modified the original design to accommodate a larger internal laser housing, added internal wiring channels, and created a custom electronics bay within the base.
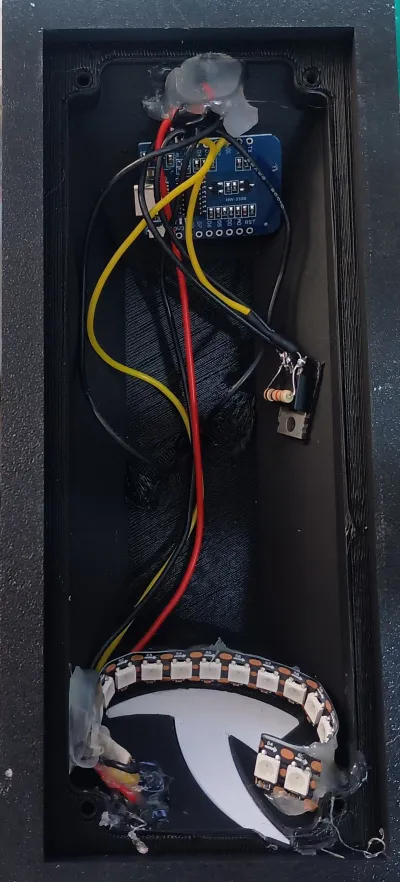
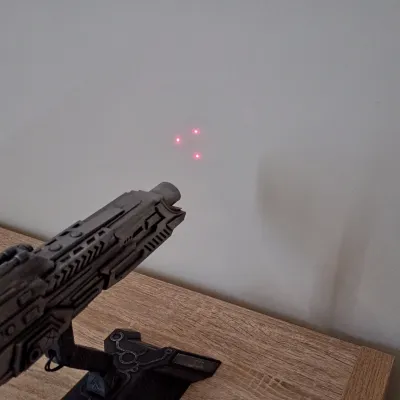
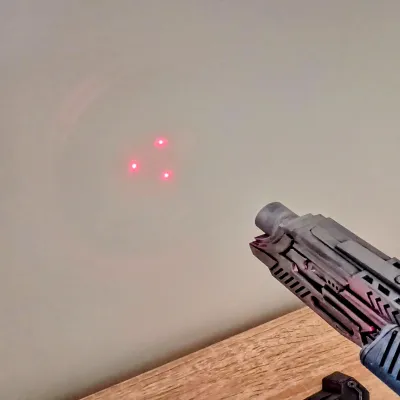
The laser housing is hollow and holds three 5V laser dot diodes, arranged in the iconic Predator targeting triangle pattern. A diffuser chamber at the front adds dramatic lighting effects via a small LED strip. Everything is wired to a D1 Mini running WLED, which controls both the lasers and LEDs. A MOSFET handles safe switching of the lasers, so they can be toggled remotely via presets or the WLED app.
🛠️ Remix Features:
- Rear section modified to support a larger laser housing and internal wiring
- Custom electronics mount added underneath for a D1 Mini and MOSFET
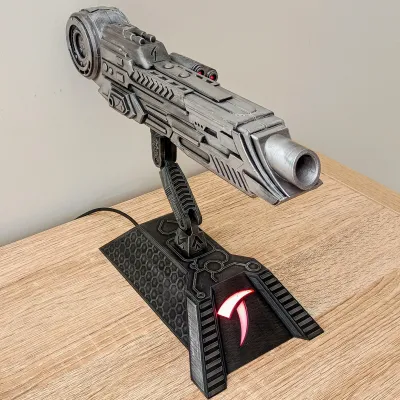
- Diffuser chamber at the front for LED FX
- Laser pod is hollow, designed to hold 3x 5V red laser diodes
- All controlled wirelessly using WLED presets and effects
🔌 Requirements:
- 5V USB or DC power supply
- D1 Mini (ESP8266) flashed with WLED
- 3x 5V red laser dot diodes
- Small LED strip (for diffuser)
🙏 Remix Credit
Huge thanks to Martin for uploading the original Plasma Caster model. This remix wouldn’t exist without his incredible design work. His spaceship models are some of the best on MakerWorld — especially the Rocinante from The Expanse, and his Stargate Goa’uld ships are literally out of this world. I reached out to him for permission before I even started printing, and I’m very grateful that he allowed me to post this remix.
Check out Martin’s page — seriously, his work is phenomenal.
https://makerworld.com/en/@martin.taichl
🧱 Assembly Instructions
🧩 1. Assemble the Plasma Caster
- Print and assemble the main body of the cannon/caster.
- Glue Arm Top and Arm Top Lower together and allow to dry.
🔴 2. Install the Laser Module
- Insert 3x 5V laser dot diodes into the laser pod cap.
- Twist all positive (red) wires together and all negative (black) wires together.
- Solder and tin the wire ends.
- Add extension wires long enough to reach the base compartment.
- Tip: Use black wire for both, but mark the positive one (e.g. with red heatshrink).
- Power the lasers briefly to:
- ✅ Confirm they’re aligned in a triangle
- ✅ Adjust focus if needed
- Apply a small drop of CA glue to secure each laser diode in place.
- Slide the laser pod cap onto the cannon and feed the wires through the rear-left routing channel.
🦴 3. Mount the Caster
- Glue the laser pod to the main cannon body.
- Thread wires down through the caster arm assembly.
- Insert the wires through the middle arm and secure to the cannon using an M3 x 12mm screw and nut.
- Continue routing the wires into the top of the base, and secure it with another M3 x 12mm screw and nut.
- The caster simply rests on the mount, so you can adjust the pose freely.
💡 4. Add the Diffuser
- Glue the diffuser panel to the front cutout of the base.
- Apply the WS2812B LED strip, add wires to strip now if it doesn't have them already, around the diffuser and secure, I used a few dabs of hot glue to hold it adjacent to the diffuser.
🔌 Electronics & Wiring
🧠 5. Flash WLED to D1 Mini
- Connect D1 Mini to your computer via USB.
- Go to https://install.wled.me
- Select WLED version 0.14.0 (recommended) and install.
- Connect to your Wi-Fi when prompted.
🪛 6. Wiring Overview
🔴 Power Distribution (all 5V devices share power):
- Twist together and solder:
- 5V USB wire (Insert through hole in base before soldering)
- +5V wire from LED strip
- +5V wire from laser diodes
- Solder to D1 Mini’s 5V pad
- Twist together and solder:
- GND USB wire
- GND wire from LED strip
- (Optional but recommended): Add an extra wire to this bundle and solder it to the Source leg of the MOSFET — this helps unify all ground connections and keeps wiring clean and organized.
- Solder to D1 Mini’s GND pad
🧰 7. MOSFET Wiring (Laser Switching)
- Laser GND (negative) connects to MOSFET Drain (middle leg)
- MOSFET Source (right leg) connects to GND (shared with D1 Mini)
- MOSFET Gate (left leg) connects to GPIO pin on D1 Mini (e.g., D1 / GPIO5)
- Add:
- 220Ω resistor between Gate and D1 Mini GPIO
- 10kΩ resistor from Gate to GND (pull-down)
🎛️ 8. WLED Setup for Laser Control
Use WLED Relay Control
- In WLED, go to Config > LED Preferences
- Scroll down to Relay GPIO and set it to your control pin (e.g., GPIO5)
- Set logic to Active High (laser on when pin is HIGH)
- Save and reboot
💡 LED + Laser Segments
To give you separate control of the LED diffuser and laser module, you can divide your LEDs into WLED segments.
In this build:
- I used 18 total addressable LEDs
- The first 18 are the LED diffuser (0–17)
- The last LED (18th) is used as a dummy pixel to control the laser (on/off only)
⚠️ WLED uses 0-based indexing:
LED 0 is the first LED, and LED 17 is the 18th LED.
🧱 Segment Setup in WLED:
- Open WLED Web UI
- Go to LED Settings
- Under "LED count", enter 18
- Go to Segments
- Set up:
- Segment 0: from LED 0 to 17 → for diffuser effects
- Segment 1: from LED 17 to 18 → for laser control (MOSFET trigger)
This creates two controllable segments — you can now apply effects or colors to just the diffuser without affecting the laser.
🔦 Note on Laser Control:
- The laser isn’t a true LED pixel — it’s simply switched on and off by the D1 Mini through a MOSFET.
- WLED treats it like an LED, but you can’t change its color or brightness.
- It simply turns on when that pixel is lit, and off when it’s not.
This lets you:
- Tie the laser to a preset
- Trigger it with a segment effect
- Keep it completely separate from the LED animations
🎨 Finishing & Painting
The Predator Plasma Caster was finished using AK Interactive Silver Metallic Wax Paint for a realistic brushed-metal effect.
🖌️ Painting Method:
- Plasma Caster (cannon):
The entire surface was covered with AK Silver Metallic Wax Paint, then gently buffed to enhance the metallic sheen. This gives the cannon a solid, high-tech appearance with a consistent silver finish. - Base and Arm Components:
These were left in their base filament color or base-painted darker, then lightly dry-brushed with the same silver wax paint only on the raised edges and surfaces. This creates a worn, weathered look while preserving contrast and surface depth.
🔩 Final Step:
Once all wiring is complete and everything is in place, secure the base cover using 4x M3 x 8mm screws. This keeps the electronics safely enclosed and gives the prop a clean, finished look.
🧾 BOM
Item | Quantity | Link / Source |
|---|---|---|
| D1 Mini (ESP8266) | 1 | https://www.aliexpress.com/item/1005006235653025.html |
| N-Channel Logic-Level MOSFET IRLZ44N | 1 | https://www.aliexpress.com/item/1005003115101502.html |
| 5V Red Laser Dot Diodes | 3 | https://www.aliexpress.com/item/1005007530265787.html |
| WS2812B LED Strip (1m 144 1p30) | 1 | https://www.aliexpress.com/item/1005006766819624.html |
| USB Power Cable | 1 | https://www.aliexpress.com/item/1005008045179029.html |
| 220Ω Resistor | 1 | https://www.aliexpress.com/item/1005007133383644.html |
| 10kΩ Resistor | 1 | https://www.aliexpress.com/item/1005007133383644.html |
| Heatshrink Tubing | As needed | https://www.aliexpress.com/item/1005005336957133.html |
| M3 x 12mm Machine Screws (Arm) | 2 | https://www.aliexpress.com/item/32810852732.html |
| M3 x 8mm Machine Screws (Base Cover) | 4 | https://www.aliexpress.com/item/32810852732.html |
| M3 Nuts | 2 | https://www.aliexpress.com/item/4000152457370.html |
| CA Glue | As needed | https://www.aliexpress.com/item/1005003643576389.html |
Originality of the Model
The author declares that this work is their personally remixed model

This model is licensed under the following terms:
Credit must be given to the creator
Only noncommercial uses of the work are permitted
Remixes must be shared under the same license
Models(1)
- Predator+Shoulder+Cannon.3mfDesigner

20.67 MB

2025-09-18


