




raspberrypi
raspberrypicase
raspberry
pizero
pizero2w
zero2w
lcd
tft
lcdmount
lcdcover
lcdscreen
lcdholder
lcdcase
lcddisplay
klipper
kingroon
kp3s
tftscreen
klipperscreen
kingroonkp3spro
kp3spro
kp3spros1
s1
klipperpad

- 0.2mm layer, 3 walls, 25% infill

1-disc
PLA
Designer

15

1
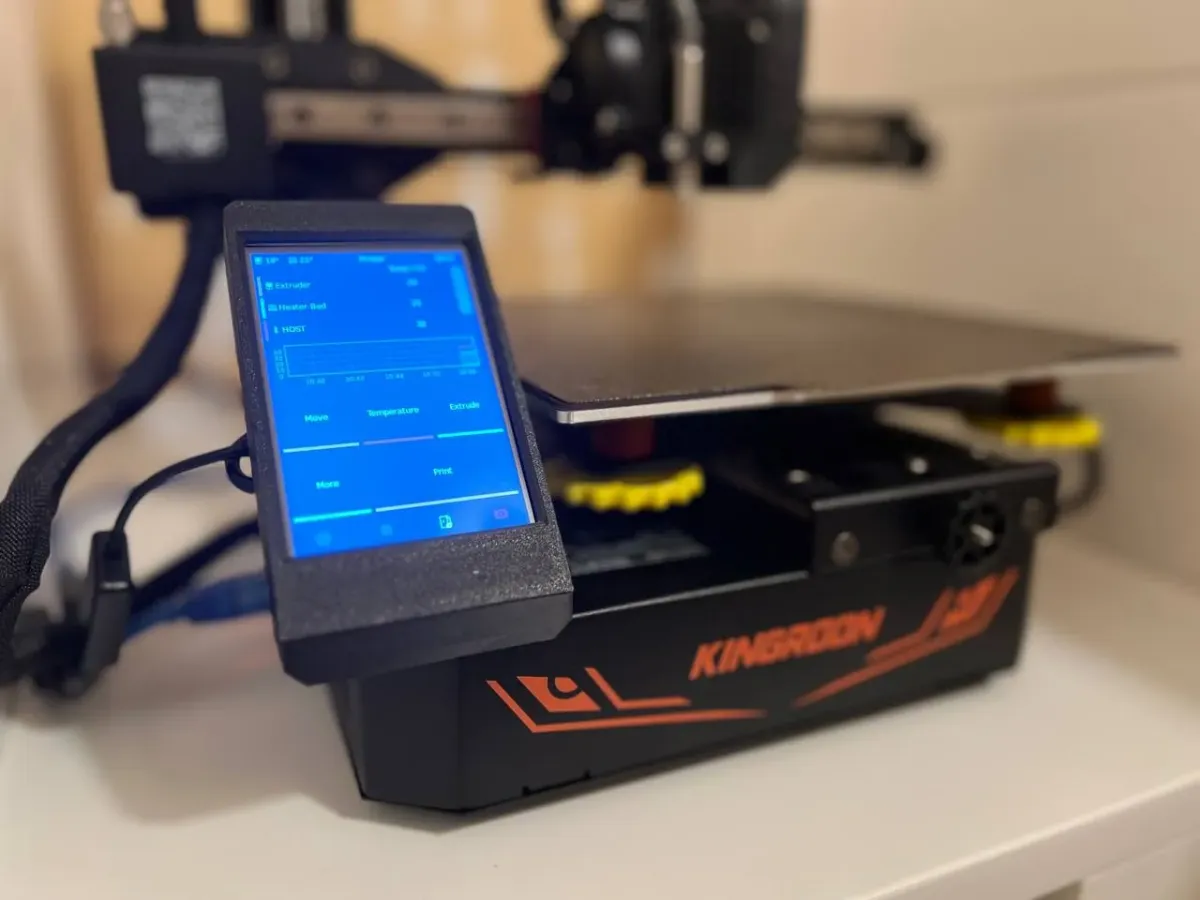
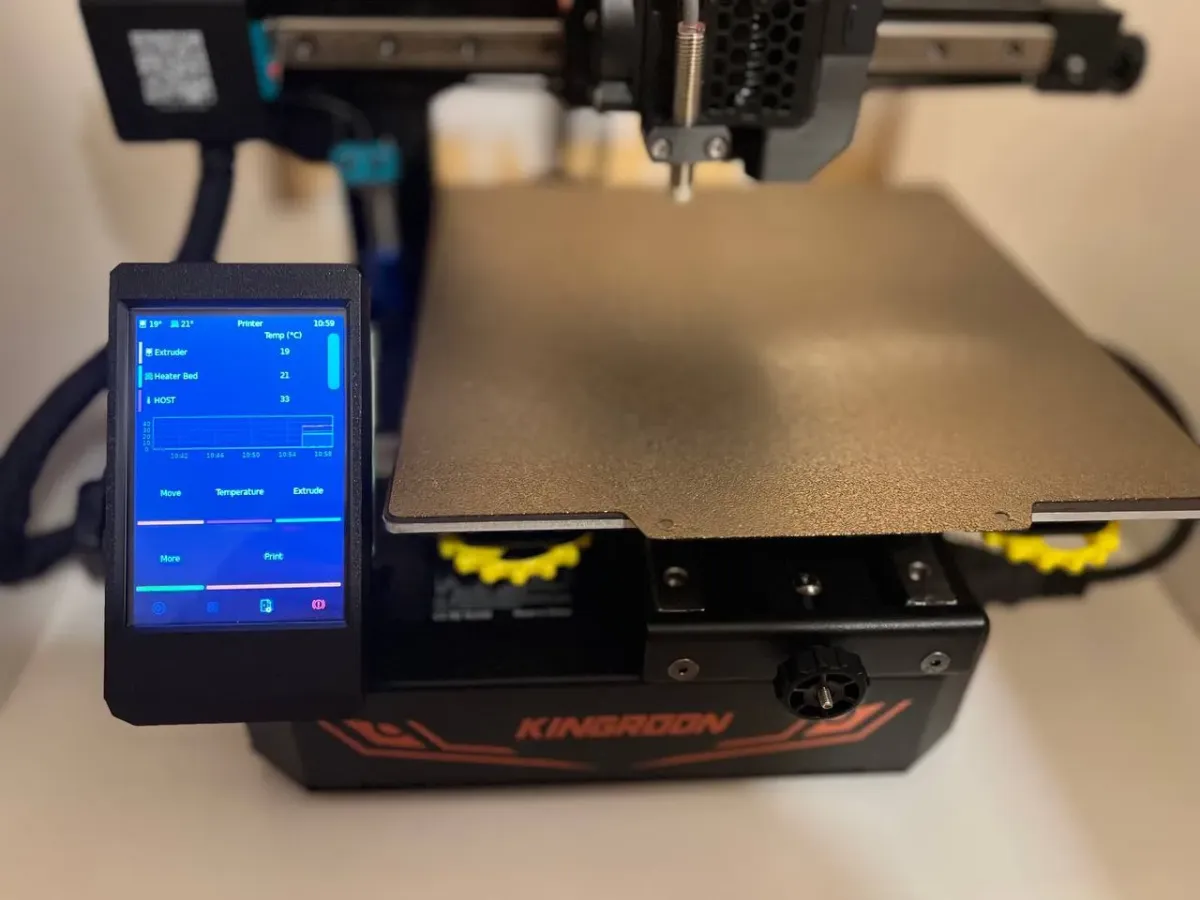
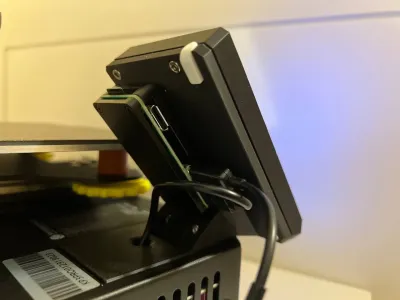
This design has been created to place a raspberry tft with klipperscreen in our kp3s Pro.
NOTE: This is only compatibility with raspberry pi zero 2w or another model with the same dimensions.
You can buy me a coffee with a donation. Me puedes invitar a un café haciendo una donación Click to donate
Commercial components
- 1 unit - LCD TFT RPi GPIO 3.5" Raspberry
- 6 units - Heat inserts M3xD4.6xL4.0
- 6 units - Screw DIN 912 M3x8
Optional
- 1 unit - Aluminum case raspberry pi zero
- 1 unit – Kit soldering iron for heat insert nuts (Optional)
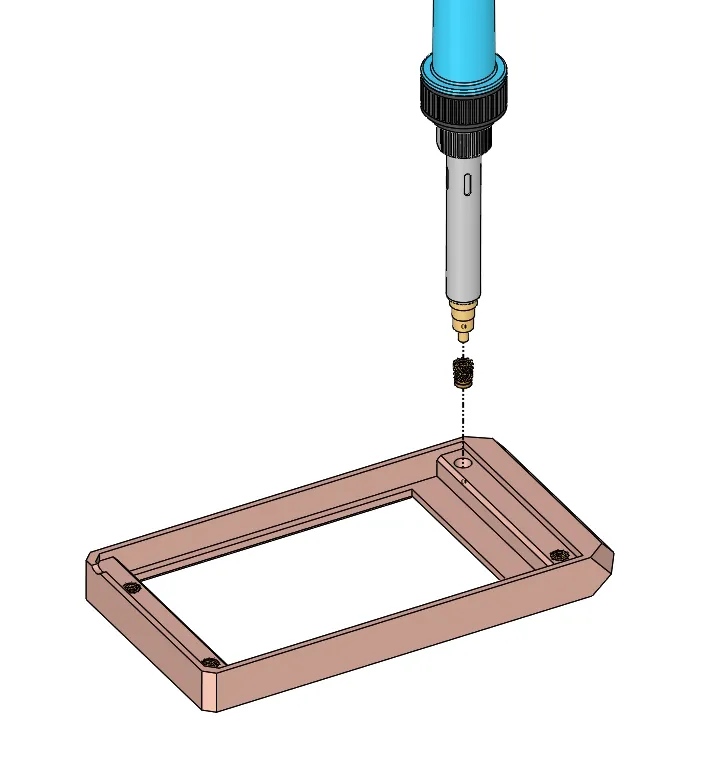
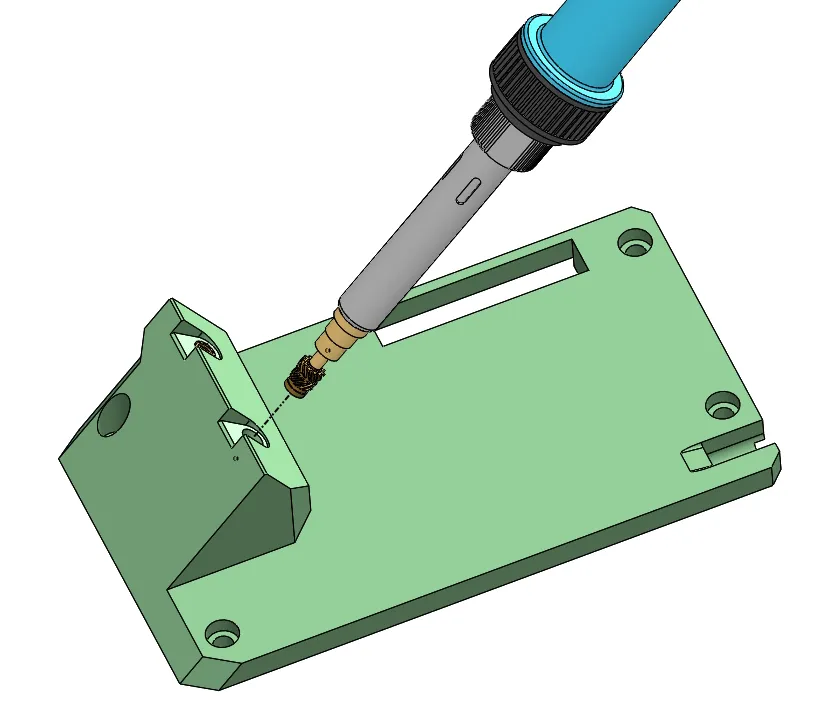
Heat Inserts
- 6 units - Heat inserts M3xD4.6xL4.0
Assembly instructions
1. Remove the old TFT screen and install the base of new TFT with the same screws
- 1 unit - base_lcd_pro.stl
2. Assemble the TFT case
- 1 unit - LCD TFT RPi GPIO 3.5" Raspberry
- 4 units - Screw DIN 912 M3x8
- 1 unit - front_lcd.stl
- 1 unit - back_lcd_pro.stl
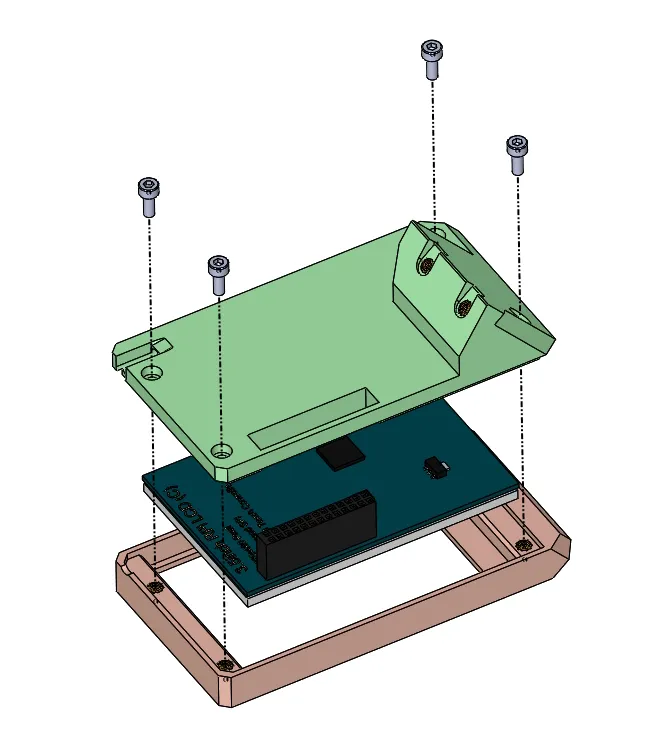
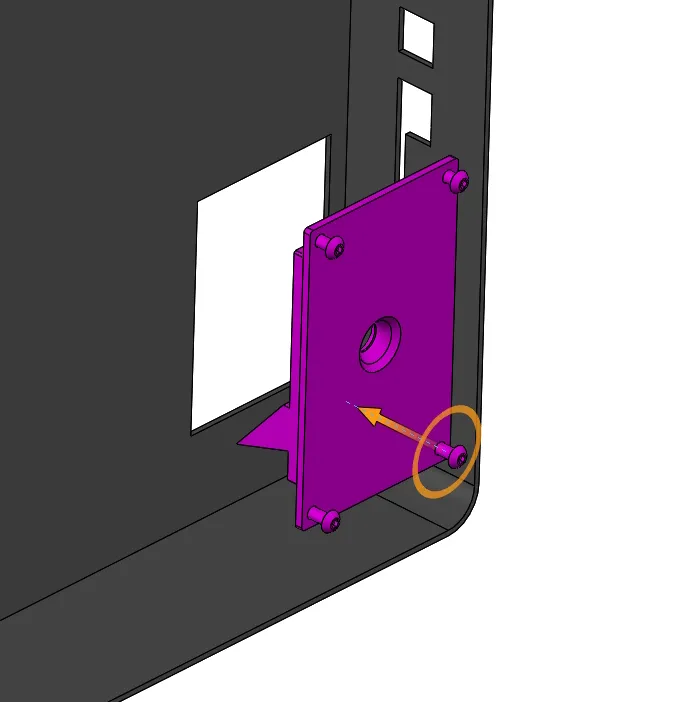
3. Fix the TFT to the printer base
- 2 units - Screw DIN 912 M3x8
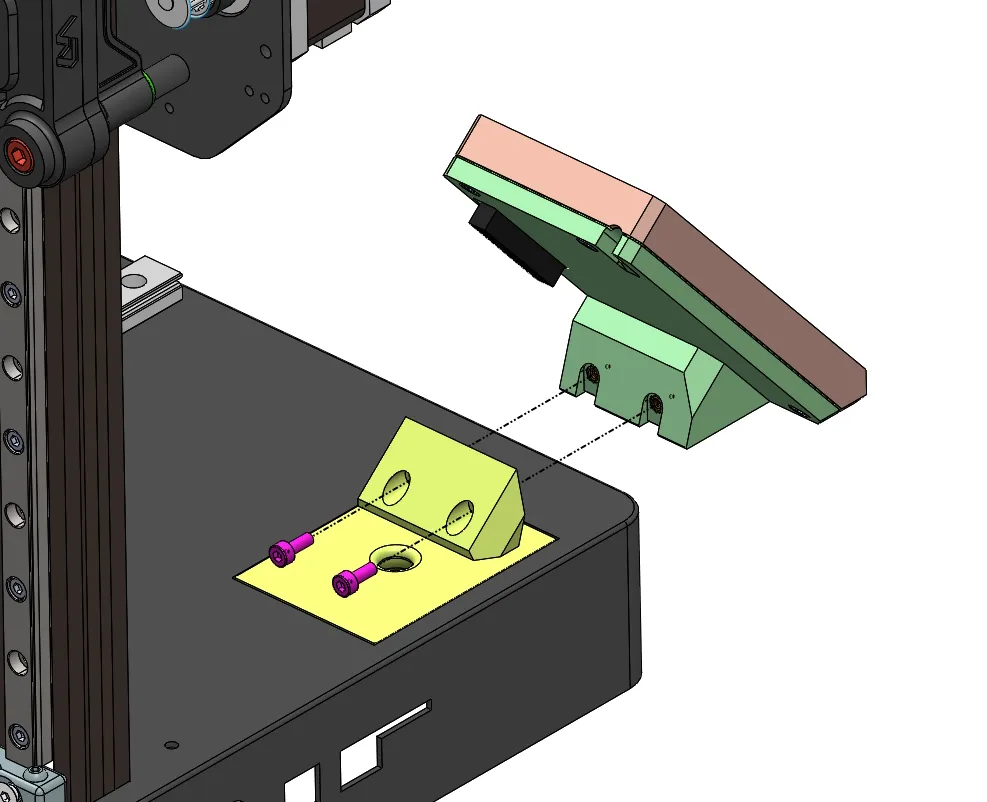
4. Connect the raspberry to the TFT
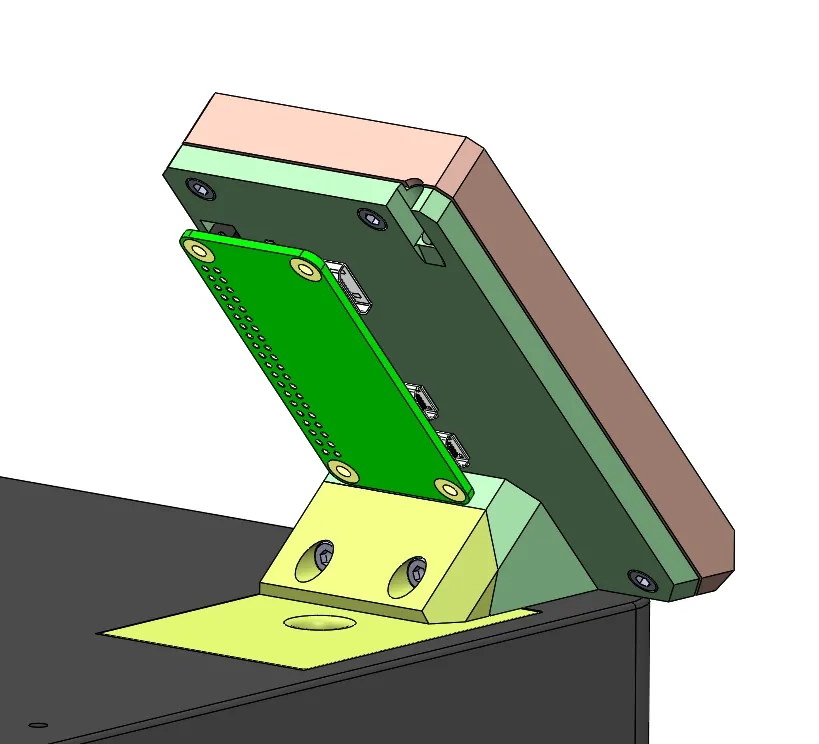
5. LCD Installation
Resource: http://www.lcdwiki.com/3.5inch_RPi_Display
Open terminal(SSH) and install the driver on RaspberryPi
sudo rm -rf LCD-showgit clone https://github.com/goodtft/LCD-show.gitchmod -R 755 LCD-showcd LCD-show/sudo ./LCD35-show
Wait A Few Minutes, when the system reboot ok, you can see that.
Rotate the display, execute the following command:
cd LCD-show/sudo ./rotate.sh 90
5. Installing Klipper Screen
Resource: https://klipperscreen.readthedocs.io/en/latest/Installation/
Originality of the Model
The author declares that this work is their personally original model
This model is licensed under the following terms:
Credit must be given to the creator
Only noncommercial uses of the work are permitted
Models(1)
- lcd_kp3s_pro.3mfDesigner

5.86 MB

2025-07-16


