

titan
esp32
tealight
wled
hunter
hive
rgb led
warlock
destiny game
d1 mini
fallen
vex
Destiny 2
destiny 2 ghost
destiny ghost
led tealight holder
Destiny
led tealight
led tealight stand
destinyghost
destiny ghost shell
destiny led
cabal
frontier ghost shell
taken
ghost shell

- 0.2mm layer, 2 walls, 15% infill

12-disc
PLA
Designer

7

0
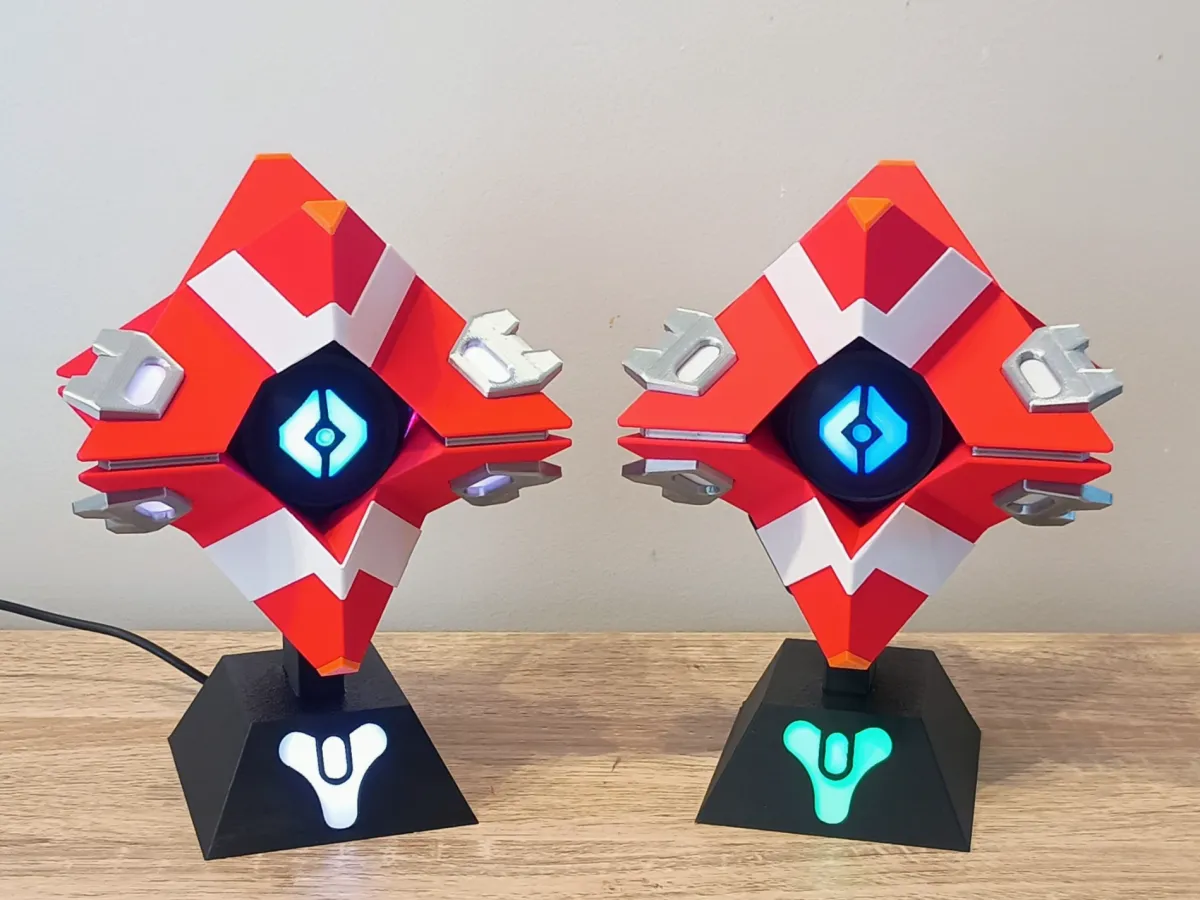
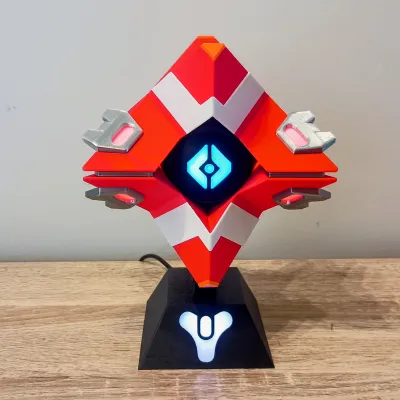
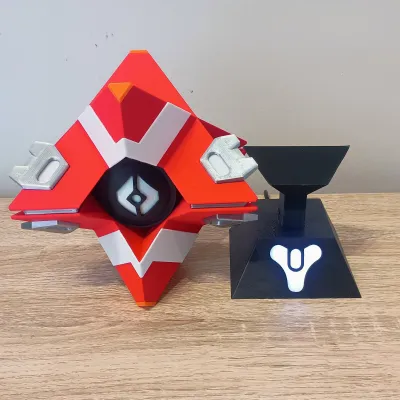
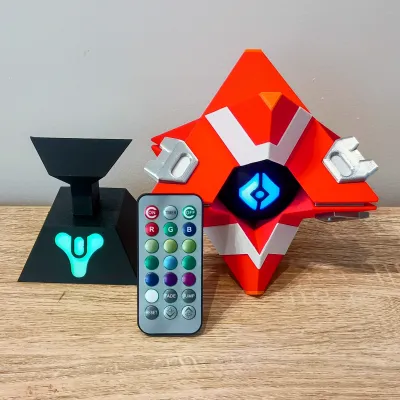
This project is a 3D printed Destiny Ghost shell inspired by the Frontier Shell, designed as a display piece with multiple lighting options.
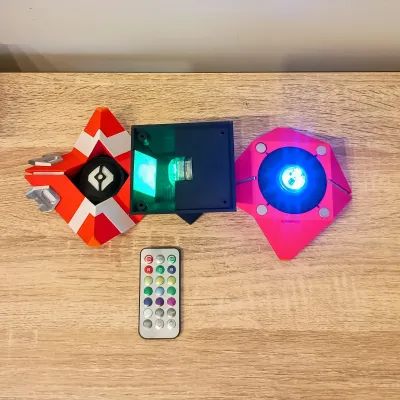
The model supports two main lighting variants:
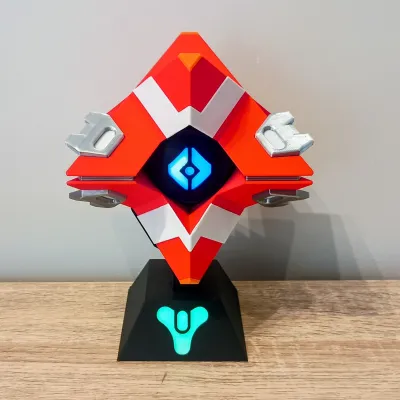
• USB Powered WLED version using an ESP32-C3 SuperMini and WS2812B LEDs
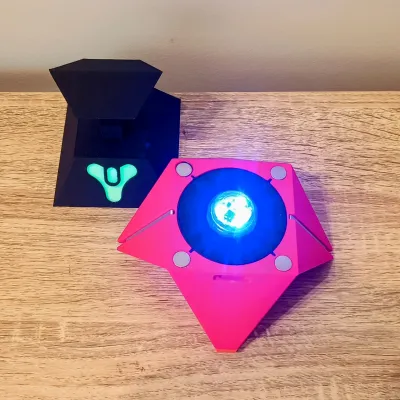
• Battery powered version using LED tealights
The LED Ghost connects to the stand using a 3-pin magnetic pogo connector, allowing the Ghost to be easily removed while still powering the LEDs inside the stand.
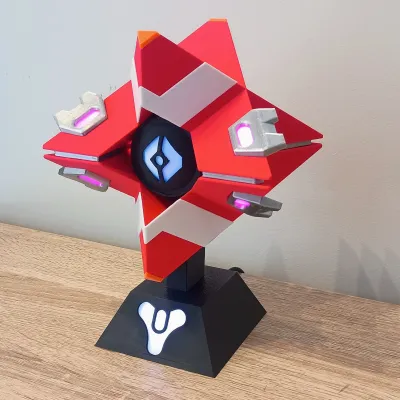
For this version I also redesigned the stand, making it slightly larger so the Destiny Tricorn logo glows more strongly compared to my previous Ghost design. The larger stand also allows space to fit an LED tealight inside the base for the battery-powered version.
Stand Variants
There are four stand options included:
LED Eye and Stand
Used for the USB / WLED version with LEDs in the Ghost and stand.Tealight Eye and Stand
Designed to hold battery powered LED tealights in both the Ghost and the stand.Solid Stand – Embossed Tricorn Logo
A non-lighting display stand.Two-Colour Stand – Multicolour / AMS Print
Allows the Tricorn logo to print in a different colour using AMS or manual filament swaps.
If you plan to build the WLED version, you must use the LED Eye and Stand parts.
Shell Variants
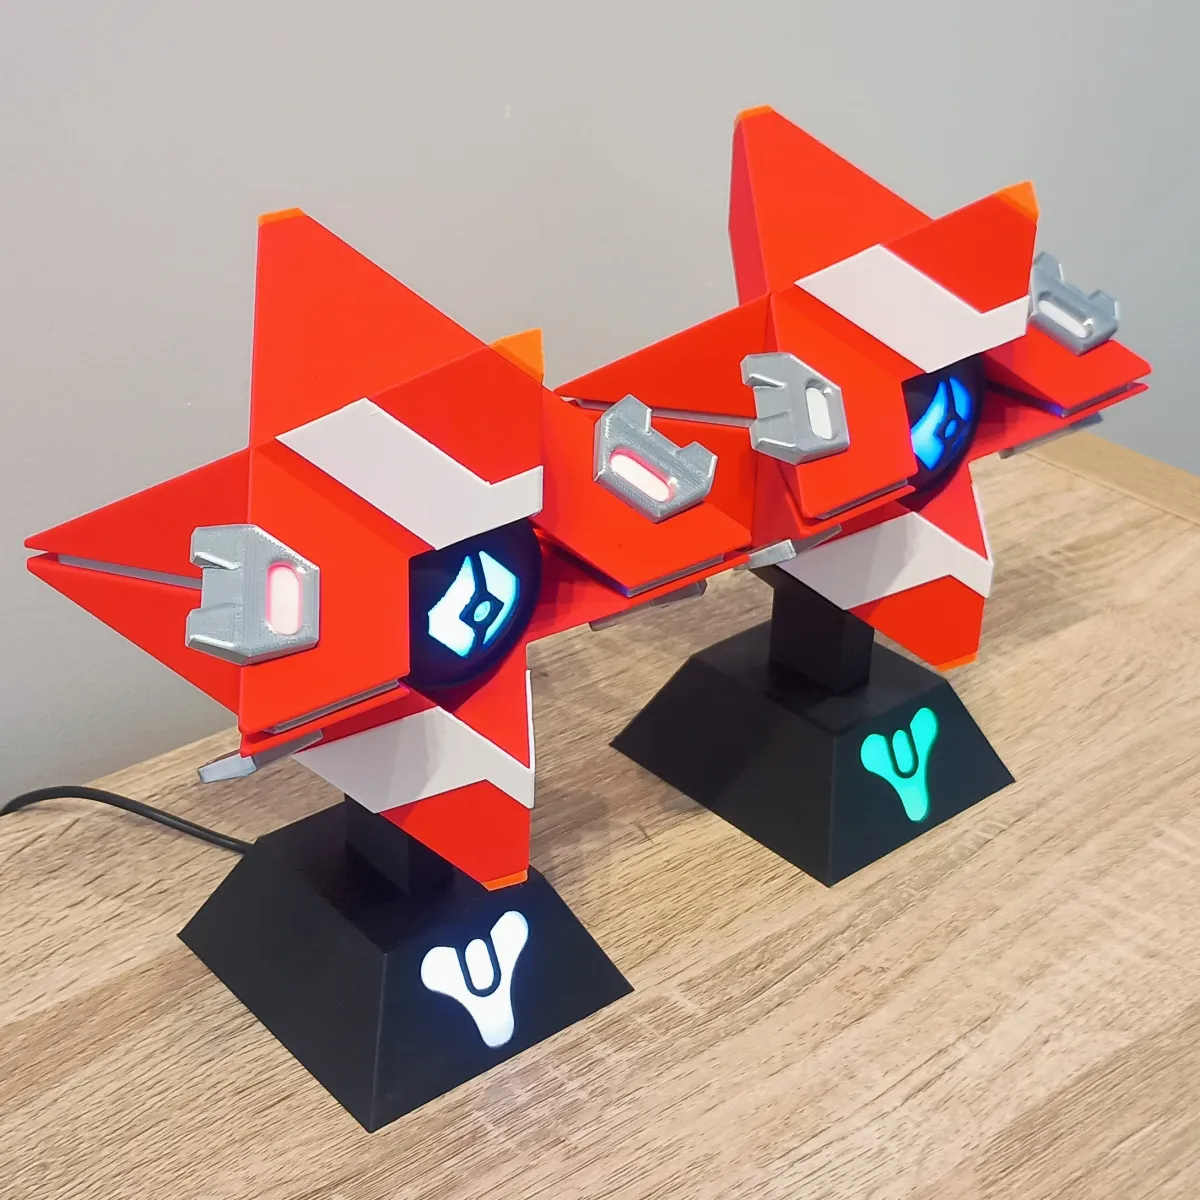
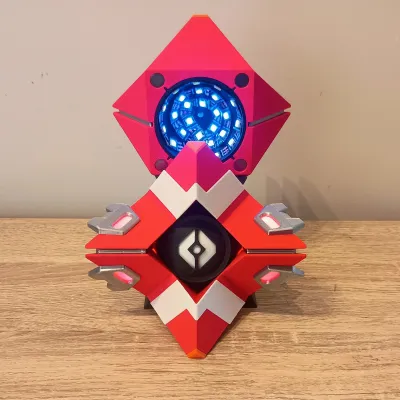
The Frontier Ghost shell includes glowing details on the wings. To support different builds there are two front shell variants and two rear shell variants.
Front Shell Variants
Front – Frontier Wing Detail LED Version
Includes cut-outs allowing LEDs to be installed behind the Frontier Wing Detail sections so they can glow. These LEDs can be controlled independently using WLED segments.Front – Frontier Wing Detail NO LED Version
No cut-outs for LEDs.
The wing details will still receive some glow from the rear eye LEDs, but it will be dimmer and always match the eye colour. I also added internal modifiers to the LED version to increase walls and infill around the cut-outs. This helps prevent light bleed, especially if lighter coloured filament is used.
Rear Shell Variants
Rear – LED Connector Version
Includes the slot for the 3-pin magnetic pogo connector used by the WLED version.Rear – Tealight Version
No connector slot. Designed to hold a battery LED tealight.
Frontier Wing Detail Inserts
Optional inserts are included for the Frontier Wing Detail sections if you are not going to add LEDs to them. You can print these inserts using glow-in-the-dark filament for additional visual effect.
Magnets
The Ghost shell uses 10mm x 2mm magnets to hold the front and rear shells together.
Make sure the polarity is correct before gluing them in place.
For the tealight version, you can also add two magnets to the rear eye and two to the stand.
This helps hold the tealights in place, as tealight sizes vary quite a lot.
Example sizes I tested ranged from:
29.8 mm diameter
30.5 mm diameter
The magnets help keep them secure despite this variation.
Assembly
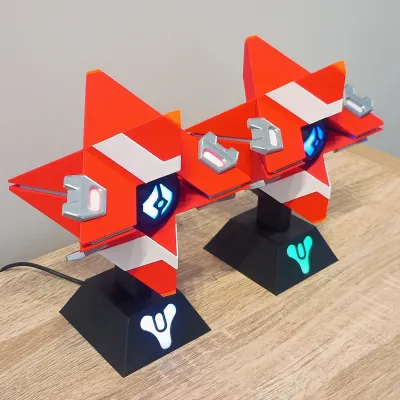
Assembly is straightforward. Refer to the photos for part orientation.
1. Face Plates
Glue the 2 white face plates onto the front shell.
Recessed cut-outs are provided to help align them.
2. Diffusers
Glue the diffusers into:
• The front eye
• The stand logo area
3. Stand Assembly
Glue the mount/support piece into the base.
If using the magnetic pogo connector, make sure the connector slot faces the rear.
4. Eye Installation
Glue:
• Front eye into the front shell
• Rear eye into the rear shell
5. Frontier Wing Detail
Install the Frontier Wing Detail diffusers or inserts and glue them into the front shell.
6. Magnets
Install 10x2mm magnets in the front and rear shells.
Check polarity before gluing.
WLED Version – Electronics Setup
Flash the ESP32-C3 SuperMini with WLED.
Go to:
install.wled.me
Follow the prompts to install WLED and connect it to your WiFi.
After flashing:
Config → LED Preferences
Change the Data GPIO from GPIO2 to GPIO4
GPIO2 can cause boot issues on the SuperMini, so GPIO4 is recommended.
Wiring (WLED Version)
Start by preparing the USB power cable.
Strip about 20mm from the USB + and − wires.
Cut about 60mm lengths of red, black and yellow wire.
Twist the USB positive with the red wire, tin and solder.
Do the same for USB negative and the black wire.
Tin the ESP32 pads:
5V
G
GPIO4
Solder:
Red → 5V
Black → GND
Yellow → GPIO4
Stand LEDs
The redesigned stand includes a proper mounting area for the LED strips.
I used:
3 LED strips with 3 LEDs each
Connect them with 20-30mm jumper wires.
Wire order:
Red → 5V
Yellow → Data
Black → GND
Make sure the LED strips follow the correct direction:
DI → Data In
DO → Data Out
If the orientation is wrong the LEDs will not work.
Magnetic Connector
Run the wires up through the stand mount.
Trim to about 20-30mm above the mount.
Wire order on the connector:
Right → 5V (Red)
Middle → Data (Yellow)
Left → GND (Black)
Glue the connector into place using CA glue.
Ghost Eye LEDs
Run the wires into the rear shell and solder to the LED strip.
Typical layout:
Stand LEDs: 9 LEDs
Rear Eye: ~26 LEDs
The eye LEDs can be spiraled around the inside of the shell.
Frontier Wing Detail LEDs (Optional)
If lighting the Frontier Wing Detail, add four LEDs:
Layout used:
1 LED
30mm jumper
1 LED
50mm jumper
1 LED
30mm jumper
1 LED
Glue each LED behind the cut-out using a small amount of hot glue.
Work around the shell clockwise starting from the lower left.
WLED Segment Setup
Set the total LED count to the full number of LEDs used.
Example:
Stand = 9
Eye = 26
Wing details = 4
Total = 39 LEDs
Create WLED segments so each section can be controlled independently.
Power
If using a phone charger you can increase the current limit.
Example:
5V 2A wall charger → set Max Current to 2000mA
This allows slightly higher brightness.
LED Strip Recommendation
Very cheap LED strips do work, but I recommend using higher quality WS2812B strips.
The ones I normally use from AliExpress have been reliable and have good colour brightness.
ESP32-C3 SuperMini vs D1 Mini
Both boards work well for this project.
ESP32-C3 SuperMini
• Smaller
• Faster
• Usually cheaper
D1 Mini
• Slightly better WiFi range
I generally use whichever one is cheapest during AliExpress sales.
Item | Quantity | Links |
| D1 Mini (or ESP32) | 1 | https://www.aliexpress.com/item/1005006235653025.html? |
| ESP32 SuperminiC3 (or D1 Mini) | 1 | https://www.aliexpress.com/item/1005006599545782.html? |
| WS2818B DC5V RGB LED (60 IP30) | 1 Meter | https://www.aliexpress.com/item/1005006766819624.html? |
| RGB LED Tealights | 2 | https://www.aliexpress.com/item/32957648312.html? |
| 10mmx2mm Round Magnets | 8 (+4 for Tealight) | https://www.aliexpress.com/item/1005009166794091.html? |
| M3 6mm Screw | 4 | https://www.aliexpress.com/item/32969042589.html |
USB cable (At Least 100 cm) | 1 | https://www.aliexpress.com/item/1005008045179029.html |
| Wire 26 AWG Red, Black, Yellow | as needed | https://www.aliexpress.com/item/4001283806251.html |
| Soldering Iron | 1 | https://www.aliexpress.com/item/1005007099216072.html |
| Solder | as needed | https://www.aliexpress.com/item/1005008695639704.html |
| CA Glue | as needed | https://www.aliexpress.com/item/1005008249812950.html? |
| Hot glue | as needed | https://www.aliexpress.com/item/1005008055271799.html? |
Originality of the Model
The author declares that this work is their personally original model
This model is licensed under the following terms:
This work is licensed under a Standard Digital File License. Digital files have a strict non-commercial, personal use only license.
You shall not share, sub-license, sell, rent, host, transfer, or distribute in any way the digital file or 3D printed versions of this object, nor any other derivative work of this object in its digital or physical format (including remixes of this object). You can not host these files on other digital platforms, web stores or cloud repositories. The objects may not be used in any way whatsoever in which you charge money, collect fees.
Models(1)
- Frontier+Shell+Ghost.3mfDesigner

13.56 MB

2026-06-04