


 GIF
GIF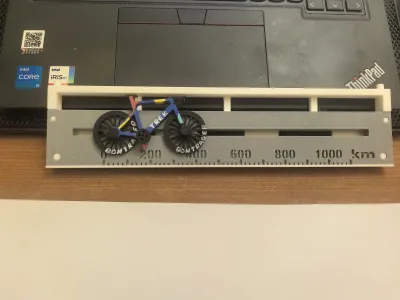
Motion
Cycling
Clock in
Record

 0.2 mm layer height, 2‑wall walls, 15% infill density
4-disc
PLA
Designer

83

8
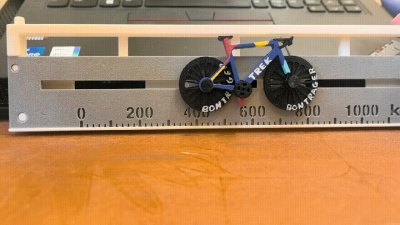
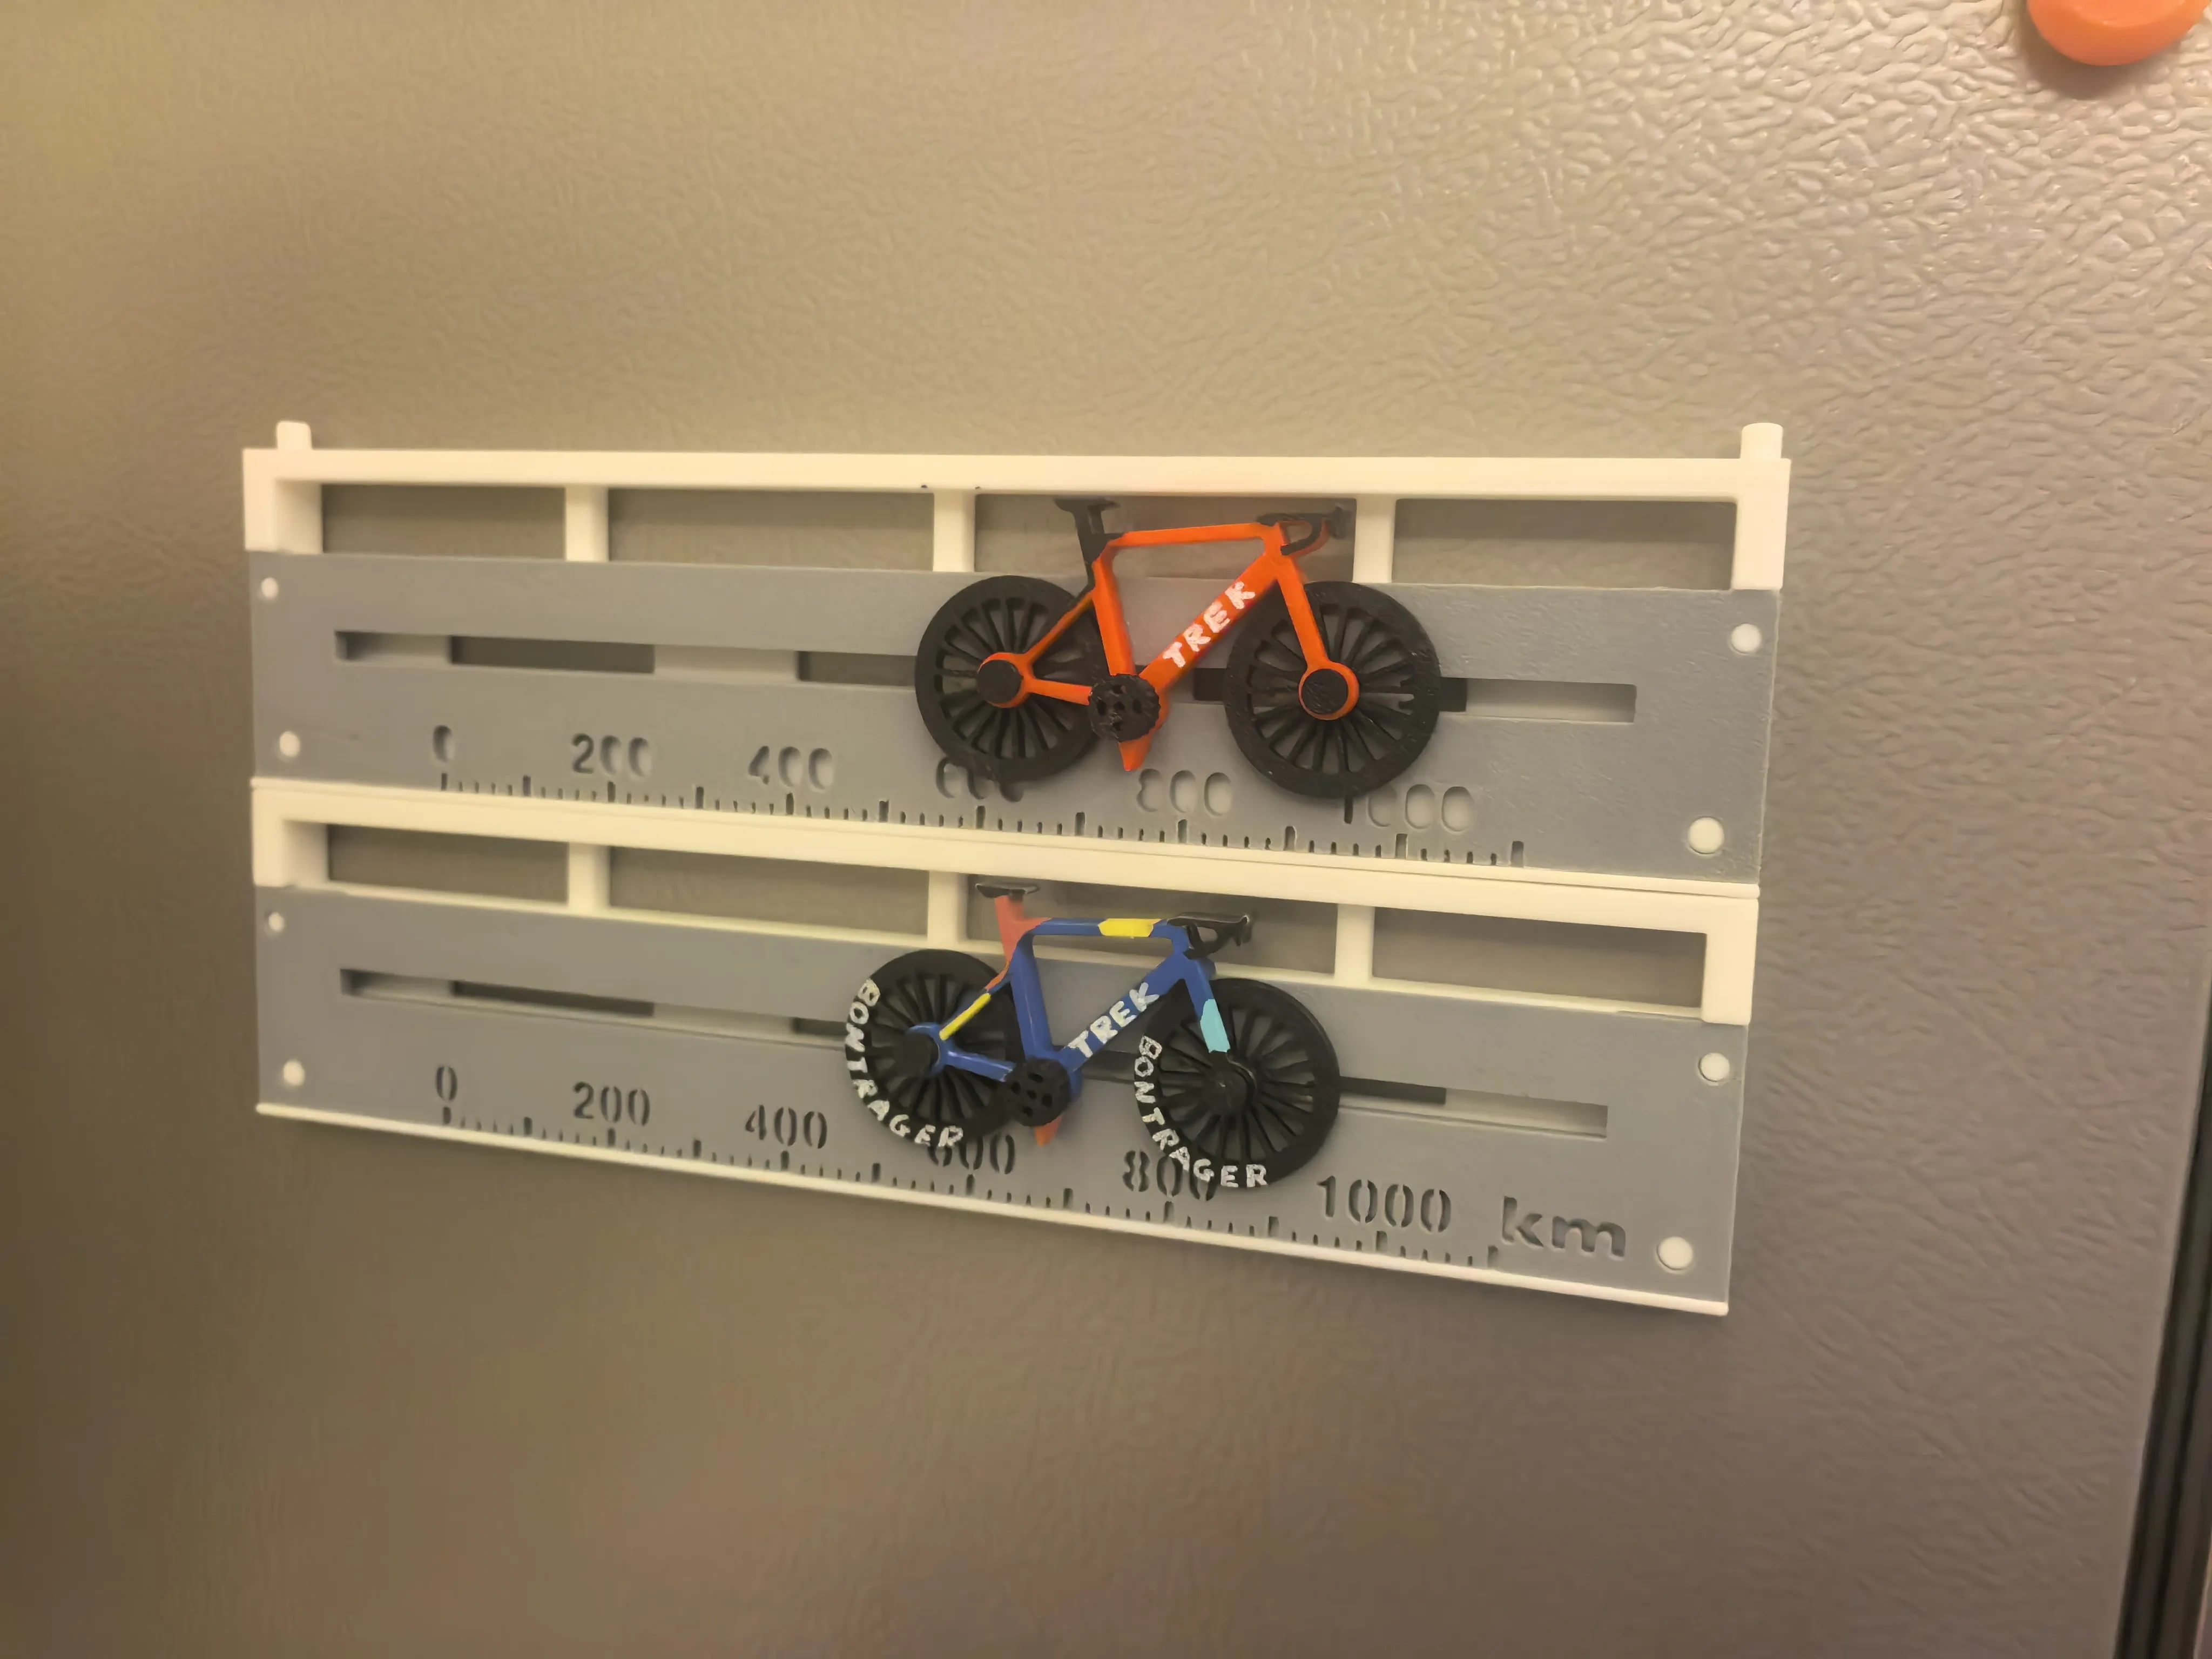
Cycling Mileage Tracker: Utilizing a gear‑rack mechanism, the wheel rotates in sync with increasing mileage.
Mileage Record for Cycling: Through the coordinated operation of gears and a rack, the wheel spins as the distance traveled accumulates, adding an engaging twist to the process of tracking cycling milestones.
1. As the wheel turns with each increment of cycling distance, it vividly simulates a bicycle speeding along the open road, making mileage tracking both functional and fun;
With the wheel rotating in tandem with increasing cycling mileage, this design captures the dynamic motion of a bicycle on the road, infusing the mileage recording process with a sense of excitement and playfulness.
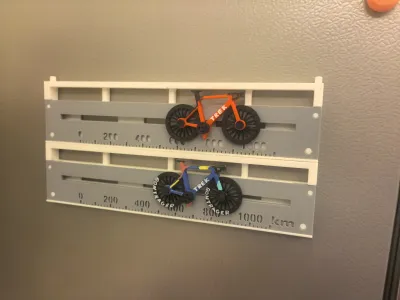
2. A magnetic mounting slot is strategically reserved on the back of the unit—simply attach a φ10mm × 2mm magnet (ensure it’s securely bonded with adhesive) to any metal surface, such as a refrigerator, for convenient and hands-free use;
A dedicated magnetic mounting point is provided on the rear panel, allowing you to easily affix the device to metallic surfaces like refrigerators using a small, strong magnet (note: secure with adhesive for long‑term stability).
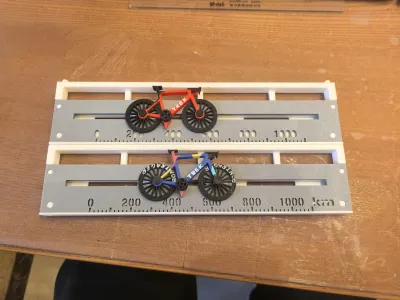
3. Thanks to its modular design, multiple components can be effortlessly combined and installed—so why not challenge your friends to see who can assemble theirs faster?
With a versatile, modular construction, you can easily mix and match components to create your own unique setup—and race your friends to see who can complete their build in record time!
Printing Notes: For the first print job—namely the base plate and frame—be sure to enable support structures; for the second print job—the scale cover plate—activate thin wall detection; the third print job has no special requirements.
For the first print run (base plate and frame), make sure to enable support structures;
For the second print job (scale cover plate), activate thin wall detection;
No special requirements for the third print job.
Assembly Notes:
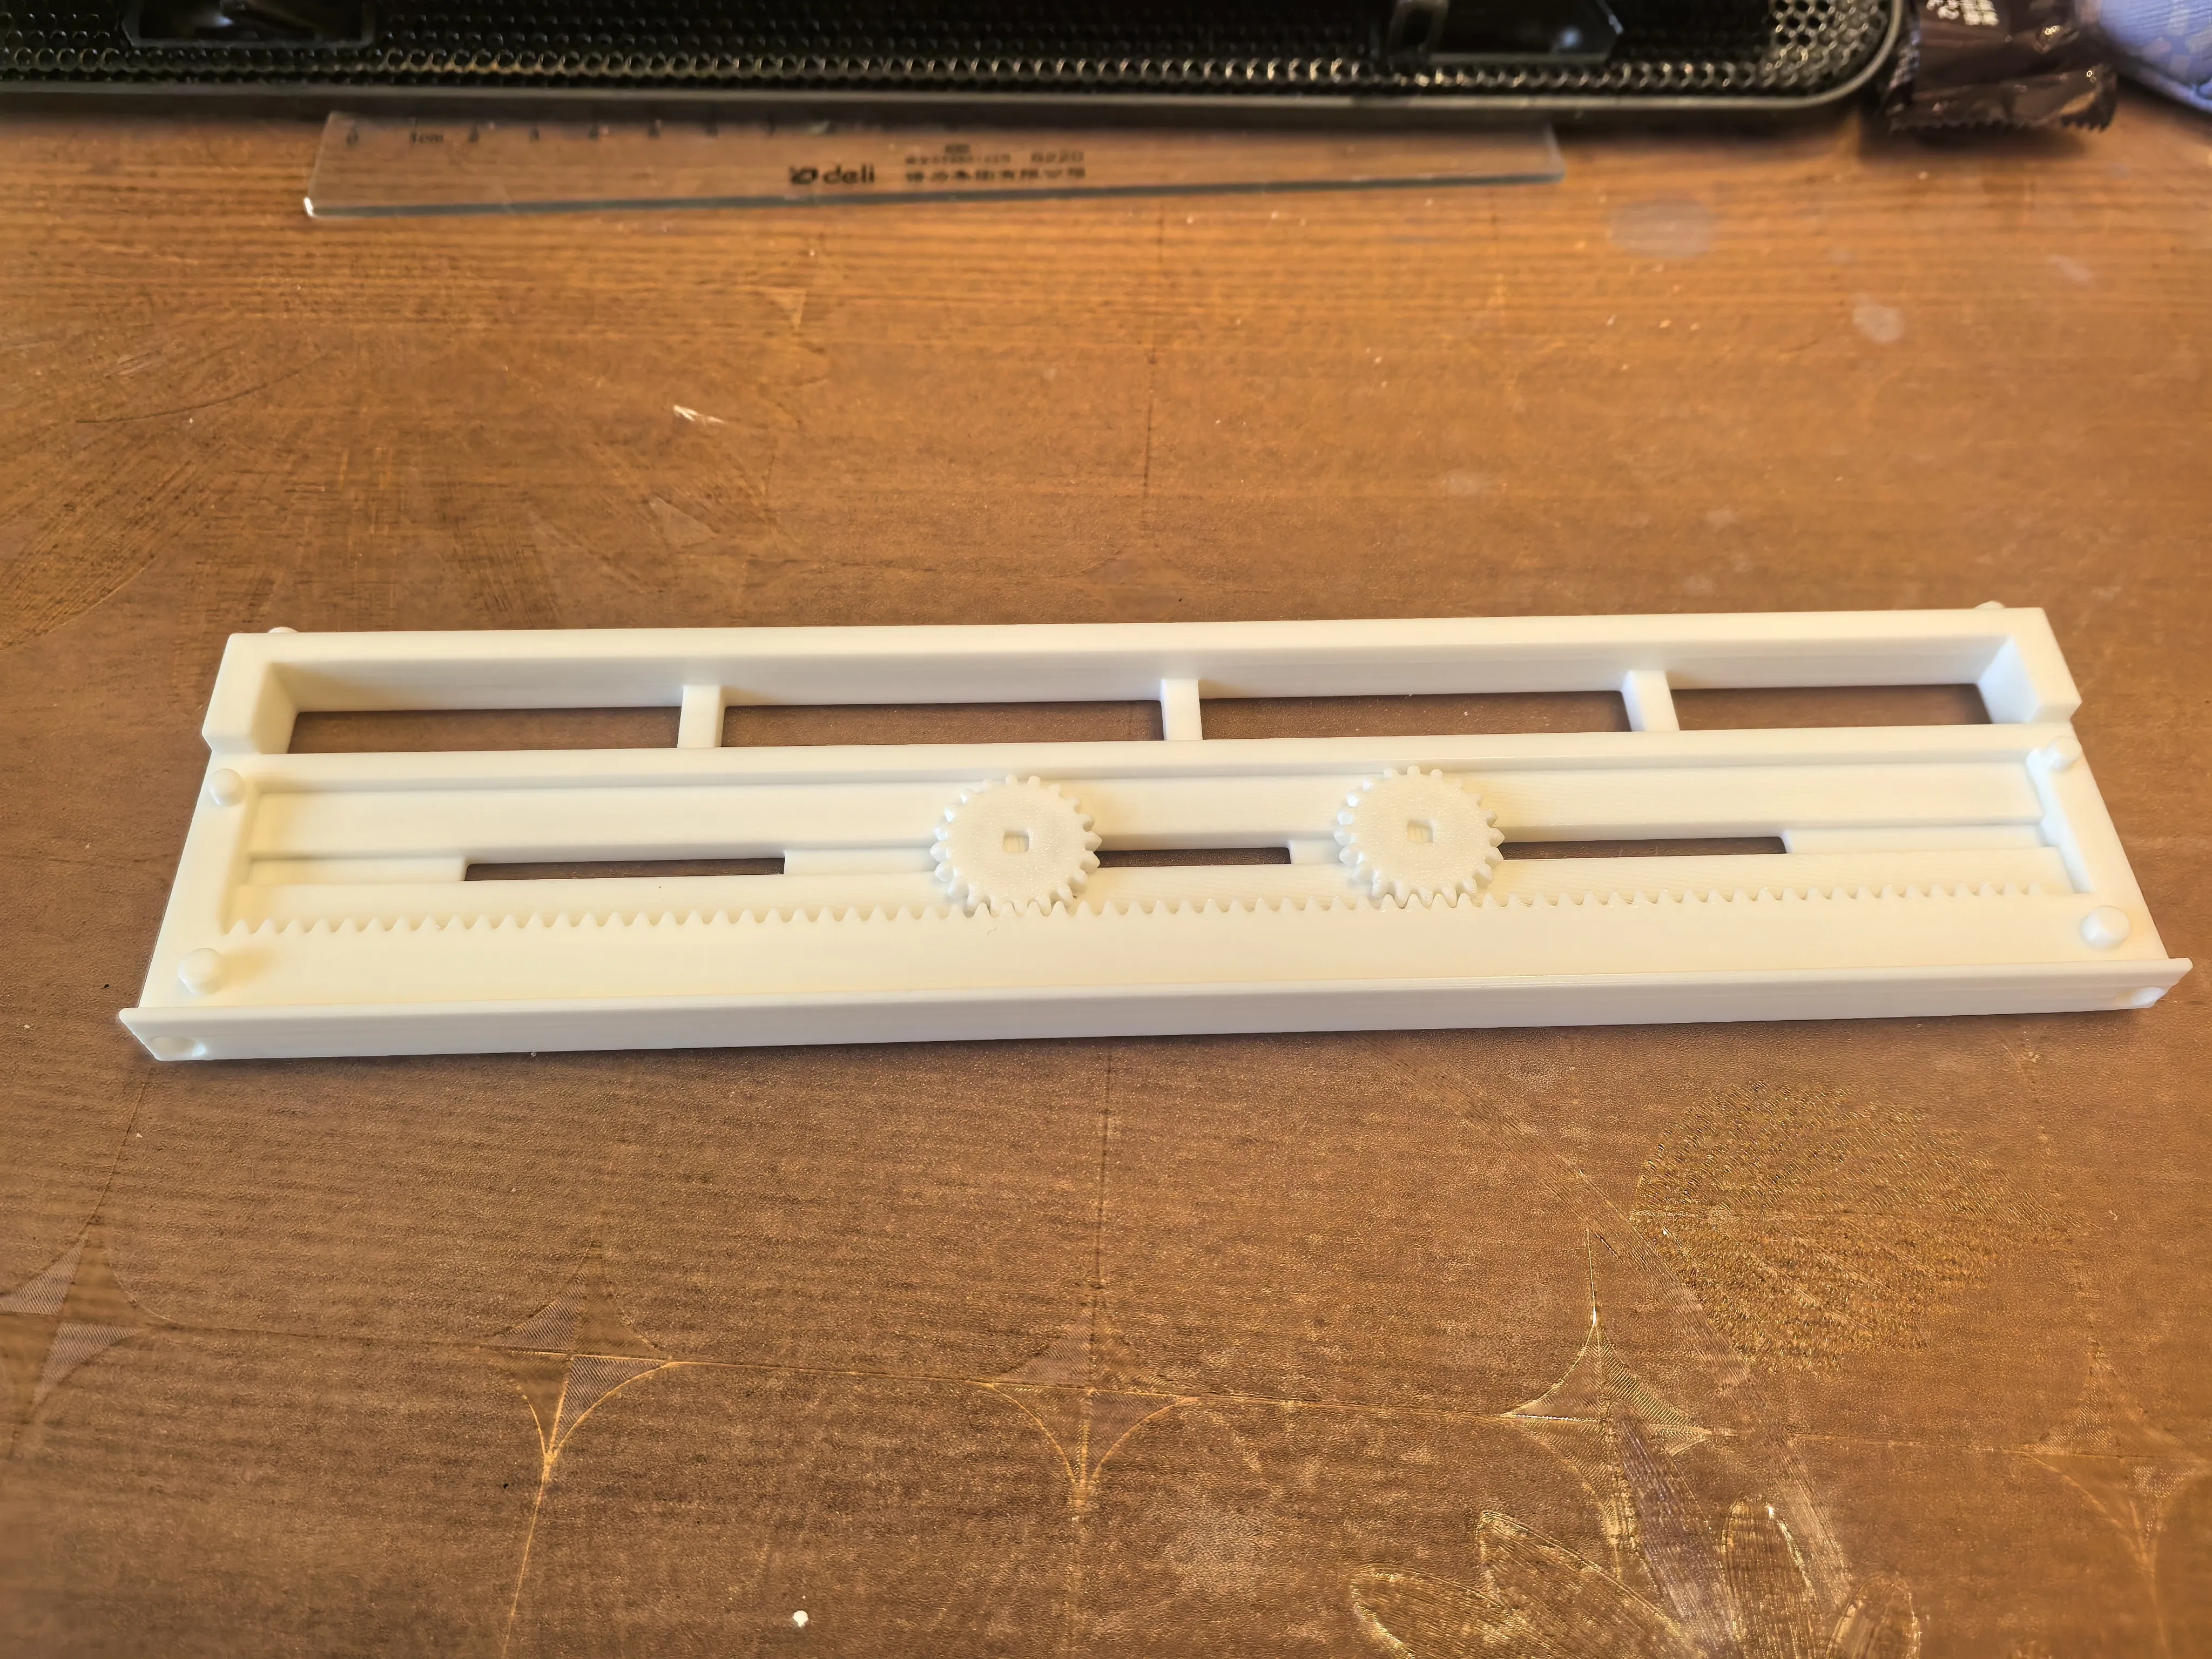
1. Begin by installing the gear onto the rack on the base plate—no need to adjust the gear spacing at this stage.
Assembly Instructions:
First, mount the gear onto the rack of the base plate; for now, there’s no need to fine‑tune the gear spacing.
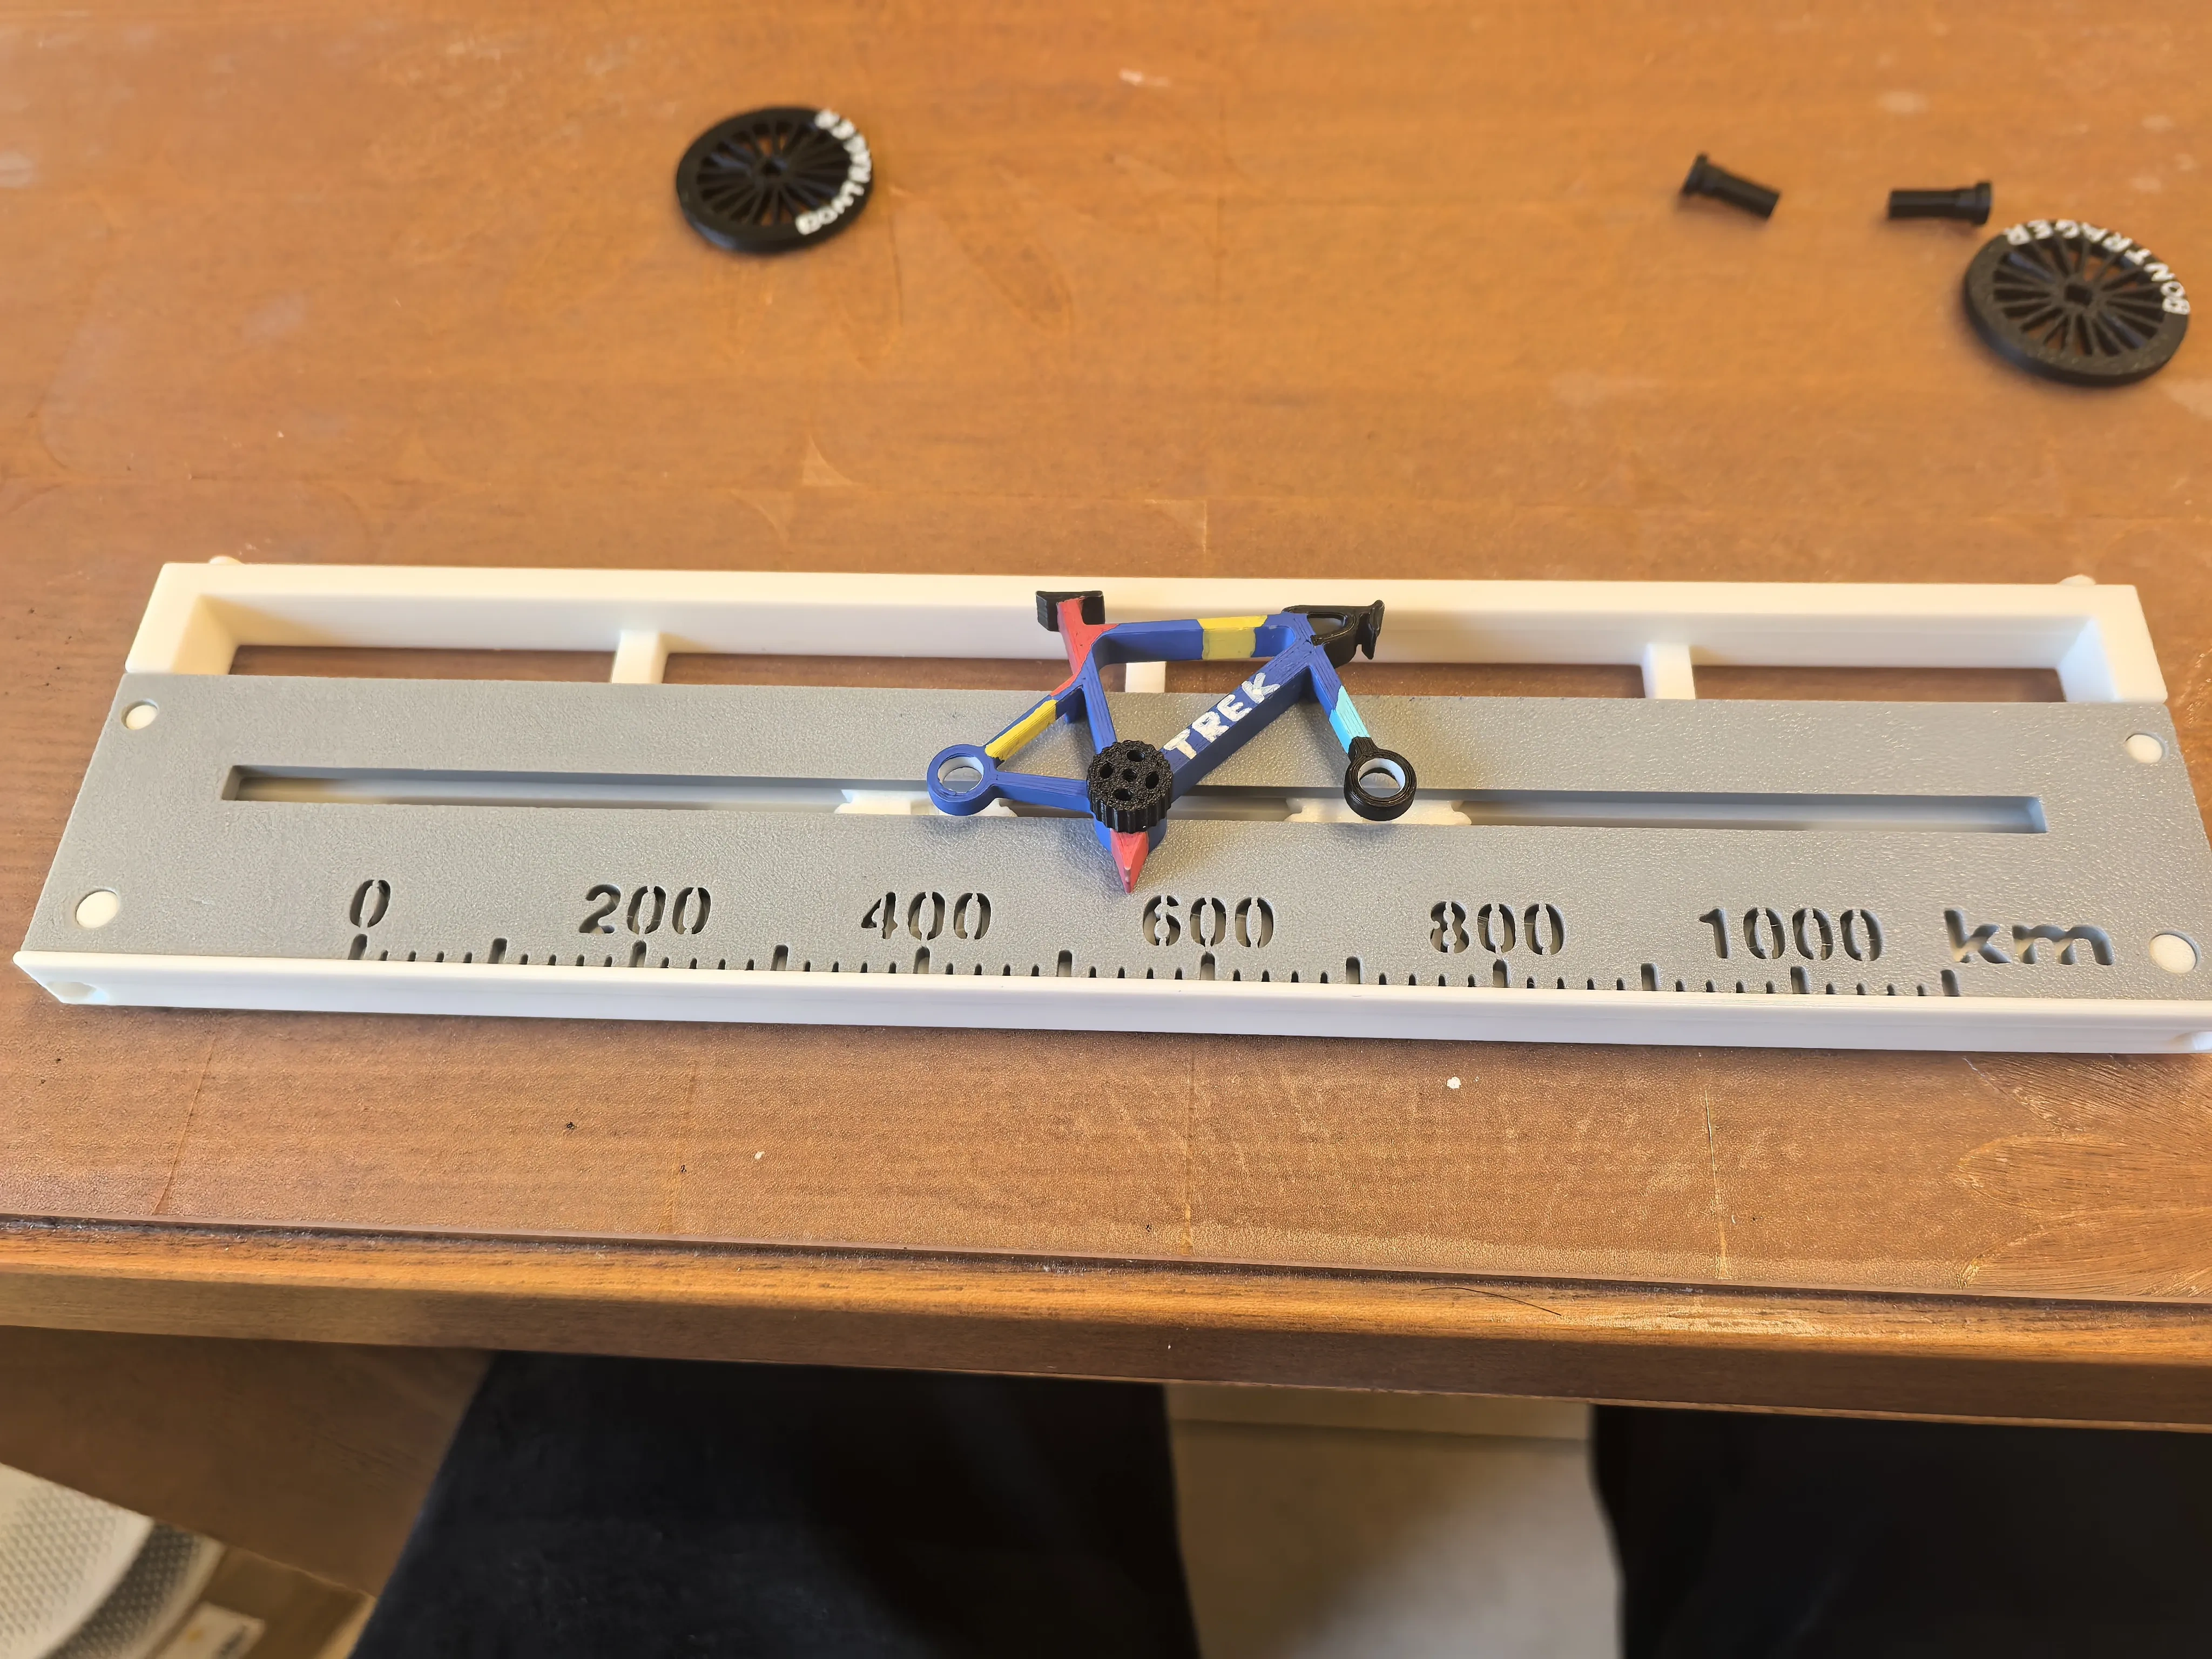
2. Next, place the scale cover plate over the assembly, then install the frame (pre‑insert the crankset into the frame’s designated hole). Finally, snap the rear portion of the frame into the groove that runs between the scale cover plate and the base plate.
Second, position the scale cover plate in place, then install the frame (insert the crankset into the frame’s pre‑drilled hole ahead of time); once in place, lock the rear section of the frame into the groove that connects the scale cover plate and the base plate.
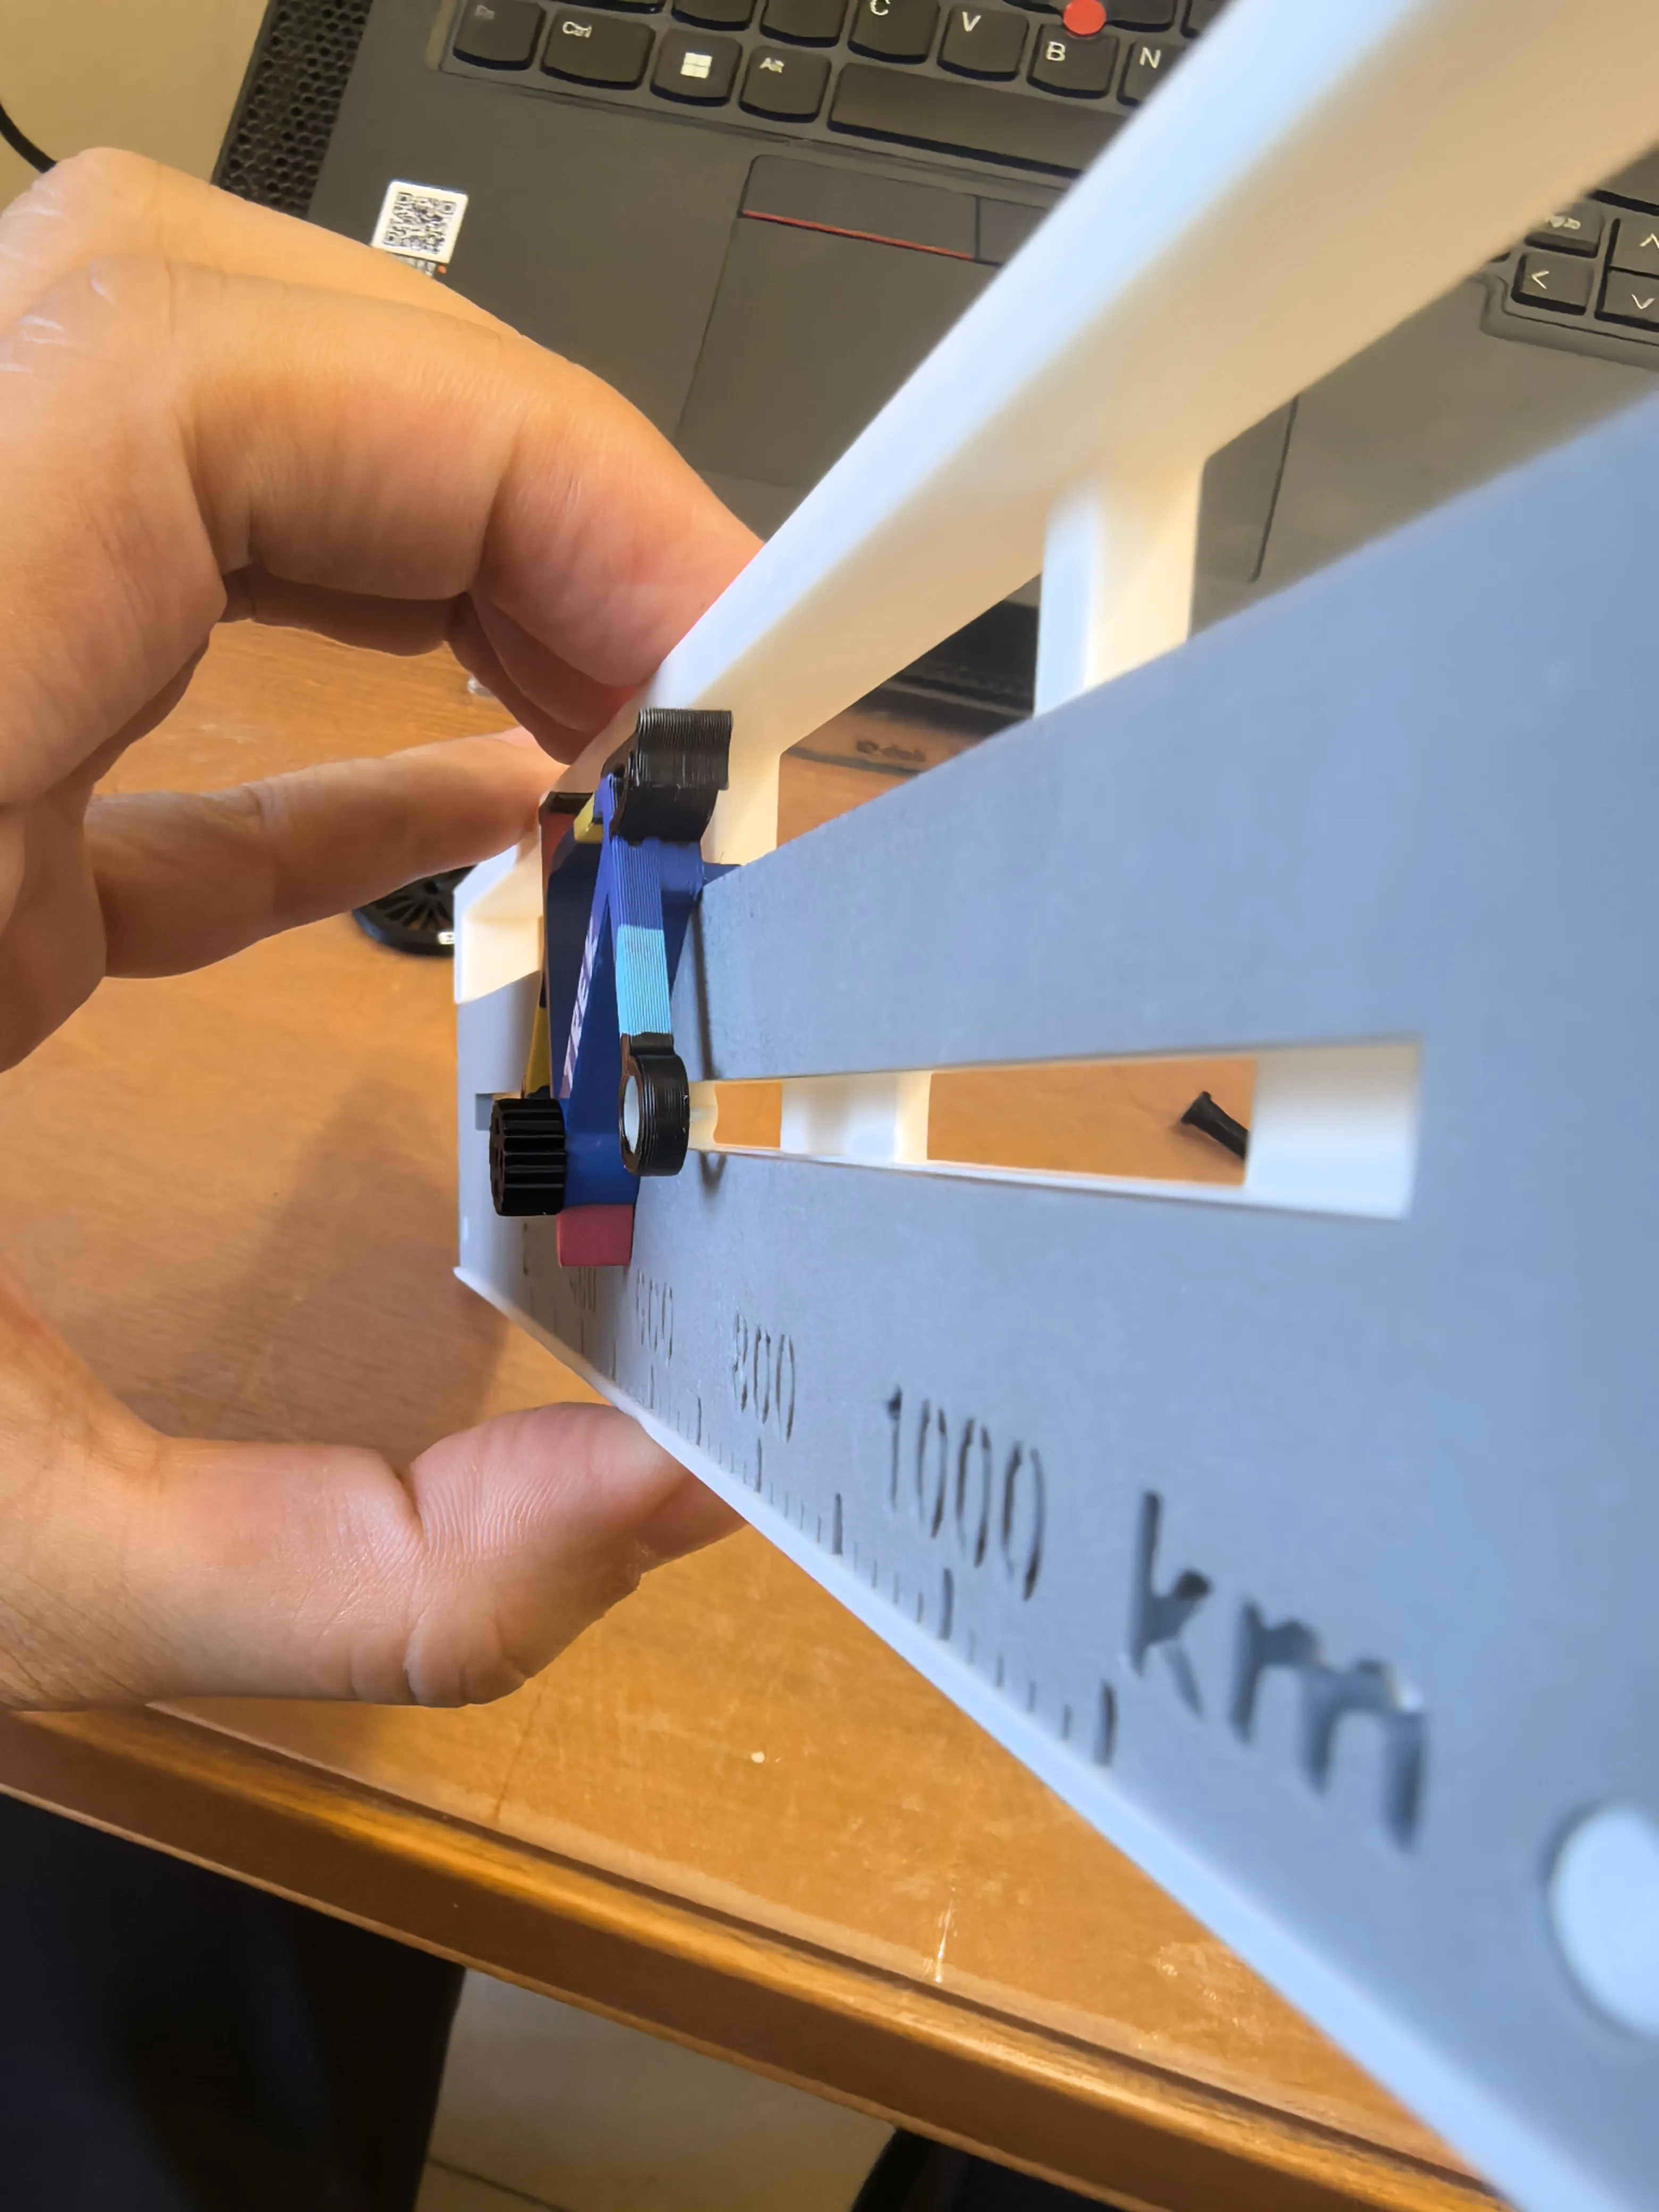
3. Insert the front and rear wheel assemblies between the frame and the cover plate, then carefully adjust the overall alignment. Pass the front and rear wheel axles down through the frame, wheel assemblies, and gears from above—taking care to align one side’s gear with the frame before proceeding to the other side. The wheel axles and gears are designed with an interference fit; after ensuring proper alignment, give each joint a gentle tap to secure them in place. Once assembled, grasp the crankset and gently rock the vehicle back and forth several times—allowing friction between components to smooth out movement and enhance the overall riding experience.
Third, insert the front and rear wheel assemblies between the frame and the cover plate, then carefully adjust the overall alignment. Pass the front and rear wheel axles down through the frame, wheel assemblies, and gears from above—first align the gear on one side with the frame, then move on to the other side. The wheel axles and gears are designed with an interference fit; after confirming precise alignment, gently tap each joint to ensure a snug, secure connection. Once fully assembled, grip the crankset and give the entire vehicle a few gentle back-and-forth motions—letting friction between components work its magic to smooth out movement and deliver a more fluid, enjoyable ride.

Bill of materials
- NameQuantityNotes
- 1磁铁φ10mm*2mm2
Originality of the Model
The author declares that this work is their personally original model
This model is licensed under the following terms:
This work is licensed under a Standard Digital File License. Digital files have a strict non-commercial, personal use only license.
You shall not share, sub-license, sell, rent, host, transfer, or distribute in any way the digital file or 3D printed versions of this object, nor any other derivative work of this object in its digital or physical format (including remixes of this object). You can not host these files on other digital platforms, web stores or cloud repositories. The objects may not be used in any way whatsoever in which you charge money, collect fees.
Models(1)
- 骑行打卡齿轮联动.3mfDesigner

18.23 MB

2026-02-24