




27 watts
Huawei
Wireless Charging

- 0.2 mm layer height, 2‑wall walls, 15% infill density

1-disc
PETG
Designer

25

0
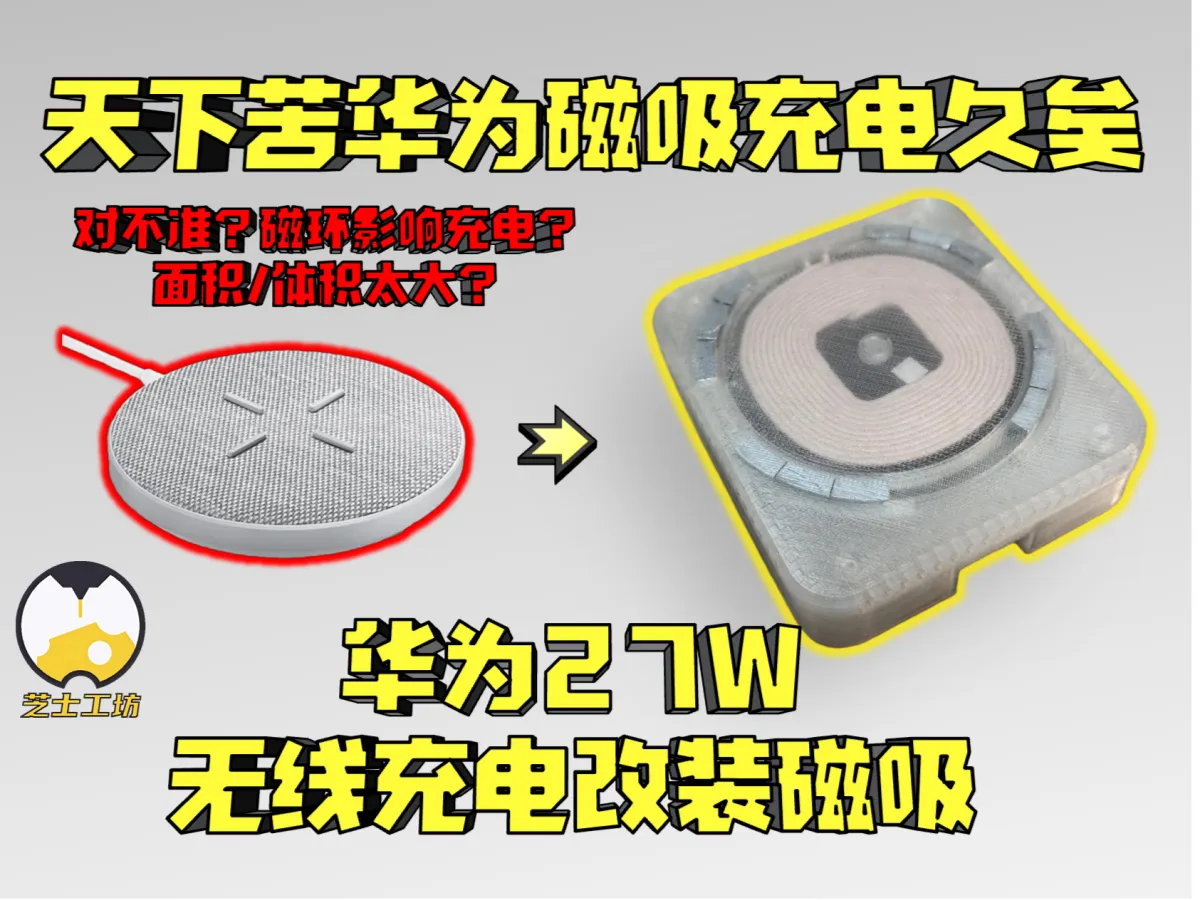
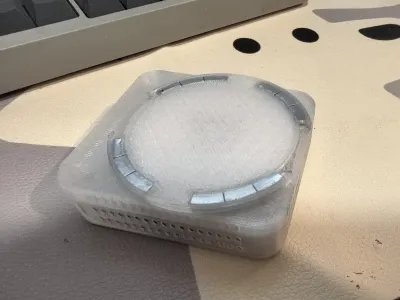
The world has been longing for a magnetic wireless charging solution from Huawei for ages!!! Are you worried about misalignment leading to failed charging? Do you find that Apple’s MagSafe ring design either prevents proper charging or reduces charging efficiency? Or perhaps you’re frustrated by the bulky 27W charger—too large in size and inconvenient to carry around?
All of these issues are now resolved!!!!!!
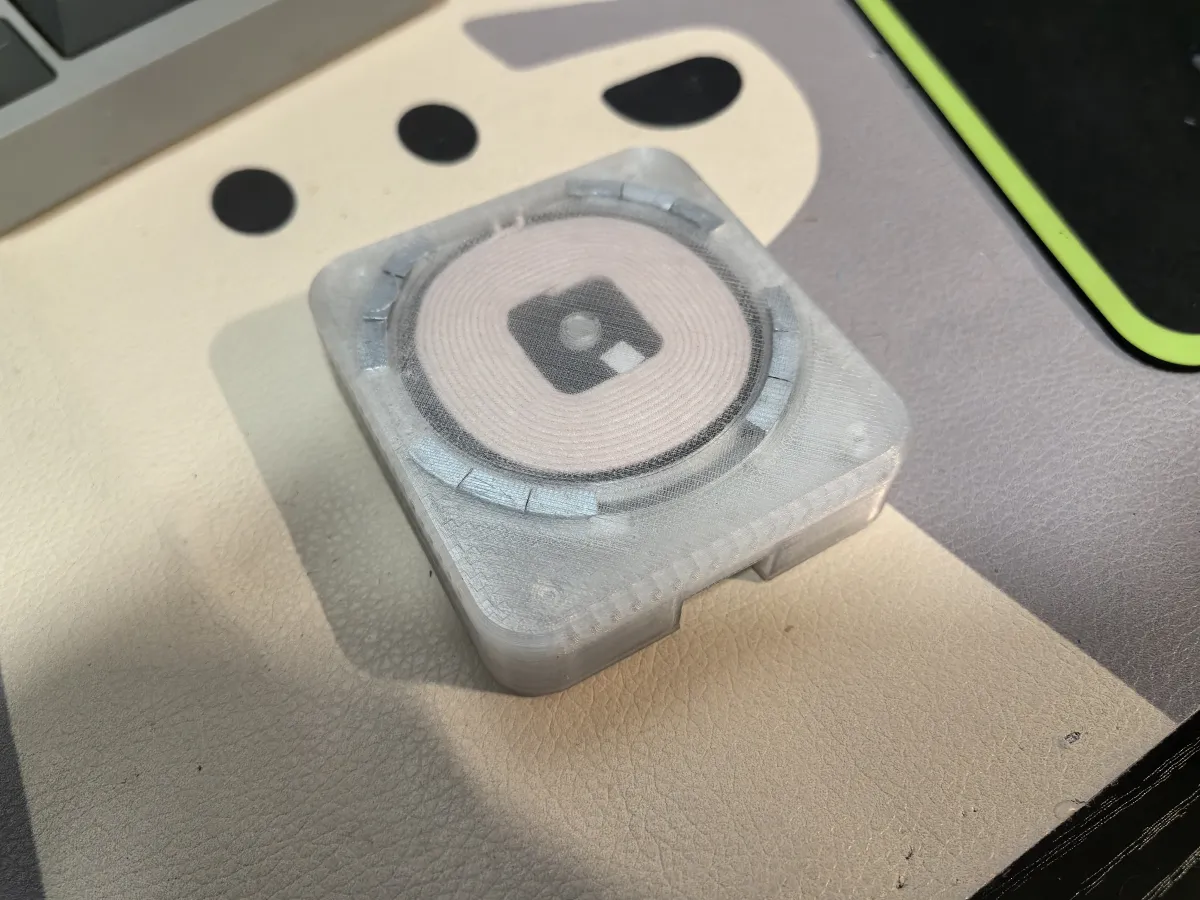
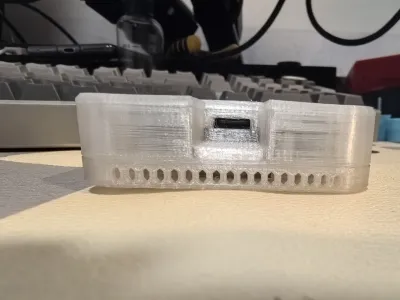
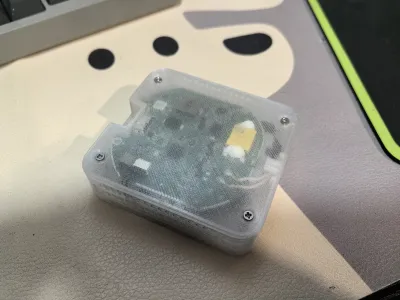
This modified 27W wireless charger for Huawei uses only original components—except for the magnets and screws—which have been carefully reconfigured.
If you’ve developed any improvements, feel free to share them directly in my print configuration files, or simply credit the source: Cheese Workshop.

Additional Components Required for Each Modification:
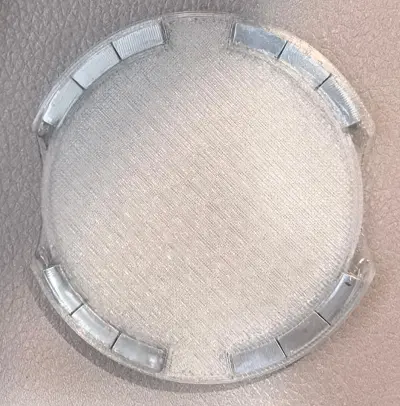
Parts: 4 x M2*10 flat-head screws; 1.6mm thick O17 Apple MagSafe magnets (24 total—12 for the main unit and 12 for the magnetic ring); 4 x 1.5/2mm round N52 magnets; nano adhesive—available in thicknesses ranging from 0.5mm to 1mm; UV curing glue (plus a UV curing lamp); and 5cm diameter double-sided adhesive tape for attaching the magnetic pads to the back of your phone.
Tools: A Phillips screwdriver (essential); wire cutters (for disassembling the 27W wireless charger); and metal shears (to reduce the size of the original components).
For a detailed disassembly video of the 27W wireless charger, please search online yourself—though we recommend purchasing wire cutters, as disassembly can be quite labor‑intensive.
Installation Sequence:
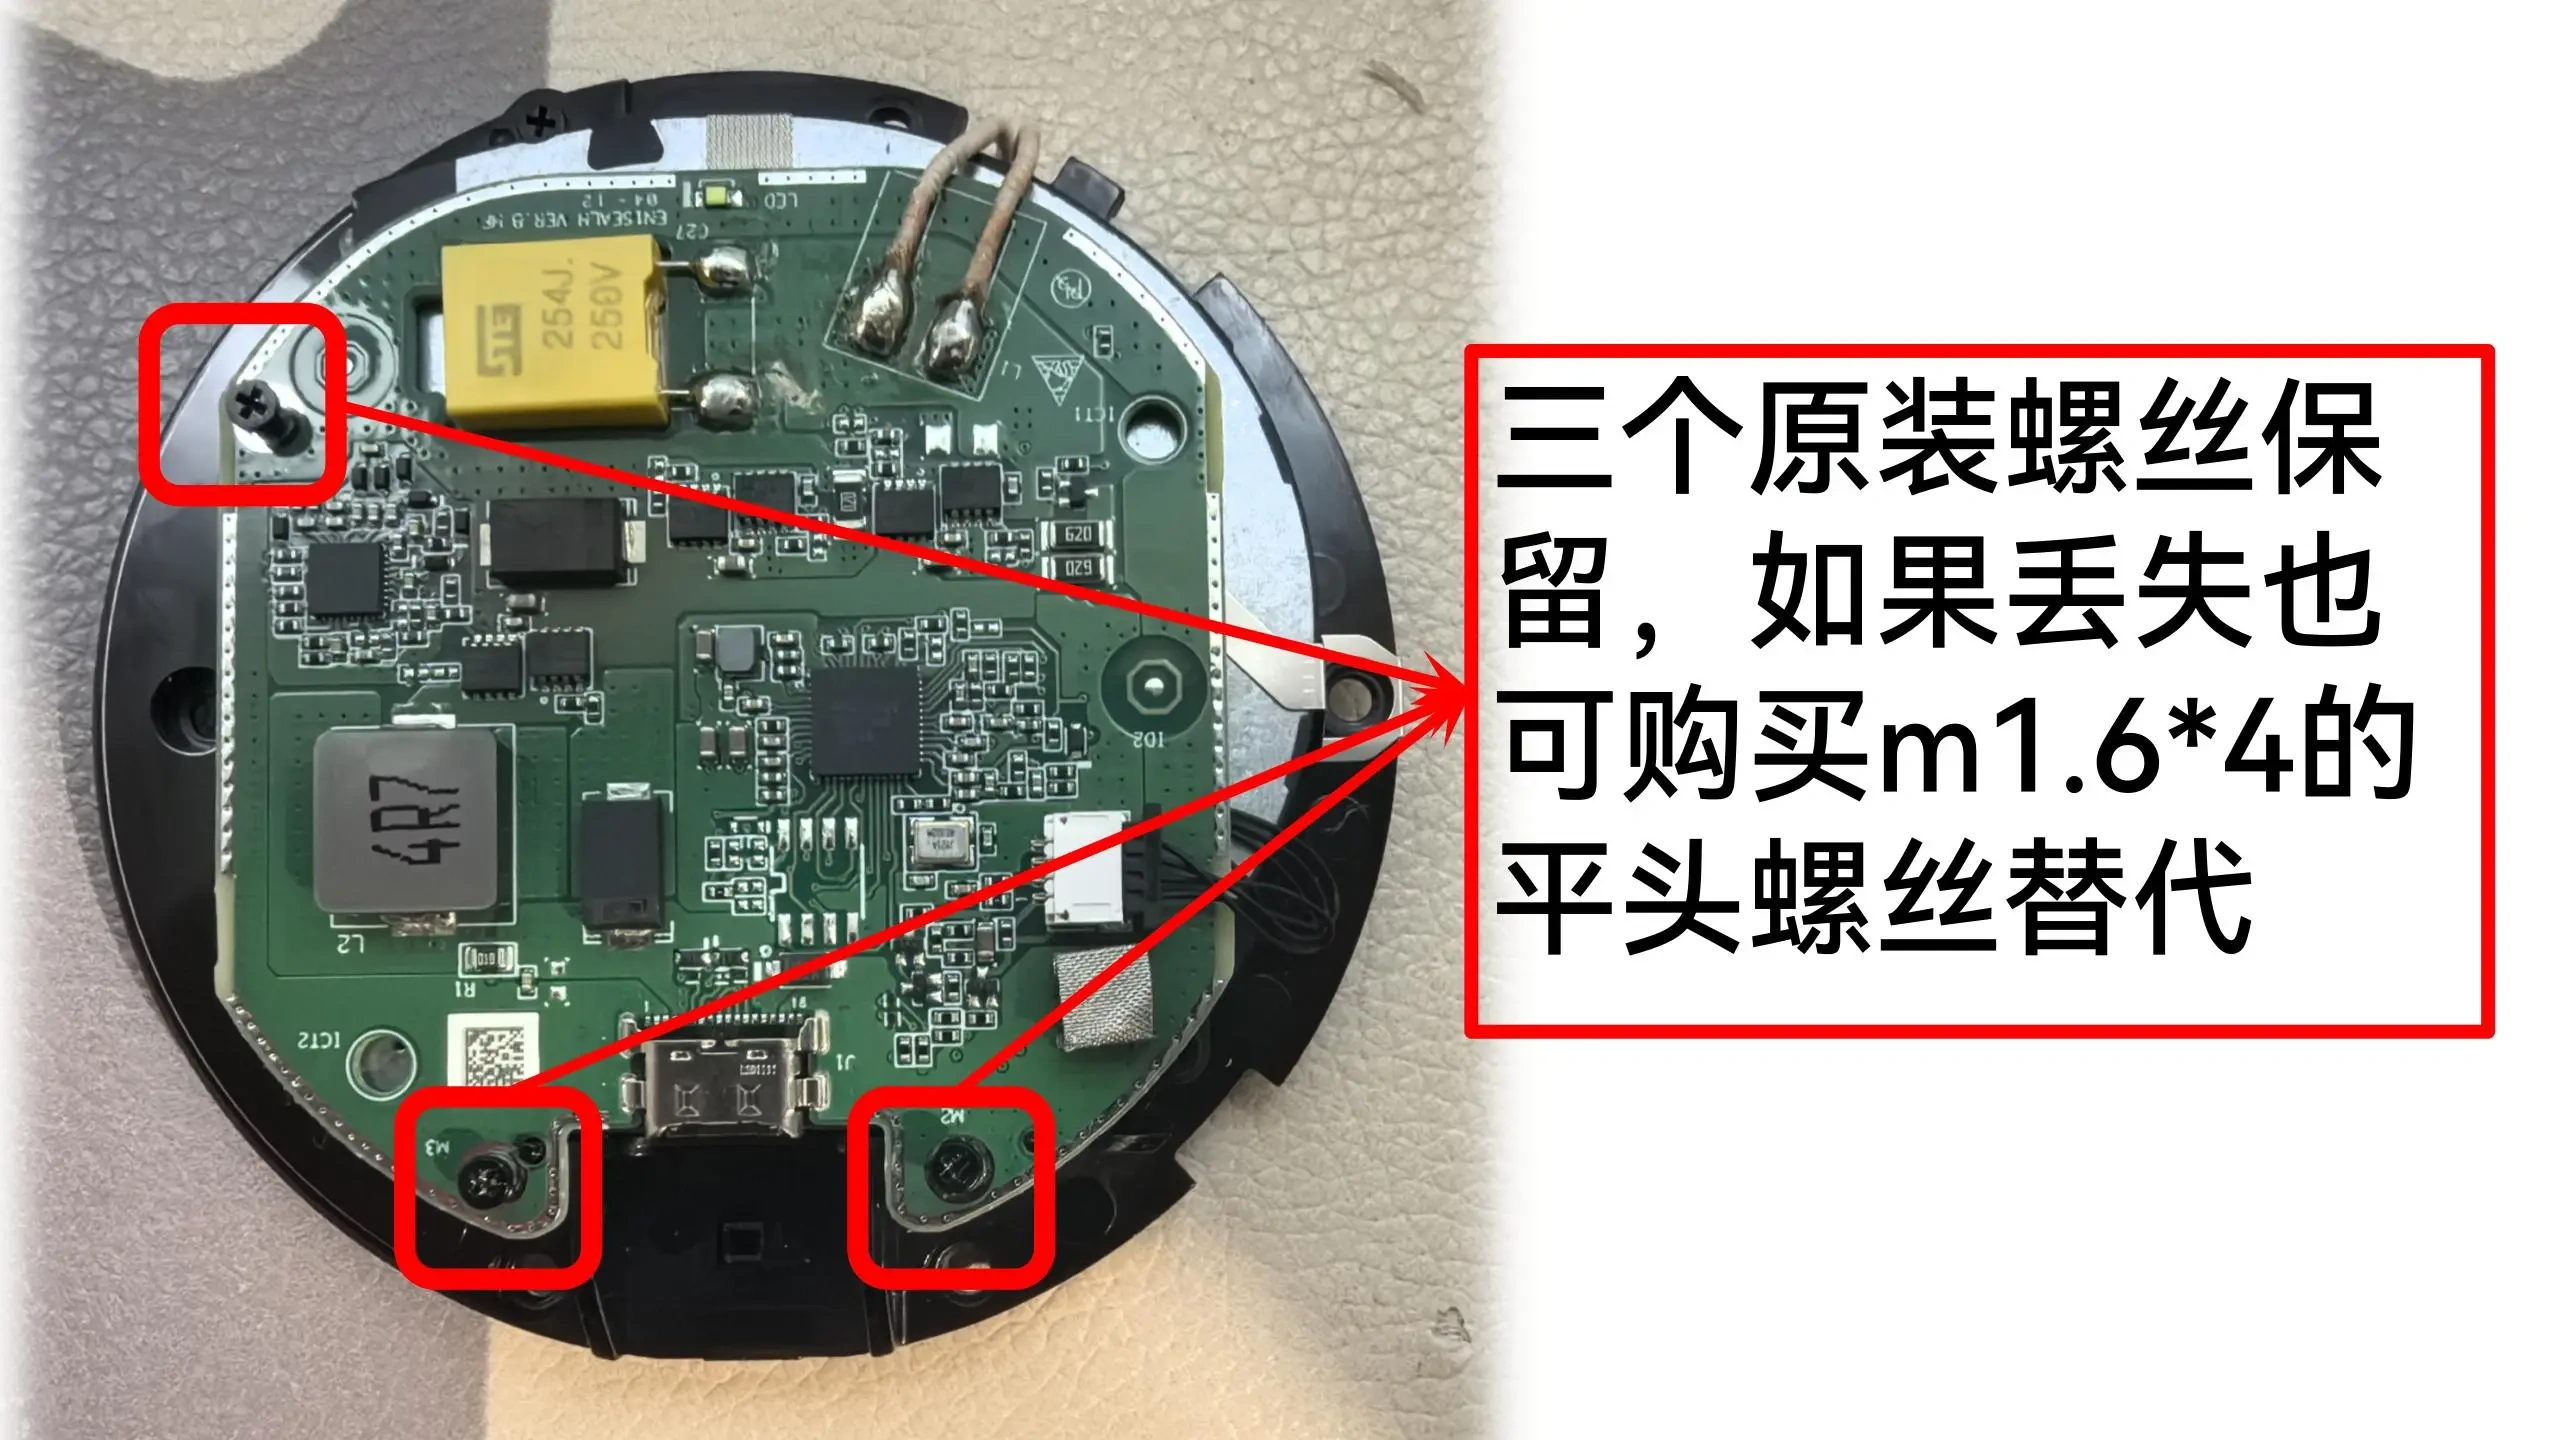
1. Retain the three original screws—if they’re lost, you can substitute with M1.6*4 flat-head screws instead.
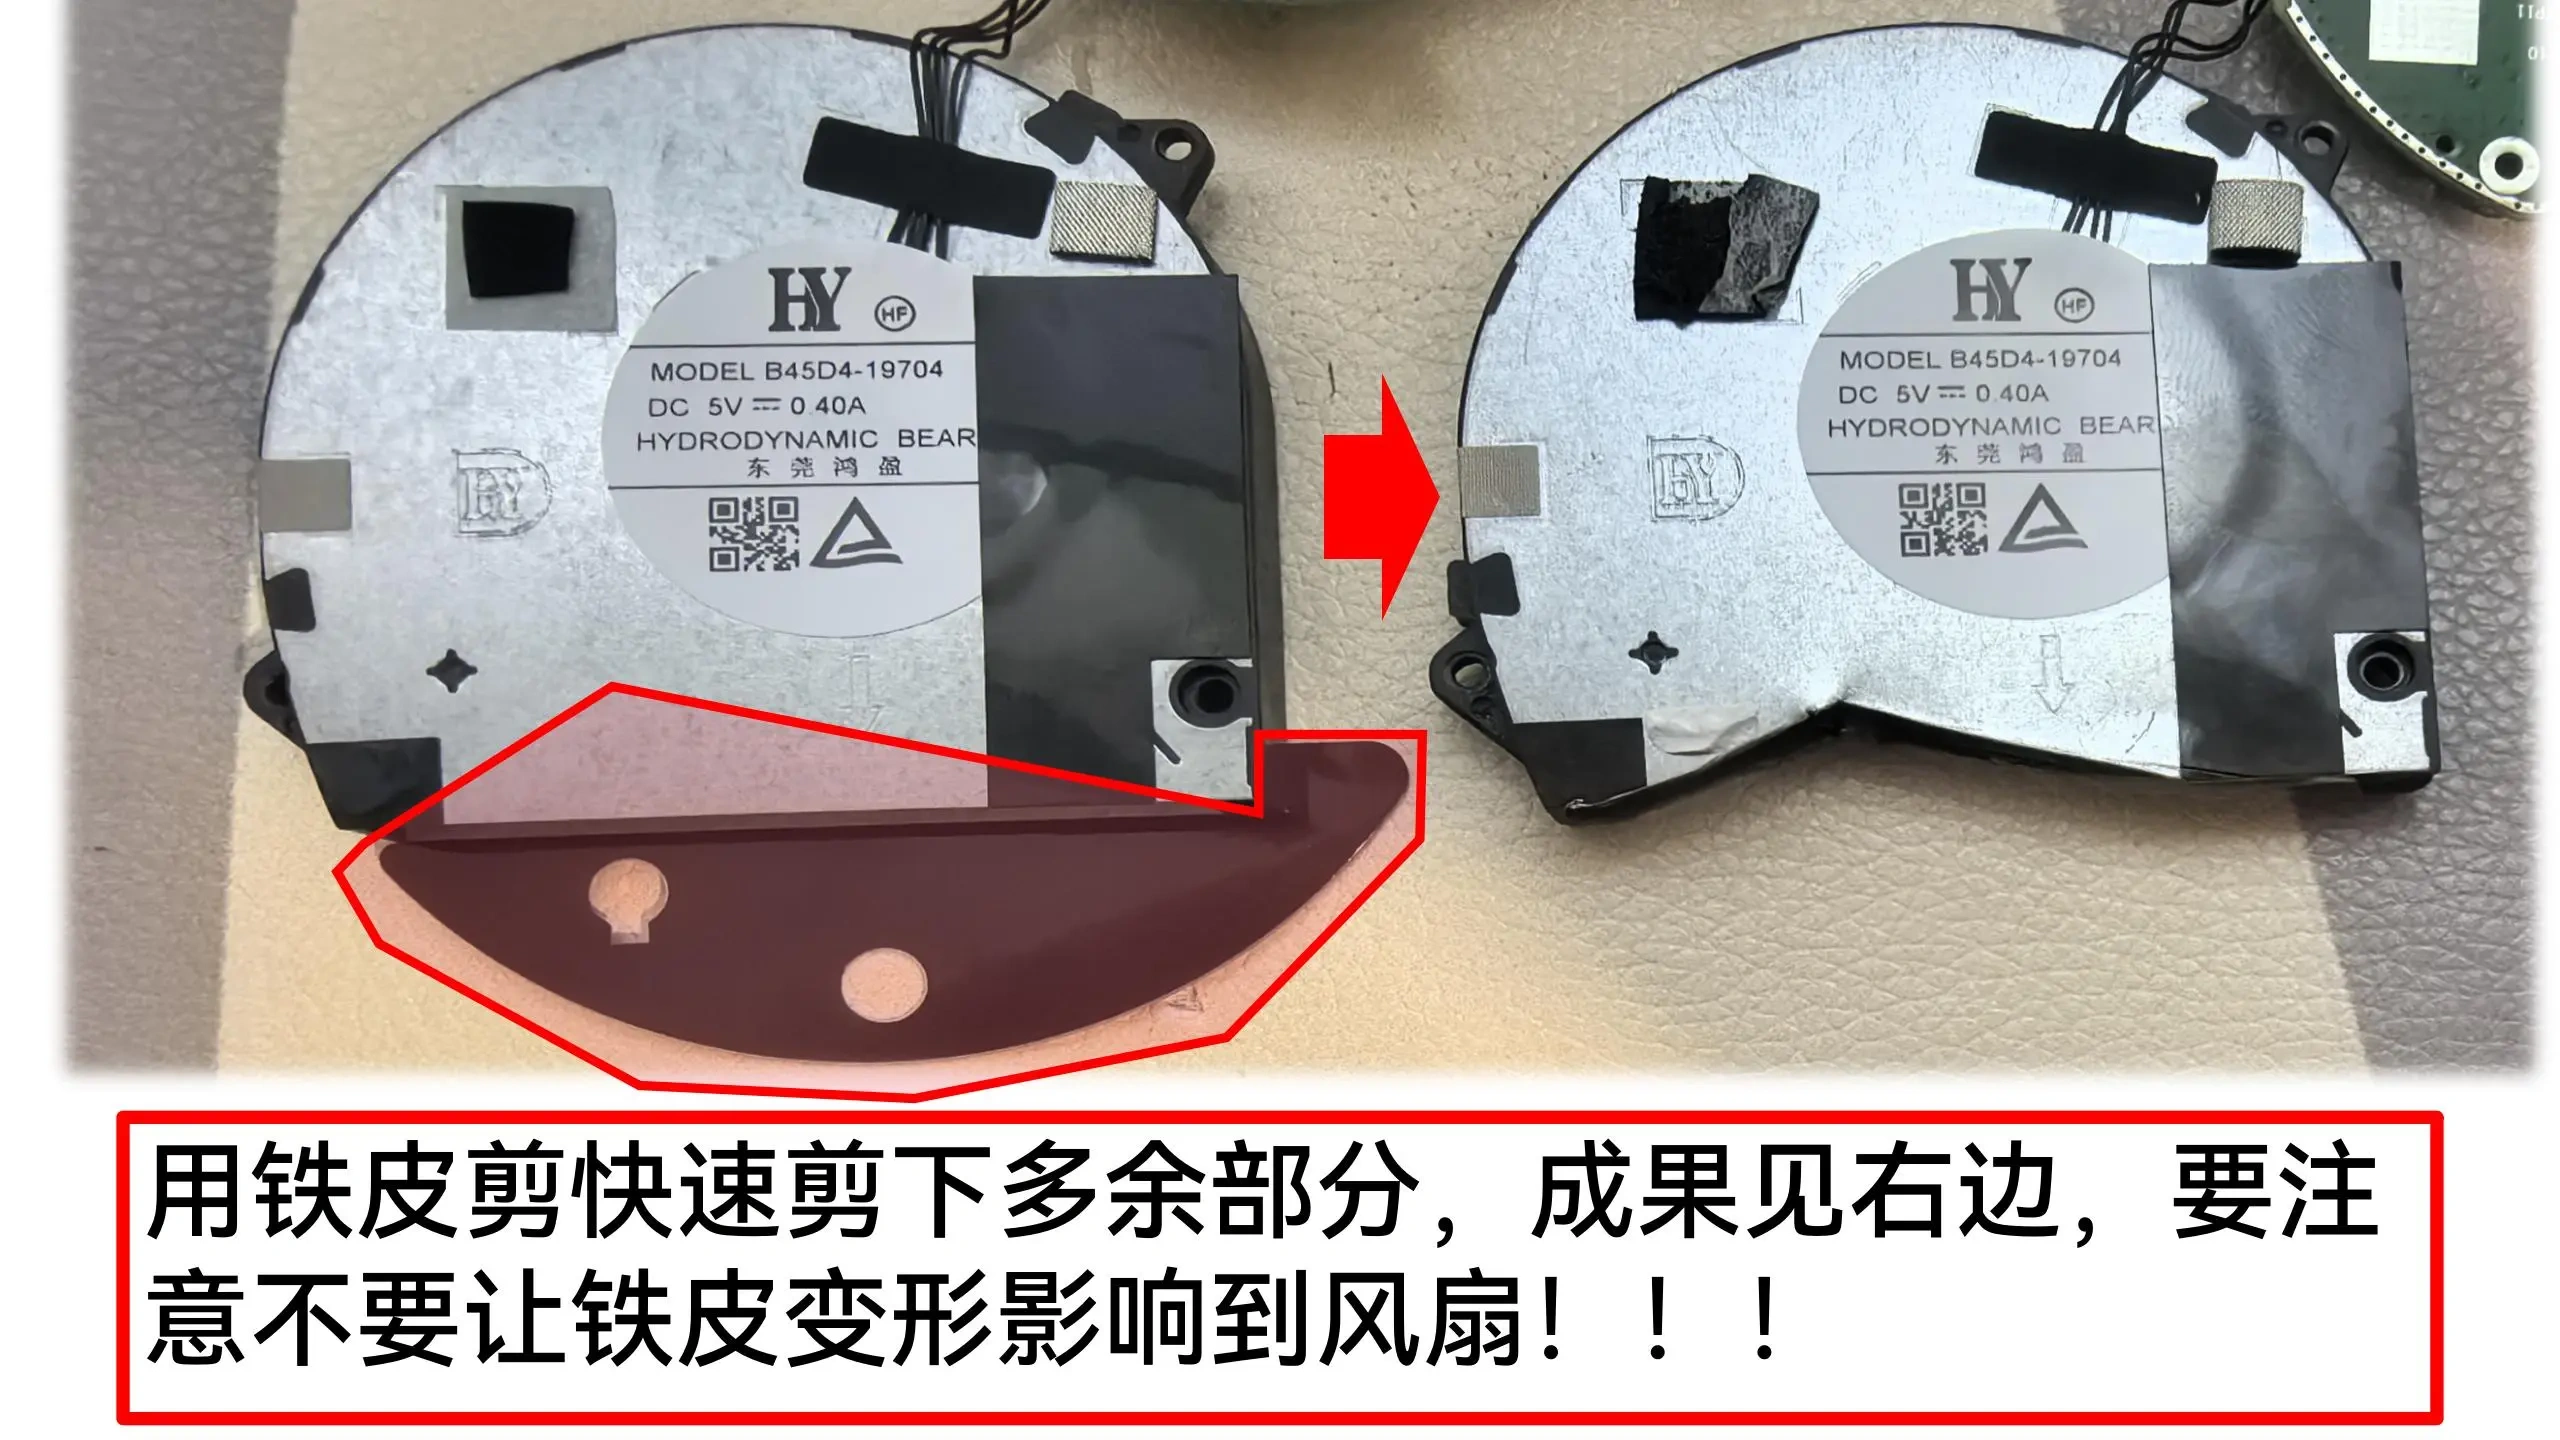
2. Use metal shears to quickly trim away any excess material—the result is shown on the right—but be careful not to deform the metal sheet, which could interfere with the fan’s operation!!!
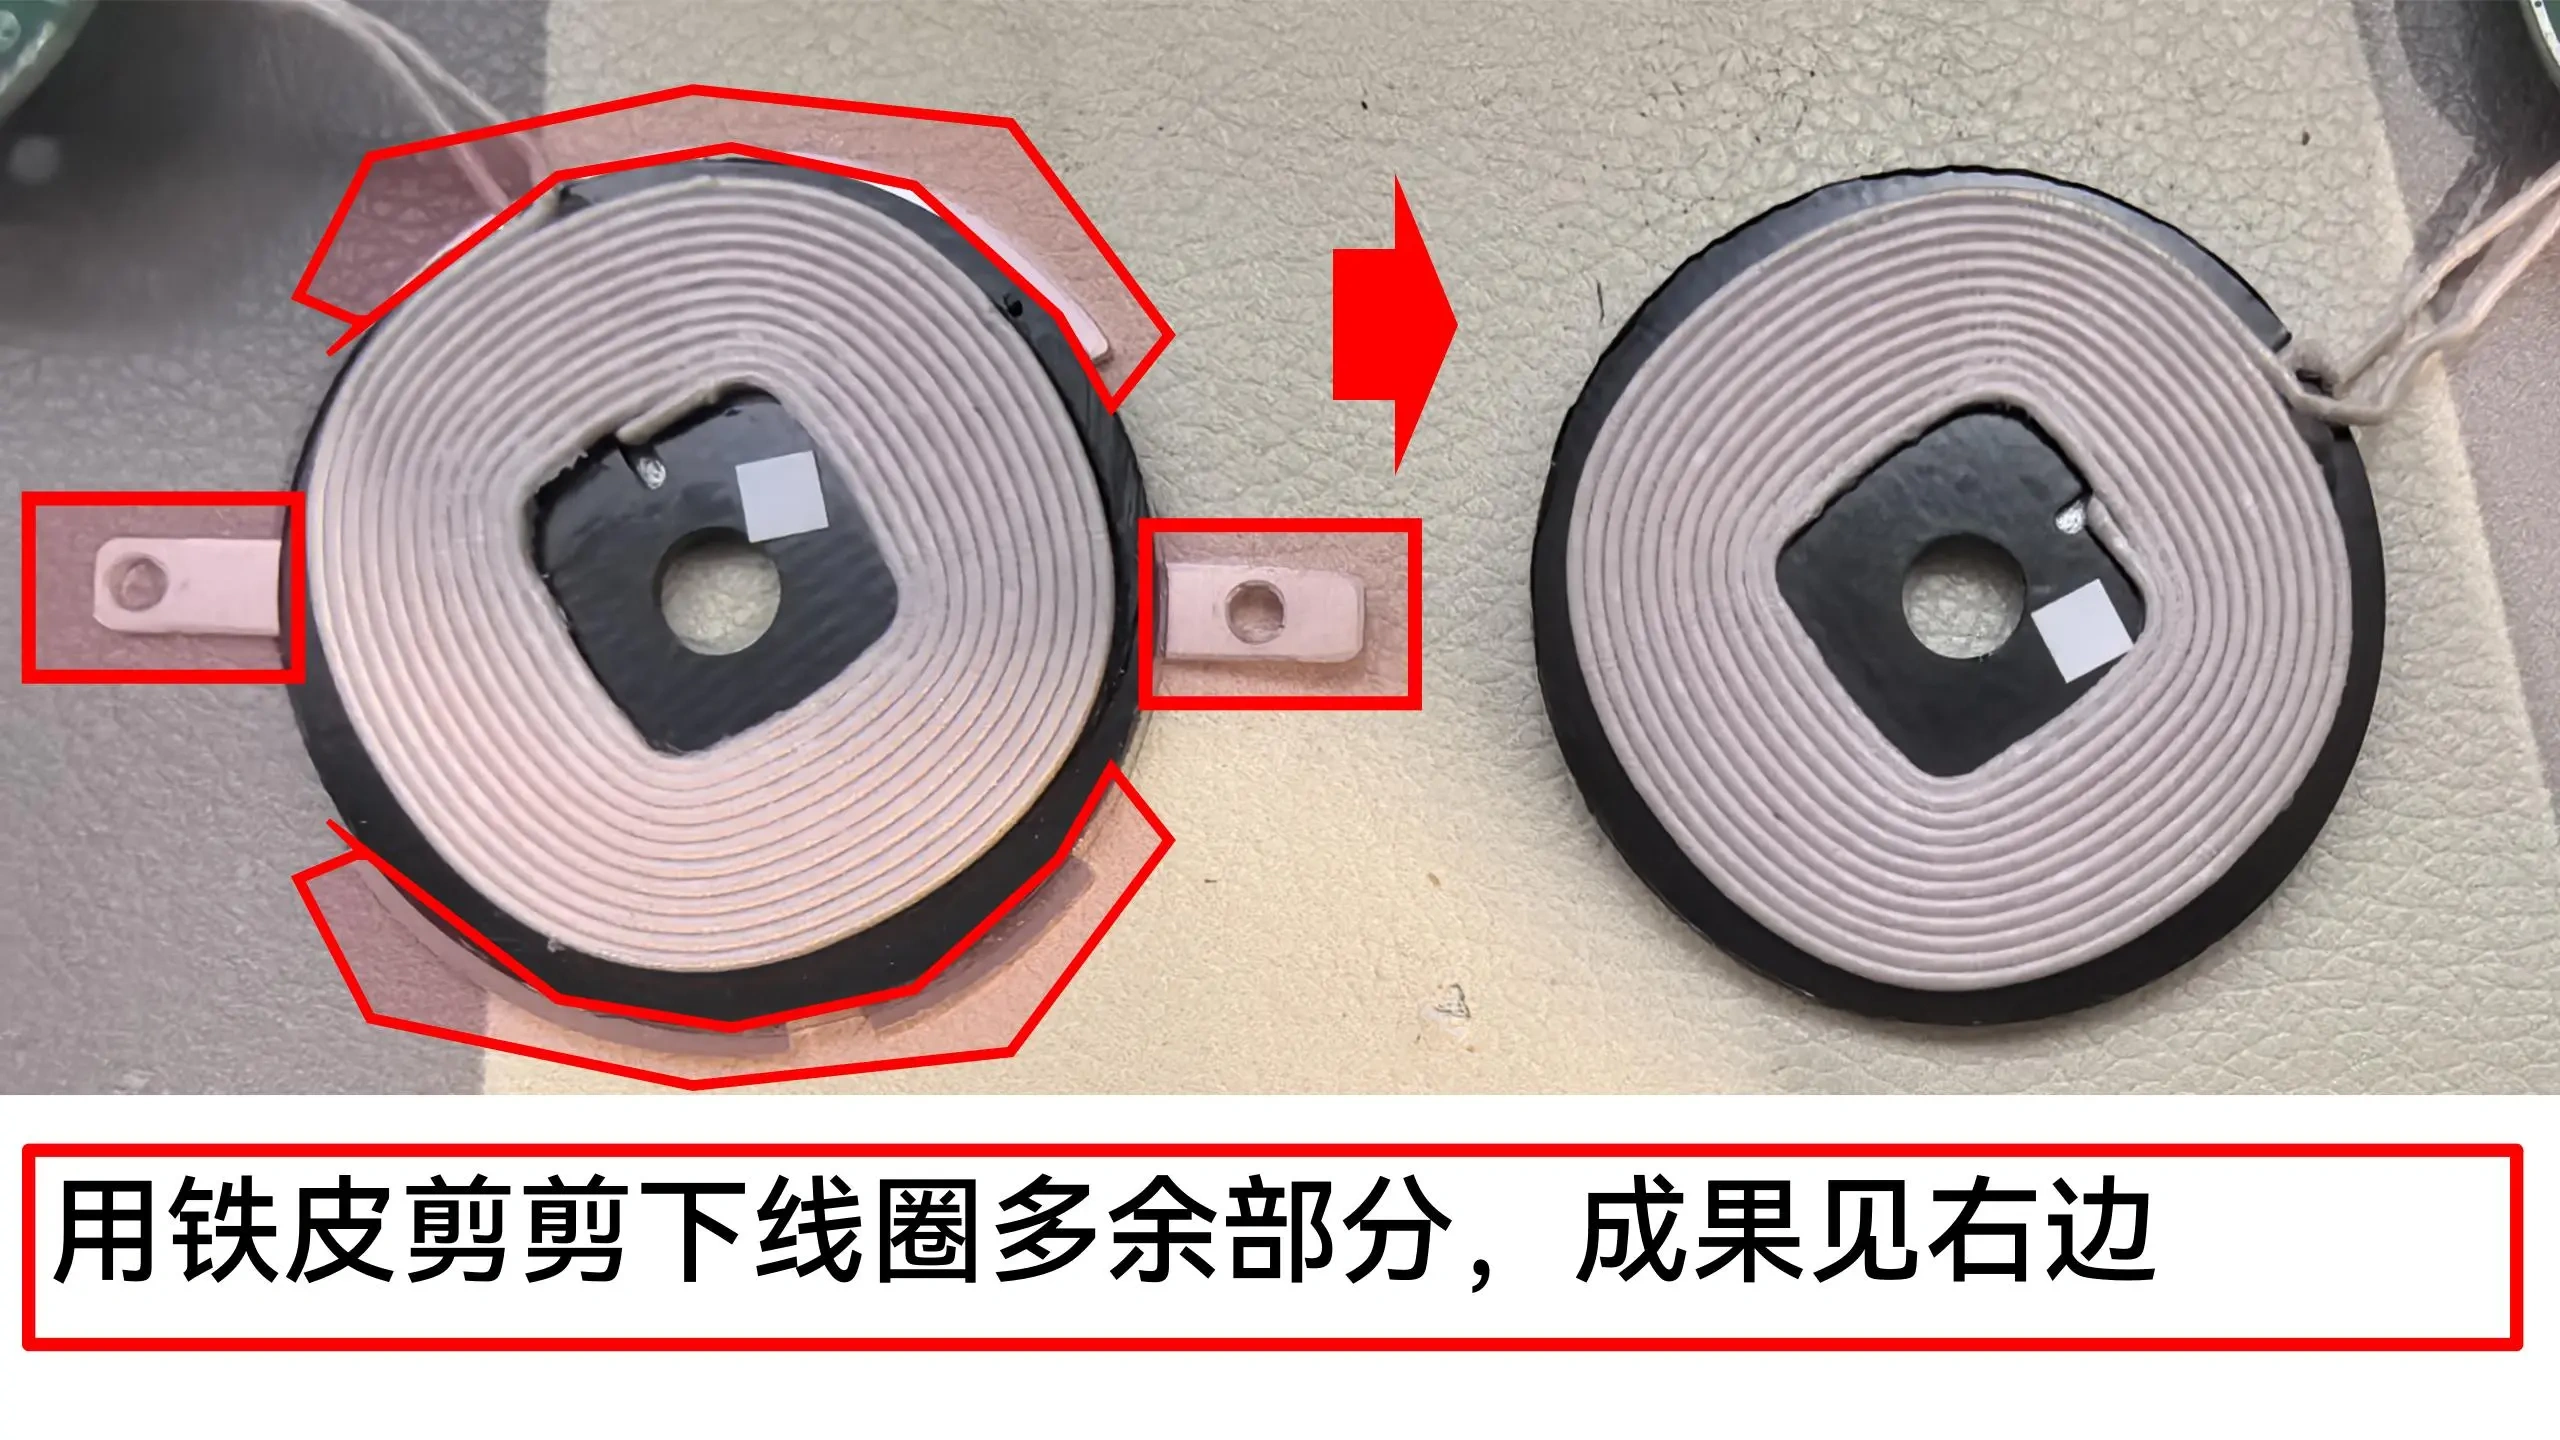
3. Trim the excess coil material using metal shears—the finished result is shown on the right.
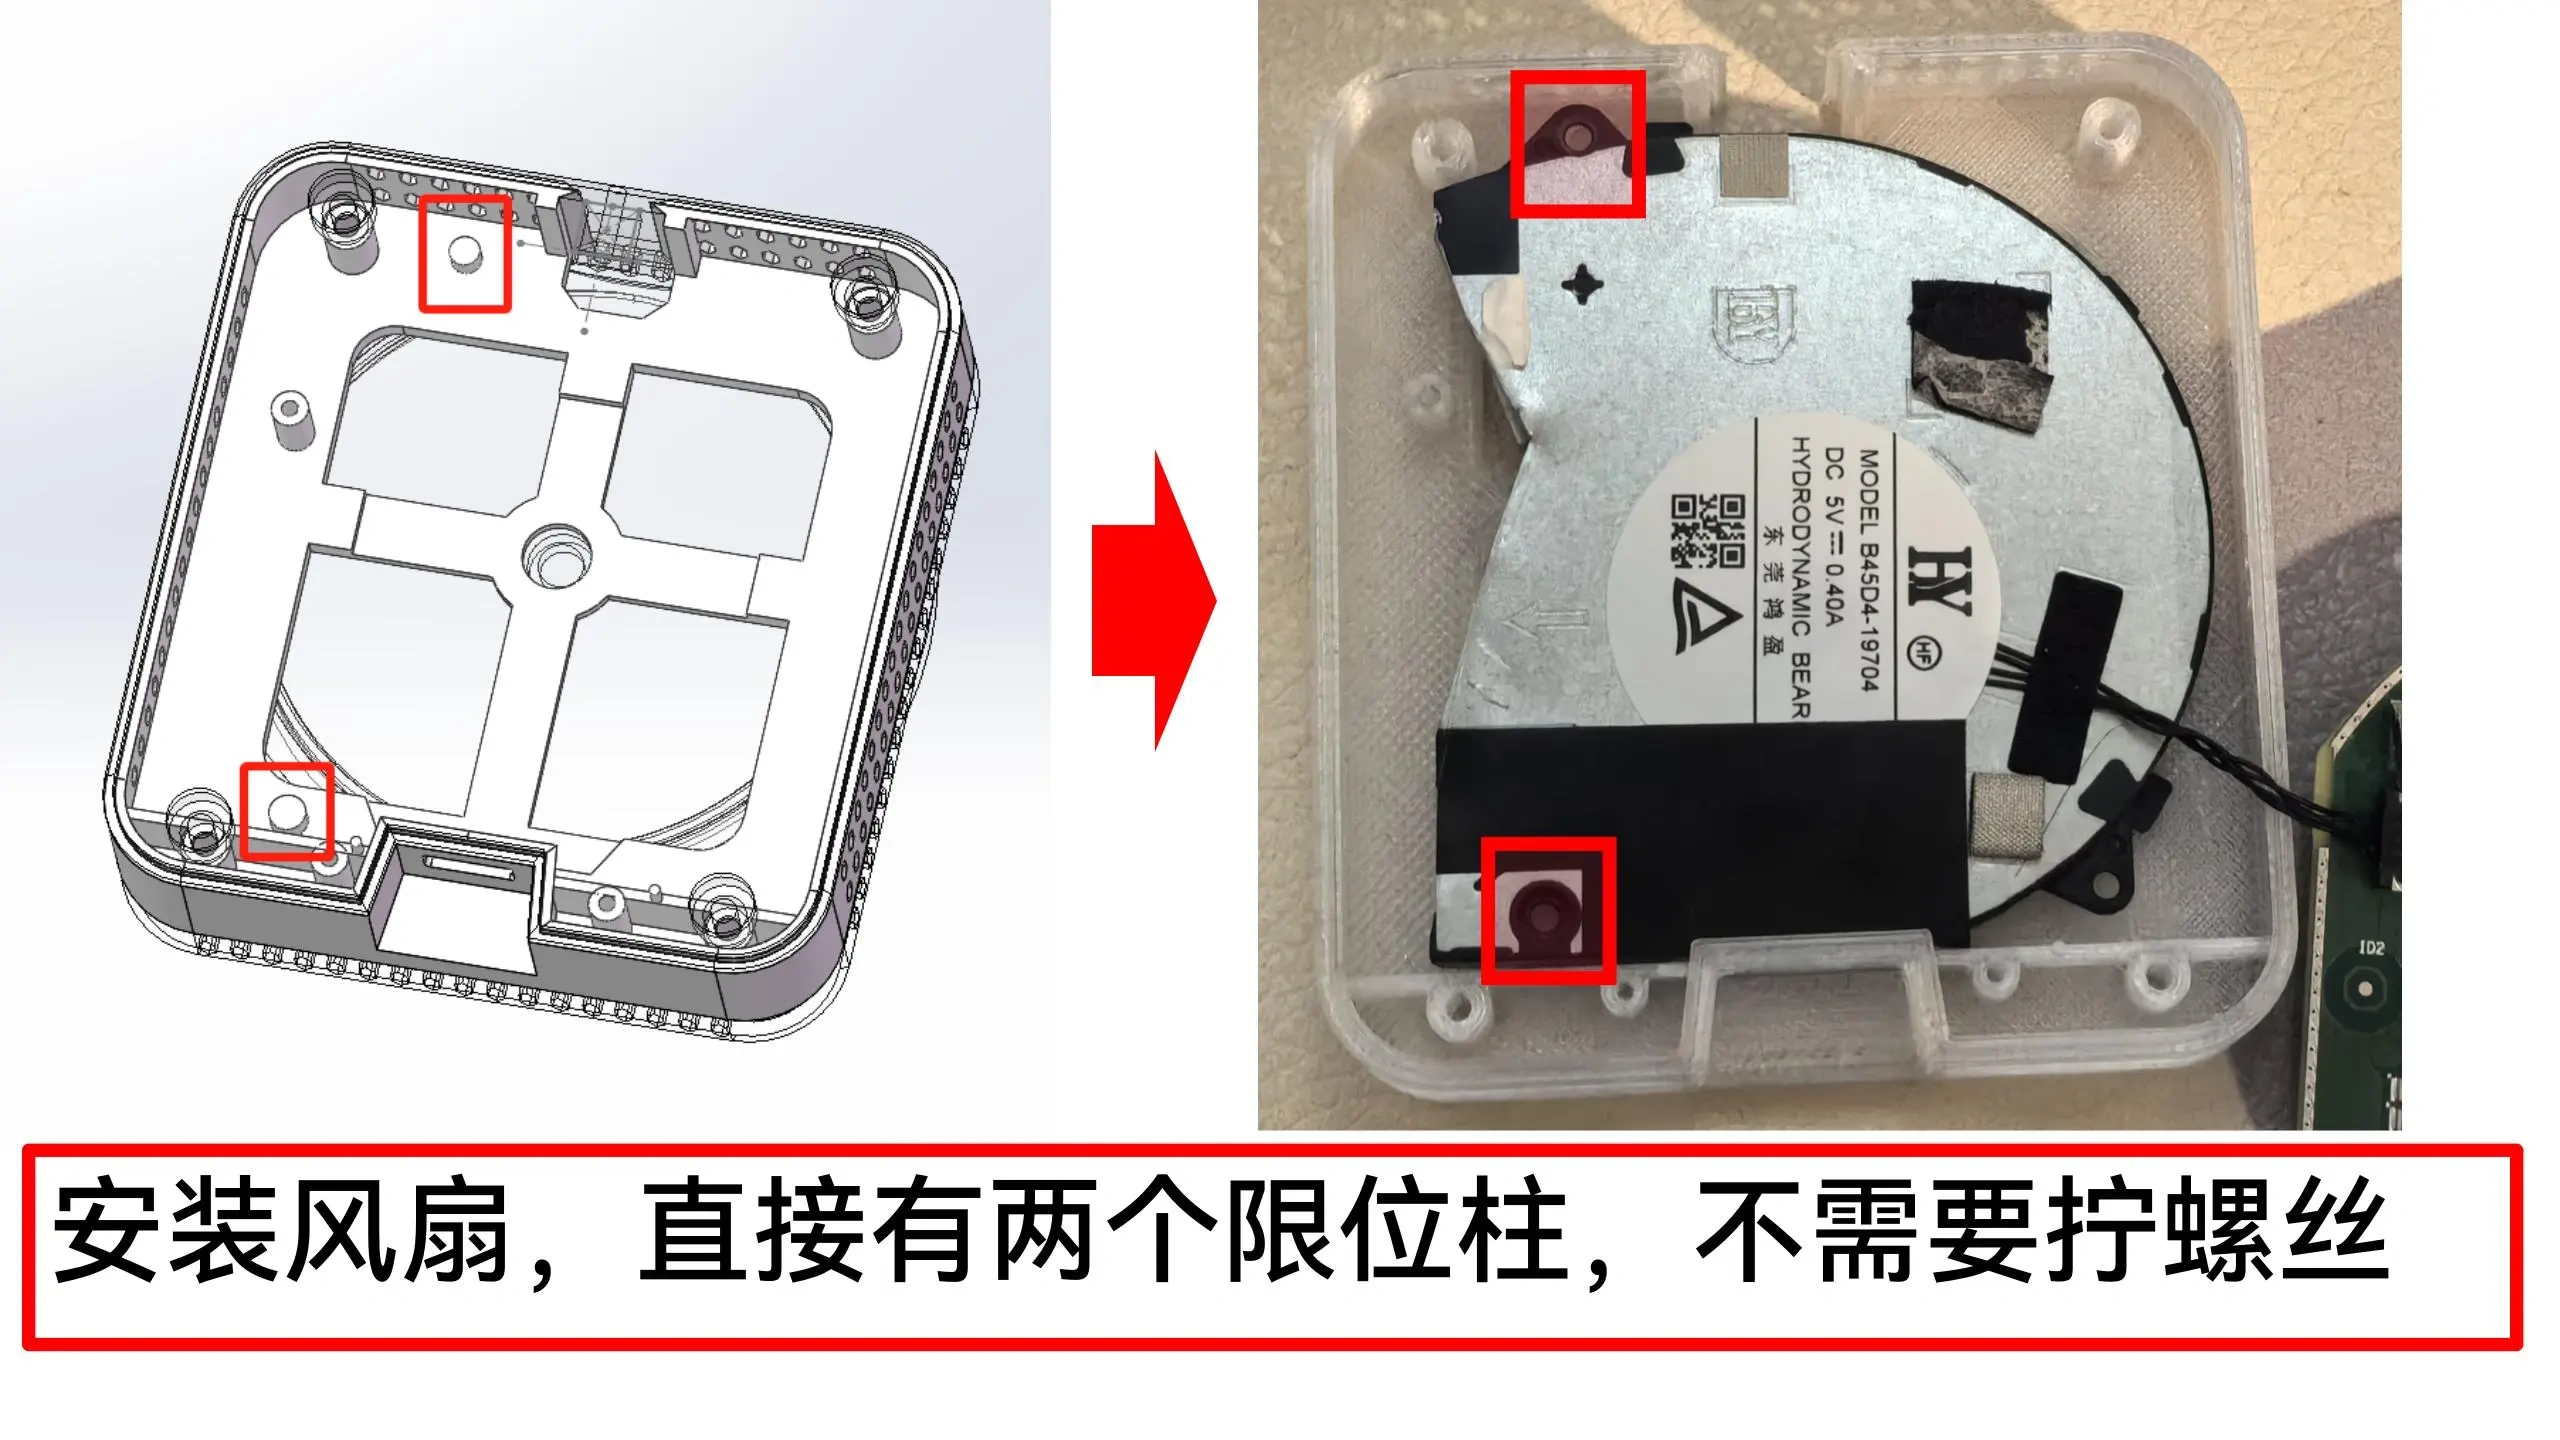
4. Install the fan—two locating pins are already in place, so no screws are needed.
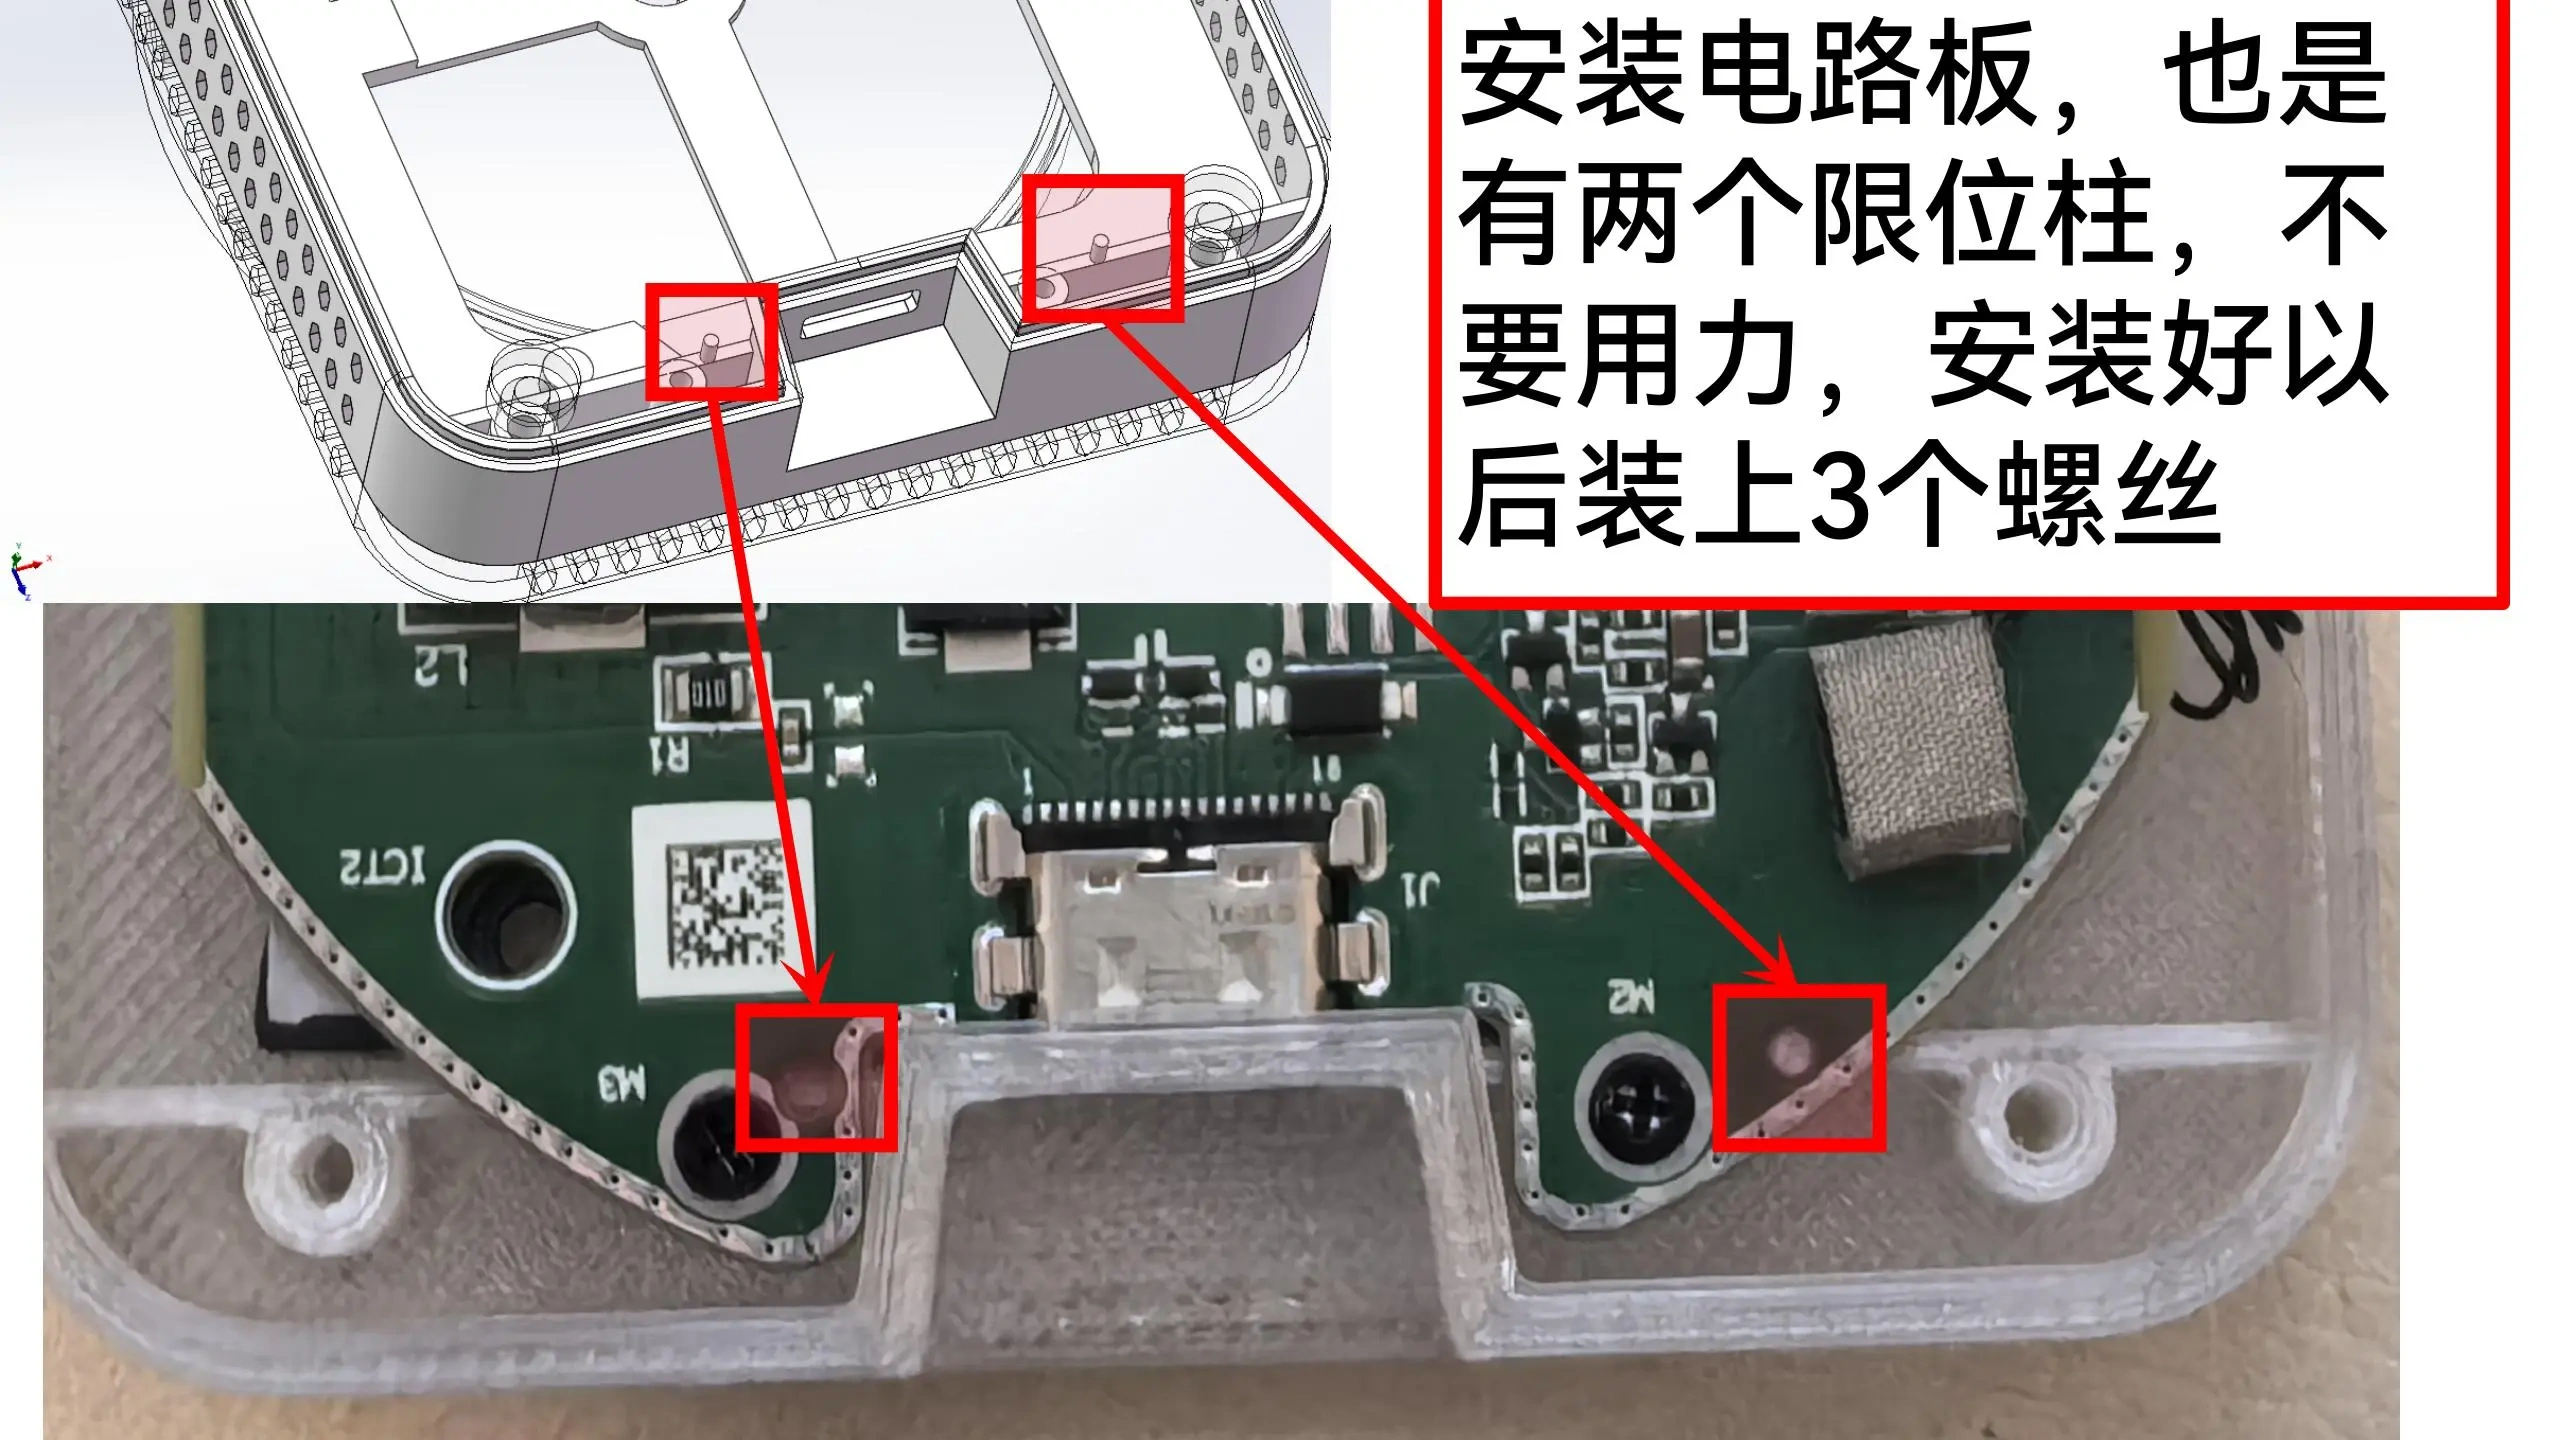
5. Install the circuit board—again, two locating pins are provided; apply gentle pressure during installation, then secure it with three screws.
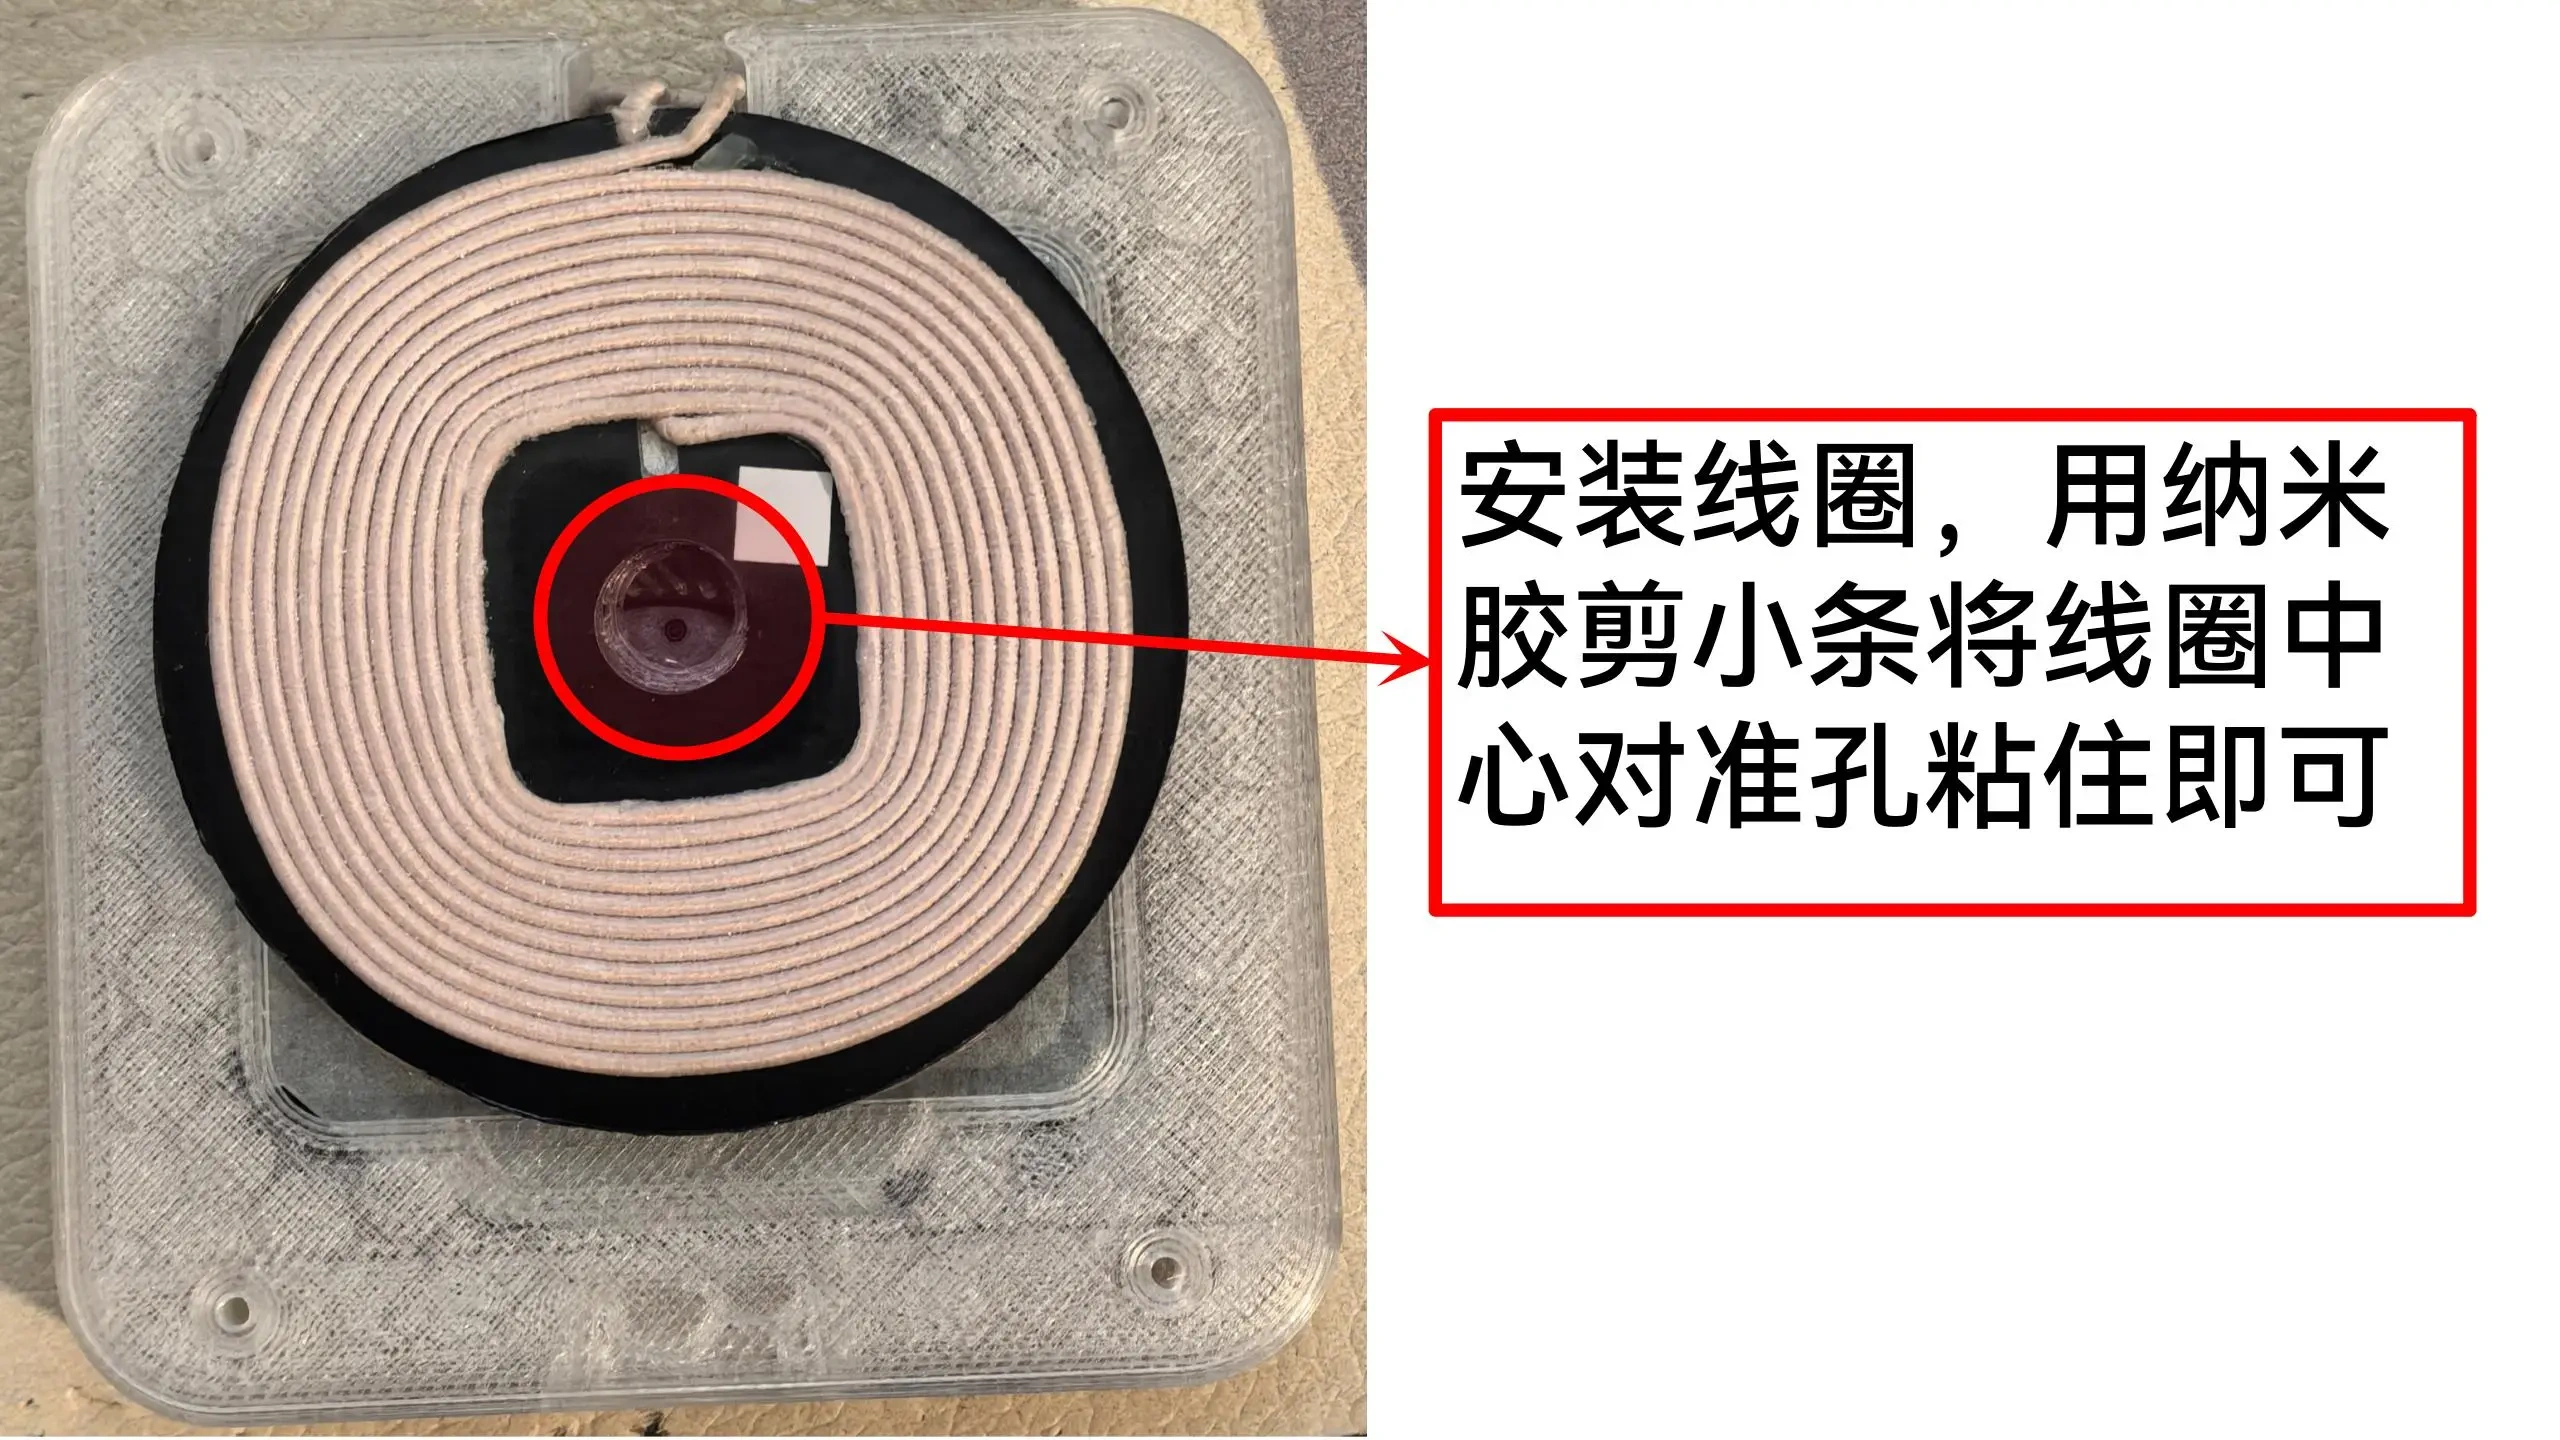
6. Install the coil—simply use nano adhesive to cut small strips and align the coil’s center with the corresponding hole before securing it in place.
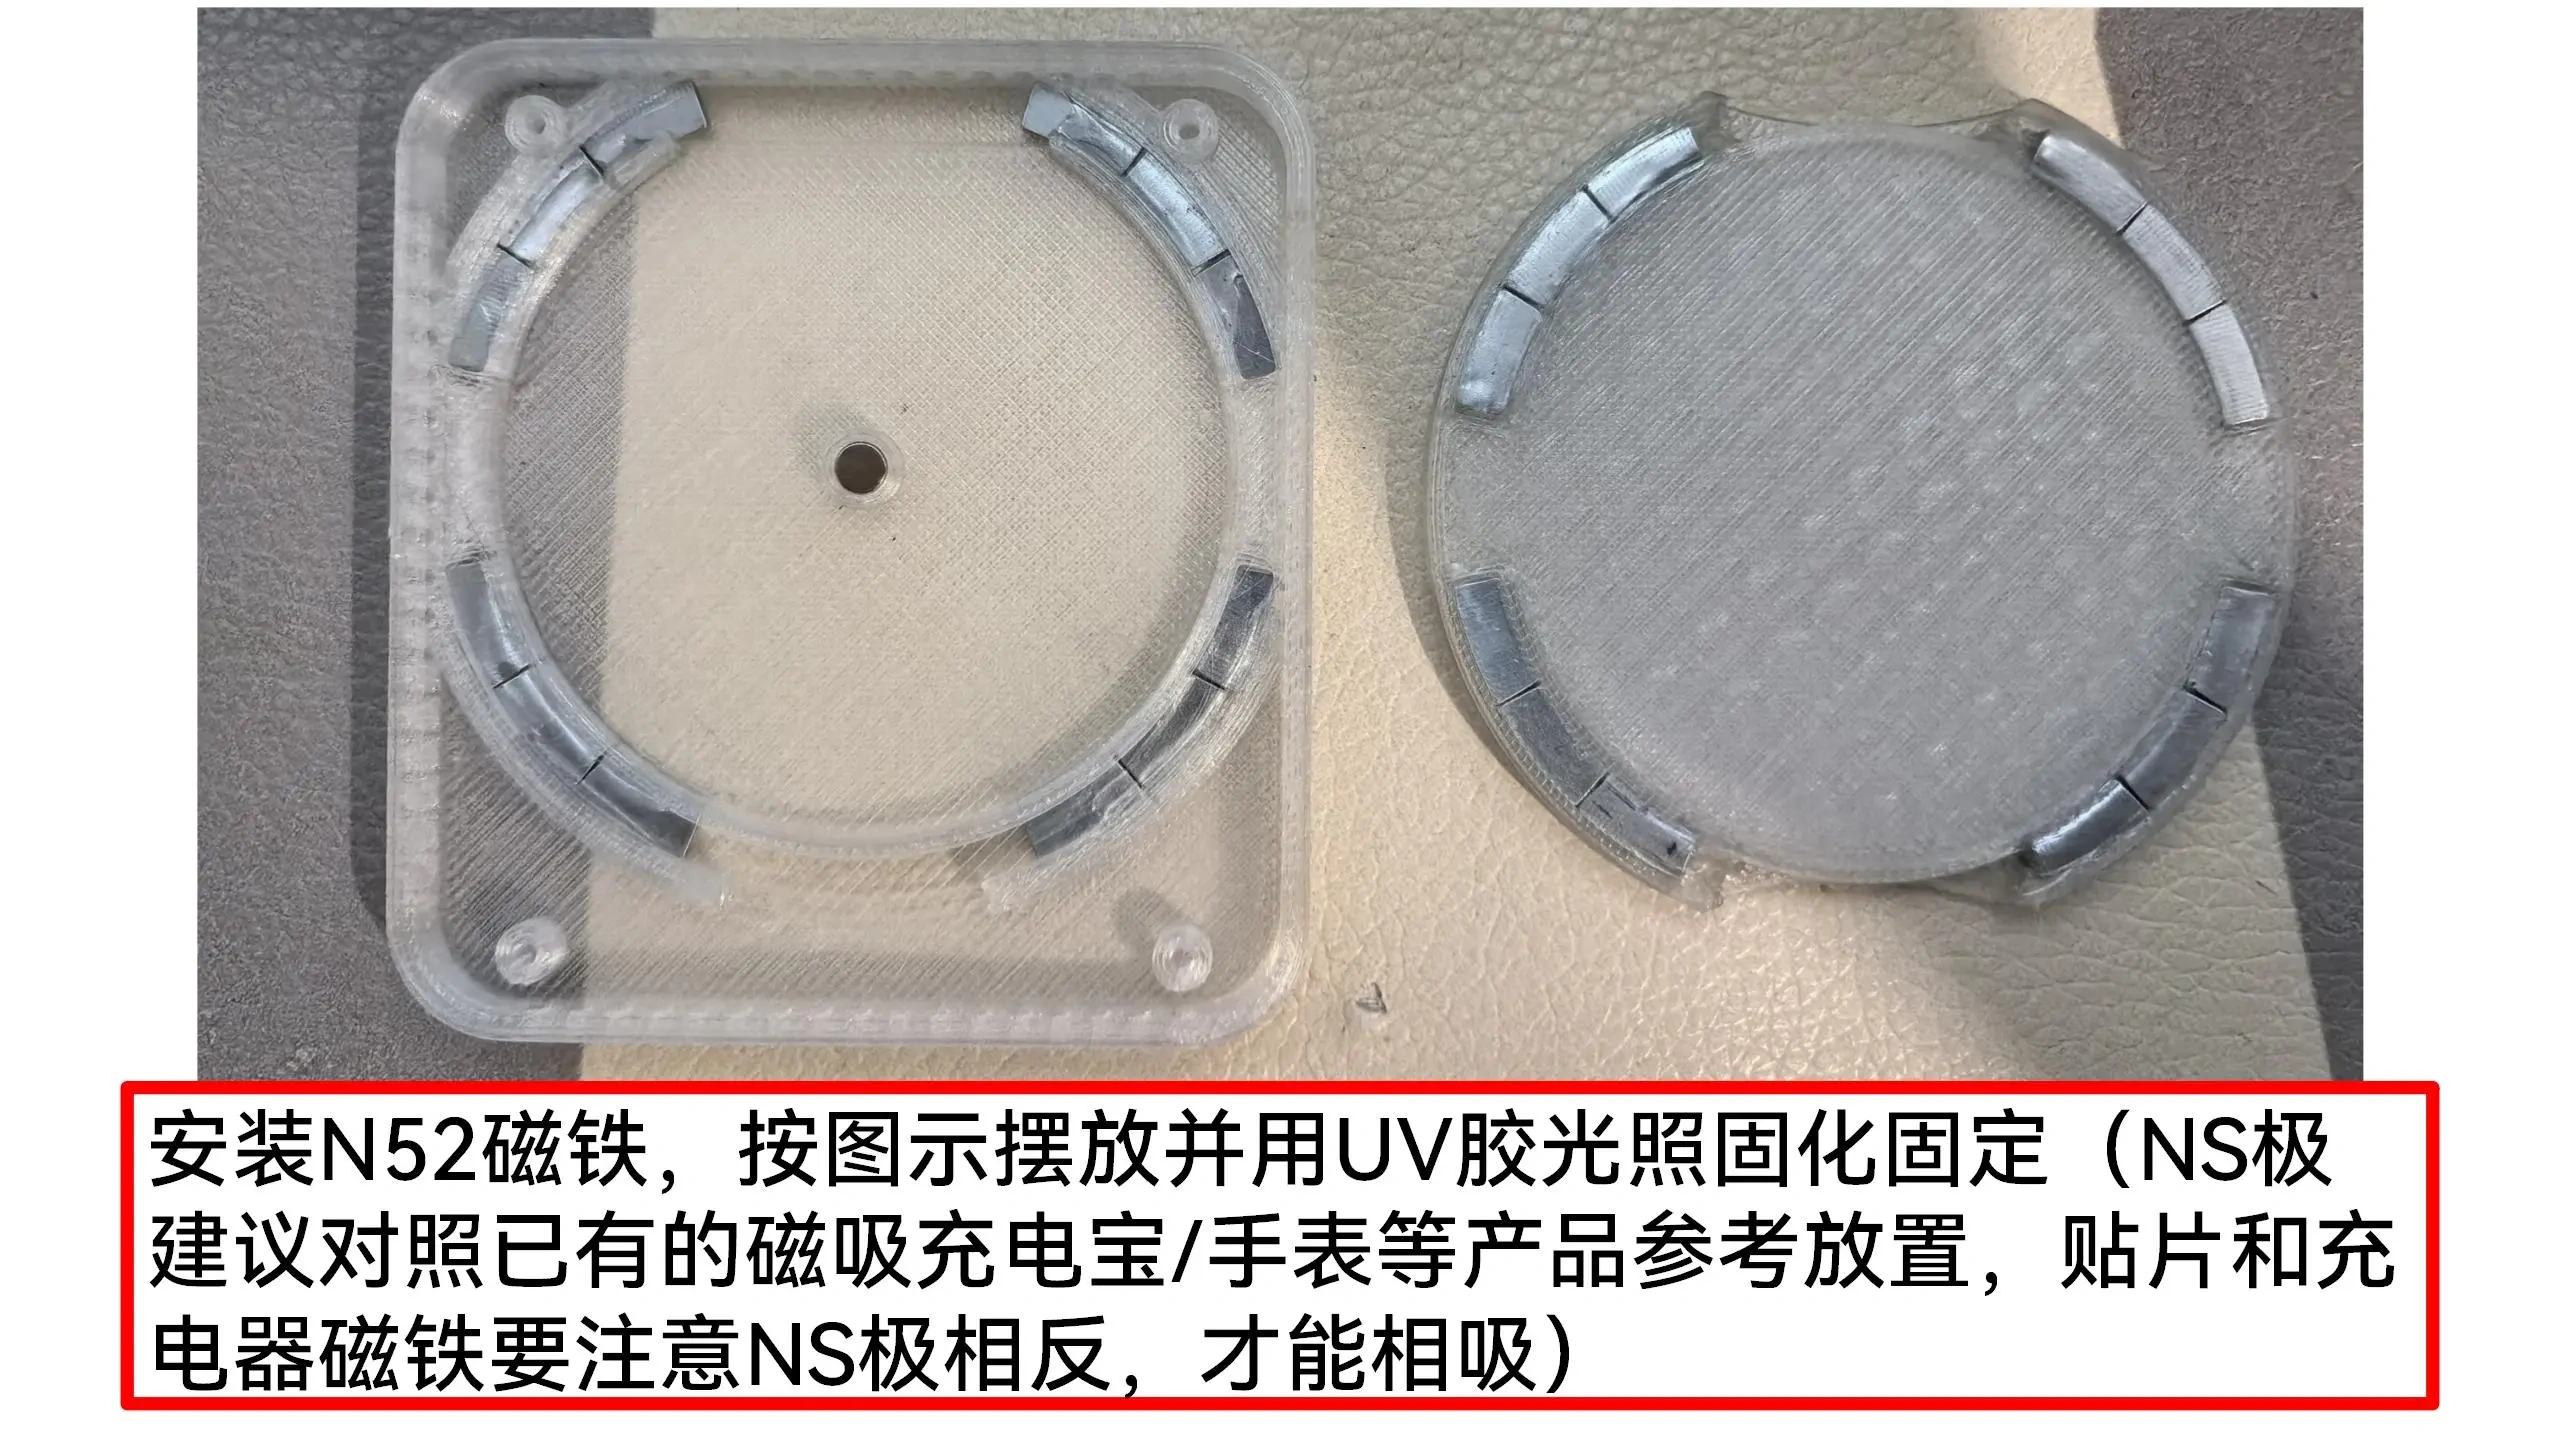
7. Install the N52 magnets—position them according to the diagram and use UV glue to cure and secure them under light exposure (we recommend referencing existing MagSafe chargers, smartwatches, or other magnetic charging devices to determine the correct NS pole orientation; remember: the magnetic pads and charger magnets must face opposite NS poles to ensure proper attraction).
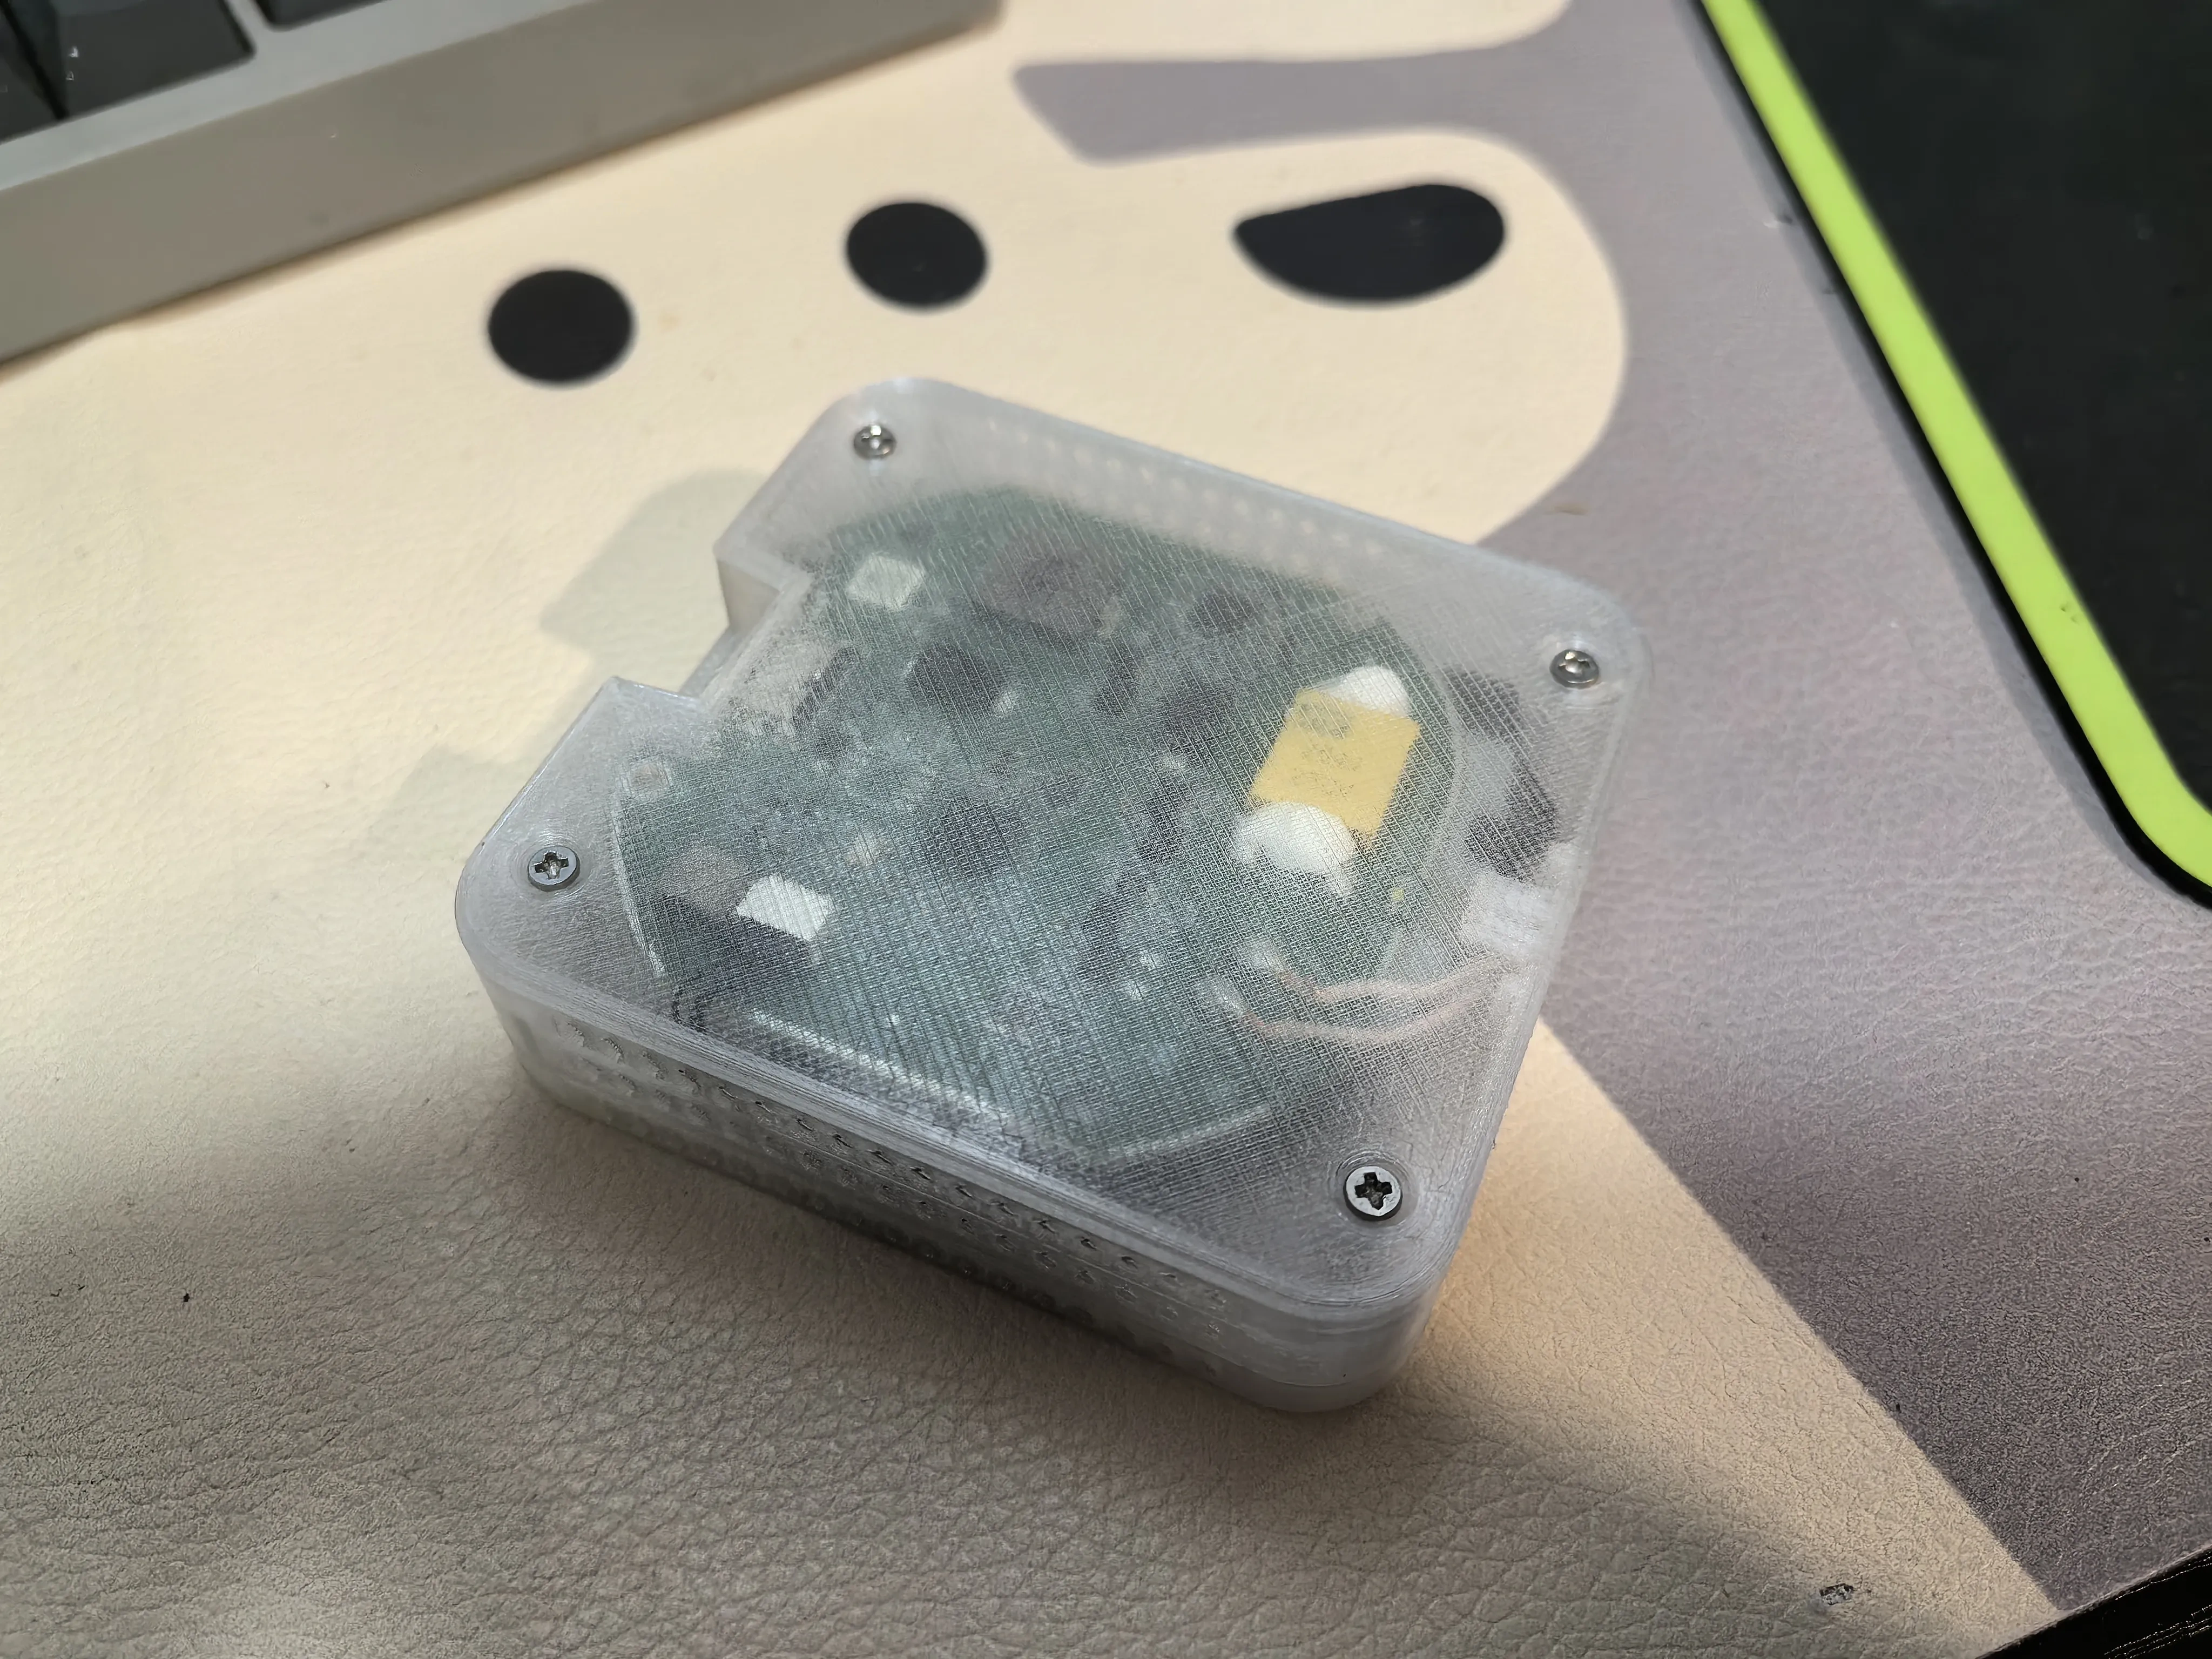
8. Assemble the wireless charger using M2*10 screws.
9. Attach the magnetic pads to the back of your phone—be sure to align them with the center of your phone’s wireless charging component; we recommend watching online videos demonstrating phone disassembly to confirm the exact positioning.
Bill of materials
- NameQuantityNotes
- 1铁皮剪1
- 2水口剪1
- 3紫外线固化灯1
- 4UV胶水1
- 5十字螺丝刀1
- 65cm直径双面胶1
- 7苹果magsafe磁铁1.6厚O17拆分N52磁铁24
- 8m2*10平头螺丝4
- 9纳米胶0.5/1mm厚1
- 104*1.5/2圆形N52磁铁1
Originality of the Model
The author declares that this work is their personally original model
This model is licensed under the following terms:
Credit must be given to the creator
Only noncommercial uses of the work are permitted
Remixes must be shared under the same license
Models(1)
- 华为27w无线充电原装改造磁吸.3mfDesigner

524.62 KB

2025-12-14


