



'%3e%3cpath%20id='Rectangle%20995'%20d='M0%200H24C26.2091%200%2028%201.79086%2028%204V52C28%2054.2091%2026.2091%2056%2024%2056H0V0Z'%20fill='black'%20fill-opacity='0.2'/%3e%3cpath%20id='Vector'%20d='M17%2022L11%2028L17%2034'%20stroke='white'%20stroke-opacity='0.85'%20stroke-width='1.5'%20stroke-linecap='round'%20stroke-linejoin='round'/%3e%3c/g%3e%3cdefs%3e%3cclipPath%20id='clip0_1639_4805'%3e%3crect%20width='28'%20height='56'%20fill='white'/%3e%3c/clipPath%3e%3c/defs%3e%3c/svg%3e)
 GIF
GIF
 GIF
GIF
 GIF
GIF
 GIF
GIF
'%3e%3cpath%20id='Rectangle%20995'%20d='M0%204C0%201.79086%201.79086%200%204%200H28V56H4C1.79086%2056%200%2054.2091%200%2052V4Z'%20fill='black'%20fill-opacity='0.2'/%3e%3cpath%20id='Vector'%20d='M11%2022L17%2028L11%2034'%20stroke='white'%20stroke-opacity='0.85'%20stroke-width='1.5'%20stroke-linecap='round'%20stroke-linejoin='round'/%3e%3c/g%3e%3cdefs%3e%3cclipPath%20id='clip0_1639_4802'%3e%3crect%20width='28'%20height='56'%20fill='white'/%3e%3c/clipPath%3e%3c/defs%3e%3c/svg%3e)
The Idea Guy
Sink splash guard

 0.12 mm layer height, 2‑wall walls, 10% infill density
'%20fill='%23B3B3B3'/%3e%3crect%20id='Rectangle%201051'%20x='8'%20y='2'%20width='12'%20height='0.5'%20transform='rotate(90%208%202)'%20fill='%23D9D9D9'/%3e%3crect%20id='Rectangle%201052'%20x='11'%20y='2'%20width='12'%20height='0.5'%20transform='rotate(90%2011%202)'%20fill='%23B3B3B3'/%3e%3cpath%20id='Rectangle%201048'%20d='M2%202H14V14H11L10.5%2014.5H8H5.5L5%2014H2V2Z'%20stroke='%23828282'%20stroke-linejoin='round'/%3e%3c/g%3e%3c/g%3e%3c/svg%3e)
3-disc
PLA
Designer- Layer height: 0.12 mm, wall thickness: 2 layers, infill density: 15%
3-disc
PLA
Designer - 0.12 mm layer height, 2-wall thickness, 50% infill
2-disc
PLA
Designer

22

0

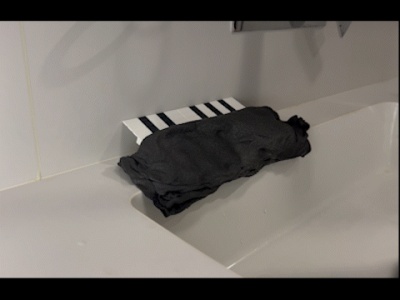
This time we tried a new approach: leveraging the material’s thermoplastic properties to soften it with hot air from a hair dryer, allowing us to reshape the model and better match sinks of varying depths;
PLA typically only needs about 40 seconds of heating; we recommend using PLA for its ease of use. With PETG, however, the heating time is slightly longer, so you’ll need to pay closer attention;
Before applying the hot air, we suggest placing a damp cloth on the print bed to prevent unintended warping in other areas (though this isn’t strictly necessary);
To accommodate different sink depths, the design adopts a modular structure, enabling users to freely adjust the length and depth by combining individual modules—simply use the slicing software’s cut-and-split function to customize the assembly.

The model file is already divided into separate parts, so you can either copy just the extended water-stop section to increase the depth or delete it to shorten the length.

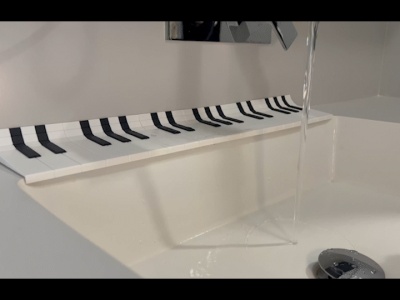
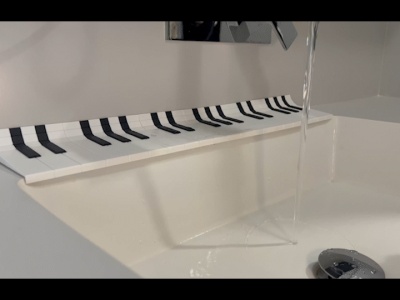
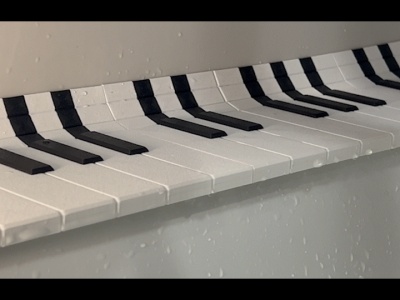
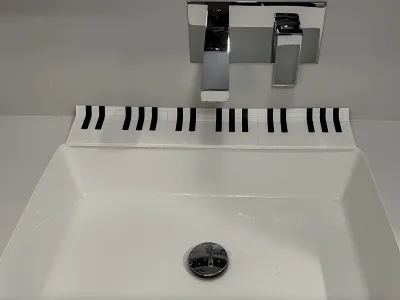
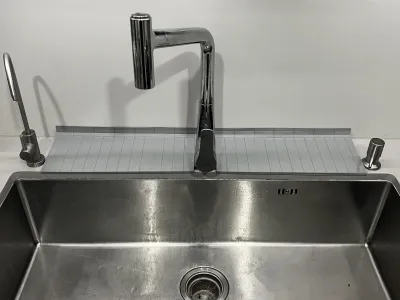
This is the standard-depth version; the actual sink shown in the photo has a depth of 80 mm.

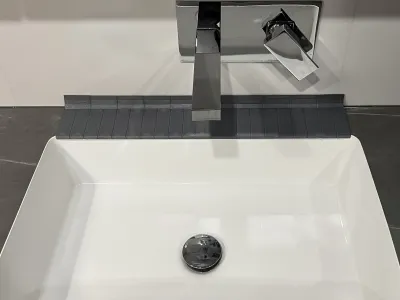
Another deeper version designed for kitchen use.

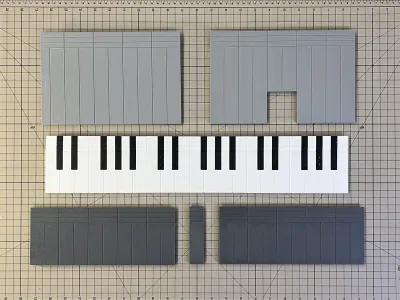
Each module segment is 50 mm long; users can combine them according to their specific dimensional requirements. There’s also a separate 25-mm module available in the accessories. Alternatively, you can bypass the modular system altogether and cut the pieces directly to the desired size, as shown in the figure below.

The total length of each modular unit is 248.5 mm. Use fasteners to connect the extended sections, and after assembly, apply glue along the back edges to seal the joints and prevent water seepage.

Once printing is complete, simply remove the decorative edge trim at the joint locations.


The extended version includes a recessed panel to hold the faucet, which can also be enlarged using the cutting function—but that will require a bit more patience. For now, we’ve left a 55-mm clearance for this purpose.

After completing the overall assembly, if you notice any unevenness or warping at the ends, you can print the included insertion modules and secure them to the countertop using 3M double-sided tape, making it easy to disassemble and clean later.
Originality of the Model
The author declares that this work is their personally original model
This model is licensed under the following terms:
This work is licensed under a Standard Digital File License. Digital files have a strict non-commercial, personal use only license.
You shall not share, sub-license, sell, rent, host, transfer, or distribute in any way the digital file or 3D printed versions of this object, nor any other derivative work of this object in its digital or physical format (including remixes of this object). You can not host these files on other digital platforms, web stores or cloud repositories. The objects may not be used in any way whatsoever in which you charge money, collect fees.
Models(3)
- 挡水 标准单色版.3mfDesigner
'%3e%3cpath%20id='Vector'%20d='M13.6663%201.33331H2.33301C1.78072%201.33331%201.33301%201.78103%201.33301%202.33331V13.6666C1.33301%2014.2189%201.78072%2014.6666%202.33301%2014.6666H13.6663C14.2186%2014.6666%2014.6663%2014.2189%2014.6663%2013.6666V2.33331C14.6663%201.78103%2014.2186%201.33331%2013.6663%201.33331Z'%20stroke='%23808080'%20stroke-linejoin='round'/%3e%3cpath%20id='Vector_2'%20d='M11.3333%201.33331V7.33331H5V1.33331H11.3333Z'%20stroke='%23808080'%20stroke-linejoin='round'/%3e%3cpath%20id='Vector_3'%20d='M9.66699%203.66669V5.00002'%20stroke='%23808080'%20stroke-linejoin='round'/%3e%3c/g%3e%3cdefs%3e%3cclipPath%20id='clip0_3212_168684'%3e%3crect%20width='16'%20height='16'%20fill='white'/%3e%3c/clipPath%3e%3c/defs%3e%3c/svg%3e)
130.98 KB
'%3e%3cpath%20id='Vector'%20d='M7.99967%2014.6666C11.6816%2014.6666%2014.6663%2011.6819%2014.6663%207.99998C14.6663%204.31808%2011.6816%201.33331%207.99967%201.33331C4.31777%201.33331%201.33301%204.31808%201.33301%207.99998C1.33301%2011.6819%204.31777%2014.6666%207.99967%2014.6666Z'%20stroke='black'%20stroke-opacity='0.49'%20stroke-linejoin='round'/%3e%3cpath%20id='Vector_2'%20d='M8.00235%204.00006L8.00195%208.00299L10.8284%2010.8295'%20stroke='black'%20stroke-opacity='0.49'%20stroke-linecap='round'%20stroke-linejoin='round'/%3e%3c/g%3e%3cdefs%3e%3cclipPath%20id='clip0_1890_13189'%3e%3crect%20width='16'%20height='16'%20fill='white'/%3e%3c/clipPath%3e%3c/defs%3e%3c/svg%3e)
2026-05-10
- 挡水 钢琴键版.3mfDesigner
148.65 KB
2026-05-10
- 挡水 加长版.3mfDesigner
192.47 KB
2026-05-10
View all(3)


