


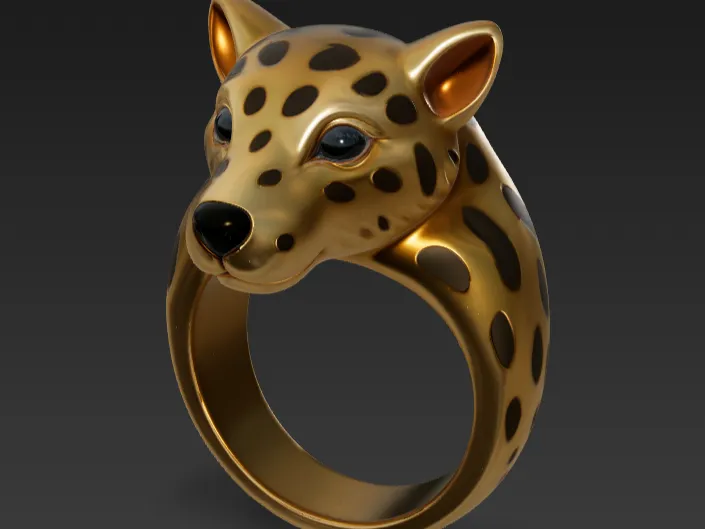
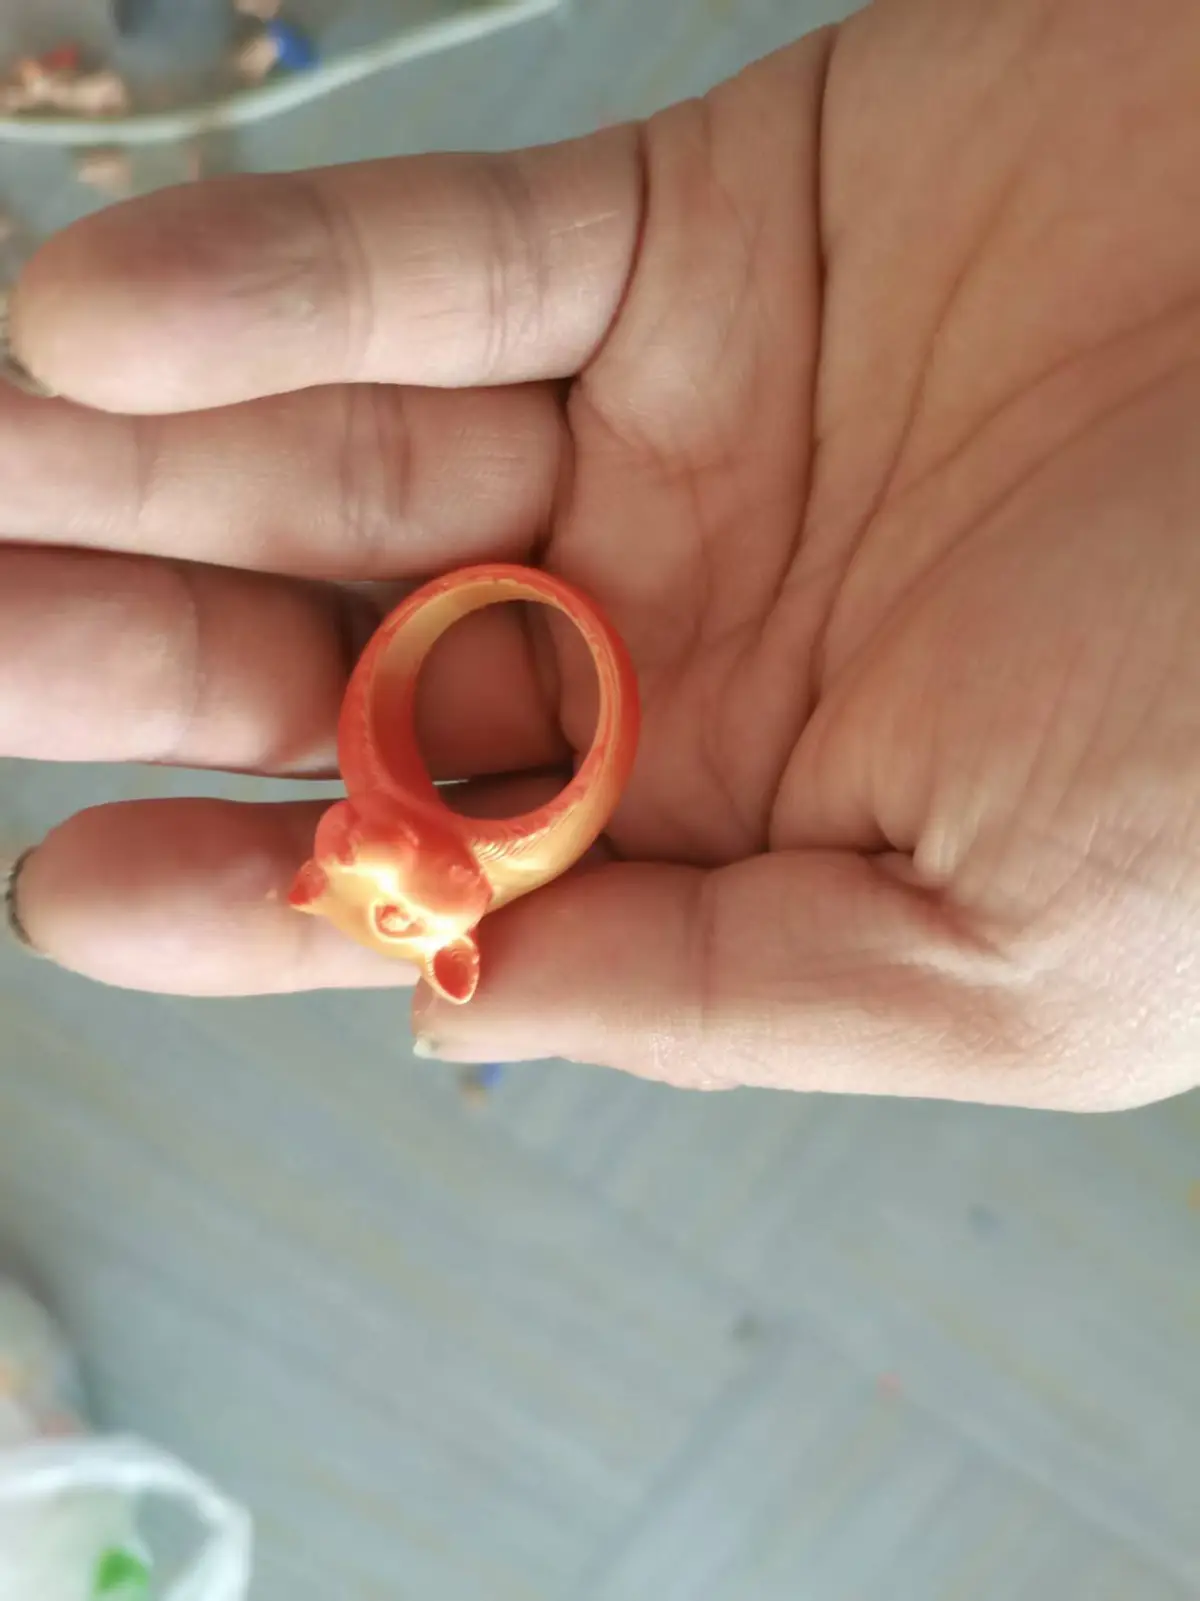

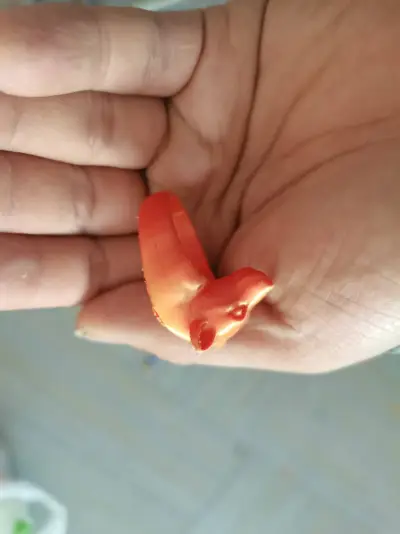
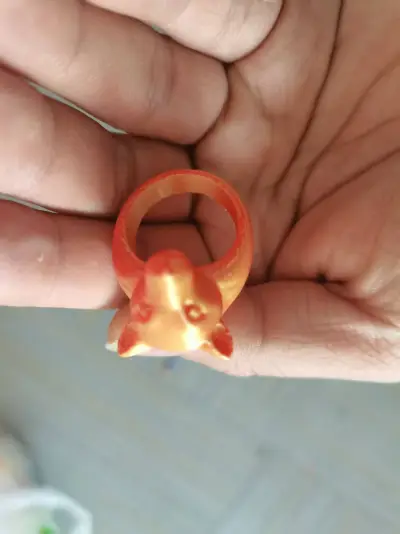
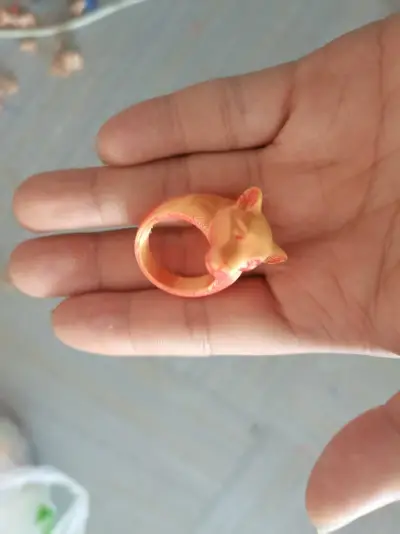
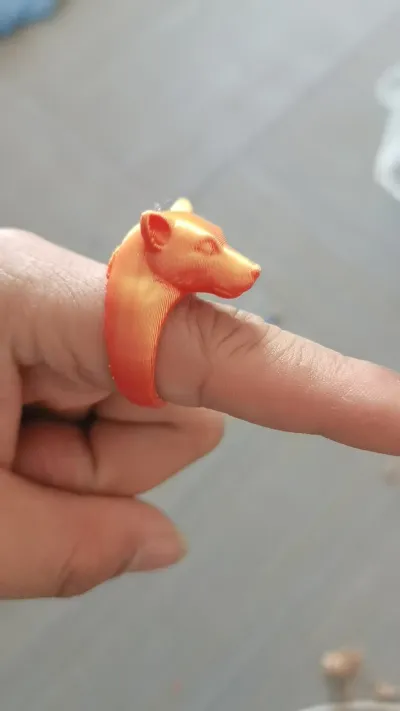

Leopard Ring
FDM Printing
Integrated Molding
No glue required
3D‑printed ring
Powerful Ring
Paintable
Directly printable
Wearing Accessories
Creative Jewelry
Desktop Decorations
Animal-shaped designs
Structurally robust
3D Jewelry
Jewelry Models
Minimalist and imposing
A Perfect Gift

- 0.2 mm layer height, 3‑layer walls, 15% infill density

3-disc
PLA
Designer

6

1
Detailed Configuration Guide for 3D‑Printed Leopard Ring
I. Source of Inspiration
The design of this leopard ring draws inspiration from the majestic power and graceful lines of the cheetah, seamlessly blending animal form with wearable aesthetics. Thanks to advanced 3D printing technology, we’ve been able to realize a fully integrated structure—combining the three-dimensional contours of the leopard’s head, its distinctive spotted texture, and the ring band itself. This design not only captures the cheetah’s wild, dynamic energy but also ensures everyday comfort and structural stability for long‑term wear.
II. Printing Configuration (Detailed Version)
1. Material Selection
- PLA: Ideal for beginners—easy to print, low shrinkage, and cost‑effective, making it perfect for rapid prototyping and proof-of‑concept testing.
- PETG: Offers superior toughness and impact resistance, less prone to breakage, and well suited for finished pieces intended for daily wear.
- Photopolymer Resin: Recommended for final production parts, as it delivers exceptional detail reproduction—perfectly capturing intricate features like leopard spots and eye sockets—with a surface finish that closely mimics the质感 of metal or even bio‑inspired skin.
2. Key Parameters
- Layer Height:
- FDM: 0.15–0.2 mm (a layer height of 0.15 mm yields finer leopard patterns and more refined facial details).
- Photopolymer: 0.05–0.1 mm (optimal for maximum detail fidelity).
- Wall Thickness: ≥1.5 mm to ensure structural integrity at the junction between the ring band and the leopard head, preventing breakage during wear.
- Infill Density:
- FDM: 15–20% (balances lightweight construction with durability; for higher strength, increase to 25%).
- Photopolymer: Solid infill (the resin material is inherently strong enough—solid infill enhances both aesthetic appeal and tactile quality).
- Print Temperature (FDM):
- PLA: Nozzle 200–210°C, heated bed 50–60°C.
- PETG: Nozzle 220–230°C, heated bed 80°C.
- Cooling Fan: Keep the cooling fan on throughout the entire print for PLA; for PETG, you can slightly reduce fan speed when printing detailed areas of the leopard head to avoid uneven cooling between layers.
3. Print Orientation and Build Plate Preparation
- Recommended Orientation: Position the ring band perpendicular to the build plate, with the leopard head facing upward. This orientation minimizes damage to the leopard head’s intricate front‑face details caused by support structures while ensuring optimal roundness of the ring band.
- Build Plate Preparation:
- FDM: Use masking tape or PEI sheets, applying a light coat of adhesive such as PVA glue stick to enhance adhesion.
- Photopolymer: Employ a release film to ensure the model adheres firmly to the build plate.
III. Support Structures and Brim Settings
1. Supports (Must Be Enabled)
- Necessity: The leopard head features several overhanging sections—including the muzzle, ears, and mandible—where unsupported geometry is prone to collapse without proper support.
- Support Types:
- FDM: Use tree‑like supports or lightweight supports to minimize contact area with the model and simplify removal.
- Photopolymer: Rely on automatic support generation, focusing on adding supports beneath the leopard head and in overhanging regions to prevent damage to the leopard’s delicate spotted pattern.
- Key Settings:
- Support Density: 15–20%.
- Distance Between Support and Model: 0.2 mm for FDM; 0.1 mm for photopolymer.
- Minimize the contact area at the top of each support to reduce post‑print打磨 workload.
2. Brim / Brim Setting (Recommended to Enable)
- Necessity: The bottom of the ring band has limited contact area with the build plate, making it susceptible to warping or lifting. Enabling a brim significantly improves adhesion and prevents edge curling.
- Setting Recommendations:
- Brim Width: 2–3 mm.
- Brim Layers: 2–3 layers.
- Distance from Model: 0.5 mm to facilitate easy separation after printing.
IV. Assembly and Adhesive Instructions
This model is designed as a single‑piece, seamless print—no assembly required after printing, and no need for any adhesive whatsoever. Post‑processing steps are as follows:
1. Remove Supports: Carefully peel off supports starting from the base using needle‑nosed pliers and a small utility knife, taking extra care to protect the leopard head’s ears, eye sockets, and spotted texture.
2. Sand and Polish:
- Begin with 200–400 grit sandpaper to smooth out residual support marks and layer lines.
- Follow up with 800–1200 grit sandpaper for fine polishing, achieving a highly polished surface finish.
- (Optional) Apply polishing compound or UV polish to further enhance the surface’s metallic luster.
3. Post‑Processing Coloring:
- Hand‑paint the leopard pattern using acrylic paints, or apply metallic finishes such as copper or gold via spray coating.
- For photopolymer models, electroplating or vapor deposition can be applied directly for even more striking results.
V. Important Notes
- Before printing, always check the model in your slicing software for any non‑manifold geometry or broken faces, and repair them as needed.
- For your first print, we recommend starting with a scaled‑down version—such as a 50% reduction—to test support performance and detail accuracy.
- Before wearing, lightly sand and polish the inside of the ring to enhance comfort and fit.
Originality of the Model
The author declares that this work is their personally original model
This model is licensed under the following terms:
Credit must be given to the creator
Models(1)
- 豹子戒指.3mfDesigner

1.46 MB

2026-02-18


