


Time-delay relay housing
Protective Case

- 0.2 mm layer height, 3‑layer walls, 15% infill density

1-disc
PLA
Designer

1

0
📦 Introduction to the 3D‑Printed Enclosure for Relay Modules
💡 Design Inspiration
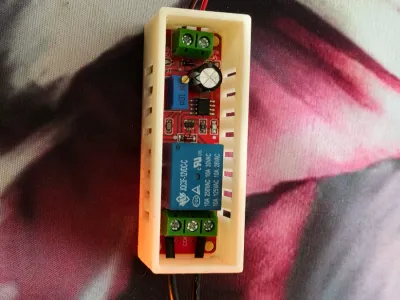
When using small relay modules, the exposed circuit board is prone to dust accumulation, short circuits, or accidental contact—and lacks a secure mounting structure when integrated into larger systems. To address these challenges, we designed this enclosure, which not only safeguards the circuitry but also strikes a balance between functionality and safety by incorporating strategically placed heat dissipation vents and cable exit ports.
🖨️ Printing Requirements
- Material: PLA (easy to print, low cost) or PETG (higher impact resistance and temperature tolerance) are both recommended.
- Layer Height: 0.2 mm—optimizes print accuracy while maintaining a reasonable printing speed.
- Infill: 15%–20%—provides sufficient structural integrity while keeping the enclosure lightweight.
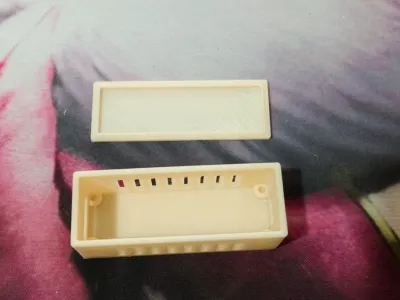
- Separate Top Cover Printing: The top cover is printed separately from the main enclosure body for easier post‑assembly installation.
🔧 Structure & Functionality
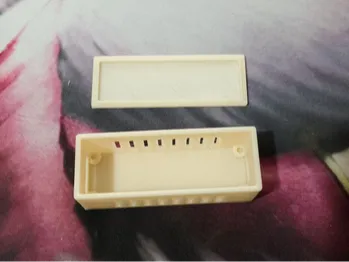
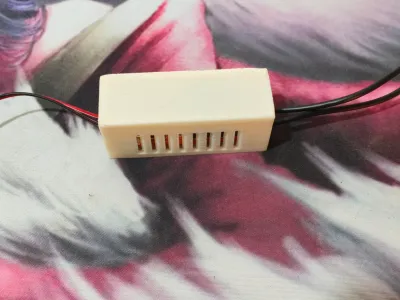
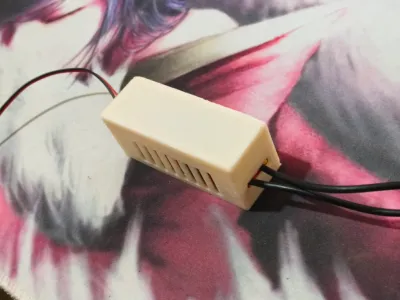
- Enclosure Body:
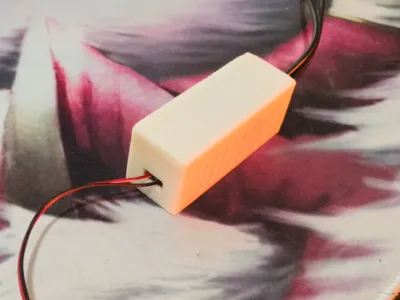
- Side panels feature built‑in heat dissipation grilles that efficiently dissipate heat generated during relay and chip operation.
- Two end‑cap cable ports allow for convenient routing of power input and relay output wires.
- Internal positioning posts precisely secure the relay module, preventing unwanted movement or vibration.
- Top Cover:
- Connects to the enclosure via a snap‑fit mechanism, enabling quick removal for easy debugging and maintenance.
- Smooth, flat surface ideal for adhering labels or marking the module’s intended function.
🛠️ Assembly Instructions
1. Print the components: Print the enclosure body and top cover separately.
2. Post‑Print Finishing: Remove any print supports or burrs to ensure all surfaces are smooth and free of imperfections.
3. Mount the Module: Carefully place the relay module inside the enclosure and secure it in position using screws or hot‑melt adhesive on the designated locating posts.
4. Route the Cables: Pass the power and load cables through the cable exit ports, ensuring the wiring does not compress the circuit board.
5. Install the Top Cover: Snap the top cover securely onto the enclosure body to complete assembly.
✅ Key Advantages
- Enhanced Protection: Shields against dust and accidental contact, significantly improving circuit stability.
- Portability: The integrated design makes it easy to carry and install across various devices.
Originality of the Model
The author declares that this work is their personally original model
This model is licensed under the following terms:
No Copyright.
Models(1)
- 继电器延时导通模块外壳.3mfDesigner

67.77 KB

2026-03-01