


feet
v2
king
klipper
feets
kingroon
antivibration
inputshaper
kingroonkp3spro
kp3spro
prov2
kingroonkp3sprov2
kingroonkp3spros1
kp3spros1
hula
input
hulafeets
hulacenter

- 0.2mm layer, 3 walls, 25% infill

2-disc
PLA
Designer

34

3
This piece is made to used with the HULA design. I only designed the center part, the other parts of Hula you can download in the next link:
Original HULA design:
https://makerworld.com/en/models/417509#profileId-502157
Installation Guide:
1 . Remove electronic cover of your kingroon
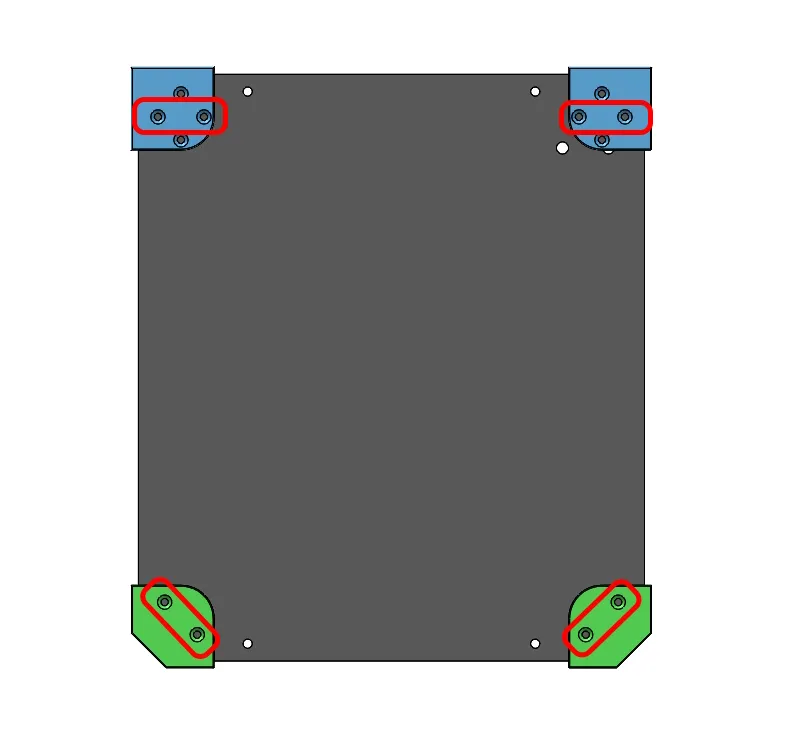
2. Use the template to make a drills in the cover (drill diameter 3 or 3.2mm)
Note: You have two template, 1 for the back and another one for the front. It's important to make the drill in the back according to red marks in the image
3. Screw your HULA feets in the electronic cover, you need 8 units of M3x8 screws
4. Assembly the electronic cover in your KP3s Pro
Note: You cant used the two screws from z-axle but I the design this piece to make the axis remains very stable making maintenance easier.
Bill of materials
- NameQuantityNotes
- 1M3x8 screws8
Originality of the Model
The author declares that this work is their personally original model
This model is licensed under the following terms:
Credit must be given to the creator
Only noncommercial uses of the work are permitted
Models(4)
- KP3S_PRO_Center_support.3mfDesigner

1.92 MB

2025-08-22
 Template_front_kp3s.stlDesigner
477.52 KB
2025-08-22
 Hula_kp3s_pro.stlDesigner
2.00 MB
2025-08-22
 Template_back_kp3s.stlDesigner
899.30 KB
2025-08-22
View all(4)