




Lens Adapter
Focus
Focus Tool
KMZ
kmz mir1
mir-1
lens
soviet


5

1
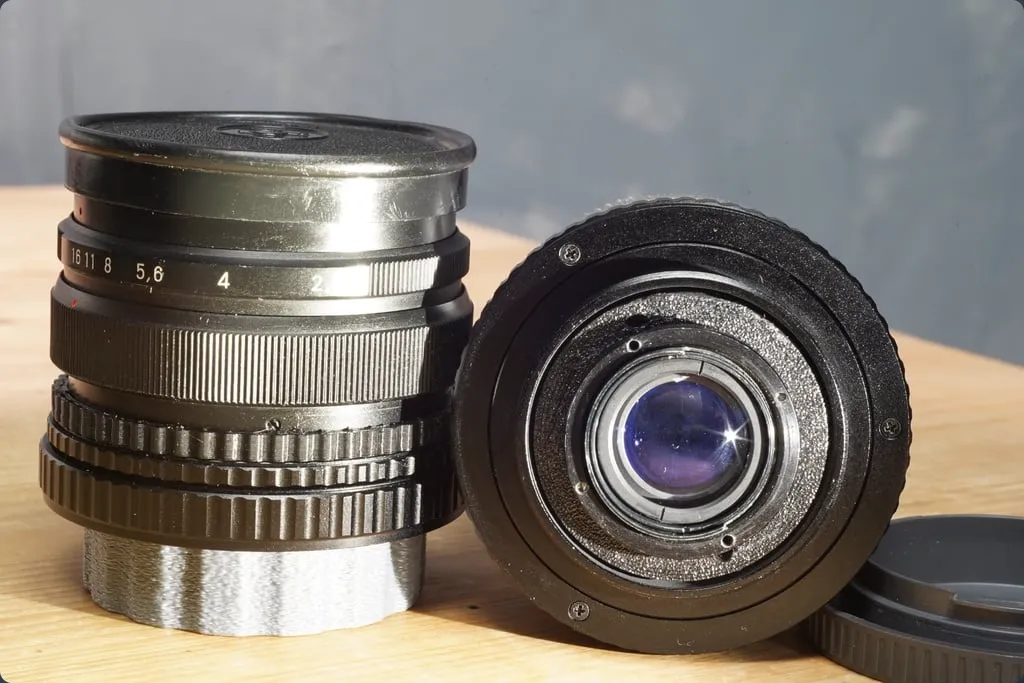
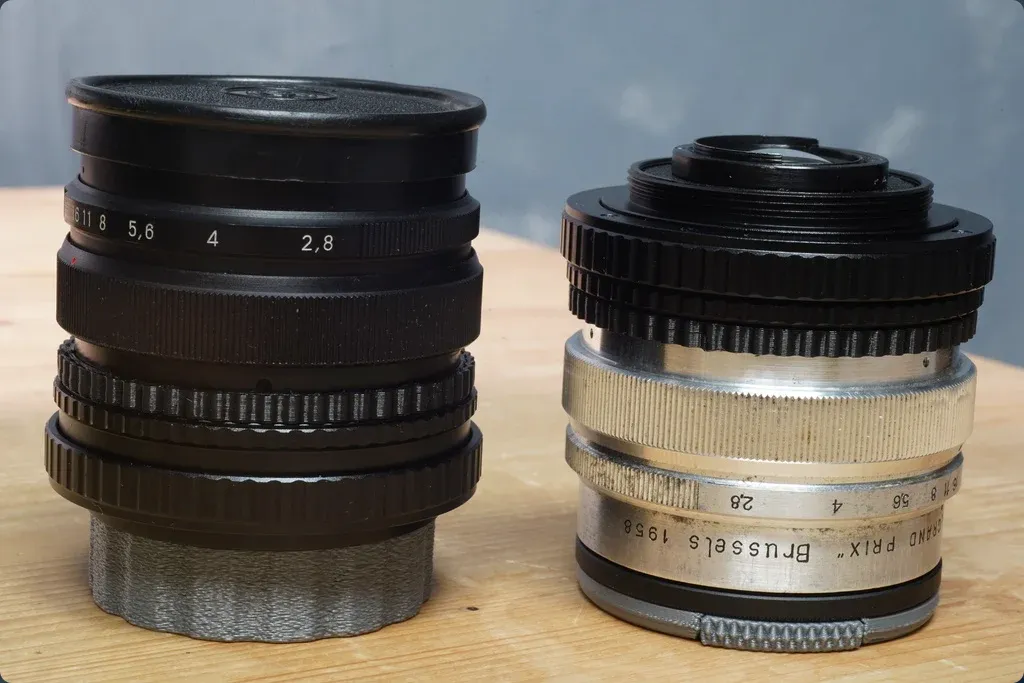
This is an adapter designed to replace the focusing helicoid block on Mir-1 (Мир-1) and Mir-1V (Мир-1В) lenses with a variable-distance focusing macro extension ring.
Once, I tried to unscrew a seized adapter from my favorite white Mir-1 lens (KMZ, 1966 production), but in the process, I damaged the threads in the focusing helicoid block. After that, I bought a Mir-1V lens (VOMZ, 1988 production), but its helicoid was also in poor condition. As a result, this project came about, with which I successfully repaired both lenses. With a 12-17mm macro ring I achieved focusing from about 40cm to infinity.
Assembly Instructions:
Purchase a helicoid macro extension ring for M42 mount with a variable length of 12-17 millimeters. A M42 ring with different parameters might work, but if its minimum length is significantly greater than 12mm, you will lose the ability to focus to infinity.
Screw the printed threaded part into the macro ring so that the front part (facing the front lens element) protrudes outward from the macro ring by approximately 2mm. On the rear part (facing the camera) of the printed part, there are two slots for a lens spanner wrench. The thread should engage very tightly, so that you cannot turn the printed part in the macro ring without using the wrench. The entire assembly will rely on the friction force between these threads after assembly. If the thread engages too easily – slightly increase the size of the model in the slicer. If the part refuses to screw in straight – you can flip it over, screw it in and out from the other (top) side. The thread start at the top should print better due to the model's design. After this, the plastic threads will compress slightly, and the thread start on the bottom side will align.
Place the decorative 3D-printed ring onto the protruding part of the printed part screwed into the macro ring.
On the rear side of the lens, there is a retaining ring screwed on, with two round slots for a spanner wrench and one or two locking screws. Loosen the screws in the ring and completely unscrew the ring counter-clockwise using a lens spanner wrench. After this, the lens's focusing part should detach from the optical block.
One or more shim rings will be placed on the optical block. Insert them into the groove in the 3D-printed part so that they sit flat without tilting.
Insert the optical block into your new focusing block and secure it from the rear side with the retaining ring that was unscrewed in step 4.
Mount the lens on the camera, turn the focusing ring of the new focusing block to its shortest, fully retracted position, and verify that you are focused at infinity. If infinity focus is not achieved – screw the plastic part deeper into the macro ring using the wrench (you don't need to remove the optical block for this). Screw it in about 1/4 turn at a time and check the result until you achieve infinity focus.
Once you achieve the desired result – loosen the retaining ring on the rear of the lens, rotate the optical block so that the markings on the aperture ring are in the correct position.
- Tighten and secure the retaining ring.
Originality of the Model
The author declares that this work is their personally shared model

This model is licensed under the following terms:
No Copyright.
Models(5)
 mir1-helicoid-p1.step
190.58 KB

2025-06-16
- mir1-helicoid-p1.stl
13.55 MB
2025-06-16
- mir1-helicoid-p2.step
169.78 KB
2025-06-16
- mir1-helicoid-p2.stl
436.02 KB
2025-06-16
- mir1-helicoid.FCStd
1.47 MB
2025-06-16
View all(5)


