


Toys
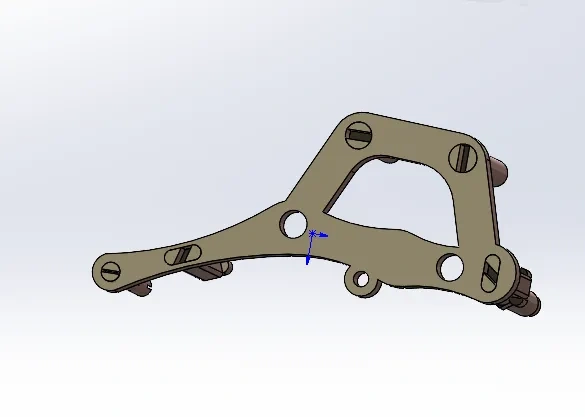
Three-wheeled cart
Clockwork toys
Mainspring power
Energy storage
Card toys
Build Up Momentum

- 0.28 mm layer height, 2-wall structure, 15% infill density

2-disc
PLA
Designer5(4)

385

78
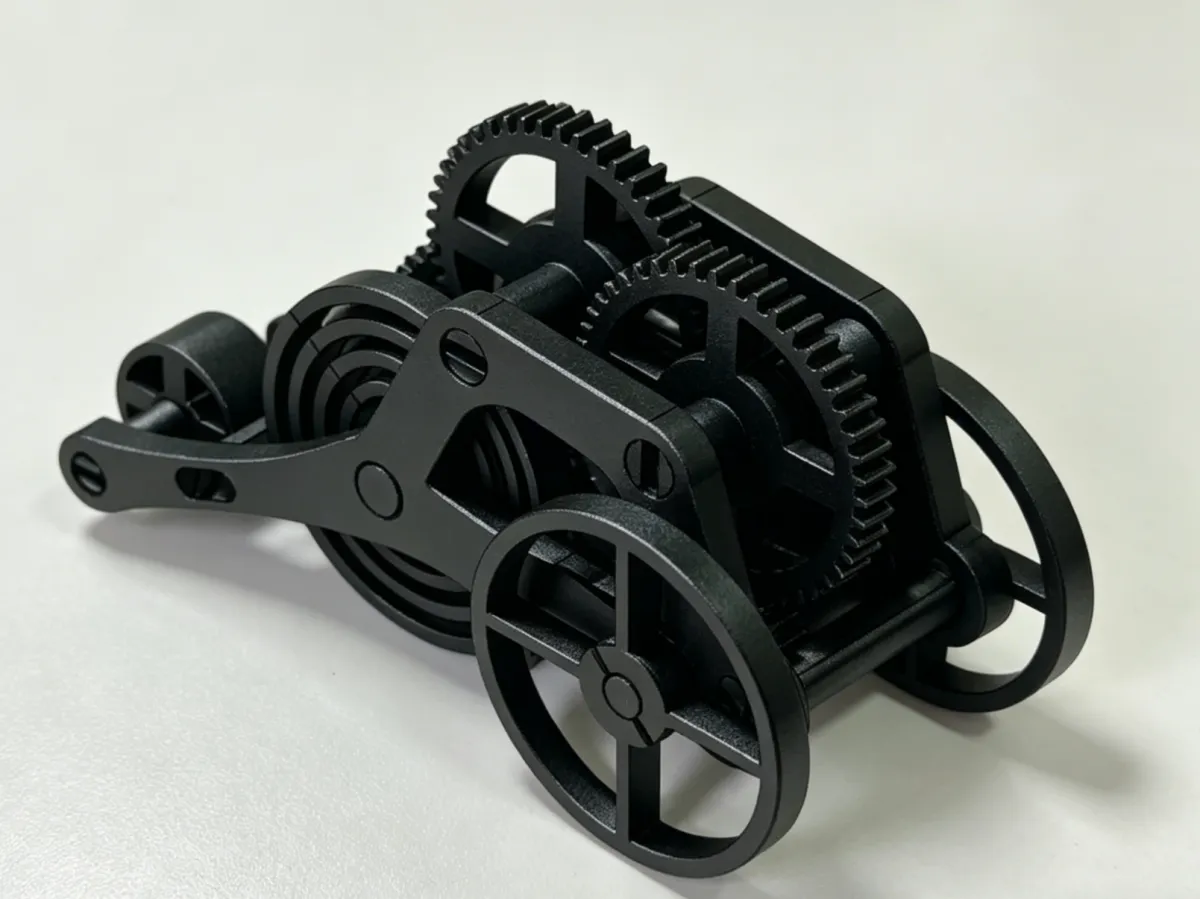
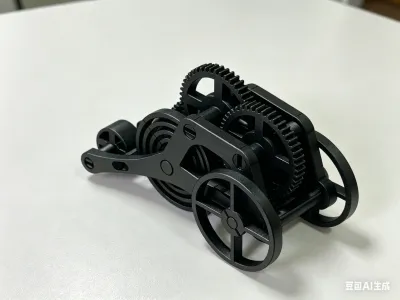
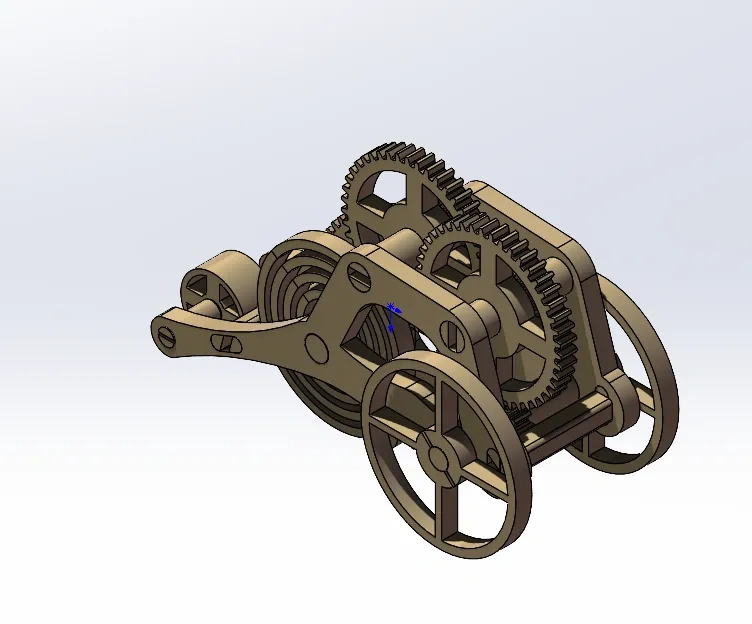
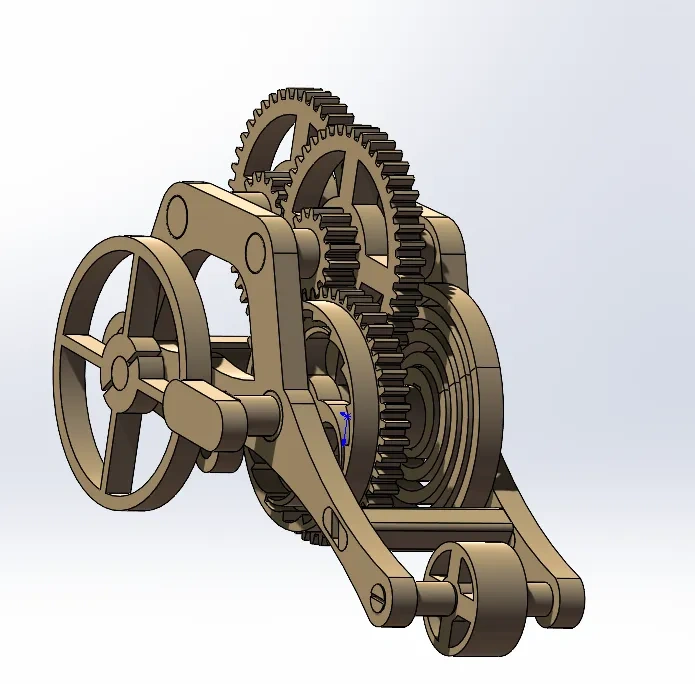
Do you still remember the joy of watching your childhood toy zoom across the floor after winding up its spring? Now we’ve brought it back—entirely gear-driven, battery-free, and ready in a single 3D print.
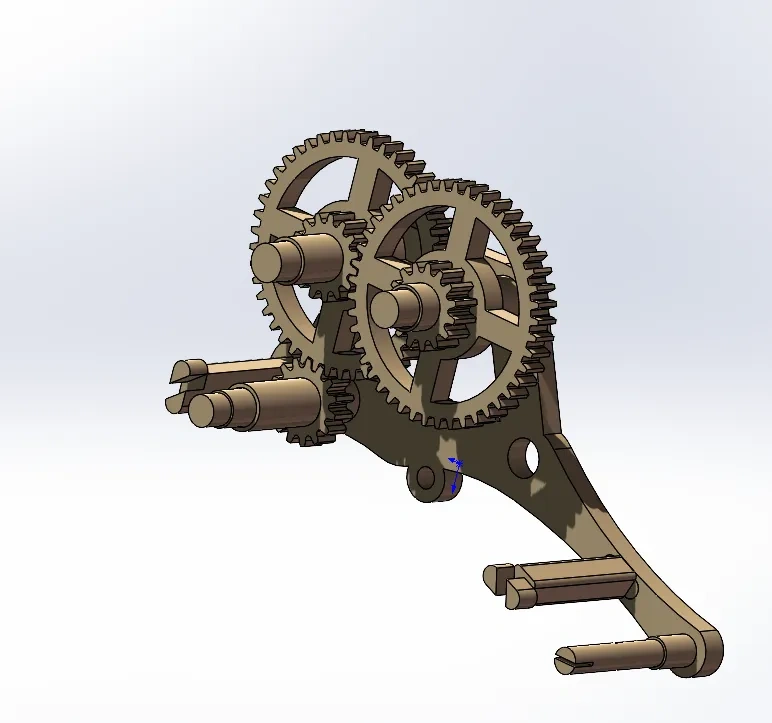
This isn’t just any model. It’s a card-style toy that actually runs. Its design is ingeniously simple: all components are integrated onto a single print plate, requiring no glue or screws; thanks to the precise tolerances achieved through 3D printing, the parts snap together directly. You can experience firsthand the meticulous assembly of the spring-driven gear train, learning how energy is stored in the spring, transmitted through the gears, and ultimately propels the tricycle forward—a truly immersive, hands-on lesson in mechanical principles.
🚀 Key Highlights
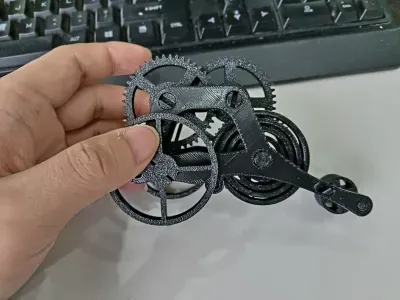
Two-print build, ready to play right out of the box: All parts are integrated on a single print plate, eliminating the hassle of multi-part printing. Once printing is complete, you can easily remove the components and assemble them using just scissors and needle-nose pliers.
Gear-driven, no batteries required: A 100% mechanical transmission system that uses a wound spring to store energy, with large and small gear sets working in tandem to drive the tricycle forward, taking you back to the pure mechanical fun of your childhood.
Simple assembly, quick to get started: The second version features an optimized design that makes assembly even easier and ensures longer running distances. With detailed step-by-step instructions and illustrations, even beginners can complete the assembly quickly.
Educational and fun for the whole family: Perfect for building together with your children, this project offers a hands-on way to understand key mechanical concepts like spring energy storage, gear meshing, and power transmission—an engaging STEM learning experience.
🛠️ Printing Notes
Recommended material: PETG (PLA may cause assembly tolerance issues due to its higher shrinkage rate)
Printing parameters: 0.28 mm layer height, 2 wall layers, 15% infill
Estimated printing time: Approximately 2.9 hours
Material consumption: About 67.55 g-
🧩 Assembly Steps
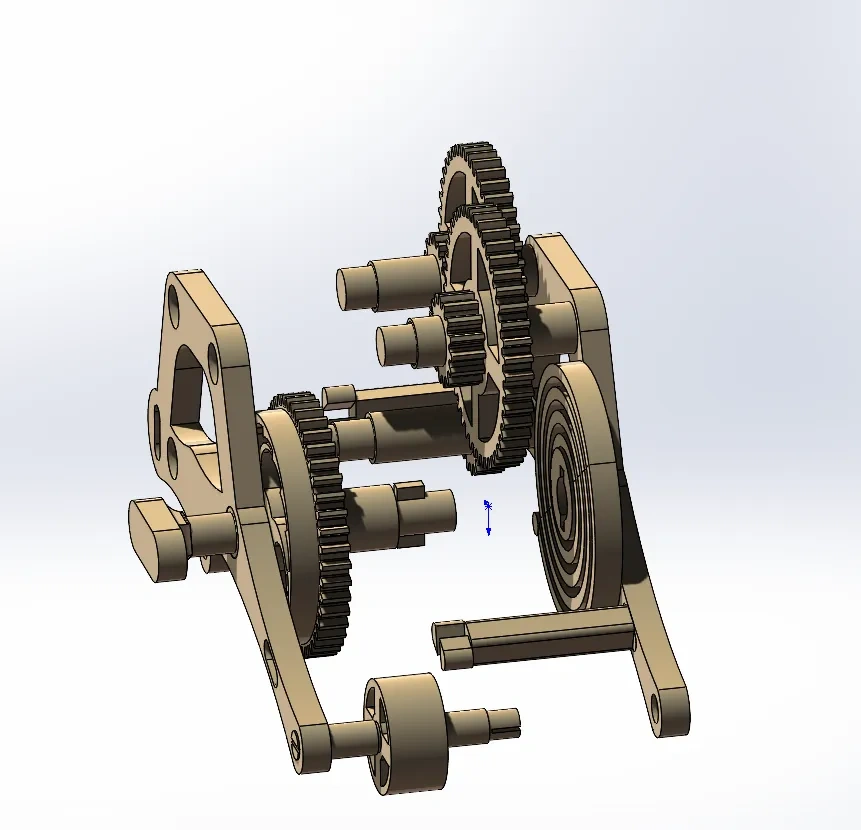
Install the drive shaft: Attach the drive shaft and retaining pins to one side of the chassis.
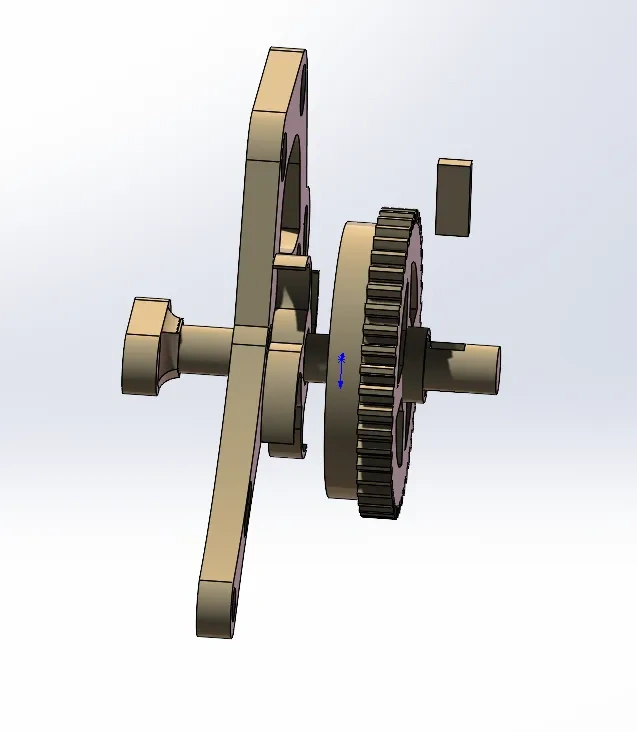
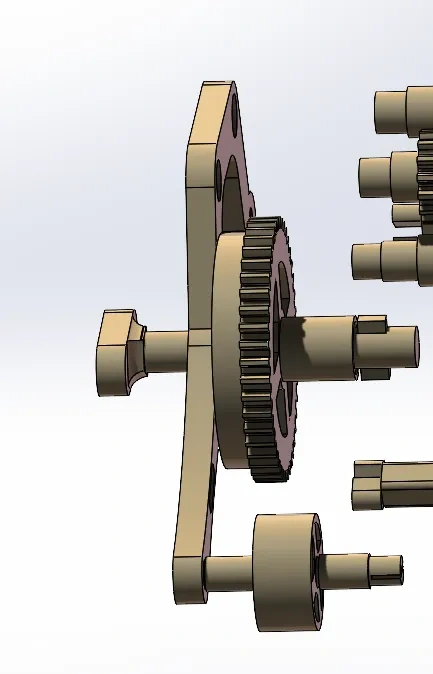
Install the gear set: Sequentially install the mainspring, large gear, small gear, and drive pinion. Note that the gears come in different sizes; once assembled, rotate them to ensure minimal resistance—this confirms proper installation-1
Insert the limit rings: Install the large, medium, and small limit rings as specified.
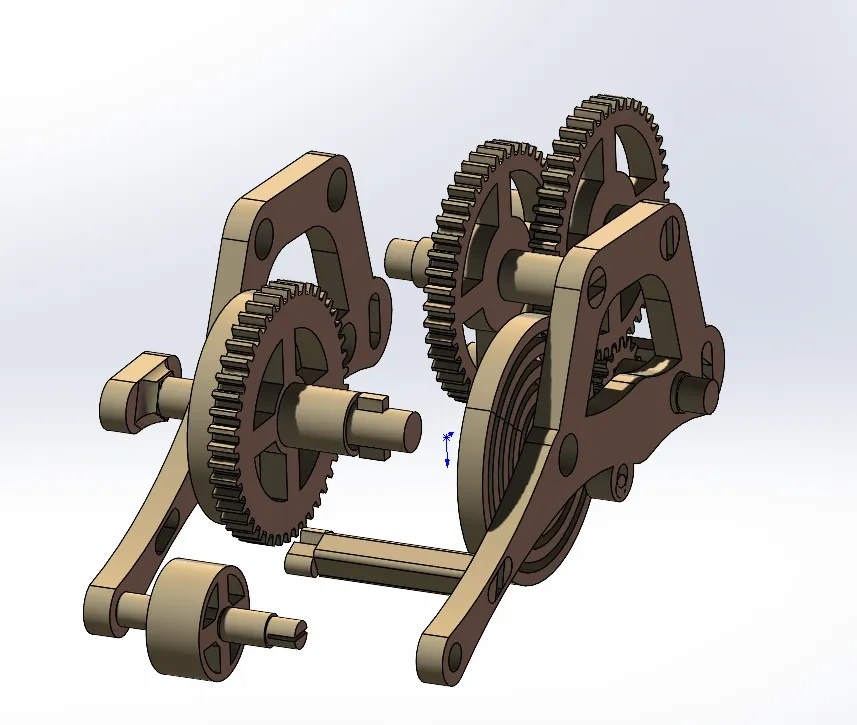
Final assembly: Attach the other side of the chassis, align the holes, and insert the pins to complete the assembly.
⚡ Frequently Asked Questions
What if it doesn’t run far enough? Try lightly sanding the pivot shaft; with proper adjustment, it should run about 10 meters.
Is assembly difficult? Be sure to use PETG for printing and ensure high print quality.
Can’t get the parts to fit? Pay close attention to the size differences among the components during assembly (gears and limit rings all have varying dimensions),
and refer to the detailed assembly diagrams.
Step 1: Completed assembly diagram
Step 2: Installing one side’s shaft and retaining pins(there’s a slightly smaller ring)

Special note: the pivot shaft (with the ring) comes in different sizes
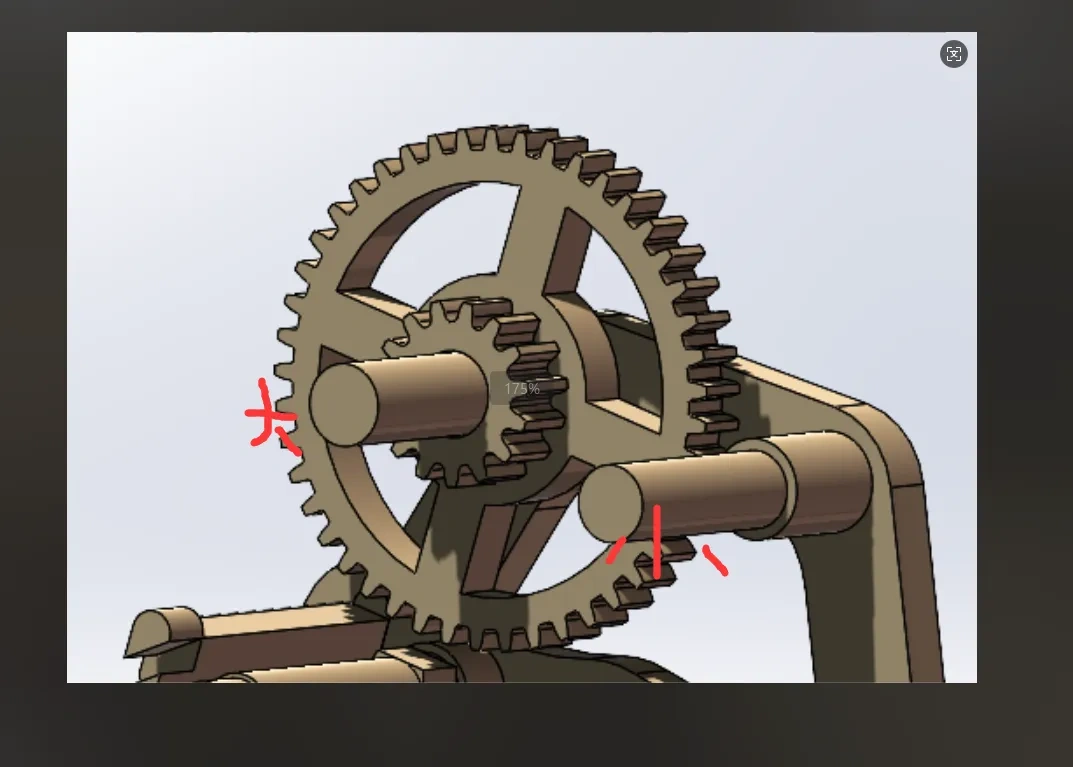
Step 3: First install the mainspring, then the large gear, small gear, and drive pinion (note that the gears also come in different sizes). After installing the large and small gears, rotate them—if there’s very little resistance, the installation is correct.

Step 4: Insert the limit rings (as shown in the figure, there are large, medium, and small ones).
Step 5: Install the other side, with an additional intermediate ring—see the second illustration.Finally, insert the pins; pay attention to the orientation of the limit gears, as shown in the third illustration.

Step 6: Once both sides are installed, align the holes and join them together.
Step 7: Congratulations—you’ve completed it! Now go ahead and enjoy playing with it.
Originality of the Model
The author declares that this work is their personally original model
This model is licensed under the following terms:
Credit must be given to the creator
Models(1)
- 三轮蓄力小车.3mfDesigner

513.53 KB

2026-04-22