

mount
probe
sovol
cartographer
sv08
sovol sv08
cartographer3d

- v3+v4

2-disc
ABS
Designer

8

0
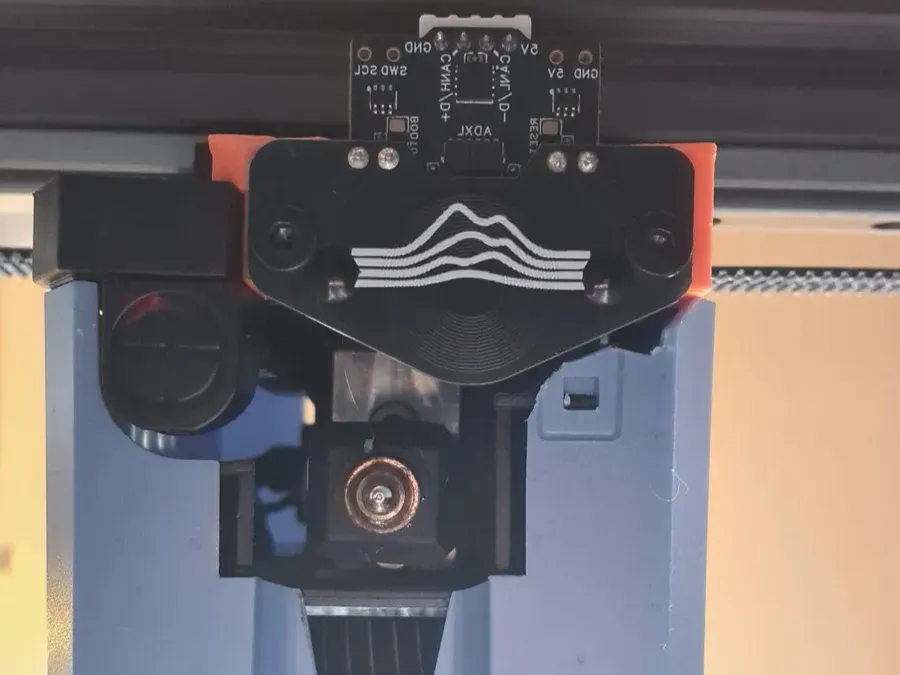
DISCLAIMER: YOU ARE GONNA NEED TO CUT A SMALL PIECE OF THE ORIGINAL SHROUD OTHERWISE THIS WON'T FIT OR USE ANOTHER SHROUD DESIGN
[955271-sv08-toolhead-cover]
Give this a read before you start and follow it to calibrate the probe [docs.cartographer3d.com]
Print settings:
ABS/ASA or better [PETG is too bendy for Touch, PLA not heat resistant enough]
0.2mm layer height
Classic wall generator
5 wall loops
5 top/bottom shells
40% cubic infill
support for the counterbores and the bridge [check photos]
Assembly:
Install 2x M3 heat inserts into mount
Turn printer off
Remove the shroud and unplug the fan connector for easier access to the toolhead
Take off the AUX fan and its mount. Keep the screws, you will reuse them
Use the 2 flathead M3 screws from the Cartographer3D box to attach the probe to the mount [Do not go full Hulk on the screws]
Route the USB cable through the lower slit in the carriage
Use the 2 socket head M3 screws [from the AUX fan removal] to attach the mount to the carriage [Same screw-tightening rule applies]
Plug the USB cable into the probe
Route the cable alongside the PTFE tube, then plug the USB-A end into the side USB port on the printer
Trim a small piece of the shroud for clearance, do not cut the small clips, they are for securing the stock ducts [check photos] or use a modified shroud
Probe offsets:
V3
X 7.3
Y 18.4
Z 2.7
V4
X 7.3
Y 20.9
Z 2.7
Originality of the Model
The author declares that this work is their personally remixed model
This model is licensed under the following terms:
Credit must be given to the creator
Remixes must be shared under the same license
Models(1)
- CCv3v4Carto_SV08.3mfDesigner

981.20 KB

2026-01-04