




CR10
Creality
CR-10


1

1
Taken from idea by baschz.
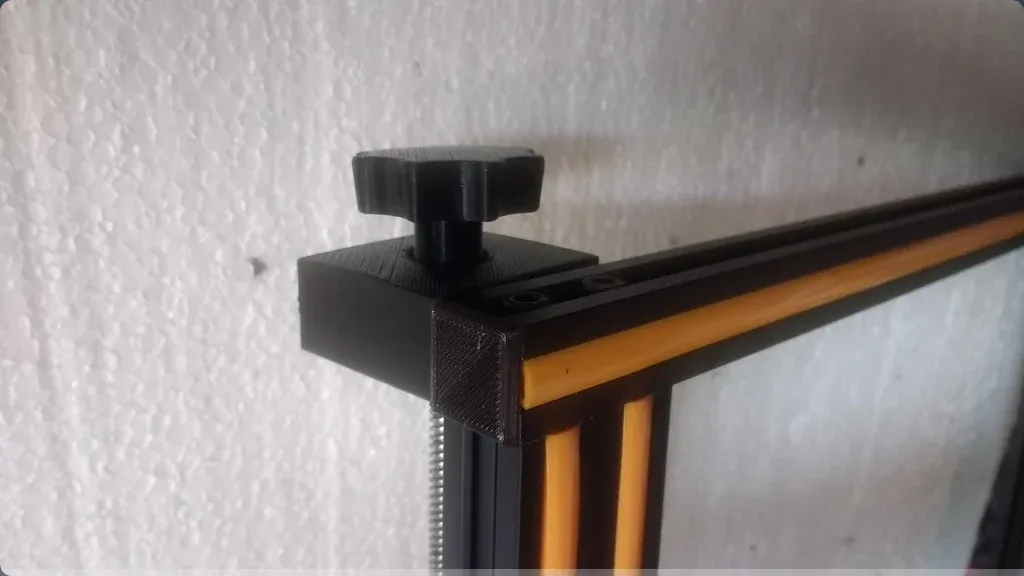
It seems all CR-10 are not the same. The knob design by baschz did not fit my leadscrew. The Z axis bearing on his machine is different than mine too.
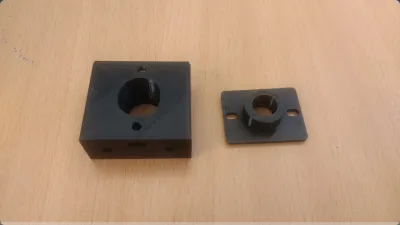
I have redesigned it and a completely new bearing so it will fit all printers.
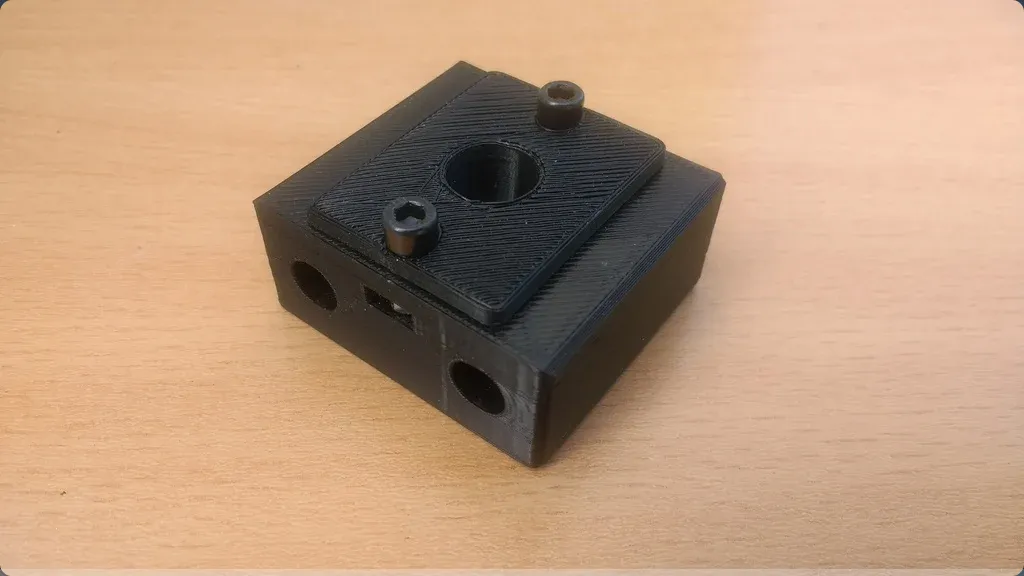
The bearing block uses the same screws and Tee nuts as the original and you also need 2 M4 x 10mm screws and nuts. The bearing is mounted in a recess that is adjustable in the Y direction so it can be accurately set to your own printer allowing for any manufacturing tolerances.
Installation instructions.
Remove existing bearing and the ball bearing inside.
Push the 2 M4 nuts into the slots in the new part and fit the ball bearing.
Attach the plate with the 2 M4 screws but do not tighten them yet. this will allow the bearing to line up correctly with the leadscrew.
Fit the new block to the printer with the screws on the top and move the Z axis all the way to the top.
Tighten the screws. This will hold the bearing in the correct Y direction.
Home the axis and then remove the new bearing and refit with the screws facing downward. Adjust the block in the X direction and tighten the screws.
Fit the knob.
Originality of the Model
The author declares that this work is their personally shared model

This model is licensed under the following terms:
Credit must be given to the creator
Models(3)
 Knob.stl
1.75 MB

2025-07-16
- Z_axis_plate.stl
225.09 KB
2025-07-16
- Z_axis_bearing.stl
453.05 KB
2025-07-16
View all(3)


