


Electronics
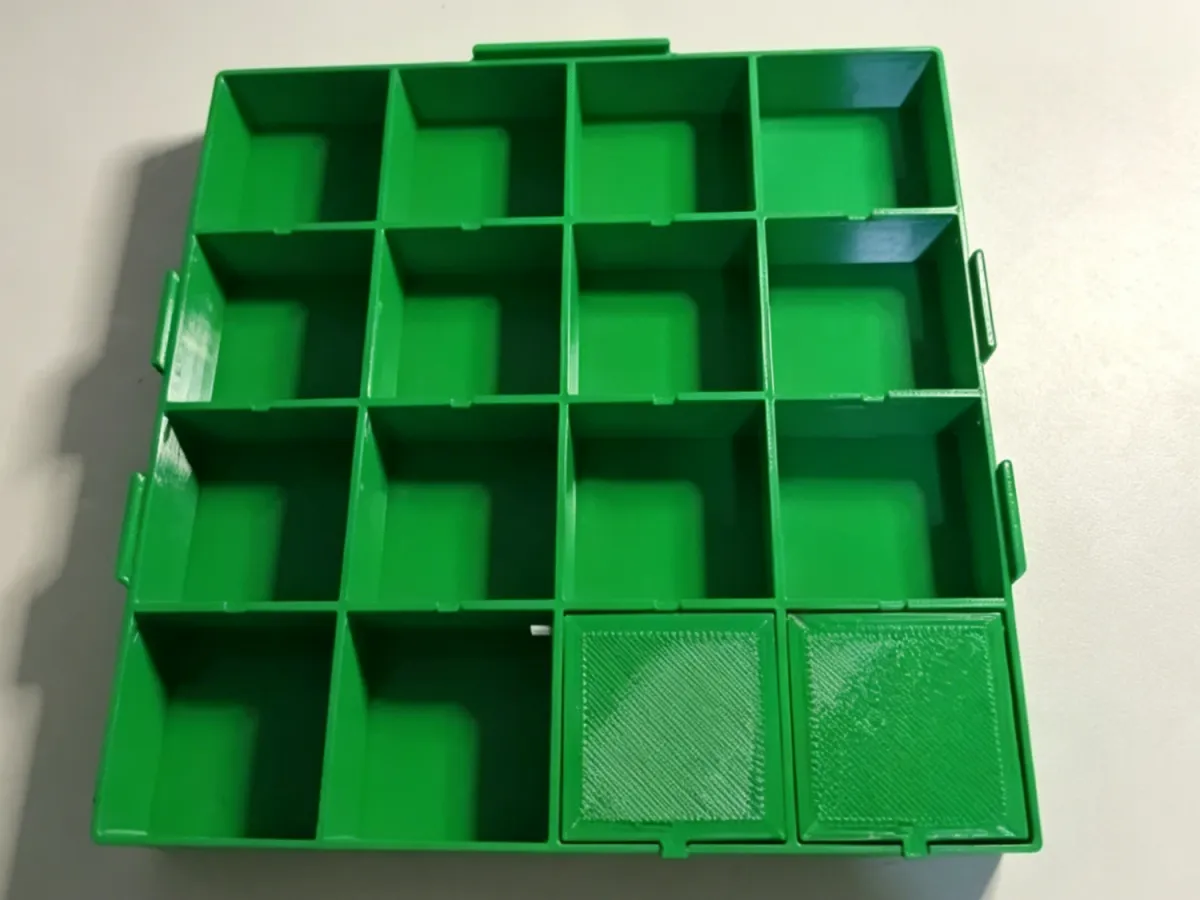
Component Storage
Screwdriver Storage
Storage Box
Box
Desktop Storage

- 0.28 mm layer height, 2-wall structure, 15% infill density

2-disc
PLA
Designer

5

1
Introduction
A purely 3D-printed mechanical spring-driven gear puzzle toy that requires no metal hardware. It employs a two-part printing strategy, recommends using PETG filament, and leverages the print filament itself as the axle, resulting in a low-cost, easily accessible transmission mechanism. The cover plate and box body are aligned via four corner定位 points, making assembly simple and intuitive. The toy itself supports vertical stacking (two boxes can be stacked on top of each other), saving desk space and storage room.
🚀 Key Highlights
Two-part printing for simplified management: The first print includes the main gear and box body, while the second print covers the cover plate and auxiliary components, preventing any single print job from becoming overly crowded.
Filament used as the axle—zero metal hardware: Simply cut 1.75mm PLA or PETG filament to serve as the axle, keeping costs extremely low and making replacement easy.
Easy axle insertion: If the axle holes are too tight, gently widen them with a craft knife, carving tool, or tweezers—no need to reprint.
Anti-mistake cover plate installation: The four corners of the second-printed cover plate align with the four corners of the box, while other parts can be placed arbitrarily, reducing the chance of incorrect assembly.
Stackable design: Two finished units can be securely stacked vertically, saving storage space and also making them suitable for multi-level displays.
🛠️ Printing Notes
Recommended materials: PETG (excellent toughness and wear resistance, leading to longer gear life); PLA+ is also acceptable, but it wears down slightly faster with prolonged use.
Printing settings: Layer height 0.2–0.28 mm, 2–3 wall layers, infill 10–15%. No supports required.
Partitioning recommendations:
First print: bottom box body, gear assembly, spring mechanism, and other core components.
Second print: top cover plate (note the special markings or locating pins at the four corners) and small auxiliary parts.
Size considerations: The maximum size per print should not exceed the printer build platform (e.g., within 200 mm).
Filament preparation: Prepare an extra short length of 1.75 mm filament of the same material (about 10–20 cm) to use as the axle rod.
🧩 Assembly Steps
Cleaning the parts: Remove the two printed parts and deburr the edges, paying special attention to removing fine burrs inside the axle holes.
Preparing the axle: Cut a 1.75 mm filament segment about 20–30 mm long. If the axle hole is too tight, gently rotate the hole with the tip of a craft knife or the handle of a pair of tweezers until it reaches the right clearance.
Installing the gears: Thread the filament axle sequentially through the gear holes and the corresponding axle seats in the bottom box, ensuring the gears can rotate freely.
Installing the spring mechanism: Insert the spring gear and energy-storage components in order.
Closing the lid: Take out the top cover plate from the second print, making sure the four corners align with the four corners of the bottom box (there are usually locating pins or grooves), and press gently.
Securing the assembly (if needed): If the design includes threads or snap-fit features, tighten them according to the original instructions; if there’s no additional fastening, the tight fit between the cover plate and the box is sufficient.
Stacking test: After completing two toys, try aligning the bottom of one with the top protrusion of the other to confirm stable stacking.
Tip: If you encounter excessive resistance when inserting the axle, don’t force it—adjust the hole slightly and try again.
⚡ Frequently Asked Questions
Is the filament axle loose or falling off?
Replace it with a slightly longer piece of filament, or apply a tiny drop of 502 glue to secure both ends. You can also lightly heat the axle end with a lighter and flatten it (exercise caution).Are the gears not turning or stuck?
Check whether the axle holes are misaligned and use a carving tool to round them out; ensure there’s no adhesion or leftover support material between the gears. Apply a small amount of dry lubricant to the axle contact surfaces.Are the four corners of the cover plate misaligned?
Inspect the second print to see if there are minor differences in the four corners (such as variations in corner radius or locating bumps), and rotate the cover plate in a different direction to try again.Is the stack unstable?
Check whether burrs on the bottom and top of the boxes are affecting the stacking structure; smooth them out with fine sandpaper. When stacking two toys, slight rotational misalignment will help them lock into place.Does PETG filament stick together or produce stringing during printing?
Lower the printing temperature appropriately (e.g., from 230°C to 220°C), increase retraction, and ensure the filament is thoroughly dried.Can other materials be used for the axle?
Yes, but we recommend plastic rods or metal wires with a diameter of 1.7–1.8 mm; anything thicker may crack the axle holes.
Originality of the Model
The author declares that this work is their personally original model
This model is licensed under the following terms:
Credit must be given to the creator
Models(1)
- 螺丝元器件盒子.3mfDesigner

173.09 KB

2026-04-23