



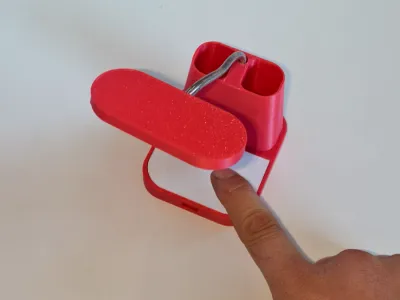

Small Table Lamp

Tap the small table lamp

 0.2 mm layer height, 3‑layer walls, 8% infill density
1-disc
PLA
Designer

2

0
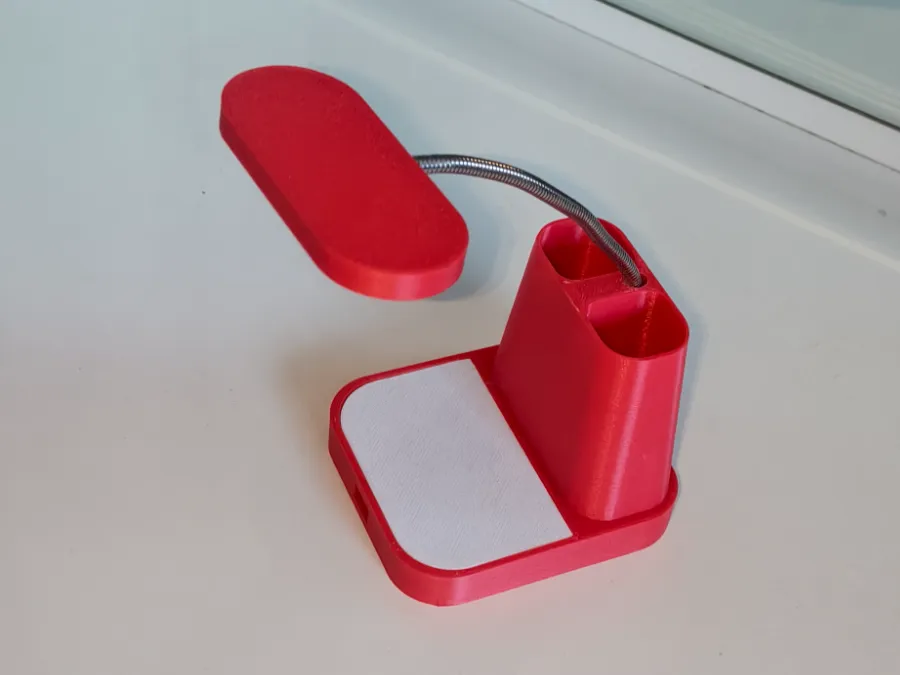
Sleek, Magnetic 3D‑Printed Mini Desk Lamp – Product Overview
1. Design Inspiration
This mini desk lamp draws its design inspiration from the seamless integration of desktop organization and minimalist, functional aesthetics. Addressing the common pain points of cluttered desk surfaces and the growing demand for portable, on‑the‑go lighting, the lamp leverages modular design principles to combine illumination with a built‑in pen holder. The striking red, high‑gloss finish not only injects visual energy into any workspace but also ensures optimal compatibility with various desk setups. The lamp head features flexible, adjustable articulation, perfectly catering to both the personalized customization needs of 3D printing enthusiasts and the versatile lighting requirements of everyday scenarios—whether it’s for office work, bedside reading, or other ambient lighting applications.
2. Printing Requirements
1. Printed Components: The lamp head assembly, base assembly, and cover plate—all four parts are printed separately, with no additional sub‑assemblies or detachable components.
2. Support Structures: No supports are required throughout the entire print process, eliminating residual support material that could compromise assembly accuracy and aesthetic appeal.
3. Filament Selection: We recommend using PLA+ in a vibrant red finish (1.75 mm diameter), offering an ideal balance of printability, structural integrity, and visual impact. For enhanced drop resistance, PETG in red is an excellent alternative.
4. Print Parameters:
- Layer Height: 0.2 mm—striking a harmonious balance between printing efficiency and surface smoothness.
- Wall Thickness: 2.4 mm—ensuring robust structural stability while minimizing the risk of breakage.
- Infill Density: 20%; for the base, we suggest increasing the infill to 30% to further enhance center of gravity stability.
- Nozzle Temperature: 200–210°C for PLA+, and 220–230°C for PETG.
- Bed Temperature: 60°C for PLA+, and 70°C for PETG.
- Print Speed: 25 mm/s for external walls, 35 mm/s for internal walls, and 40 mm/s for infill.
3. Assembly Instructions
1. Core Component Preparation: Flexible metal gooseneck tubing (with threaded ends), an LED light board (custom‑fit to the internal dimensions of the lamp head), a compact lithium‑ion battery (3.7 V, housed within the base), a tactile push‑button switch (mounted on the front panel of the base), a Type‑C charging port (embedded along the side of the base), and screws compatible with the gooseneck tubing’s thread pitch.
2. Lamp Head Assembly: Insert the LED light board into the designated slot inside the lamp head, solder the wires to the positive and negative terminals of the light board, then route the wires through the interior of the gooseneck tubing. Screw one end of the gooseneck tubing into the threaded hole at the base of the lamp head and tighten securely to ensure a firm connection.
3. Base Assembly: Arrange the lithium battery, charging port, and tactile switch according to their designated slots within the base. Connect the components in series via wiring to form a complete power circuit—be sure to insulate all solder joints. Once the circuit is confirmed to be functioning properly, screw the other end of the gooseneck tubing into the threaded hole at the top of the base.
4. Cover Plate Assembly: After fully housing the base’s electronic components, align the cover plate with the snap‑fit slots on the top of the base and press firmly to secure it in place—completing the final assembly.
Originality of the Model
The author declares that this work is their personally original model
This model is licensed under the following terms:
Credit must be given to the creator
Models(1)
- 台灯外壳.3mfDesigner

1.78 MB

2026-03-09


