


mini
Toys
edc
Sword
Mechanical
Telescopic
Weapons
Mecha
Knife
Unzip
High‑Definition Printing
Dagger
Telescopic Sword
Lightsaber
Hollowed-out design
Dagger
Machine
Xiao Jian
Small Knife
Short Knife
Hard Surfaces
Shield Axe
Handsome
Source Plan

- 0.2 mm layer height, 2-wall structure, 8% infill density

1-disc
PLA
Designer

66

24
Introduction:
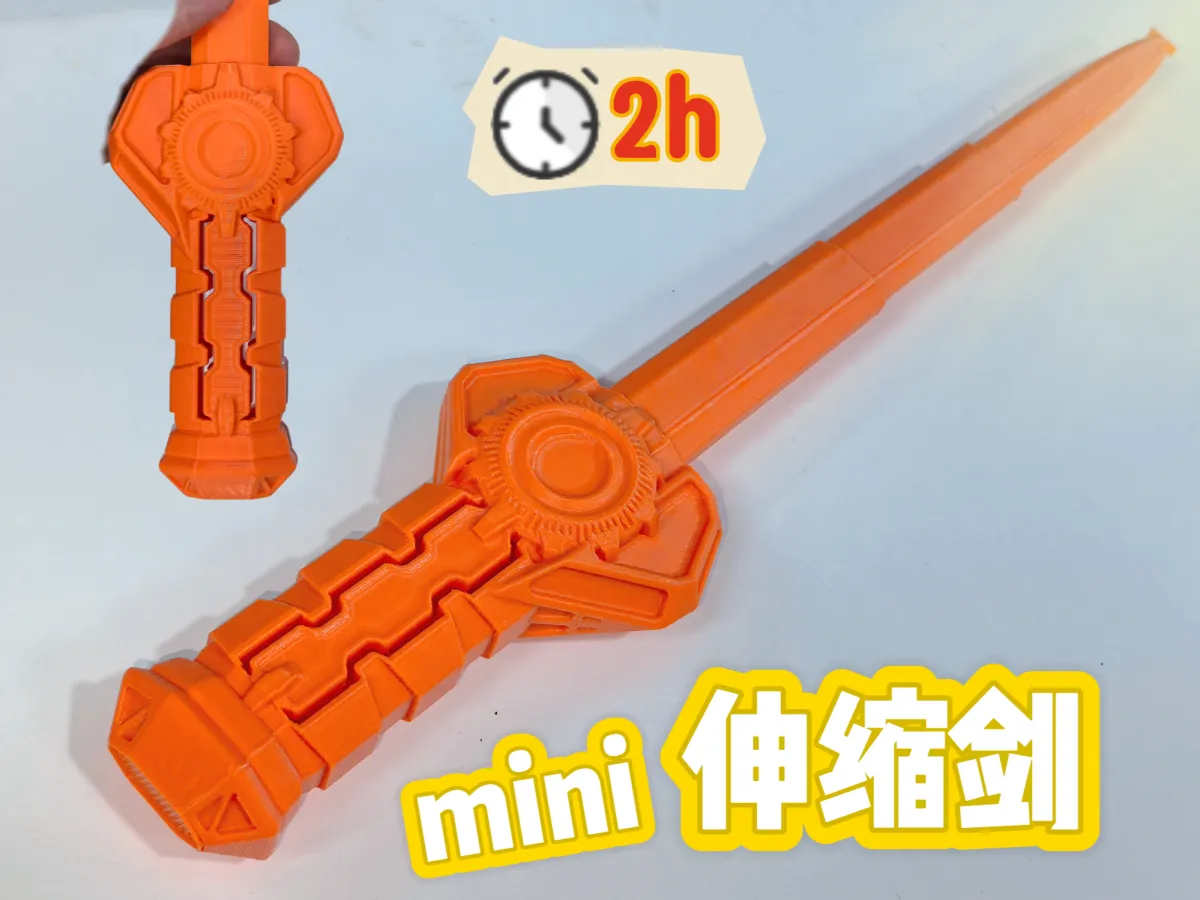
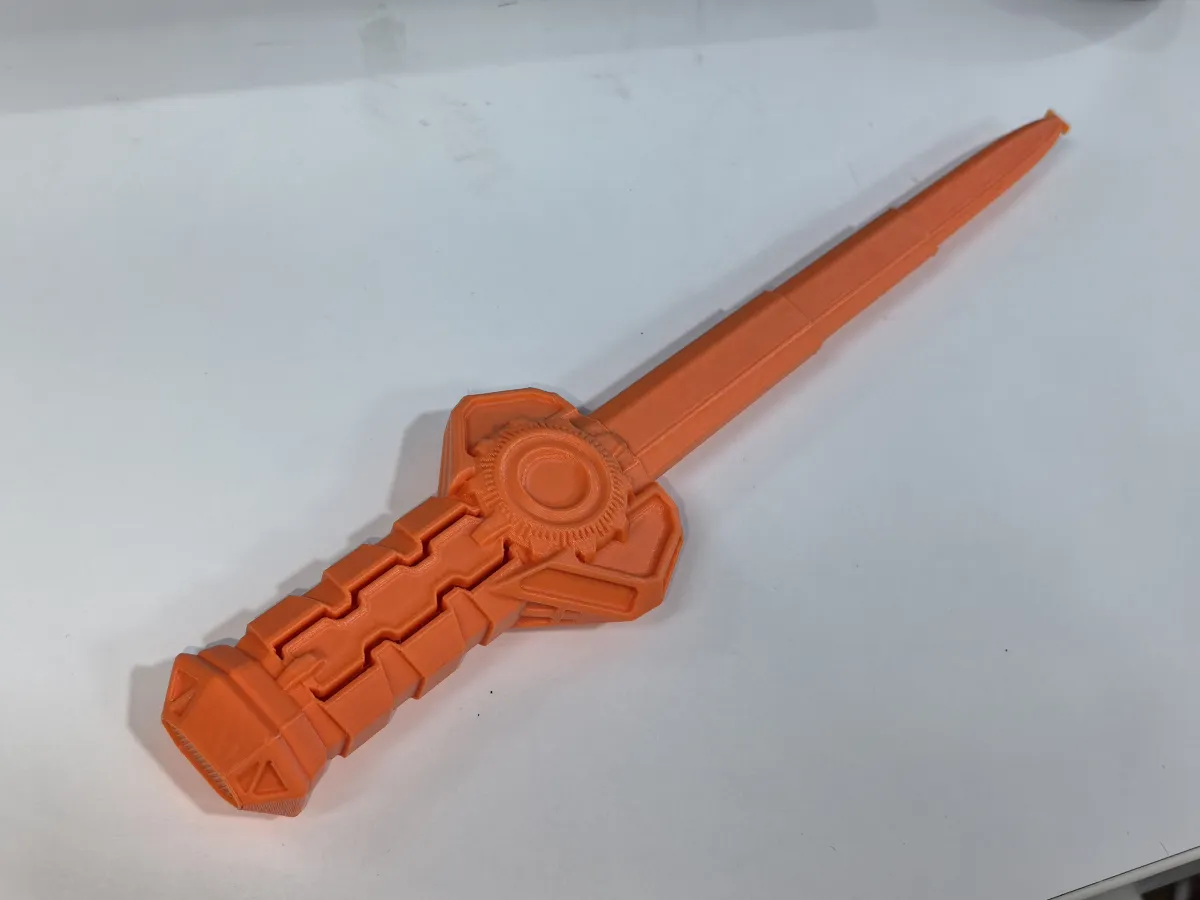
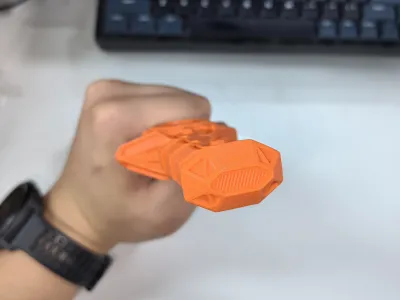
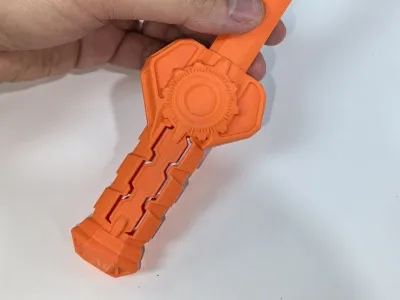
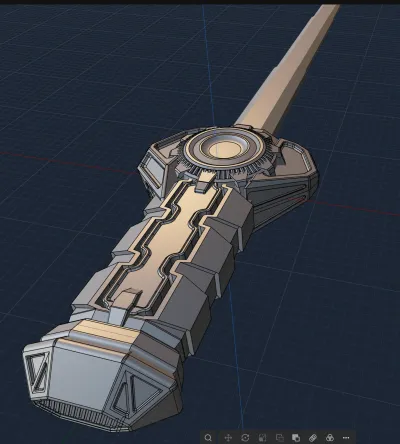
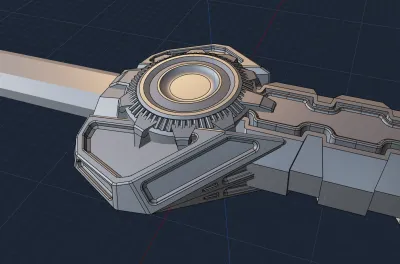
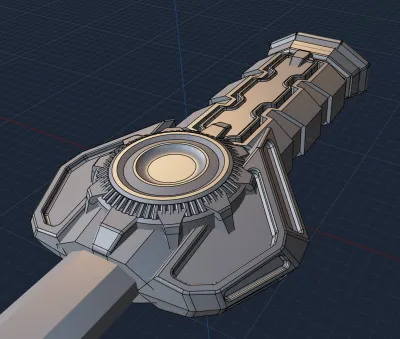
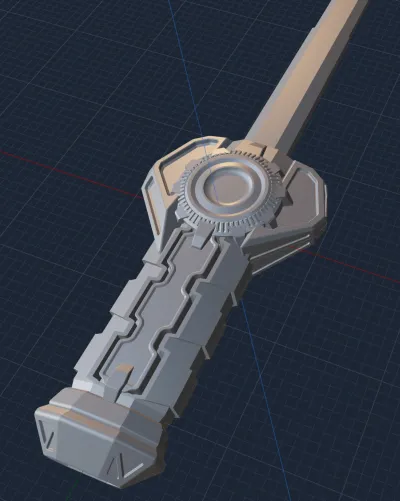
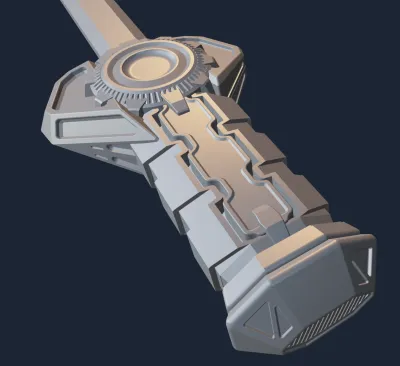
Mini Telescopic Sword No. 11 – Mecha Sword 3: Inspired by the mecha design elements I’ve been exploring lately, this piece came together almost entirely through spontaneous sketching—no clear plan, no original concept to guide me. I mixed and matched ideas from various sources, tweaking here and there until I arrived at a freestyle design that I’m actually quite pleased with—a look I’ve long dreamed of capturing in my work. The sword’s blade bears a striking resemblance to the shield‑axe wielded by the fierce warrior King Mung, with asymmetrical left‑right proportions to prevent a rigid, one‑dimensional aesthetic. Circular motifs echo the imagery of clock faces, while hollowed-out, sharply defined edges add depth and visual interest. The hilt features intricate cutouts that enhance its breathability and ergonomic feel, rounded off for safe, child‑friendly handling—smooth yet secure in the hand.
This is the 11th installment in my Mini Telescopic Sword series. Modeled in PL (Plasticitys Plastic City), the sword is printed in one piece, requiring no assembly—and takes roughly 2 hours to print. Its dimensions are perfectly suited for both adults and kids to enjoy. I plan to continue developing this series.
Recently, I’ve been diving into PL, and I’ve found it incredibly intuitive when working with hard‑surface models. Its tools for offsetting faces, chamfering edges, cutting surfaces, and creating symmetrical geometry are all highly effective, with smooth, lag‑free performance. At first, switching over from Fusion felt strange—PL doesn’t always deliver the same level of precision, so I ended up relying heavily on visual estimation for sizing and positioning. To make matters more challenging, my Blender skills are still pretty basic; I had to relearn most of the keyboard shortcuts from scratch. Plus, PL lacks a timeline‑based undo feature, which made me a bit uneasy at times—but its flexible post‑processing capabilities actually gave me more freedom to tweak and refine my designs without feeling overly dependent on time‑based adjustments. For someone like me, who spends hours tweaking a single detail, this approach is a real game‑changer. When it comes to models that don’t demand strict dimensional accuracy but place greater emphasis on artistic expression—especially hard‑surface models—PL is an ideal choice. I’ll keep learning and experimenting with PL, honing my skills in hard‑surface modeling. If you’re interested, why not join me in exploring this powerful tool and having some fun along the way?
Print Parameters: 8% spiral infill, seam alignment, no brim, supports included (hand‑drawn), plus standard settings for other parameters.
Notes:
1. It’s best not to attempt printing multiple swords at once—doing so increases the risk of print failures.
2. The base of the telescopic sword model is relatively small. To prevent warping or shifting during printing that could lead to layer misalignment, we recommend: cleaning the build plate, applying a light coat of adhesive or primer, and raising the heated bed temperature by 5°C.
3. If the first few layers fail to adhere properly and the model starts to detach mid‑print, you can gently use a craft knife to carefully slice away any excess material before continuing the print.
4. If a particular section of the telescope doesn’t extend smoothly, it may be due to slight extrusion issues or layer misalignment. Try extending and retracting the mechanism several times—it should become smoother with each cycle.
5. These prints were tested exclusively using PLA. If you’re printing with PETG, there’s a chance of adhesion issues or gaps that could affect the telescope’s smooth operation. We recommend drying your filament thoroughly and adjusting the hole compensation settings according to your specific needs.
Recommended Upstreams on PL (Thanks to these creators for guiding me into the world of PL): :
[TIEZHU Classroom – TIEZHU Classroom Personal Page – Bilibili Video]
[Bai Ze 2012 – Bai Ze 2012 Personal Page – Bilibili Video]
[Captain C4D – Captain C4D Product Rendering Personal Page – Bilibili Video]
[YA Workshop – YA Workshop Personal Page – Bilibili Video]
[Three Years and Beyond w – Three Years and Beyond w Personal Page – Bilibili Video]
[Quan Dian Studio – Quan Dian Studio Video Sharing – Bilibili Video]
Blender Hacker – Blender Hacker Personal Page – Bilibili Video (Reposted PL videos)
Originality of the Model
The author declares that this work is their personally original model
This model is licensed under the following terms:
This work is licensed under a Standard Digital File License. Digital files have a strict non-commercial, personal use only license.
You shall not share, sub-license, sell, rent, host, transfer, or distribute in any way the digital file or 3D printed versions of this object, nor any other derivative work of this object in its digital or physical format (including remixes of this object). You can not host these files on other digital platforms, web stores or cloud repositories. The objects may not be used in any way whatsoever in which you charge money, collect fees.
Models(1)
- 机甲剑3-定稿.3mfDesigner

1.43 MB

2025-09-03