


'%3e%3cpath%20id='Rectangle%20995'%20d='M0%200H24C26.2091%200%2028%201.79086%2028%204V52C28%2054.2091%2026.2091%2056%2024%2056H0V0Z'%20fill='black'%20fill-opacity='0.2'/%3e%3cpath%20id='Vector'%20d='M17%2022L11%2028L17%2034'%20stroke='white'%20stroke-opacity='0.85'%20stroke-width='1.5'%20stroke-linecap='round'%20stroke-linejoin='round'/%3e%3c/g%3e%3cdefs%3e%3cclipPath%20id='clip0_1639_4805'%3e%3crect%20width='28'%20height='56'%20fill='white'/%3e%3c/clipPath%3e%3c/defs%3e%3c/svg%3e)


'%3e%3cpath%20id='Rectangle%20995'%20d='M0%204C0%201.79086%201.79086%200%204%200H28V56H4C1.79086%2056%200%2054.2091%200%2052V4Z'%20fill='black'%20fill-opacity='0.2'/%3e%3cpath%20id='Vector'%20d='M11%2022L17%2028L11%2034'%20stroke='white'%20stroke-opacity='0.85'%20stroke-width='1.5'%20stroke-linecap='round'%20stroke-linejoin='round'/%3e%3c/g%3e%3cdefs%3e%3cclipPath%20id='clip0_1639_4802'%3e%3crect%20width='28'%20height='56'%20fill='white'/%3e%3c/clipPath%3e%3c/defs%3e%3c/svg%3e)
Holder
Elegoo
Centauri Carbon
Centauri
Elegoo Centauri Carbon
Button
Buildplate
Plates
FNT
Plates Holder
Buildplate Holder

- CentauriCarbon_Simple_4_Desktop_Covered_ElegooSlicer
'%20fill='%23B3B3B3'/%3e%3crect%20id='Rectangle%201051'%20x='8'%20y='2'%20width='12'%20height='0.5'%20transform='rotate(90%208%202)'%20fill='%23D9D9D9'/%3e%3crect%20id='Rectangle%201052'%20x='11'%20y='2'%20width='12'%20height='0.5'%20transform='rotate(90%2011%202)'%20fill='%23B3B3B3'/%3e%3cpath%20id='Rectangle%201048'%20d='M2%202H14V14H11L10.5%2014.5H8H5.5L5%2014H2V2Z'%20stroke='%23828282'%20stroke-linejoin='round'/%3e%3c/g%3e%3c/g%3e%3c/svg%3e)
2-disc
PLA
Designer - CentauriCarbon_Simple_4_Shelf_Open_ElegooSlicer
2-disc
PLA
Designer - CentauriCarbon_Simple_4_Desktop_HardTop_ElegooSlicer
3-disc
PLA
Designer - CentauriCarbon_Simple_4_Desktop_Open_ElegooSlicer
2-disc
PLA
Designer

2.3k

183
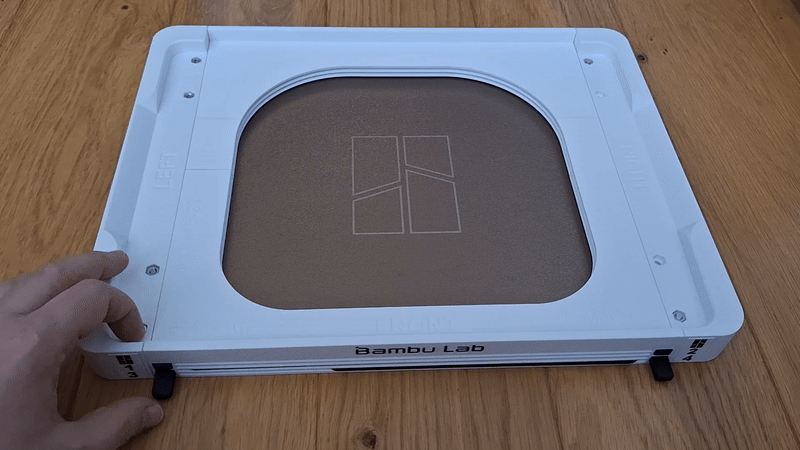
FNT Centauri Carbon Simple buildplate holder
(FNT Centauri Carbon Simple Plates holder with button)
FNT Centauri Carbon Simple buildplate holder
A new addition has joined the popular family of FNT Build Plate Holders with Button — a streamlined model named FNT Simple.
It was created in response to user requests for a faster-to-print, easier-to-assemble version of the original design.
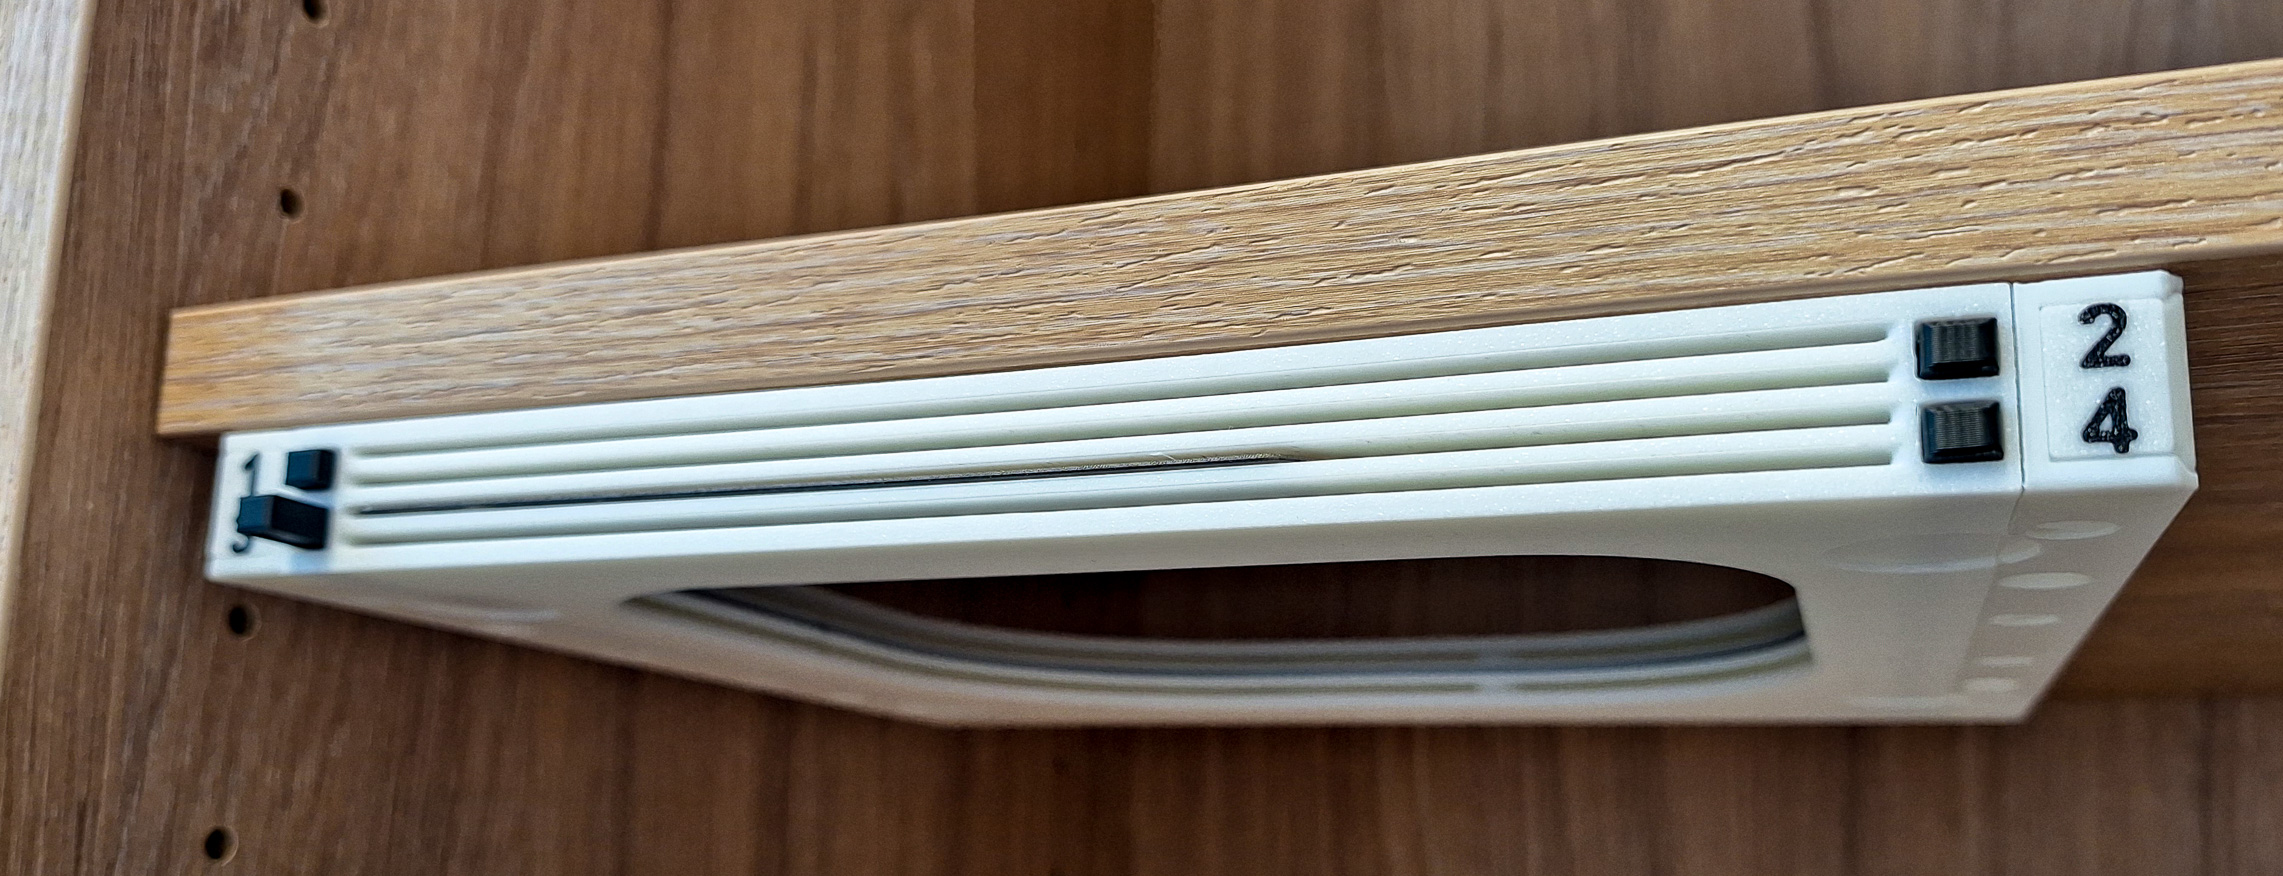
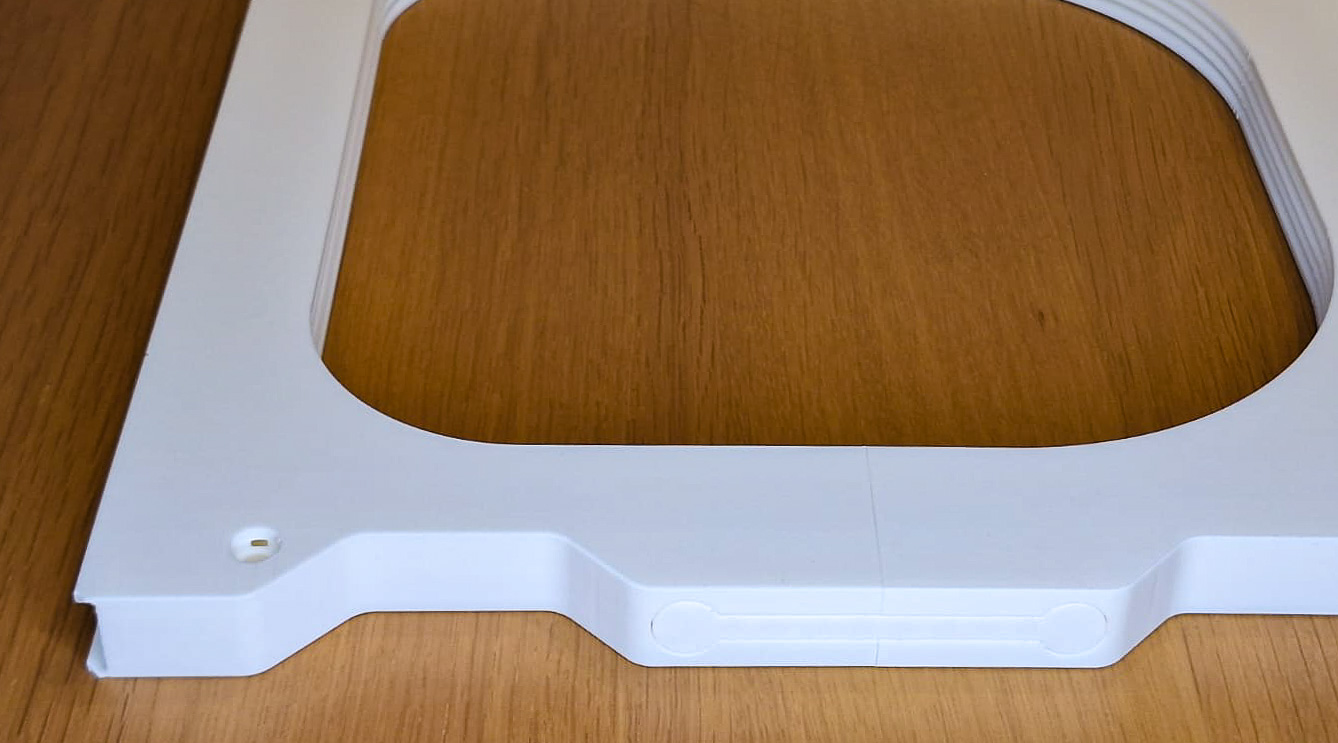
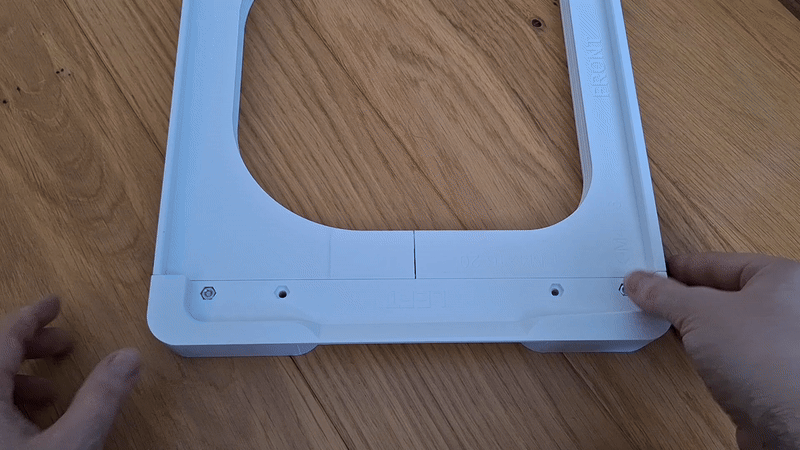
This build plate holder keeps all the benefits of the previous FNT versions — easy assembly, reliable operation, and a smooth, maintenance-free mechanism. It can be attached to a shelf using 3mm screws or double-sided tape. The holder also works great when rotated vertically.
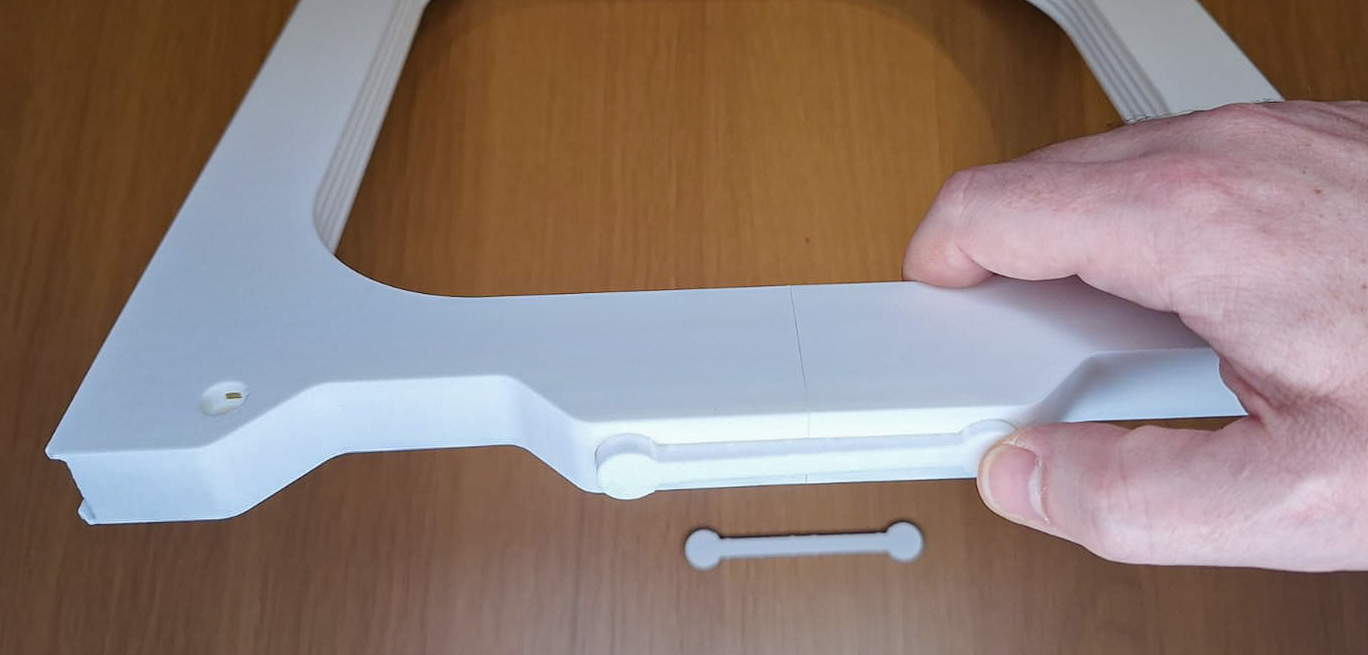
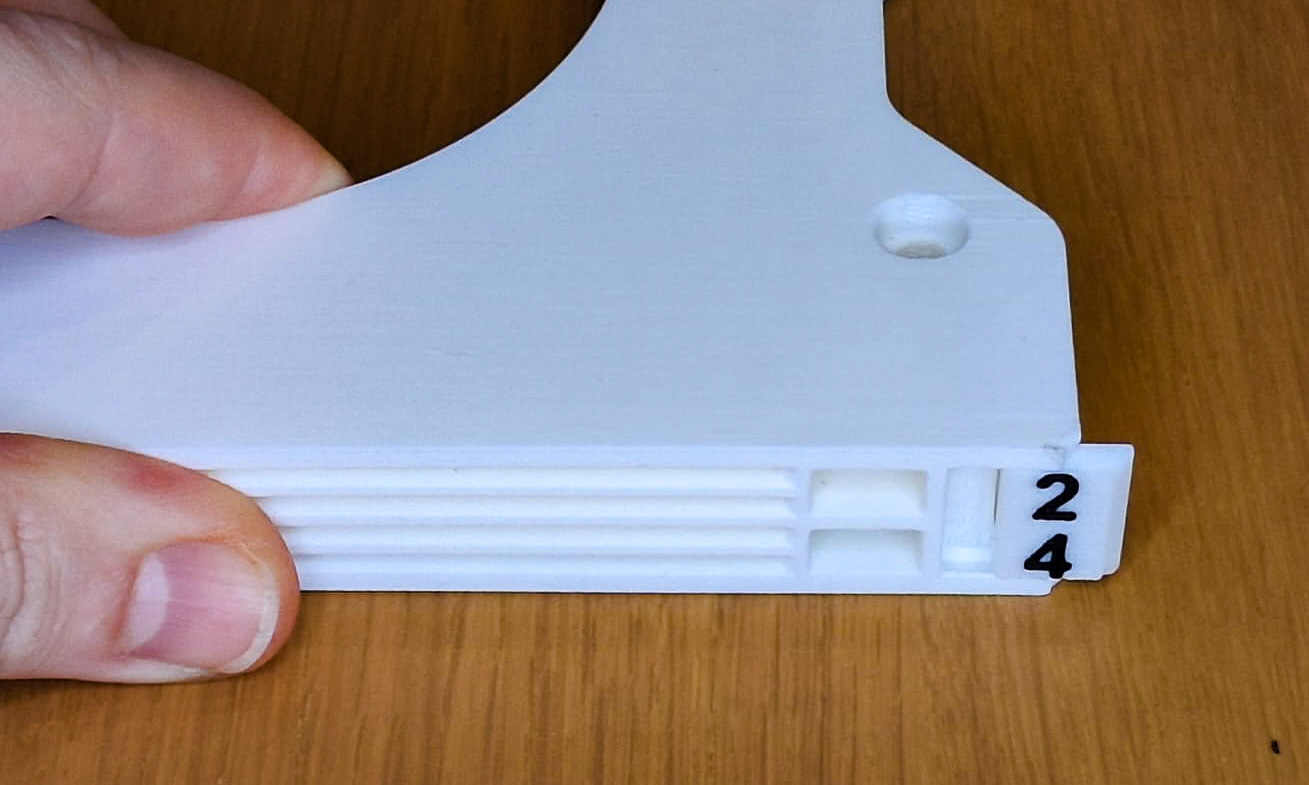
The ejection system works very lightly: when you insert the build plate, the button rises effortlessly into position.
By pressing the button, the build plate is pushed out by approximately 2 cm, making it easy to grab without touching the surface and leaving unwanted fingerprints.
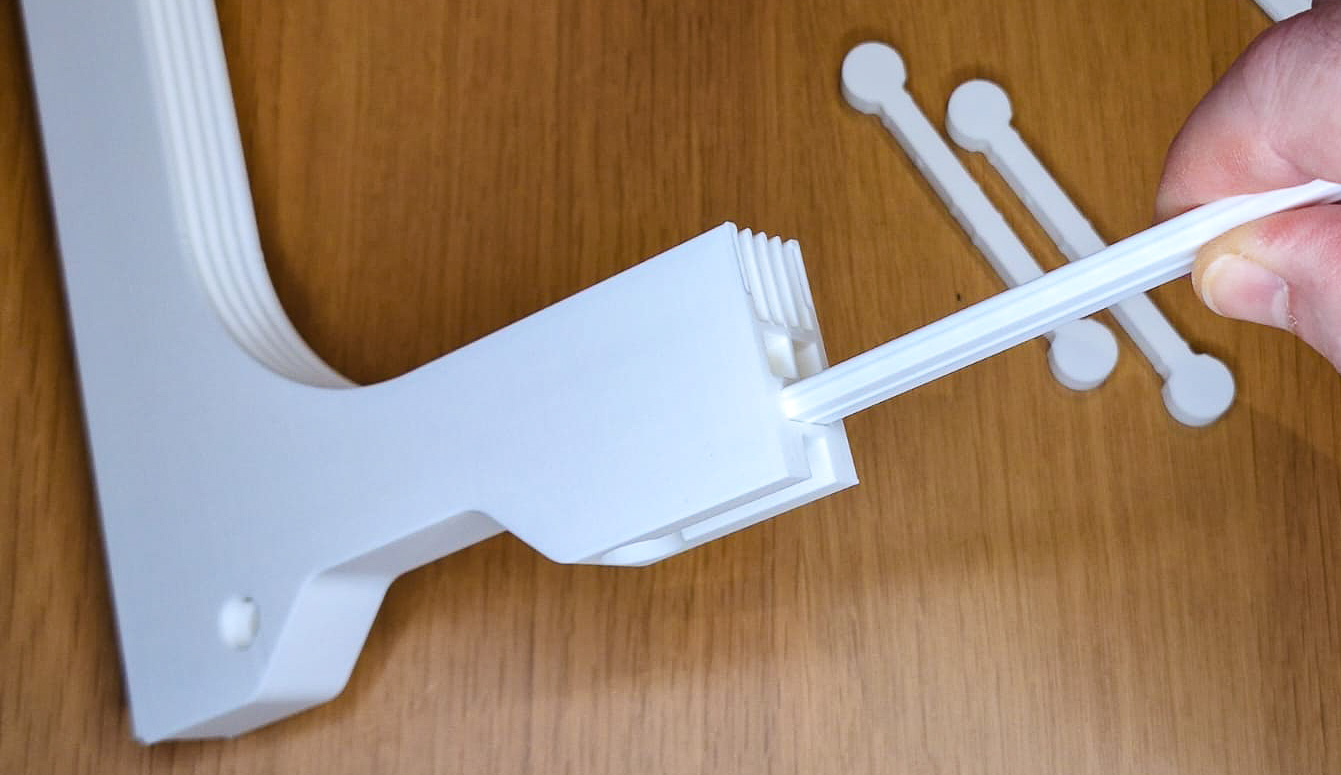
The body consists of only two printed parts, connected using alignment pins and a locking piece. The assembly is very simple, and the locking connection is extremely strong—in fact, even stronger than using screws in similar designs.
No screws or additional hardware are required, making the assembly process quick, clean, and accessible for every user.
Despite its simplified construction, the model retains the well-known FNT strength, reliability, and smooth plate handling.
The FNT Simple is available in four versions:

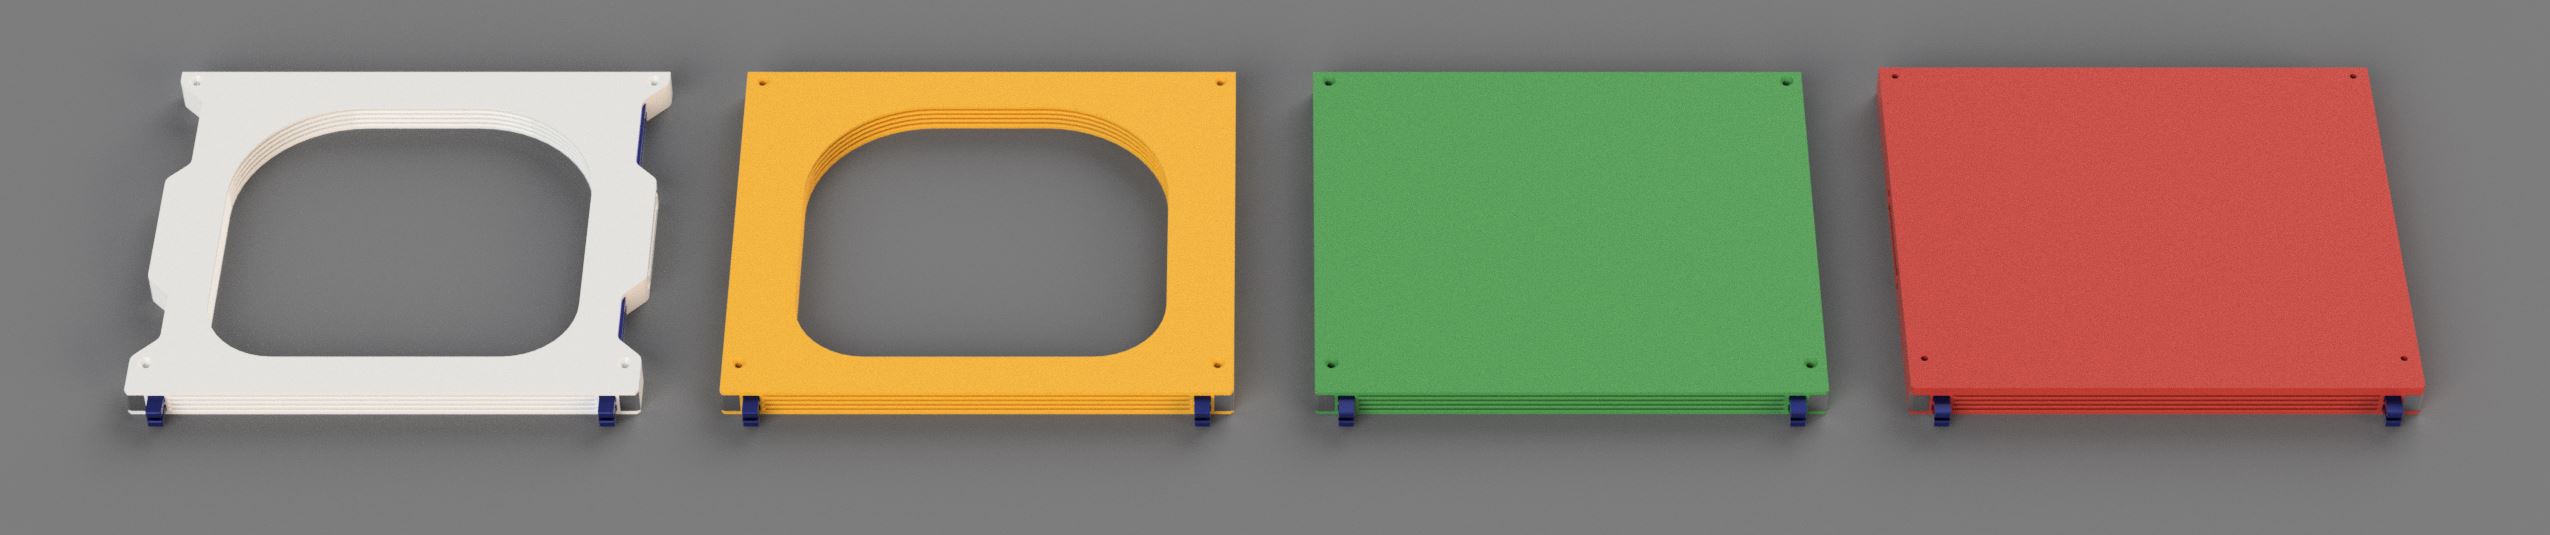
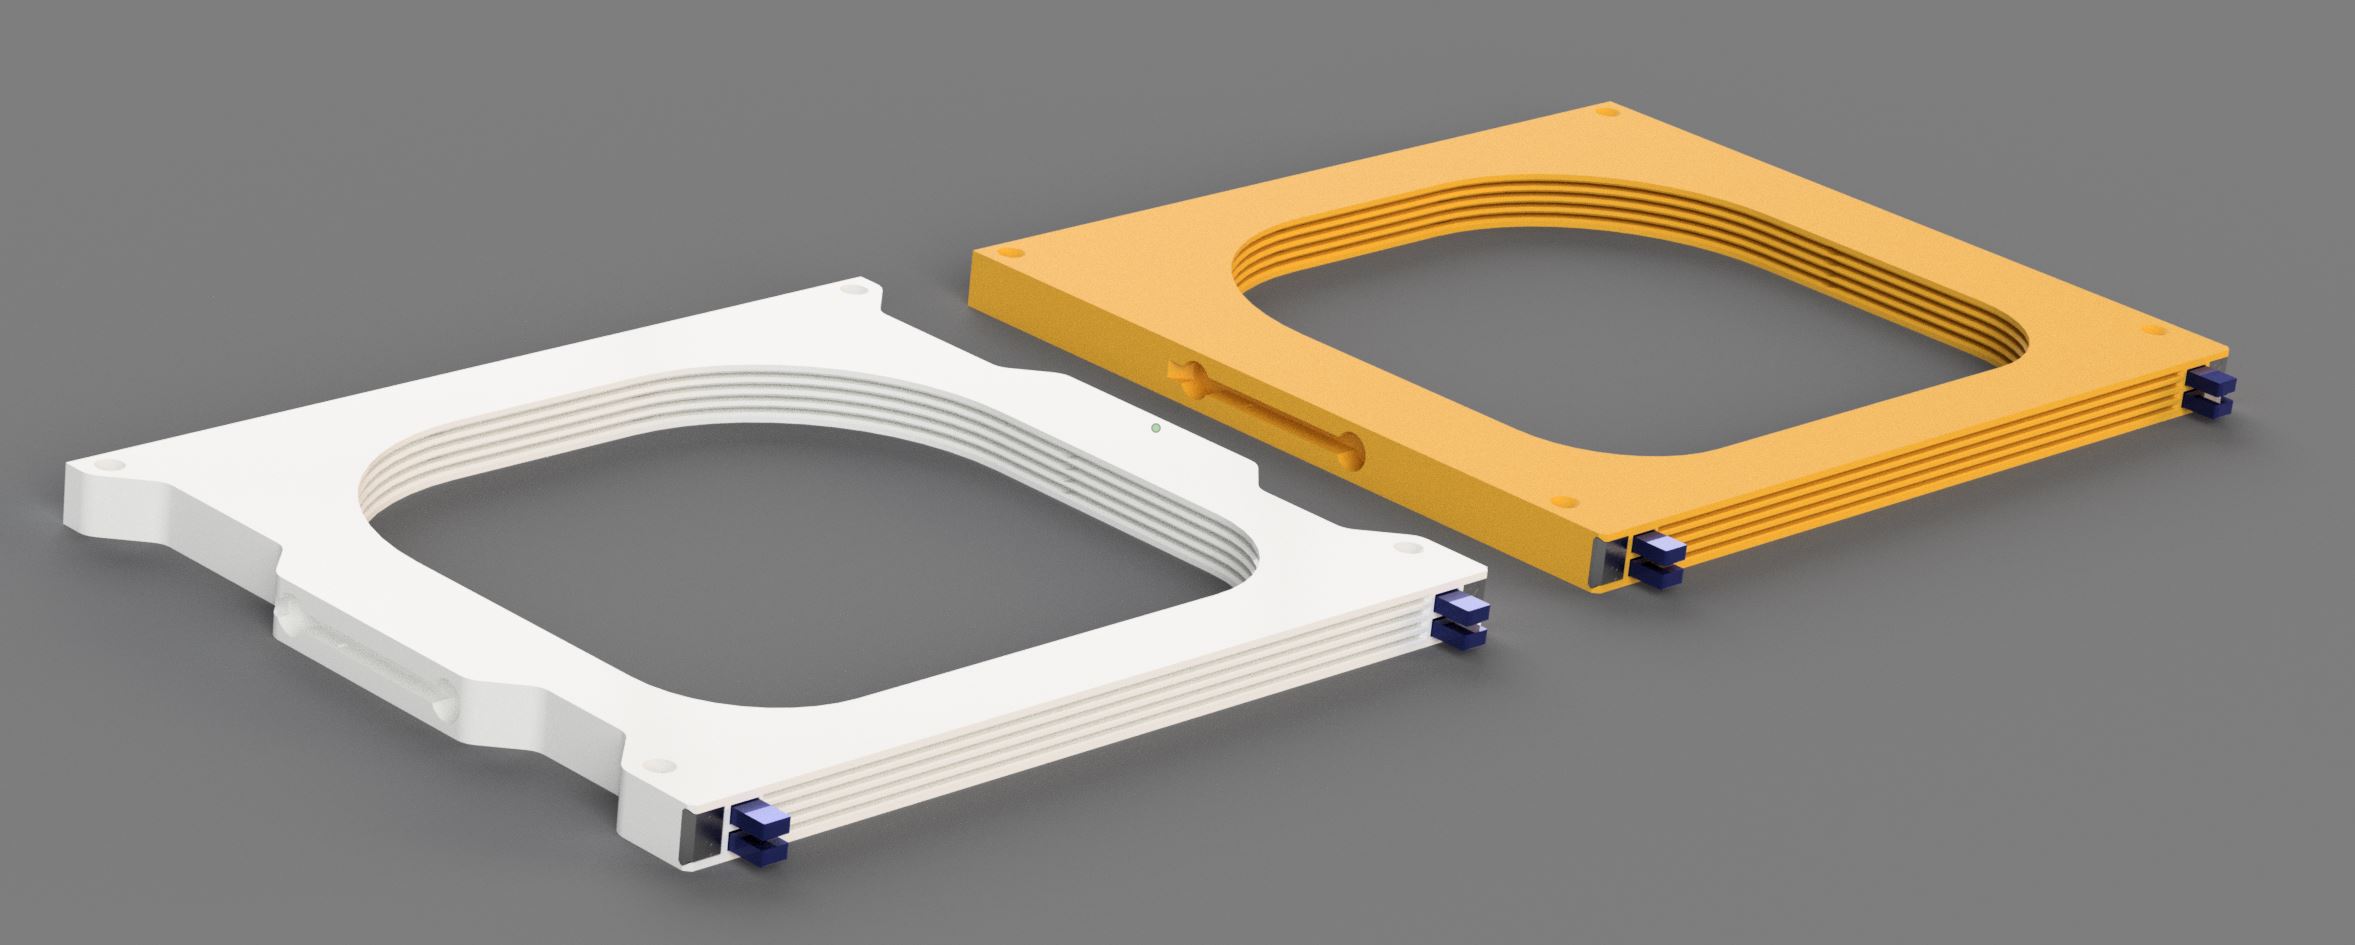
- FNT Centauri Carbon Simple4 Shelf Open (WHITE) - This version is specifically designed for installation under a shelf supported by pins.
The cutouts in the FNT holder allow the pins to be neatly hidden, creating a clean and integrated look.
Of course, the holder can also be mounted under a desk if preferred. This is the simplest and fastest-to-print model in the entire Simple4 series. - FNT Centauri Carbon Simple4 Desktop Open (YELLOW) - This version features flat, aligned side walls, unlike the Shelf variant which includes cutouts for shelf pins. The difference is purely visual — the functionality remains exactly the same.
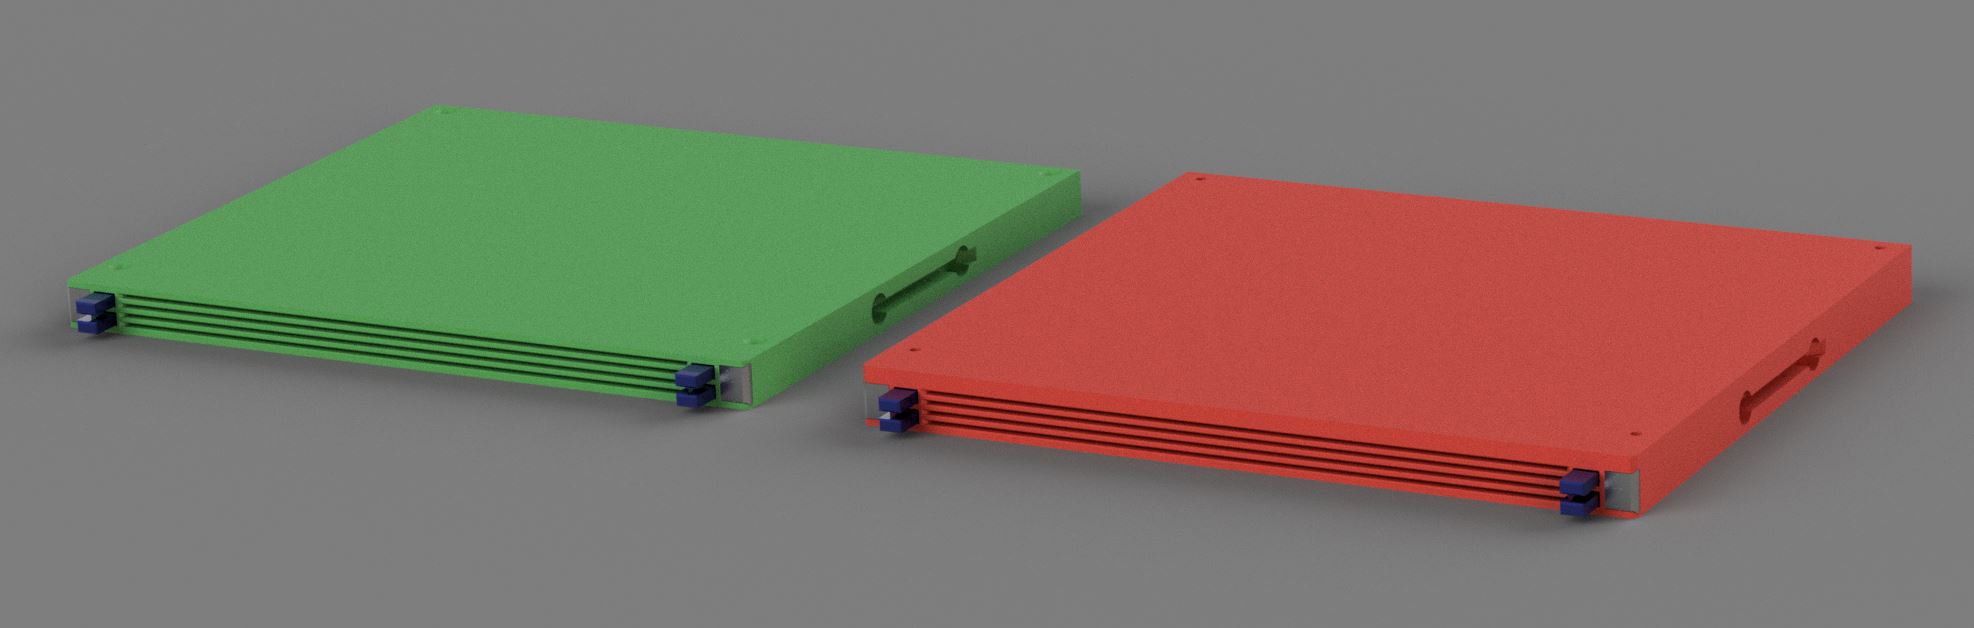
- FNT Centauri Carbon Simple4 Desktop Covered (GREEN) - This version is identical to the Desktop Open model, but includes a top cover to protect the build plates from dust.
Front and back cover is not mechanically connected betweern body parts. You can use glue it tape to secure it. - FNT Centauri Carbon Simple4 Desktop HardTop (RED) - Compared to the Covered version, the top panel in the HardTop model is 4 mm thicker, providing increased strength and rigidity.
This makes it suitable not only as a dust cover but also as a load-bearing platform, allowing it to function as a small stand. Unlike the Covered version, the HardTop cover components are interconnected, giving the entire structure greater stability and durability.
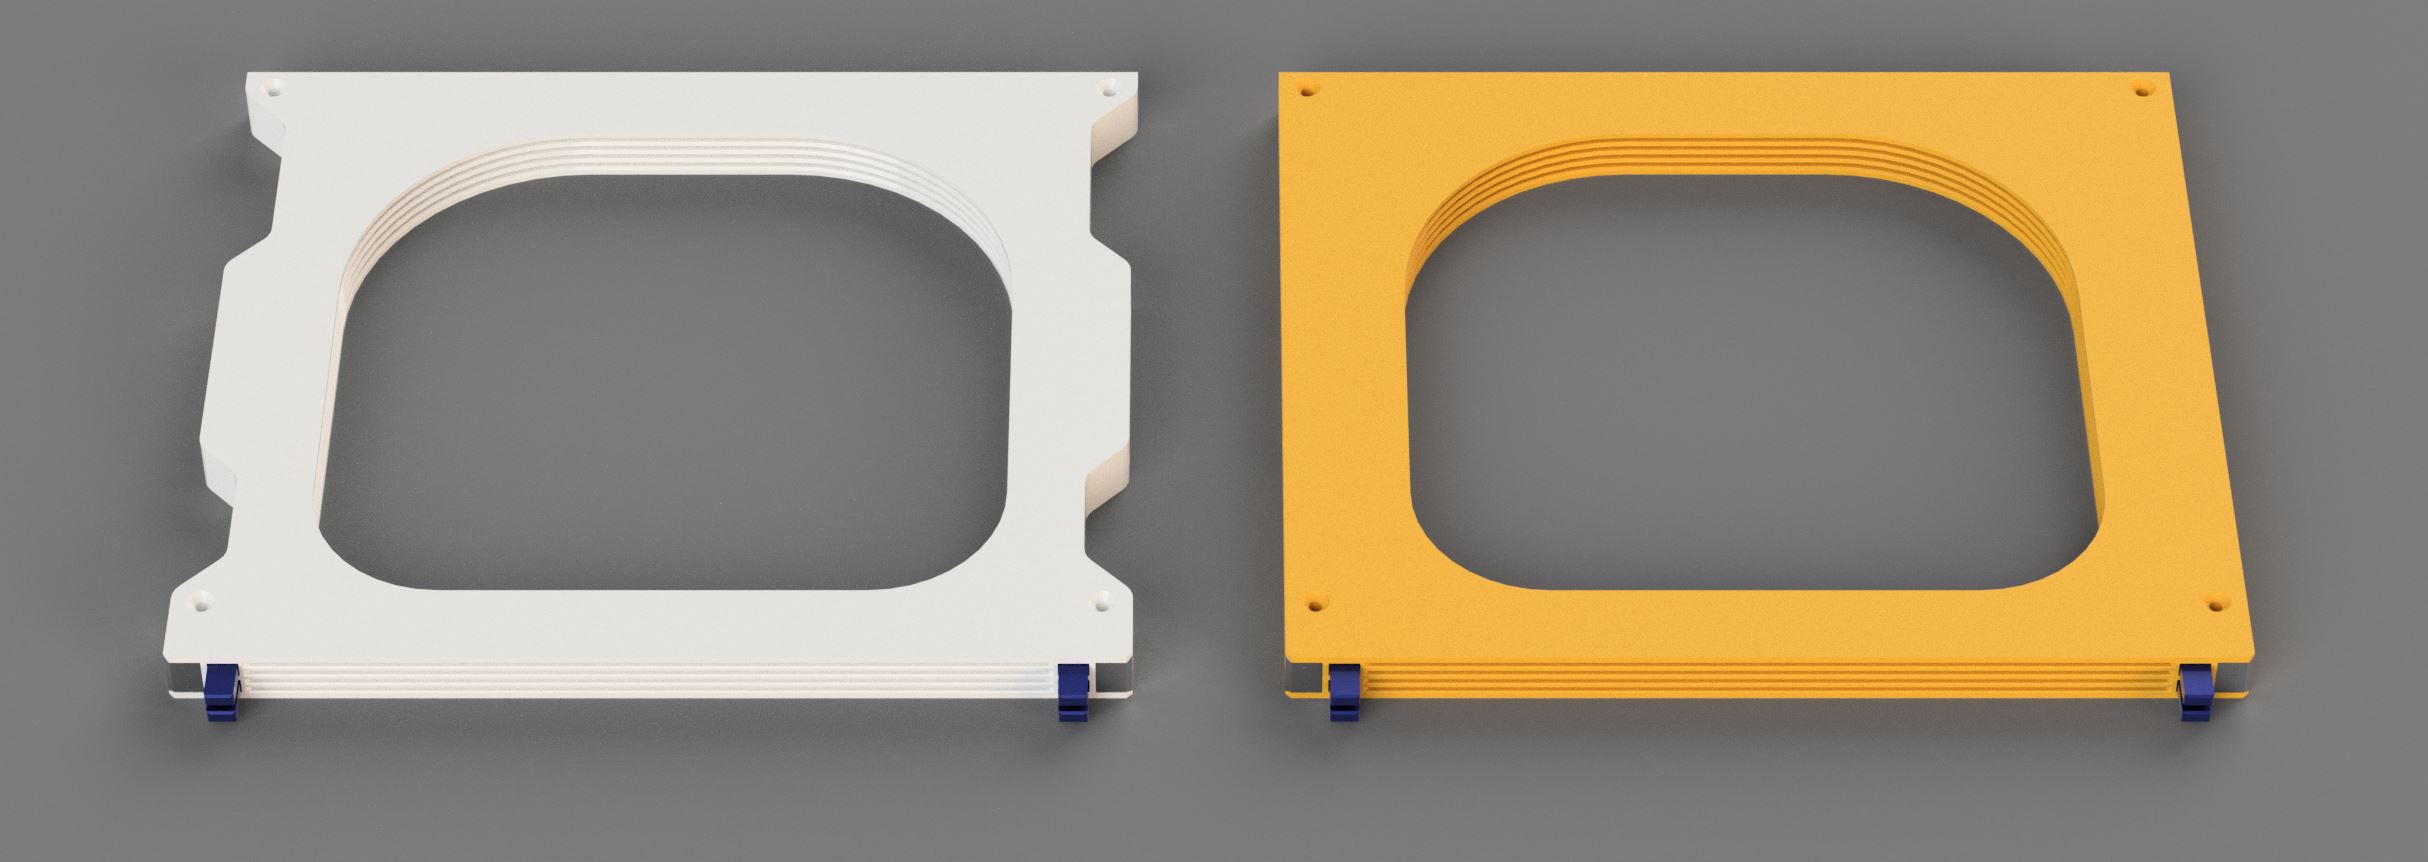
Shelf Open (WHITE) vs. Desktop Open (YELLOW) comparsion

Desktop Covered (GREEN) vs. Desktop HardTop (RED) comparsion:

Printing Instructions
To achieve the best possible results, please follow these guidelines:
- Use the included print profile – It has been thoroughly tuned and tested for optimal performance.
- Model / profile printed on A1 Mini, X1C, P1S, Centauri Carbo to test tolerances
- To make sure there was no problem with tolerances and everything would work, I used Bambu PLA Basic, but also the cheapest PLA I managed to buy (8.9 €/kg), but also old PLA with varying filament thickness. Of course everything works great. :-)
- Printer requirements – This model has a longer print time, so to avoid any potential issues, I recommend printing it in an environment without drafts or sudden temperature changes.
I personally had no problems during printing, but it’s still worth keeping this in mind for best results. - Build plate preparation – Make sure the plate is clean and degreased with IPA before printing. If there's any risk of the model lifting, apply a bit of 3DLac in the corners of the build plate. I’ve had no issues with textured build plates when following these steps.
- Filament quality matters – Don't use low-quality filament to prevent warping or non-functional button mechanisms caused by poor layer adhesion. Bambu PLA Basic works well.
- Print settings:
- Layer height: 0.2 mm
- Supports: Yes
- Brim: Yes
- Speed/layer height: Do not modify – follow the provided profile for best fit and function
- On printers with a moving bed like MK family, reduce the speed and acceleration when printing the main parts. I printed on A1 with a max speed and travelling setting of 150mm/s and acceleration 4000mm/s2 and it was OK.
- Surface & temperature – I personally use a textured build plate at 60 °C with PLA on a Bambu A1, and it works flawlessly.
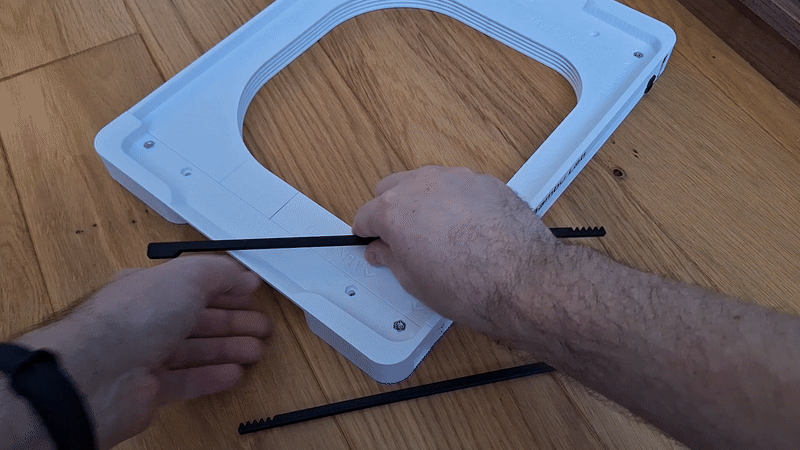
Assembly:
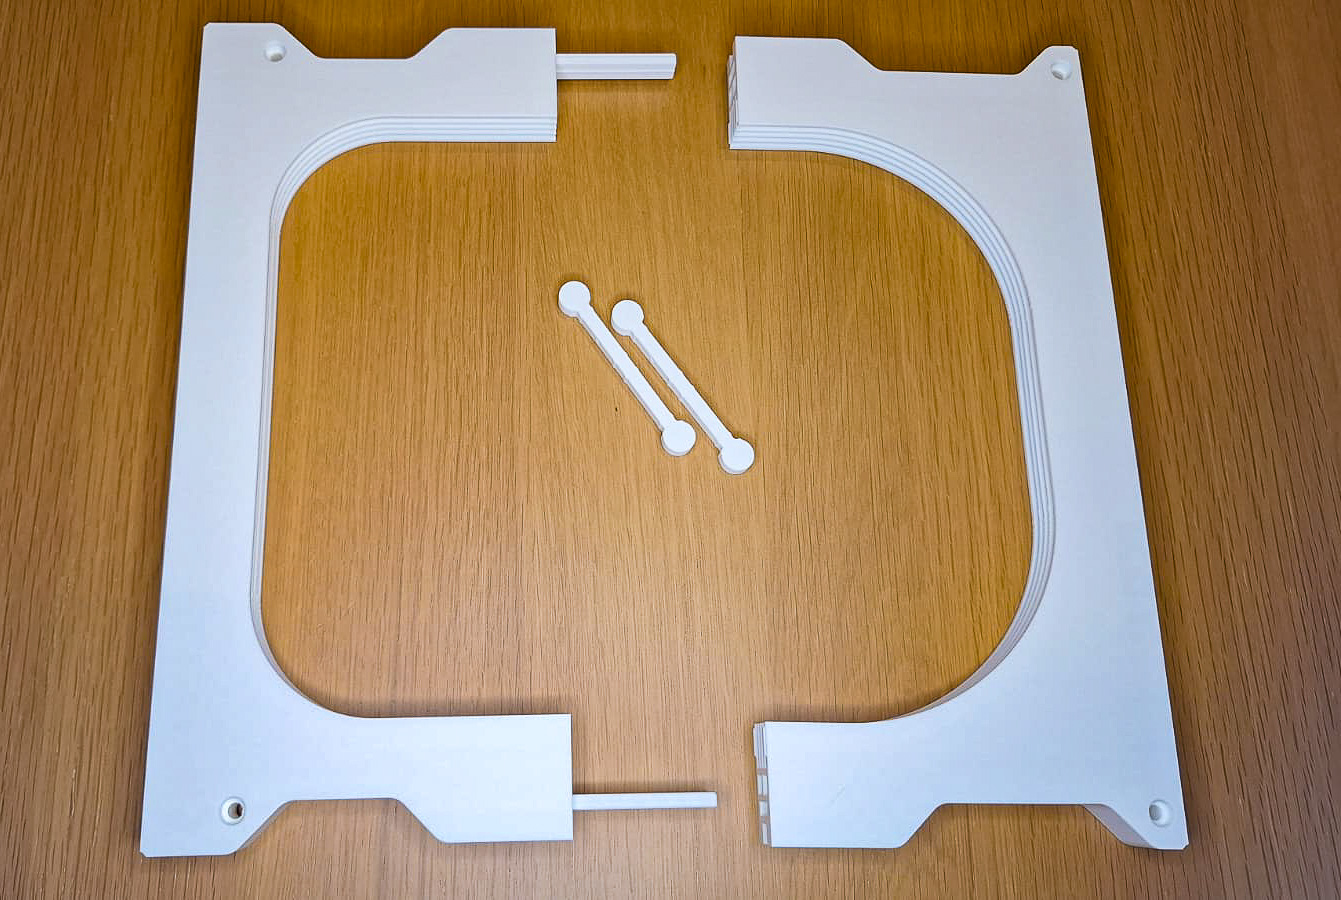
- Print Holder body (Front, Back), buttons, arms, pins, locks of selected version
- Slide both pins into the front body part firmly
- Connect back body to pins, also firmly
- Lock parts together with lock parts
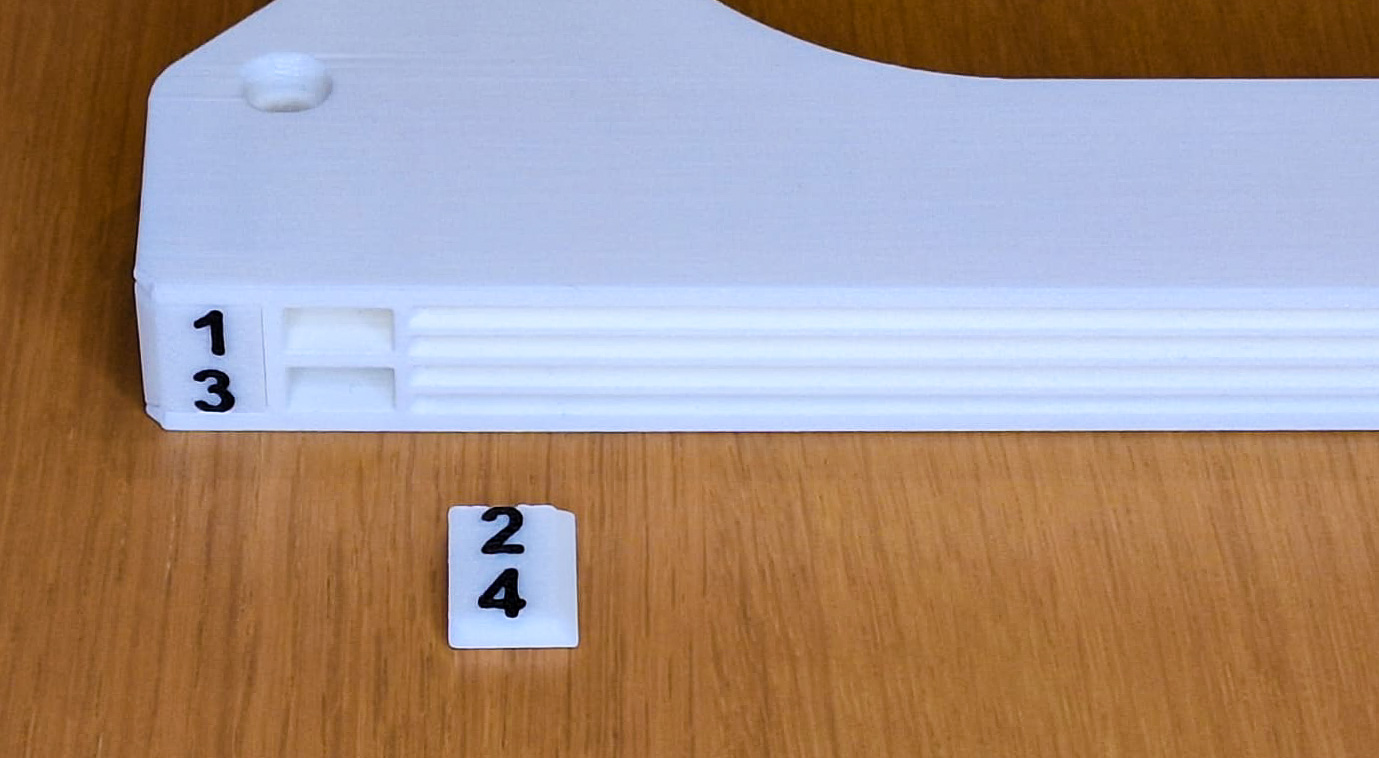
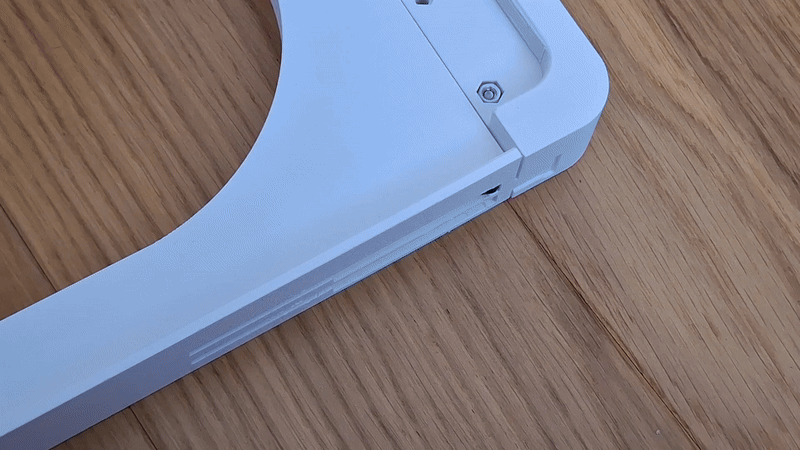
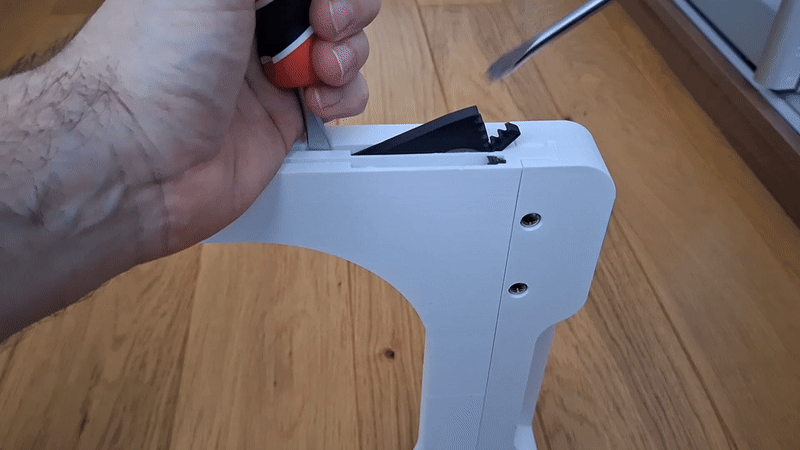
- Insert button to the holder. Slide in / out several times to clean slot and button bar from printing imperfections
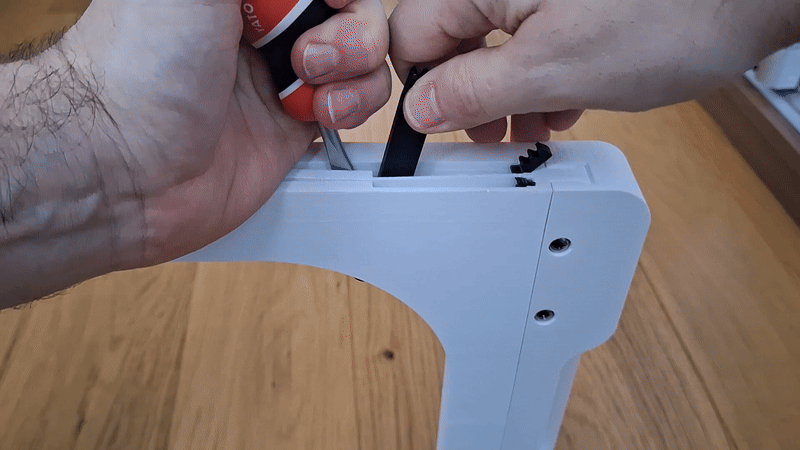
- Align the button and arm teeth according to the picture. Push the arm into the holder firmly. First attach the upper arms (1 and 2), then the lower arms (3 and 4).
- Test whether the button and arm move easily
- Install labels
- Install the holder under your desk, shelf or use foam pads up to 16mm in diameter to place on the desktop.

If you need to remove the lock, use a flat screwdriver and gently push it out.
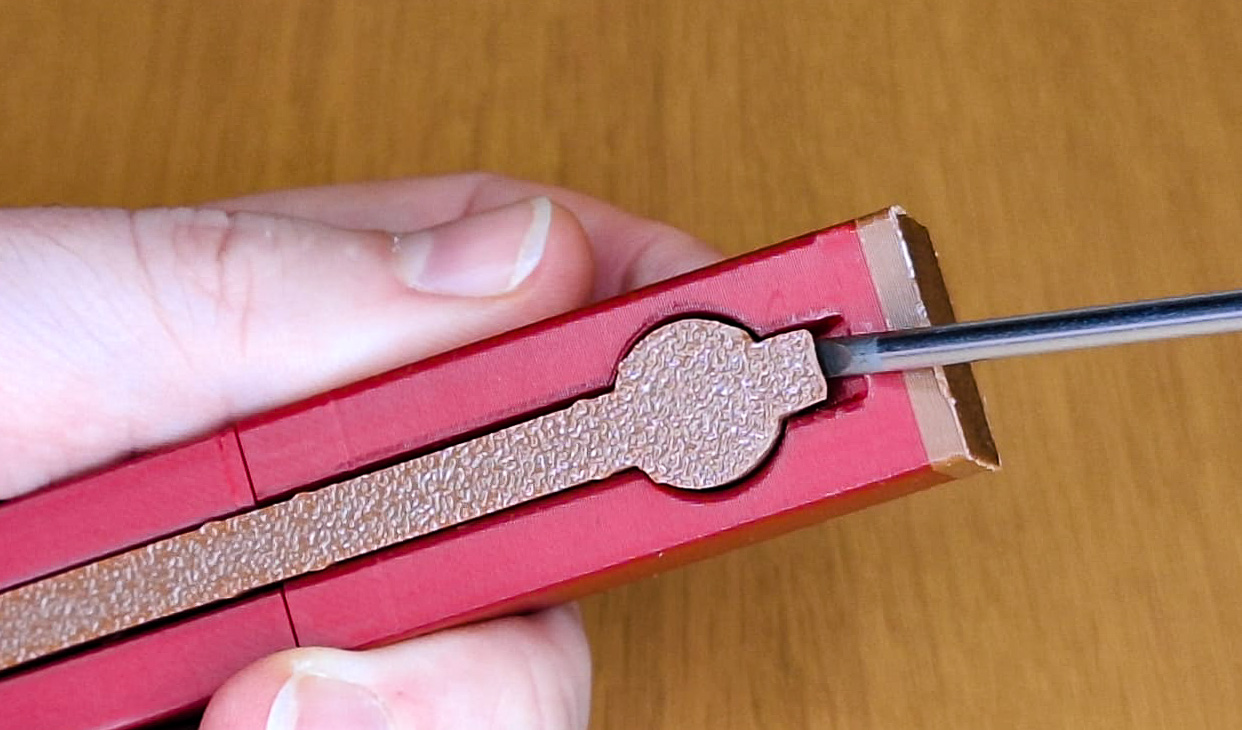
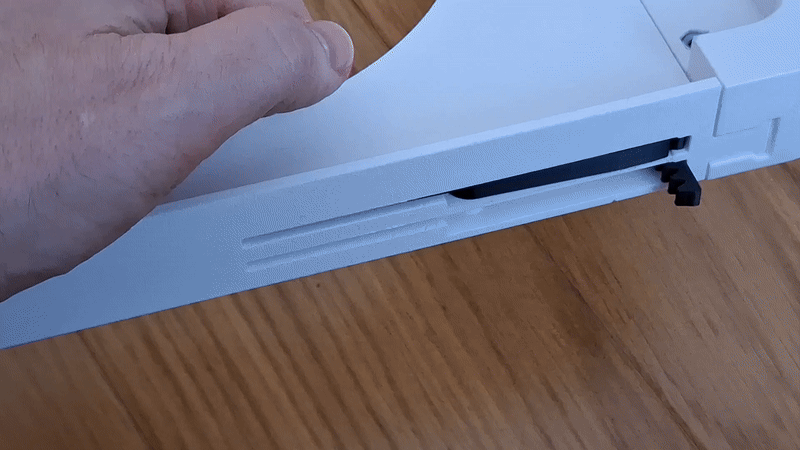
An emergency button / arm removal procedure
If for any reason the arm or button needs to be removed, I am adding an emergency removal procedure. The removal should not damage the body of the holder, but the button and arm will likely be damaged.
Originality of the Model
The author declares that this work is their personally original model
This model is licensed under the following terms:
Credit must be given to the creator
Only noncommercial uses of the work are permitted
Remixes must be shared under the same license
Models(12)
- CentauriCarbon_Simple_4_Shelf_Open_ElegooSlicer.3mfDesigner
'%3e%3cpath%20id='Vector'%20d='M13.6663%201.33331H2.33301C1.78072%201.33331%201.33301%201.78103%201.33301%202.33331V13.6666C1.33301%2014.2189%201.78072%2014.6666%202.33301%2014.6666H13.6663C14.2186%2014.6666%2014.6663%2014.2189%2014.6663%2013.6666V2.33331C14.6663%201.78103%2014.2186%201.33331%2013.6663%201.33331Z'%20stroke='%23808080'%20stroke-linejoin='round'/%3e%3cpath%20id='Vector_2'%20d='M11.3333%201.33331V7.33331H5V1.33331H11.3333Z'%20stroke='%23808080'%20stroke-linejoin='round'/%3e%3cpath%20id='Vector_3'%20d='M9.66699%203.66669V5.00002'%20stroke='%23808080'%20stroke-linejoin='round'/%3e%3c/g%3e%3cdefs%3e%3cclipPath%20id='clip0_3212_168684'%3e%3crect%20width='16'%20height='16'%20fill='white'/%3e%3c/clipPath%3e%3c/defs%3e%3c/svg%3e)
572.45 KB
'%3e%3cpath%20id='Vector'%20d='M7.99967%2014.6666C11.6816%2014.6666%2014.6663%2011.6819%2014.6663%207.99998C14.6663%204.31808%2011.6816%201.33331%207.99967%201.33331C4.31777%201.33331%201.33301%204.31808%201.33301%207.99998C1.33301%2011.6819%204.31777%2014.6666%207.99967%2014.6666Z'%20stroke='black'%20stroke-opacity='0.49'%20stroke-linejoin='round'/%3e%3cpath%20id='Vector_2'%20d='M8.00235%204.00006L8.00195%208.00299L10.8284%2010.8295'%20stroke='black'%20stroke-opacity='0.49'%20stroke-linecap='round'%20stroke-linejoin='round'/%3e%3c/g%3e%3cdefs%3e%3cclipPath%20id='clip0_1890_13189'%3e%3crect%20width='16'%20height='16'%20fill='white'/%3e%3c/clipPath%3e%3c/defs%3e%3c/svg%3e)
2025-12-27
 FNT_Arm_CC.stlDesigner
96.18 KB
2025-12-27
 FNT_CentauriCarbon_Simple_Button.stlDesigner
62.19 KB
2025-12-27
 FNT_CentauriCarbon_Simple4_Shelf_Back.stlDesigner
699.30 KB
2025-12-27
 FNT_CentauriCarbon_Simple4_Shelf_Front.stlDesigner
566.10 KB
2025-12-27
 FNT_S4_LogoPlate_Left.stlDesigner
177.43 KB
2025-12-27
 FNT_S4_LogoPlate_Right.stlDesigner
151.25 KB
2025-12-27
 FNT_Simple4_Insert.stlDesigner
7.89 KB
2025-12-27
 FNT_Simple4_Shelf_Open_Lock.stlDesigner
578.01 KB
2025-12-27
- CentauriCarbon_Simple_4_Desktop_Open_ElegooSlicer.3mfDesigner
573.13 KB
2025-12-27
- CentauriCarbon_Simple_4_Desktop_HardTop_ElegooSlicer.3mfDesigner
559.64 KB
2025-12-27
- CentauriCarbon_Simple_4_Desktop_Covered_ElegooSlicer.3mfDesigner
548.90 KB
2025-12-27
View all(12)
Attachments(4)
zip
CentauriCarbon_Simple_4_Desktop_Covered.zip
1.03 MB
2025-12-27
zip
CentauriCarbon_Simple_4_Desktop_HardTop.zip
1.03 MB
2025-12-27
zip
CentauriCarbon_Simple_4_Desktop_Open.zip
1.08 MB
2025-12-27
zip
CentauriCarbon_Simple_4_Shelf_Open.zip
1.08 MB
2025-12-27
View all(4)


