


'%3e%3cpath%20id='Rectangle%20995'%20d='M0%200H24C26.2091%200%2028%201.79086%2028%204V52C28%2054.2091%2026.2091%2056%2024%2056H0V0Z'%20fill='black'%20fill-opacity='0.2'/%3e%3cpath%20id='Vector'%20d='M17%2022L11%2028L17%2034'%20stroke='white'%20stroke-opacity='0.85'%20stroke-width='1.5'%20stroke-linecap='round'%20stroke-linejoin='round'/%3e%3c/g%3e%3cdefs%3e%3cclipPath%20id='clip0_1639_4805'%3e%3crect%20width='28'%20height='56'%20fill='white'/%3e%3c/clipPath%3e%3c/defs%3e%3c/svg%3e)
'%3e%3cpath%20id='Rectangle%20995'%20d='M0%204C0%201.79086%201.79086%200%204%200H28V56H4C1.79086%2056%200%2054.2091%200%2052V4Z'%20fill='black'%20fill-opacity='0.2'/%3e%3cpath%20id='Vector'%20d='M11%2022L17%2028L11%2034'%20stroke='white'%20stroke-opacity='0.85'%20stroke-width='1.5'%20stroke-linecap='round'%20stroke-linejoin='round'/%3e%3c/g%3e%3cdefs%3e%3cclipPath%20id='clip0_1639_4802'%3e%3crect%20width='28'%20height='56'%20fill='white'/%3e%3c/clipPath%3e%3c/defs%3e%3c/svg%3e)
Miniature models
Switch Decoration
Scene Miniature Models

- 0.2 mm layer height, 2‑wall walls, 15% infill density
'%20fill='%23B3B3B3'/%3e%3crect%20id='Rectangle%201051'%20x='8'%20y='2'%20width='12'%20height='0.5'%20transform='rotate(90%208%202)'%20fill='%23D9D9D9'/%3e%3crect%20id='Rectangle%201052'%20x='11'%20y='2'%20width='12'%20height='0.5'%20transform='rotate(90%2011%202)'%20fill='%23B3B3B3'/%3e%3cpath%20id='Rectangle%201048'%20d='M2%202H14V14H11L10.5%2014.5H8H5.5L5%2014H2V2Z'%20stroke='%23828282'%20stroke-linejoin='round'/%3e%3c/g%3e%3c/g%3e%3c/svg%3e)
4-disc
PLA
Designer

4

0
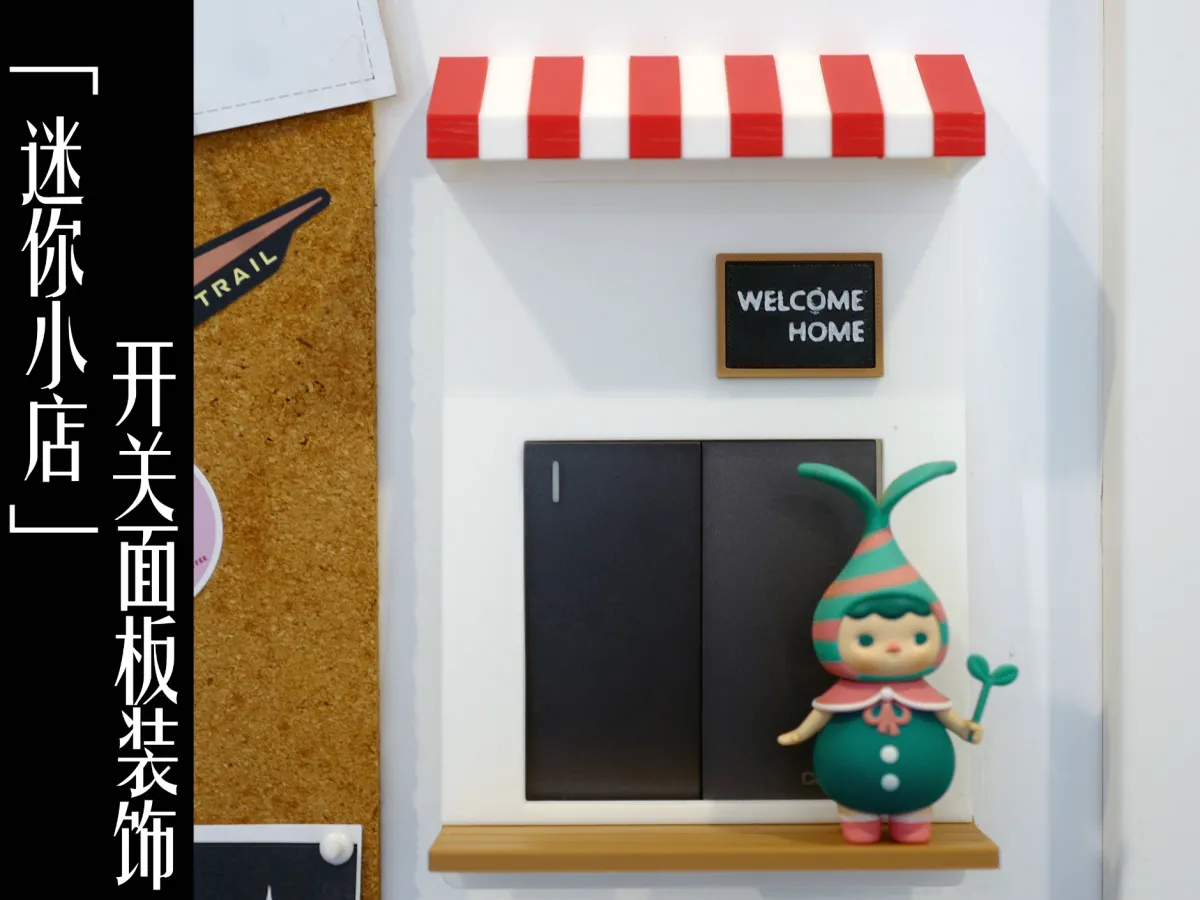
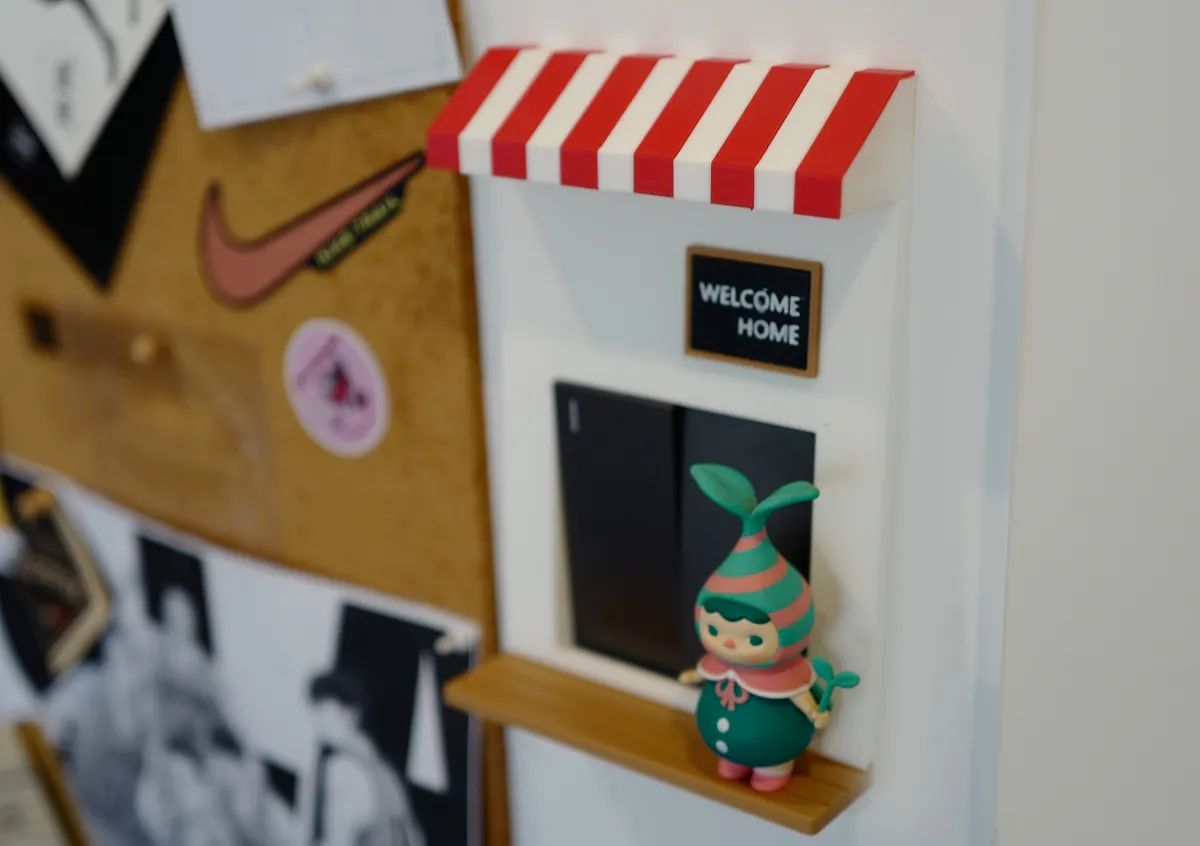
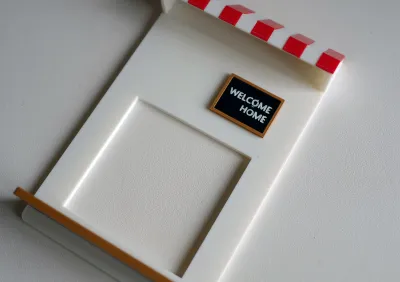
This product is a creative retrofit accessory designed specifically for wall switches, featuring a “miniature convenience store” aesthetic, transforming an ordinary household switch into a charming little nook hidden on the wall.
A fully realized shop design with meticulous attention to detail—the exterior faithfully recreates classic elements of a mini convenience store: a red-and-white striped awning at the top exudes a retro street vibe; below, a light wood-colored platform perfectly mimics a store counter; and in the middle, a dedicated space for the switch ensures that operation remains unhindered while turning what would otherwise be a cold appliance into a “storefront.” Paired with a small blackboard above reading “WELCOME HOME,” it instantly evokes the warm feeling of “entering a store as soon as you step inside your home.”
Specially tailored for double-gang switches—practical and foolproof—the housing is 3D-printed to fit standard 86-type double-gang wall switches (opening dimensions: 86 mm wide by 90 mm high). Installation requires no removal of the existing switch; simply snap it into place. Even renters can easily customize their walls without damaging the surface. At the same time, ample clearance ensures smooth switch operation, balancing aesthetics with functionality.
Can be paired with decorative items to create personalized scenes—the base platform offers convenient storage space, ideal for displaying POP MART blind box figures or other favorite trinkets, effortlessly crafting unique miniature settings. Different styles of decor can evoke distinct moods—cute, vintage, or soothing—all equally well-suited.
Lightweight material + simple installation—zero-threshold customization—printed using PLA filament, the piece is lightweight and easy to mount with adhesive or seamless double-sided tape. No tools are required, making assembly straightforward. The smooth, refined surface leaves no rough edges, ensuring it looks elegant rather than cheap when placed on the wall.
The following assembly steps are extremely simple since all components arrive pre-cut and require no multiple colors; some parts may need glue for final assembly.
| First, prepare all printed parts along with a bottle of glue. |  |
| Begin by assembling the signboard (you can customize the embossed text directly in slicing software), then glue it onto the base plate. |  |
| Next, attach the canopy trim using glue, paying careful attention to orientation. |  |
| The canopy and base plate connect via a sturdy mortise-and-tenon joint, which can also be reinforced with additional glue. |  |
| The bottom partition slides into its groove but can also be secured with glue. |  |
| Installation complete. |   |
Originality of the Model
The author declares that this work is their personally original model
This model is licensed under the following terms:
This work is licensed under a Standard Digital File License. Digital files have a strict non-commercial, personal use only license.
You shall not share, sub-license, sell, rent, host, transfer, or distribute in any way the digital file or 3D printed versions of this object, nor any other derivative work of this object in its digital or physical format (including remixes of this object). You can not host these files on other digital platforms, web stores or cloud repositories. The objects may not be used in any way whatsoever in which you charge money, collect fees.
Models(1)
- 开关装饰.3mfDesigner
'%3e%3cpath%20id='Vector'%20d='M13.6663%201.33331H2.33301C1.78072%201.33331%201.33301%201.78103%201.33301%202.33331V13.6666C1.33301%2014.2189%201.78072%2014.6666%202.33301%2014.6666H13.6663C14.2186%2014.6666%2014.6663%2014.2189%2014.6663%2013.6666V2.33331C14.6663%201.78103%2014.2186%201.33331%2013.6663%201.33331Z'%20stroke='%23808080'%20stroke-linejoin='round'/%3e%3cpath%20id='Vector_2'%20d='M11.3333%201.33331V7.33331H5V1.33331H11.3333Z'%20stroke='%23808080'%20stroke-linejoin='round'/%3e%3cpath%20id='Vector_3'%20d='M9.66699%203.66669V5.00002'%20stroke='%23808080'%20stroke-linejoin='round'/%3e%3c/g%3e%3cdefs%3e%3cclipPath%20id='clip0_3212_168684'%3e%3crect%20width='16'%20height='16'%20fill='white'/%3e%3c/clipPath%3e%3c/defs%3e%3c/svg%3e)
159.41 KB
'%3e%3cpath%20id='Vector'%20d='M7.99967%2014.6666C11.6816%2014.6666%2014.6663%2011.6819%2014.6663%207.99998C14.6663%204.31808%2011.6816%201.33331%207.99967%201.33331C4.31777%201.33331%201.33301%204.31808%201.33301%207.99998C1.33301%2011.6819%204.31777%2014.6666%207.99967%2014.6666Z'%20stroke='black'%20stroke-opacity='0.49'%20stroke-linejoin='round'/%3e%3cpath%20id='Vector_2'%20d='M8.00235%204.00006L8.00195%208.00299L10.8284%2010.8295'%20stroke='black'%20stroke-opacity='0.49'%20stroke-linecap='round'%20stroke-linejoin='round'/%3e%3c/g%3e%3cdefs%3e%3cclipPath%20id='clip0_1890_13189'%3e%3crect%20width='16'%20height='16'%20fill='white'/%3e%3c/clipPath%3e%3c/defs%3e%3c/svg%3e)
2026-05-20


