




Screen Door
Mesh Screen for Smoke Ventilation
Window
Window Baffles
Exhaust duct
Exhaust Fan
Exhaust ventilation
Exhaust Ventilation
Exhaust fan
Exhaust Fan

- The middle plane on the right side measures 20 cm and is a mirror image of the left-side panel; it has not yet been tested.

1-disc
PETG
Designer - The middle plane on the right side measures 1–19 cm and is a mirror image of the left-side panel; it has not yet been tested.
3-disc
PETG
Designer - The 20 cm–tall fan panel in the middle right is capped, mirroring the left-hand panel; it has not yet been tested.
1-disc
PETG
Designer - The 20 cm–tall fan plate located in the middle right is a mirror image of the left-hand panel and has not yet been tested.
1-disc
PETG
Designer - The right-side top surface measures 21 cm and is a mirror image of the left-side panel; it has not yet been tested.
1-disc
PETG
Designer - The 20 cm high, glossy surface on the right-hand base features a cable channel, which is a mirror image of the left-hand panel; it has not yet been tested.
1-disc
PETG
Designer - The 20 cm high, glossy surface on the right-hand bottom side is free of cable channels and was mirrored from the left-hand panel; it has not yet been tested.
1-disc
PETG
Designer - The 20 cm–high, 8 cm–wide hole on the right-hand bottom surface features a cable channel, which is a mirror image of the corresponding feature on the left-hand panel; it has not yet been tested.
1-disc
PETG
Designer - The 20 cm–high, 8 cm–wide hole on the right-hand bottom surface, which lacks a cable tray, is a mirror image of the corresponding feature on the left-hand panel and has not yet been tested.
1-disc
PETG
Designer - Cable Management Slot Top Cover
1-disc
PETG
Designer - Side Cover for Cable Management Tray
1-disc
PETG
Designer - Left-center planar version, 20 cm
1-disc
PETG
Designer - Smooth-surface 1–19 cm panel on the left side, middle section
3-disc
PETG
Designer - The 20 cm–high fan plate at the center left is capped off.
1-disc
PETG
Designer - 20 cm high fan plate located in the center left.
1-disc
PETG
Designer - 21 cm on the top surface of the left side
1-disc
PETG
Designer - On the left-hand base, there’s a 20 cm high glossy surface featuring cable channels.
1-disc
PETG
Designer - The left-hand base features a 20 cm high glossy surface with no cable channels.
1-disc
PETG
Designer - On the left-hand base, there’s an 8 cm‑deep hole measuring 20 cm in height, complete with a cable groove.
1-disc
PETG
Designer - On the left side, the base measures 20 cm in height and 8 cm in width, with no wire channels.
1-disc
PETG
Designer

17

1
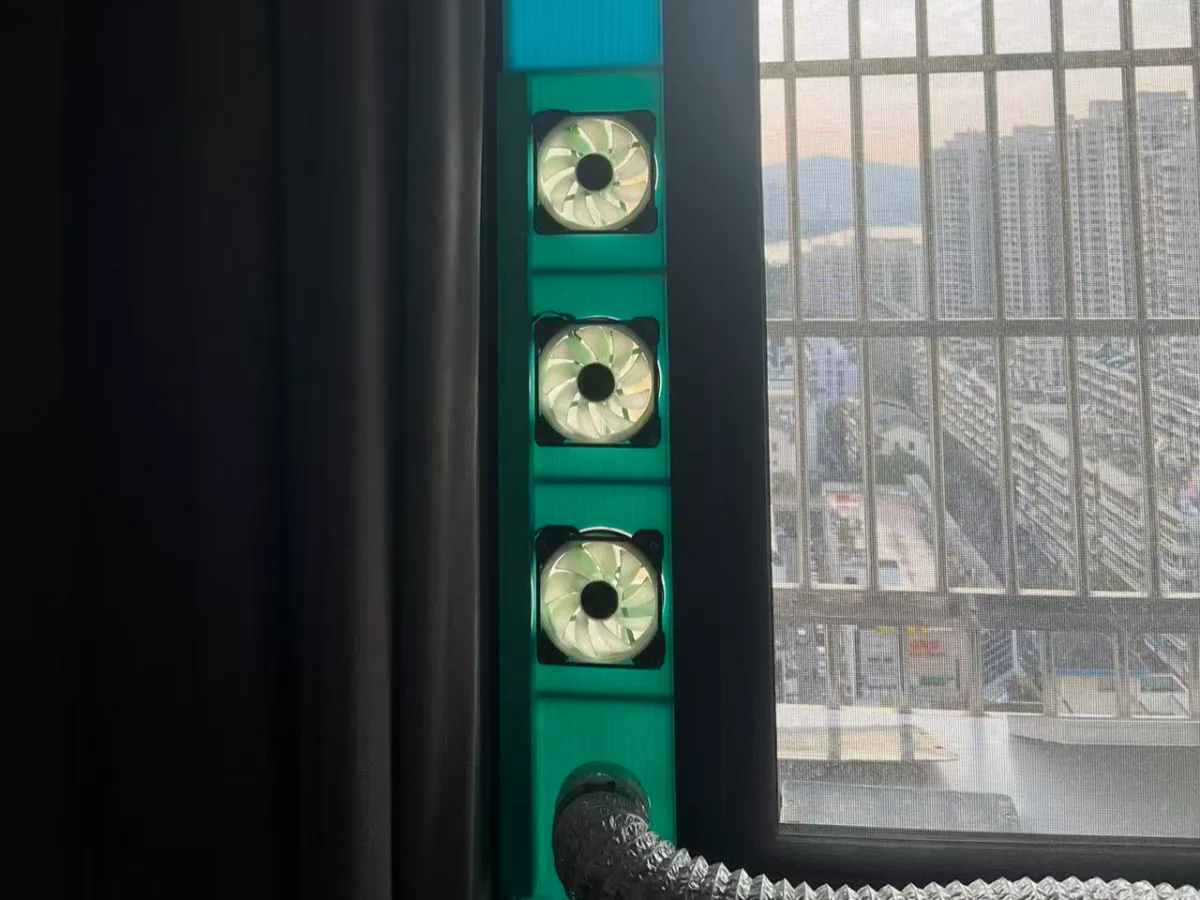
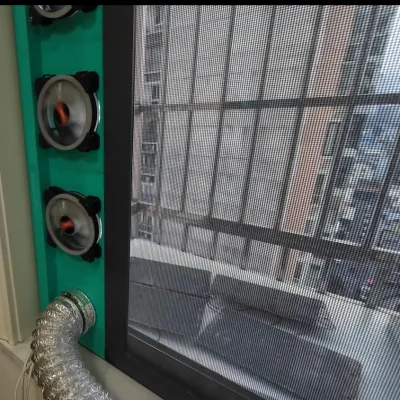
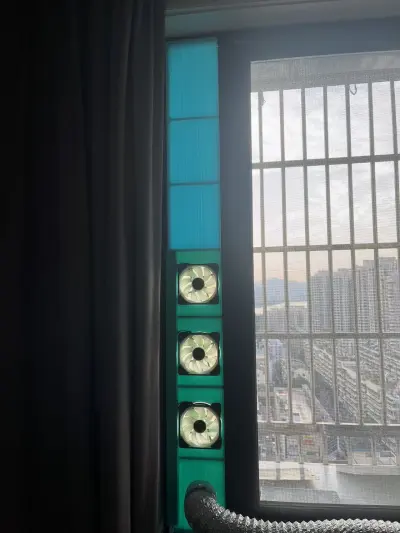
A ventilation device designed to be mounted directly onto window frames, featuring integrated outdoor exhaust for 3D printers—best used in conjunction with a mosquito screen for a secure fit.
Typically, comparable products from other brands measuring 140 cm in height retail for around 220 RMB. By hand‑crafting just seven fans, the total cost comes to only a few dozen RMB—and I even went so far as to integrate photovoltaic panels to power the fans directly.
I’ve been using this setup for over six months now, weathering several typhoon seasons (since our area is prone to strong winds but rarely sees rain, I’ve never needed to close the exterior window panes). So far, everything has held up perfectly, which is why I’m sharing this experience with you.
In theory, this design is compatible with mosquito screens that feature a central groove no deeper than 9 mm and frame thicknesses of 3 mm or less; the height can be adjusted by stacking multiple sections together.
The fans used are 12 cm in diameter, with a thickness of 2.5 cm—commonly referred to as 12025 fans.
For wiring instructions, feel free to check out the accompanying video—this step has little to do with model assembly itself.
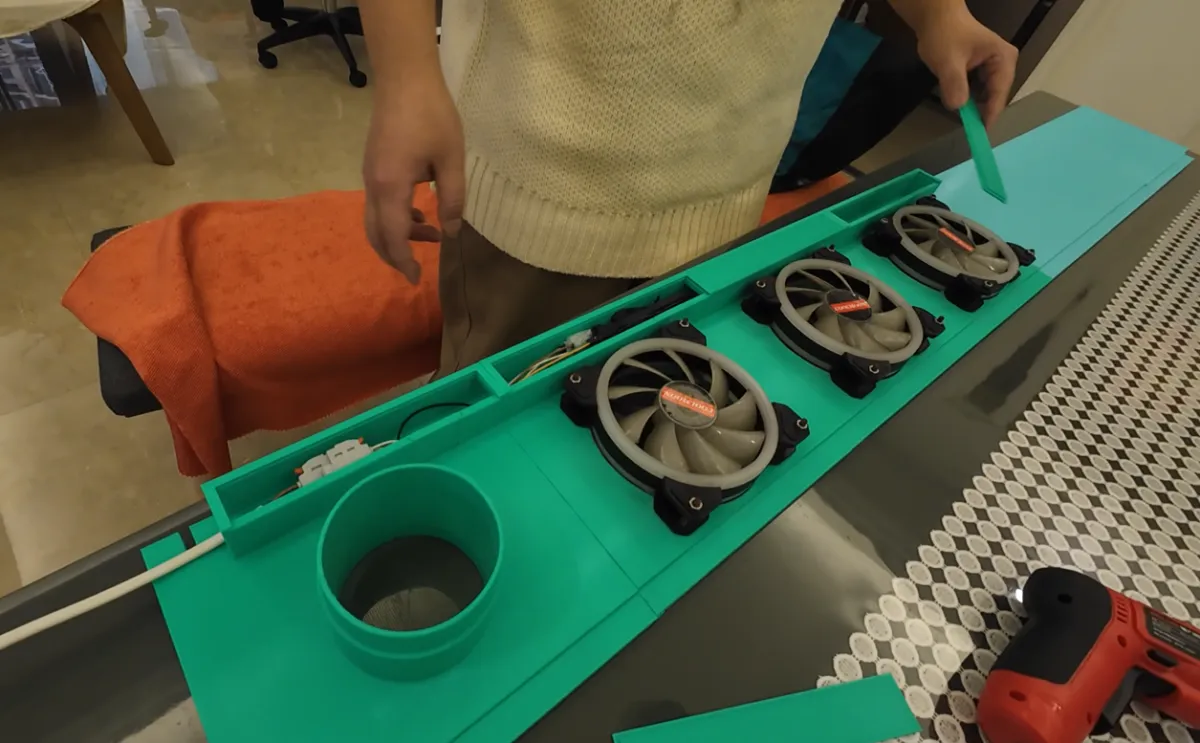
The exhaust port is designed to accommodate 8 cm diameter exhaust ducts, and a non‑perforated base plate is also provided for added versatility.
The installation video hasn’t been edited yet—but once it’s ready, I’ll upload it to Bilibili and sync it here as well. The installation process is straightforward; a quick look through the instructions will make everything clear.
To assemble, simply print the bottom panel and top panel according to your specific needs. Depending on how many fans you want to install, print the intermediate fan mounting plate along with a dedicated top plate for fan installation (the cable management channels come with sealed ends).
It’s best to measure the actual length of your mosquito screen directly—most screens will align closely enough, but if you’d like to err on the side of caution, start by printing a panel that’s 1 cm shorter than the screen’s height. Then, during final installation, take precise measurements to determine any remaining gaps—and simply print additional panels from the 1–19 cm files I’ve provided to fill those spaces.
If the length isn’t quite sufficient, print the 1–19 cm versions of the intermediate panels I’ve included to complete the assembly. If you encounter an unusual discrepancy of just 0.5 cm, please leave a comment—I’ll adjust accordingly.
After printing, begin by installing the fans and routing their cables into the cable management channels. For securing the fans, I personally use M4×45 screws paired with M4 nuts.
Next, assemble all the individual components. To ease insertion, we recommend applying a thin layer of lubricant to the slot connectors—though the design features zero tolerance, making assembly a bit tight at times; a bit of grease can make the process much smoother.
Once all the components are fully assembled, slide the side slots of the cable management channel into place.
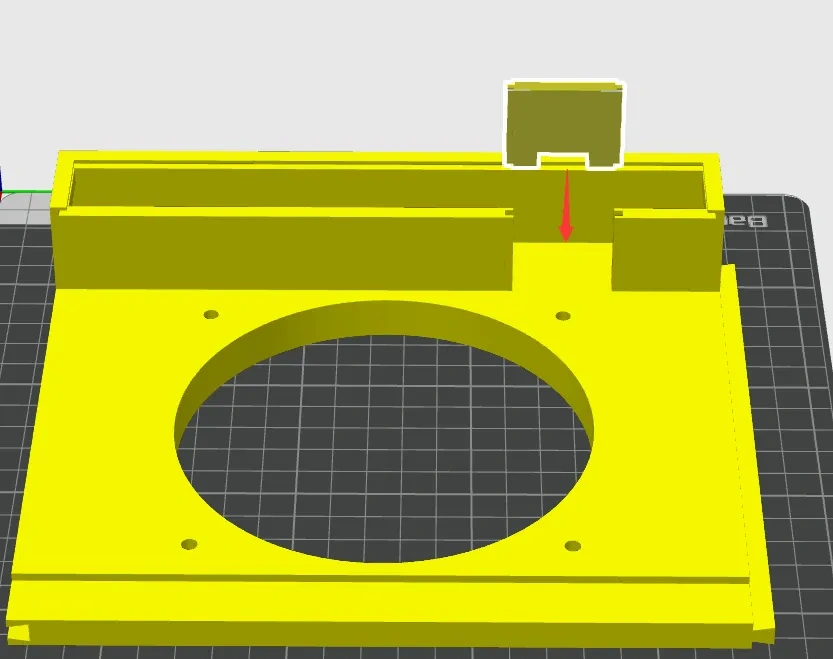
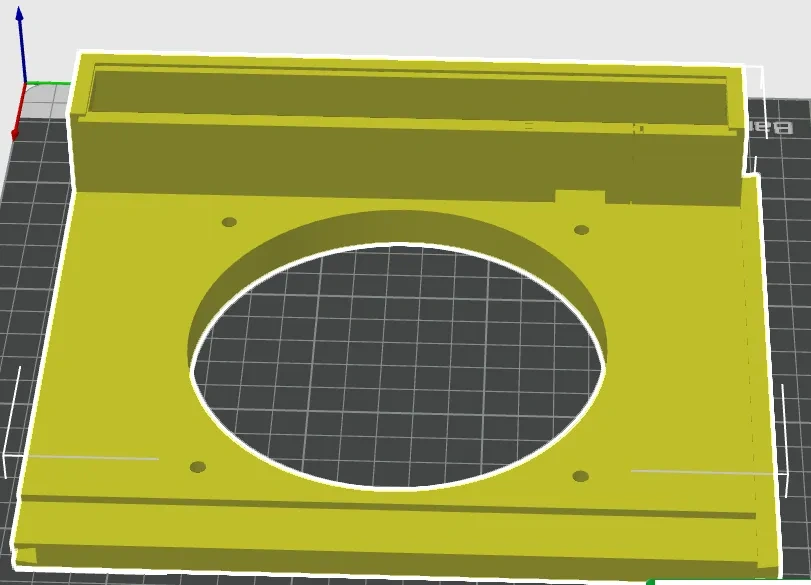
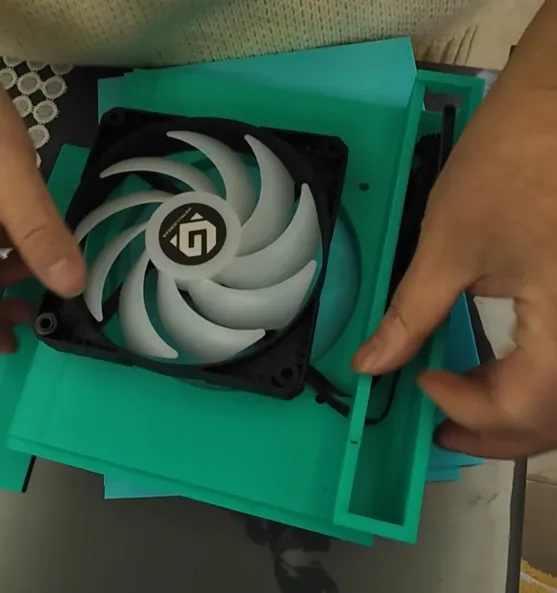
After snapping the pieces into place, slide the top cover of the cable management channel into position to complete the enclosure.
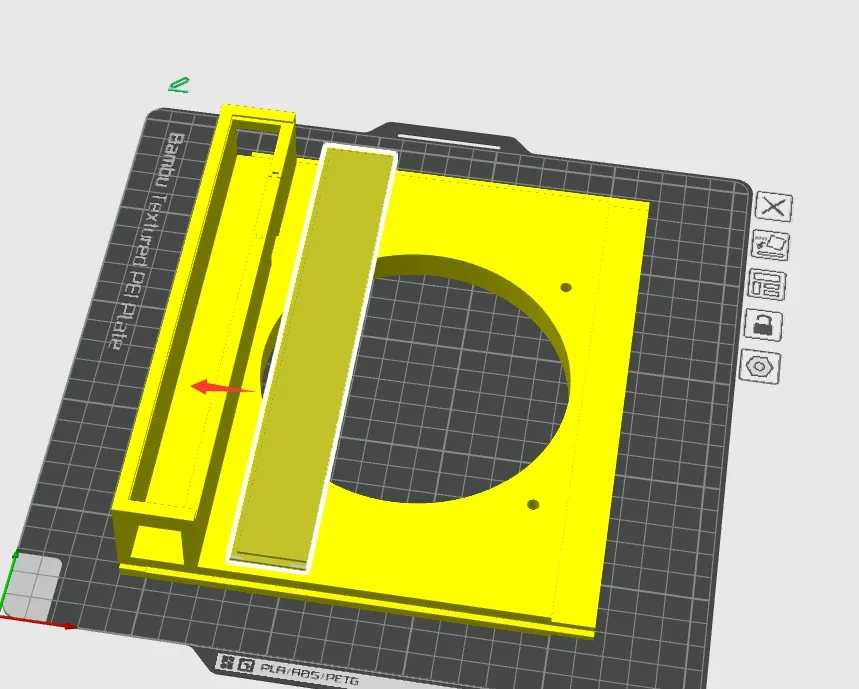

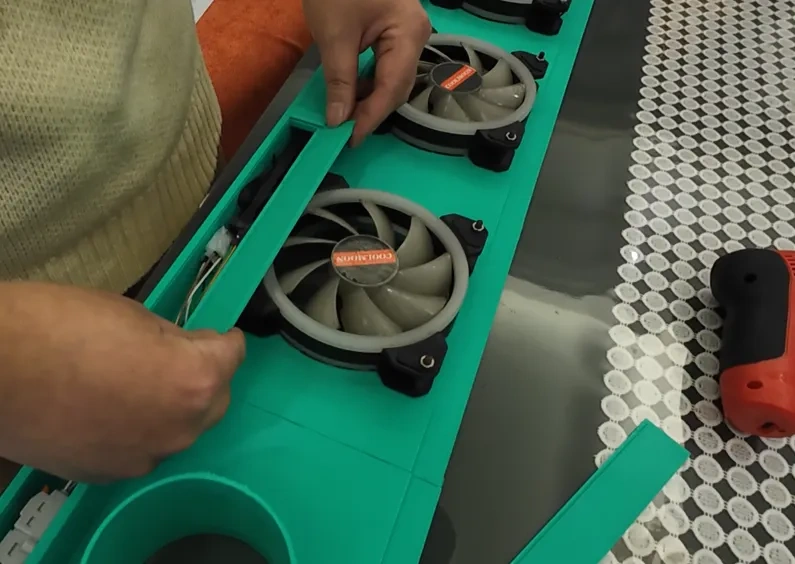
Once all components are securely installed and joined together, the finished assembly looks as shown in the image below.
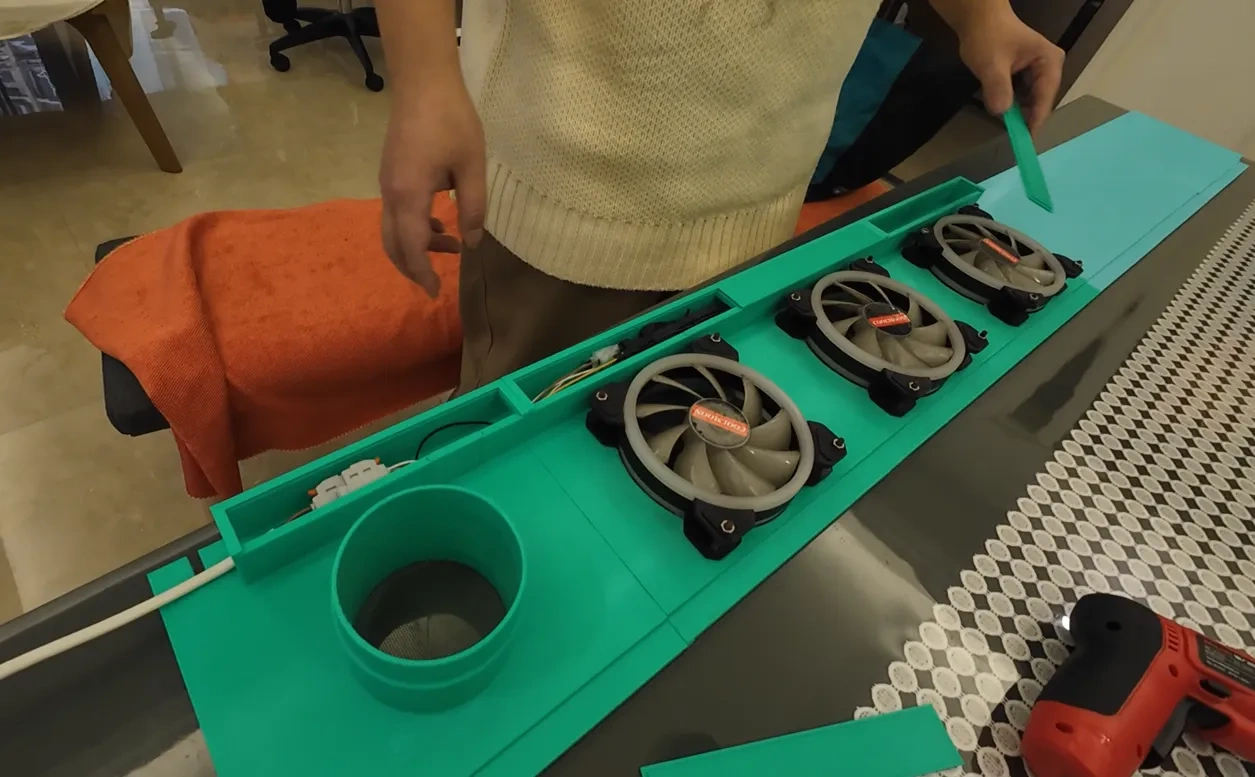
Finally, simply lift the unit vertically, insert it into the window frame, and secure it by pressing down against the top edge of the mosquito screen.
Bill of materials
- NameQuantityNotes
- 112CM厚度2.5CM风扇3需要装几个买几个就是机箱风扇
- 2M4*45平头螺丝12根据风扇数量准备
- 3M4螺母12根据风扇数量准备
Originality of the Model
The author declares that this work is their personally original model
This model is licensed under the following terms:
Credit must be given to the creator
Only noncommercial uses of the work are permitted
Remixes must be shared under the same license
Models(20)
- 左侧中间20CM高风扇板封顶.3mfDesigner

123.59 KB

2026-02-14
- 左侧中间20CM高风扇板.3mfDesigner
39.56 KB
2026-02-14
- 左侧顶面21CM.3mfDesigner
22.93 KB
2026-02-14
- 左侧底面20CM高光面无电线槽.3mfDesigner
25.67 KB
2026-02-14
- 左侧底面20CM高8CM孔有电线槽.3mfDesigner
52.45 KB
2026-02-14
- 左侧底面20CM高8CM孔无电线槽.3mfDesigner
51.55 KB
2026-02-14
- 左侧中间平面版1-19CM.3mfDesigner
89.25 KB
2026-02-14
- 右侧底面20CM高光面有电线槽.3mfDesigner
26.41 KB
2026-02-14
- 右侧底面20CM高光面无电线槽.3mfDesigner
25.84 KB
2026-02-14
- 右侧底面20CM高8CM孔有电线槽.3mfDesigner
51.88 KB
2026-02-14
- 左侧底面20CM高光面有电线槽.3mfDesigner
26.46 KB
2026-02-14
- 理线槽顶盖.3mfDesigner
21.92 KB
2026-02-14
- 理线槽侧盖.3mfDesigner
23.30 KB
2026-02-14
- 左侧中间平面版20CM.3mfDesigner
25.67 KB
2026-02-14
- 右侧顶面21CM.3mfDesigner
23.23 KB
2026-02-14
- 右侧底面20CM高8CM孔无电线槽.3mfDesigner
51.18 KB
2026-02-14
- 右侧中间平面版1-19CM.3mfDesigner
89.20 KB
2026-02-14
- 右侧中间20CM高风扇板封顶.3mfDesigner
123.63 KB
2026-02-14
- 右侧中间20CM高风扇板.3mfDesigner
38.73 KB
2026-02-14
- 右侧中间平面版20CM.3mfDesigner
25.69 KB
2026-02-14
View all(20)


