


'%3e%3cpath%20id='Rectangle%20995'%20d='M0%200H24C26.2091%200%2028%201.79086%2028%204V52C28%2054.2091%2026.2091%2056%2024%2056H0V0Z'%20fill='black'%20fill-opacity='0.2'/%3e%3cpath%20id='Vector'%20d='M17%2022L11%2028L17%2034'%20stroke='white'%20stroke-opacity='0.85'%20stroke-width='1.5'%20stroke-linecap='round'%20stroke-linejoin='round'/%3e%3c/g%3e%3cdefs%3e%3cclipPath%20id='clip0_1639_4805'%3e%3crect%20width='28'%20height='56'%20fill='white'/%3e%3c/clipPath%3e%3c/defs%3e%3c/svg%3e)
'%3e%3cpath%20id='Rectangle%20995'%20d='M0%204C0%201.79086%201.79086%200%204%200H28V56H4C1.79086%2056%200%2054.2091%200%2052V4Z'%20fill='black'%20fill-opacity='0.2'/%3e%3cpath%20id='Vector'%20d='M11%2022L17%2028L11%2034'%20stroke='white'%20stroke-opacity='0.85'%20stroke-width='1.5'%20stroke-linecap='round'%20stroke-linejoin='round'/%3e%3c/g%3e%3cdefs%3e%3cclipPath%20id='clip0_1639_4802'%3e%3crect%20width='28'%20height='56'%20fill='white'/%3e%3c/clipPath%3e%3c/defs%3e%3c/svg%3e)
Screen Door
Mesh Screen for Smoke Ventilation

- Located 20 cm high in the center-left, it was generated via mirroring from the right side and has not yet been tested.
'%20fill='%23B3B3B3'/%3e%3crect%20id='Rectangle%201051'%20x='8'%20y='2'%20width='12'%20height='0.5'%20transform='rotate(90%208%202)'%20fill='%23D9D9D9'/%3e%3crect%20id='Rectangle%201052'%20x='11'%20y='2'%20width='12'%20height='0.5'%20transform='rotate(90%2011%202)'%20fill='%23B3B3B3'/%3e%3cpath%20id='Rectangle%201048'%20d='M2%202H14V14H11L10.5%2014.5H8H5.5L5%2014H2V2Z'%20stroke='%23828282'%20stroke-linejoin='round'/%3e%3c/g%3e%3c/g%3e%3c/svg%3e)
1-disc
PETG
Designer - The 2–19 cm panel on the left side, mirrored from the right, has not yet been tested.
3-disc
PETG
Designer - The 1 cm–high plate in the middle left is a mirrored copy of the one on the right and has not yet been tested.
1-disc
PETG
Designer - The top surface on the left side is 21 cm high and was generated via mirroring from the right side; no testing has been conducted yet.
1-disc
PETG
Designer - The bottom surface on the left side is 20 cm high and was generated via mirroring from the right side; it has not yet been tested.
1-disc
PETG
Designer - File with a height of 20 cm, centered on the right side.
1-disc
PETG
Designer - On the right side, print only the 2–19 cm section in the middle—print whichever part is required.
3-disc
PETG
Designer - The top surface on the right side measures 21 cm in height.
1-disc
PETG
Designer - The right-side base measures 20 cm in height.
1-disc
PETG
Designer - Right-side bottom surface test file
1-disc
PETG
Designer - 10 cm Lid
1-disc
PETG
Designer - 10 cm diameter ventilation duct sleeve
1-disc
PETG
Designer

5

0
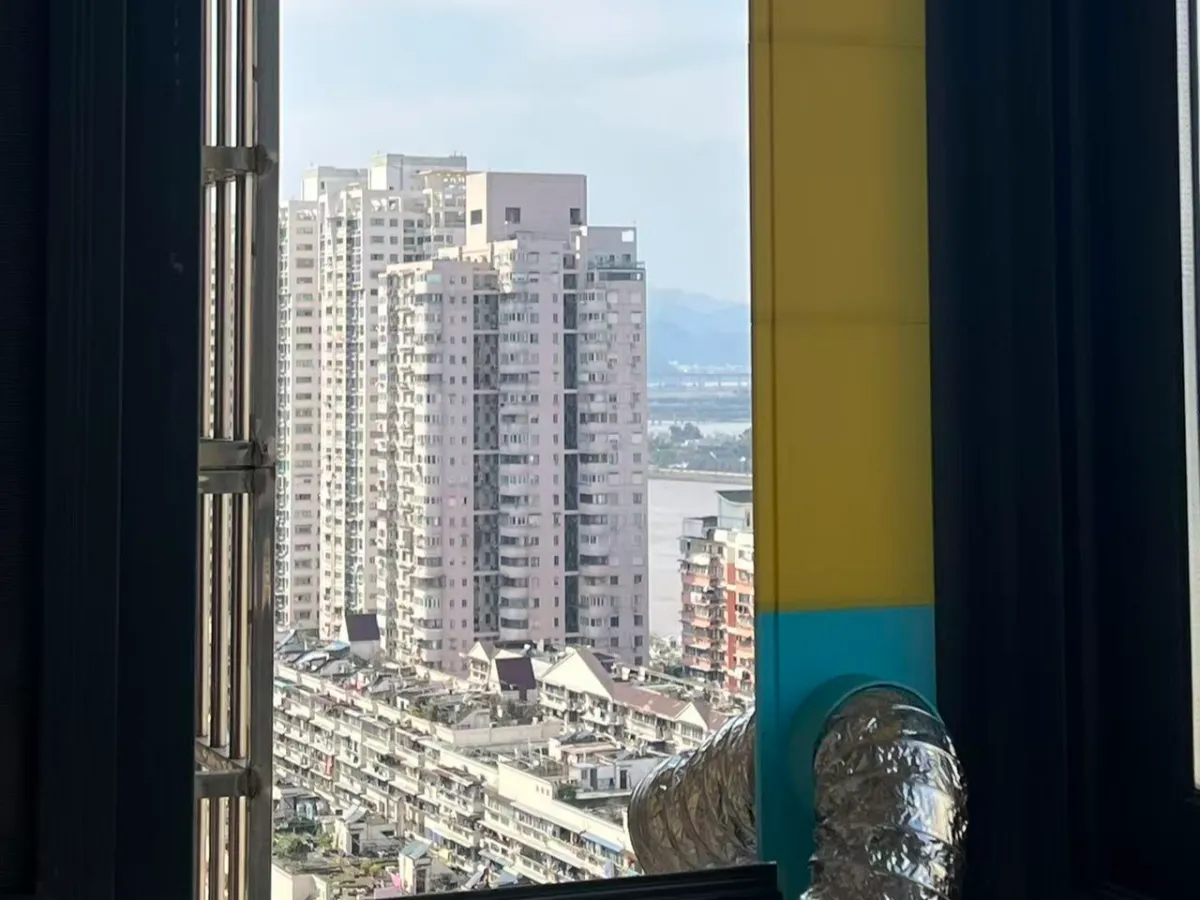
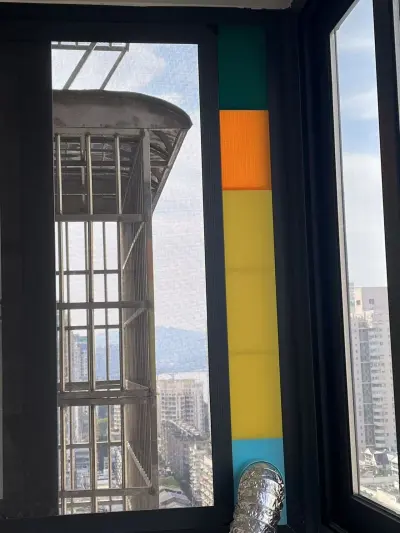
Designed for Screen Window Ventilation
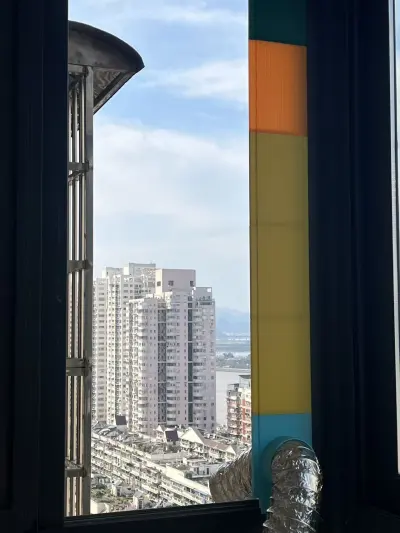
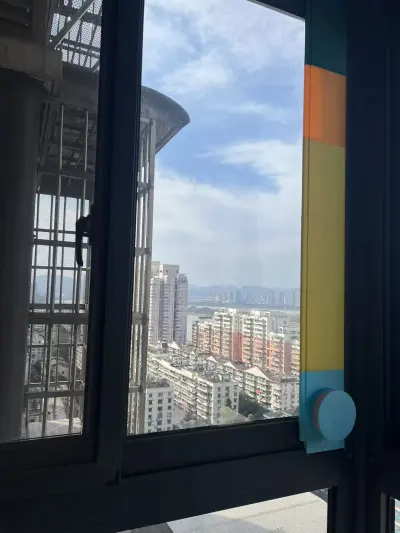
In theory, this design is suitable for screen windows with a central groove no wider than 9 mm and window frame thicknesses up to 3 mm. The height can be adjusted by joining multiple sections.
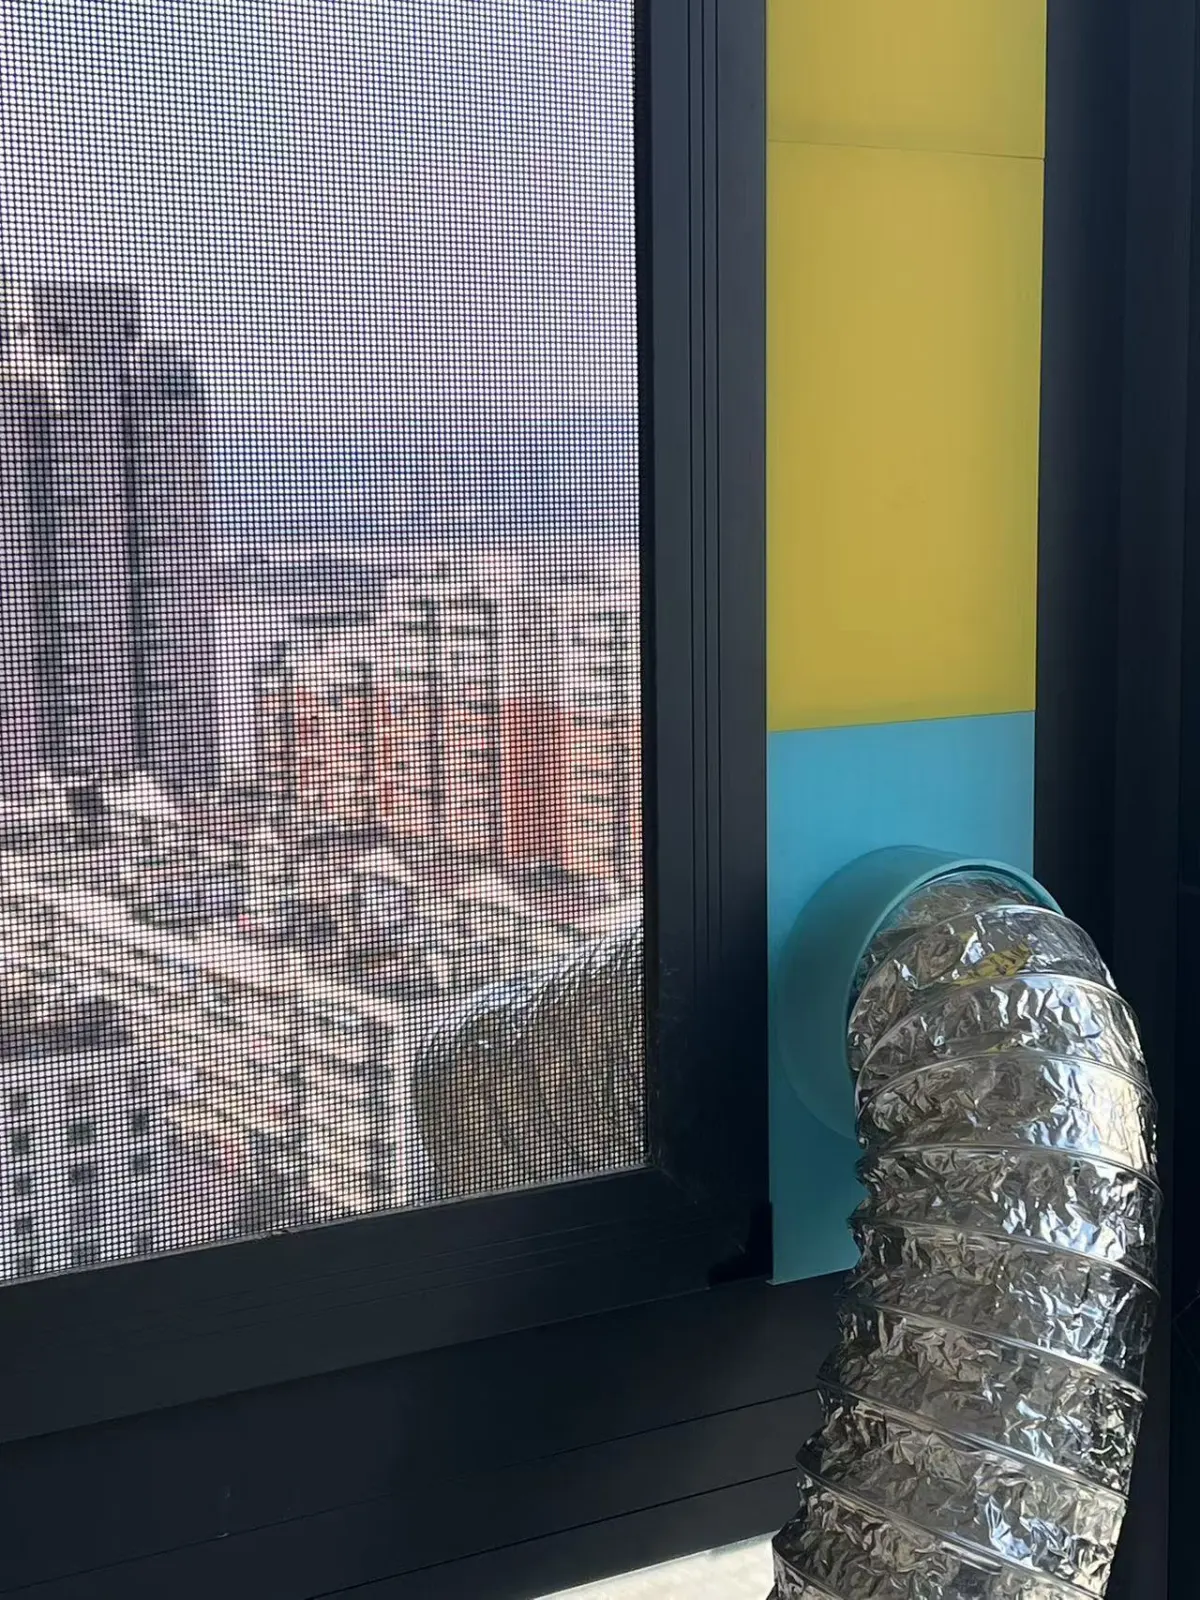
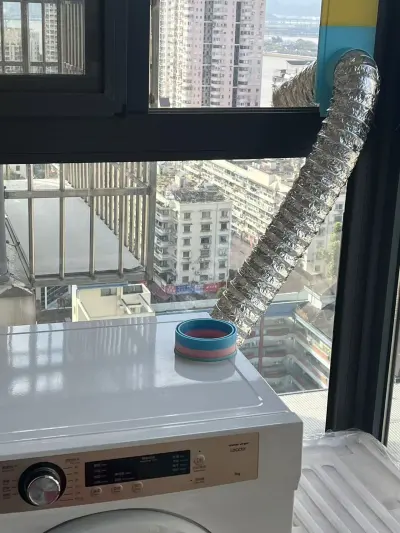
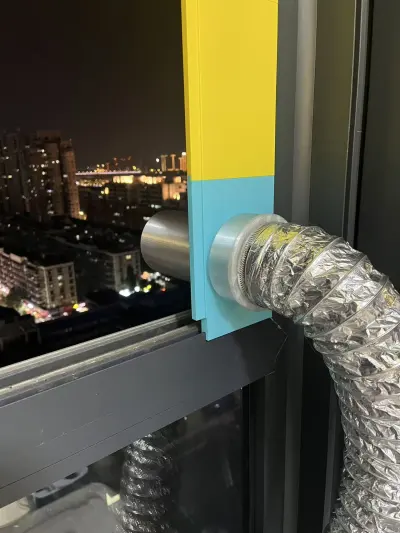
The primary purpose of the model was to address the issue of a home renovation that hadn’t included a dedicated exhaust vent for the dryer. Directly routing the dryer’s exhaust pipe out through the window would have allowed mosquitoes to easily enter, so I created this custom plate with a 10 cm opening—perfectly tailored to fit my specific screen window design.
It’s also ideal for printer exhaust systems; a 10 cm exhaust pipe will work perfectly.
I’ve been using this setup for over six months now, weathering multiple typhoon seasons—and it has remained completely intact even when the exterior window glass was left open.
The central hole allows the exhaust pipe to extend cleanly through the middle of the assembly, as enclosing the pipe within the inner section would cause dust to spray directly onto the window glass.
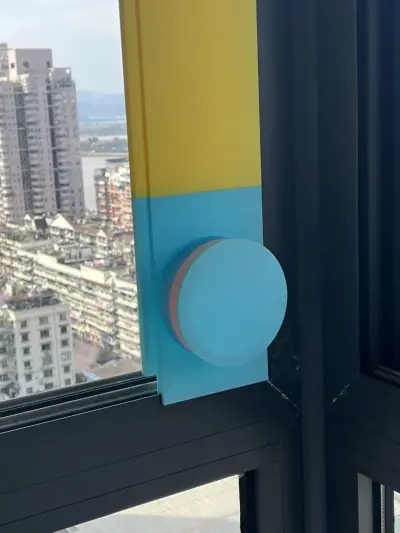
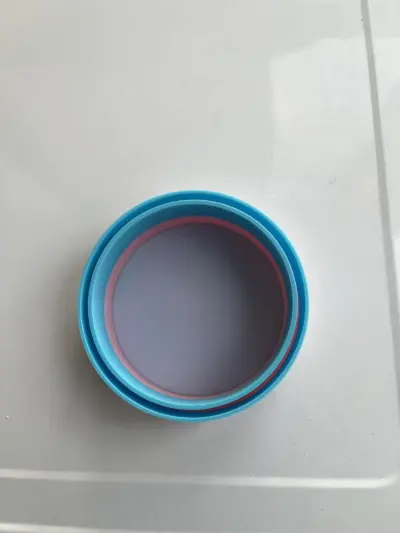
Once use is complete, simply retract the exhaust pipe, slide on the cover, and seal the opening to keep pesky insects from entering.
If your screen window has a thickness of up to 14 mm, retracting the exhaust pipe won’t interfere with the ability to close the outer window (as shown in Figure 6).
Before printing, we recommend first creating a test piece for the base to verify that it can securely snap into the window frame and form a tight seal once the screen window is closed.
PLA is not recommended for this application—exposure to wind and sunlight can lead to degradation over time.
We tested printing only with P1S; whether other printers can successfully produce this part remains uncertain.
Next, print two intermediate 1 cm sections and assemble them for testing—installing additional lengths follows the same process.
The installation procedure is similar to that of a traditional screen window: first insert the top section into the window frame, then slide the bottom section into place, push it until it clicks into position, and finally close the screen window to lock the other side in place.
To determine how many pieces you’ll need, we suggest removing the screen window and measuring its exact length.
You’ll need to print one top surface, one bottom surface, and several intermediate sections.
If the assembled unit ends up slightly shorter than desired, you can easily print additional intermediate sections in the lengths you’ve reserved—those two initial 1 cm intermediate pieces used during testing can also be repurposed to fill in any gaps, ensuring no material goes to waste.
February 10, 2025
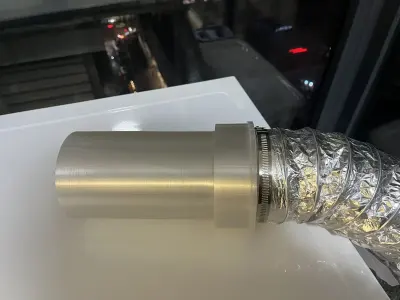
Because the ventilation hole was designed at the absolute limit of feasibility, inserting and removing the exhaust pipe became a bit tricky each time. So I decided to add a protective sleeve.
Simply remove the cover, slide the sleeve over the pipe, use it as needed, then take it off and replace the cover—easy peasy!
If you trim down the extended portion of the pipe, you can even leave the sleeve in place indefinitely without affecting the window’s ability to close properly.
Originality of the Model
The author declares that this work is their personally original model
This model is licensed under the following terms:
Credit must be given to the creator
Only noncommercial uses of the work are permitted
Remixes must be shared under the same license
Models(12)
- 左侧导风罩中间板20CM.3mfDesigner
'%3e%3cpath%20id='Vector'%20d='M13.6663%201.33331H2.33301C1.78072%201.33331%201.33301%201.78103%201.33301%202.33331V13.6666C1.33301%2014.2189%201.78072%2014.6666%202.33301%2014.6666H13.6663C14.2186%2014.6666%2014.6663%2014.2189%2014.6663%2013.6666V2.33331C14.6663%201.78103%2014.2186%201.33331%2013.6663%201.33331Z'%20stroke='%23808080'%20stroke-linejoin='round'/%3e%3cpath%20id='Vector_2'%20d='M11.3333%201.33331V7.33331H5V1.33331H11.3333Z'%20stroke='%23808080'%20stroke-linejoin='round'/%3e%3cpath%20id='Vector_3'%20d='M9.66699%203.66669V5.00002'%20stroke='%23808080'%20stroke-linejoin='round'/%3e%3c/g%3e%3cdefs%3e%3cclipPath%20id='clip0_3212_168684'%3e%3crect%20width='16'%20height='16'%20fill='white'/%3e%3c/clipPath%3e%3c/defs%3e%3c/svg%3e)
26.17 KB
'%3e%3cpath%20id='Vector'%20d='M7.99967%2014.6666C11.6816%2014.6666%2014.6663%2011.6819%2014.6663%207.99998C14.6663%204.31808%2011.6816%201.33331%207.99967%201.33331C4.31777%201.33331%201.33301%204.31808%201.33301%207.99998C1.33301%2011.6819%204.31777%2014.6666%207.99967%2014.6666Z'%20stroke='black'%20stroke-opacity='0.49'%20stroke-linejoin='round'/%3e%3cpath%20id='Vector_2'%20d='M8.00235%204.00006L8.00195%208.00299L10.8284%2010.8295'%20stroke='black'%20stroke-opacity='0.49'%20stroke-linecap='round'%20stroke-linejoin='round'/%3e%3c/g%3e%3cdefs%3e%3cclipPath%20id='clip0_1890_13189'%3e%3crect%20width='16'%20height='16'%20fill='white'/%3e%3c/clipPath%3e%3c/defs%3e%3c/svg%3e)
2026-02-10
- 左侧导风罩中间板2-19CM.3mfDesigner
88.93 KB
2026-02-10
- 左侧导风罩中间板1CM.3mfDesigner
21.59 KB
2026-02-10
- 左侧导风罩顶面21CM.3mfDesigner
24.00 KB
2026-02-10
- 左侧导风罩底面10CM通风管.3mfDesigner
87.07 KB
2026-02-10
- 右侧导风罩中间板20CM.3mfDesigner
26.23 KB
2026-02-10
- 右侧导风罩中间板2-19CM.3mfDesigner
88.86 KB
2026-02-10
- 右侧导风罩顶面21CM.3mfDesigner
24.29 KB
2026-02-10
- 右侧导风罩底面20CM高度10CM直接通风管.3mfDesigner
87.13 KB
2026-02-10
- 底面测试件.3mfDesigner
32.04 KB
2026-02-10
- 导风罩盖子10CM.3mfDesigner
118.04 KB
2026-02-10
- 10cm导风管套筒.3mfDesigner
82.72 KB
2026-02-10
View all(12)


