








Pokémon
Pokémon
Figure model
Desktop Decorations
Color‑coded printing
Disassembled model
King Nido
King Nido
- 0.2 mm layer height, 5‑layer walls, 20% infill density

8-disc
PLA
Designer

77

5
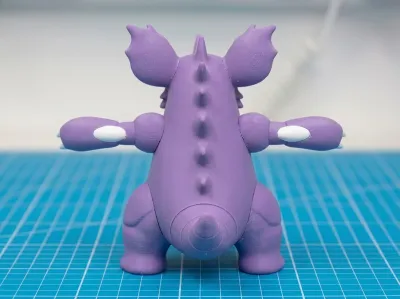
⚠️ Friendly reminder: The model depicts a standing, roaring pose with both arms raised (approximately 20 cm tall), featuring numerous body parts—torso, limbs, ears, tail, and spine—all printed as separate components. We recommend double-checking that all parts are present on the assembly preview disk before starting assembly. Handle small details such as teeth, pupils, and dorsal spines gently to avoid losing them.
👍 If you like this model, please give it a thumbs up ❤️, save it ⭐, and share your printed creation 📸. Feel free to discuss printing and assembly experiences in the comments 💬 as well.
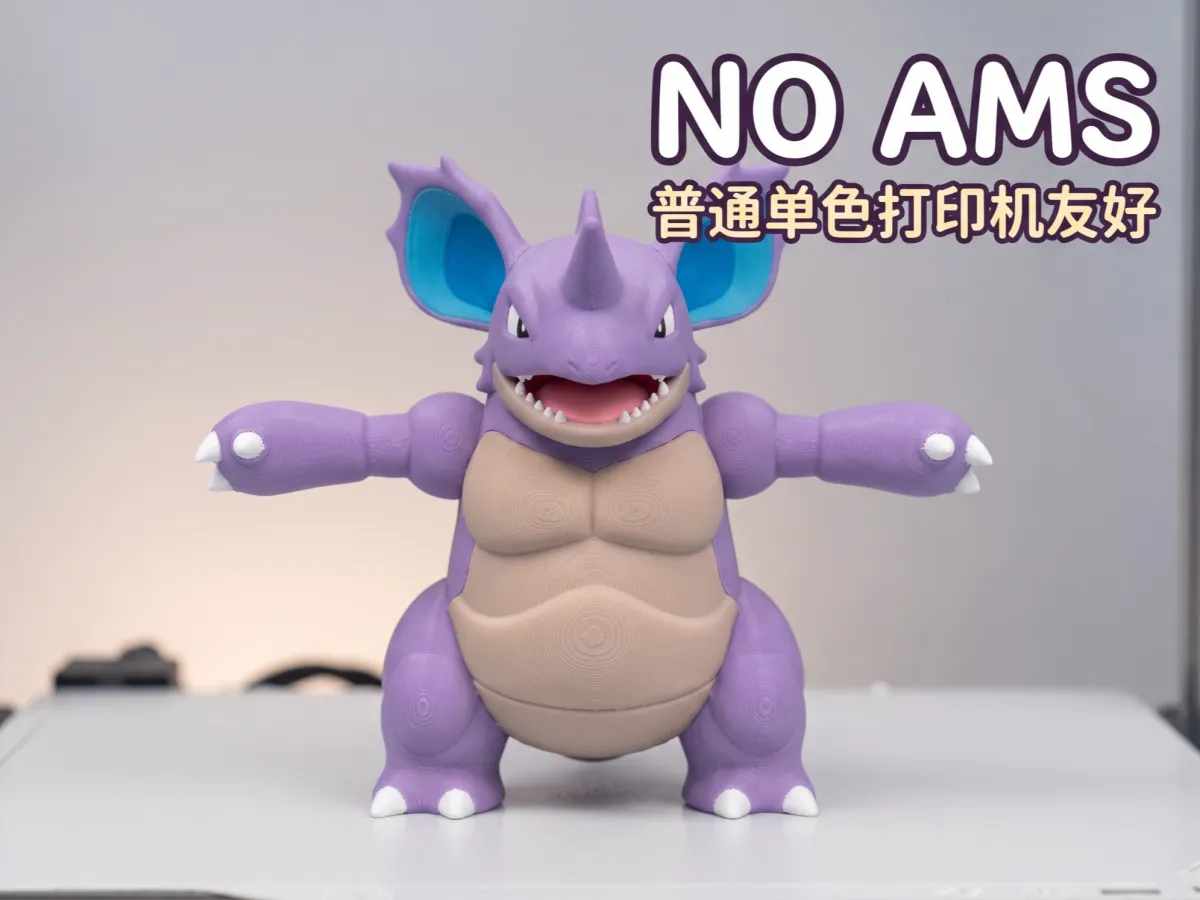
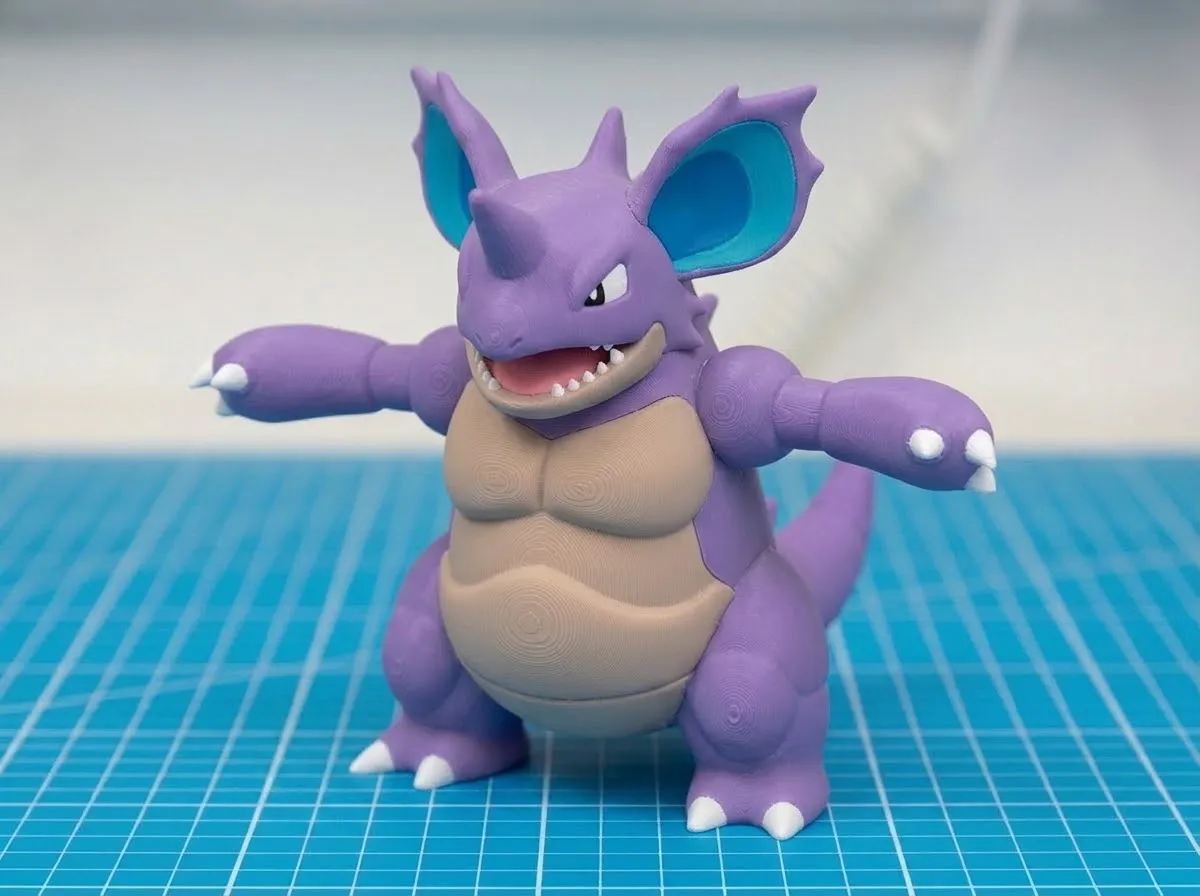
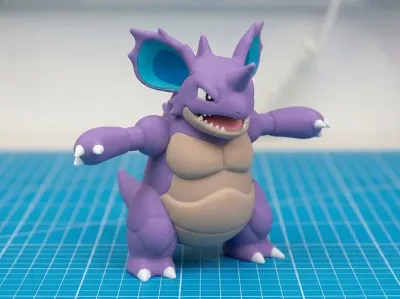
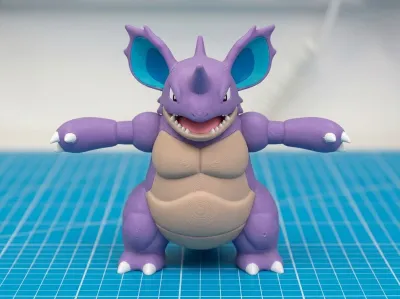
🦏 This multicolored, segmented Pokémon Nidoking figurine has a maximum span of about 20 cm when assembled, faithfully recreating the most powerful “tyrant” in the Nidoran family: a towering single horn on its forehead, bat‑like ears spread wide with striking teal inner linings, a gaping mouth revealing rows of sharp fangs, and robust arms outstretched to either side—a commanding stance that says, “Who dares approach?” It represents the final evolutionary stage of the Nidoran lineage.
🎨 The model is divided into color‑coded parts for printing; even standard monochrome 3D printers can complete it layer by layer without requiring AMS 🚫. The purple torso and limbs form the main structure, complemented by teal ear linings, beige chest and back, and white claws—creating an overall palette that closely mirrors the original anime design. Once finished, it makes an excellent desktop display piece or a collectible themed around Pokémon.
📦 The file includes multi‑color segmented models; we recommend printing each color separately:
🟣 Purple: main body, head, outer contours of the ears, limbs, and tail (main body)
🩵 Teal: inner linings of the ears
🟨 Beige: chest, abdomen, and dorsal spines
⚪ White: claws, toes, teeth, and sclera
🩷 Pink: interior of the mouth
⚫ Black: pupils
🔧 After printing, perform a dry fit of all joints first to confirm correct orientation, then secure with a small amount of glue. Since the ears and tail are curved, independent components, assemble the torso firmly before attaching these pieces.
🌟 Model highlights:
📏 Approximately 20 cm in size (maximum span)
🧩 Multi‑color segmented design (around 6 colors)
🚫 No need for AMS
🖨️ Compatible with standard monochrome printers
🔍 Preset layer height of 0.16 mm
🌳 Preset tree‑shaped automatic supports
🟦 Preset automatic Brim
🦏 Single horn, bat‑wing ears, and outstretched arms—Nidoking’s iconic, imposing pose
📋 Includes a complete assembly reference disk
💡 [Creation Concept]
💡 This project brings to life the male final evolution of the Nidoran family—Nidoking—with a strong emphasis on conveying “power.” A towering horn on the forehead, ears fully spread to either side, arms extended straight forward, paired with a wide-open mouth and rows of sharp fangs—this figure stands ready to guard its territory.
🎯 Color scheme follows the original anime design: 🟣 purple serves as the dominant hue throughout, 🩵 teal ear linings add a signature contrasting touch, while 🟨 beige accents highlight the character’s muscular physique. Teeth and claws are rendered in ⚪ white as separate components, balancing authenticity with ease of post‑assembly adjustments.
🧩 Body, head, ears, limbs, tail, and spine are separated by color, minimizing material waste from frequent color changes and simplifying later fitting and fine‑tuning. Previously created Nidoran figures can now be displayed alongside this one, gradually completing the Nidoran family lineup.
⚙️ [Printing Configuration Notes]
🖨️ We recommend using a 0.4 mm nozzle and PLA filament.
🔧 Layer height: 0.16 mm
🧱 Wall thickness: 2–3 layers
🌀 Infill: 15% (spiral pattern)
🌳 Supports: tree‑shaped automatic supports
🟦 Brim: automatic, 5–8 mm wide (recommended at 8 mm for large parts like the torso and ears)
📦 Printing disks: color‑coded (a total of 37 component disks, including one assembly preview disk)
🚫 Printing method: print each color separately, no AMS required
🦏 The main torso component (plate02, approximately 110×80×149 mm) is the largest; we suggest printing it separately and widening the Brim to 8 mm to prevent warping. As for 🩵 teal ear linings and ⚪ tiny parts like teeth and pupils, we recommend combining them with other small components of the same color during printing to avoid loss.
🛠️ [Assembly Instructions]
📋 1. After printing, verify all parts against the assembly reference disk (37 components in total).
🧹 2. Clean away any support material, Brim, and minor burrs around the joints.
🔍 3. Perform a dry fit of all parts first—do not apply glue immediately.
🔧 4. Once you’ve confirmed the correct orientation and positioning of each part, apply a small amount of glue at the joints to secure them.
🦵 5. Attach the legs and torso first, followed by the arms, head, ears, and single horn, and finally the tail.
✋ 6. With the arms held in a raised position, make slight angle adjustments after assembly to maintain symmetry and enhance visual impact.
⏰ 7. Keep the figure stable until the glue has fully cured to prevent shifting.
Originality of the Model
The author declares that this work is their personally original model
This model is licensed under the following terms:
Credit must be given to the creator
Models(1)
- 尼多王拆件 .3mfDesigner

19.83 MB

2026-10-09


