

swat
Shield
Deformation
Police
Deformable toys

- 0.2 mm layer height, 2‑wall walls, 15% infill density

2-disc
PETG
Designer

11

0
Hello, everyone, I am a green deer pigeon (the same name for the whole platform). as a designer who has won many awards on many platforms, what I bring to you this time is a semi-automatic deformation shield.
I have recently become addicted to Operation Delta, which is also known as Delta Force. There are all kinds of different players in the game! Recently, I have often fought with this cadre of Deep Blue. The bulletproof shield in his hand is really powerful. Every time he opens up, I feel like a god of war, not very enemy. My teammates followed me, and the sense of security was overwhelming! As soon as I was excited, it took me half a month to re-engrave the shield of Deep Blue in the game. From modeling to testing, every step was super fulfilling.
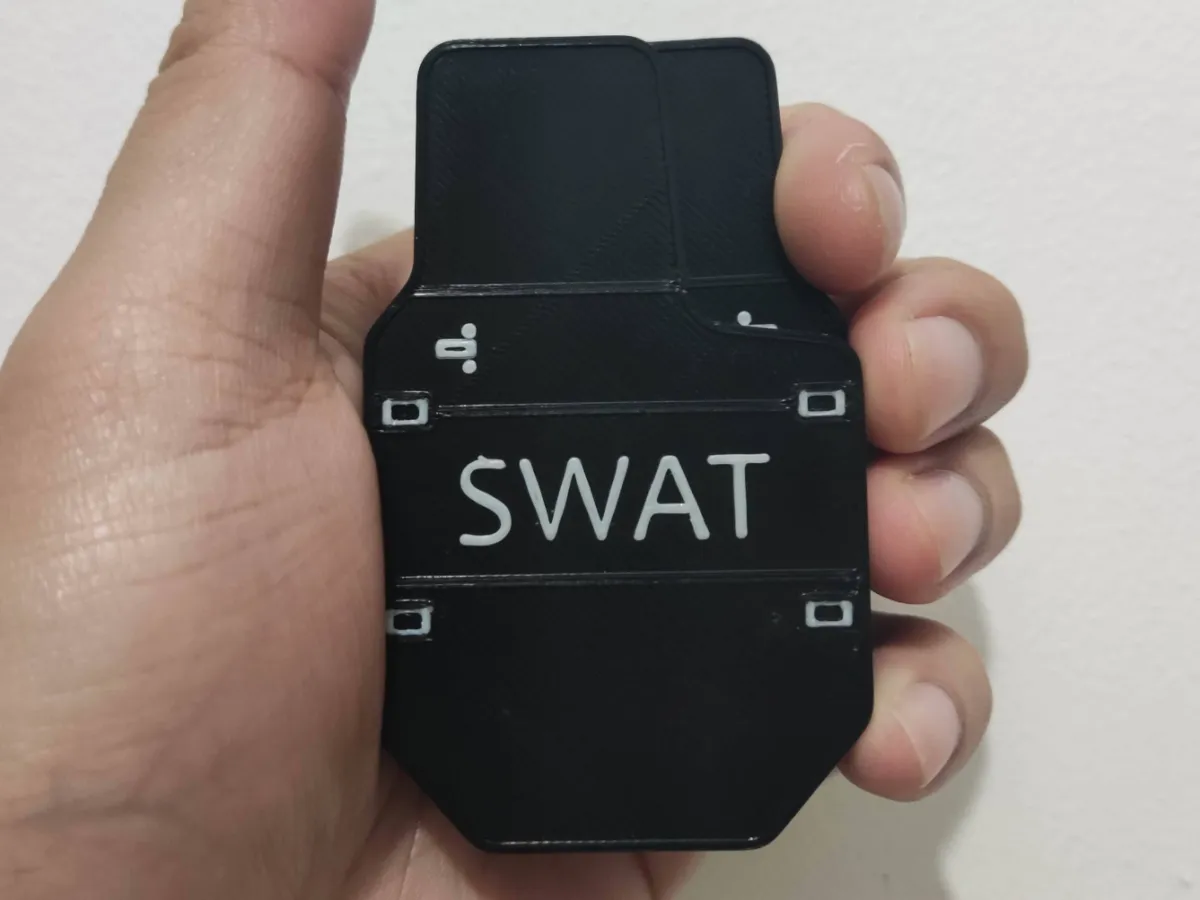
When many small partners saw it, they asked if they could make a common shield for soldiers or machines. So I made this S.W.A.T. version of the shield, and I hope you'll like it.
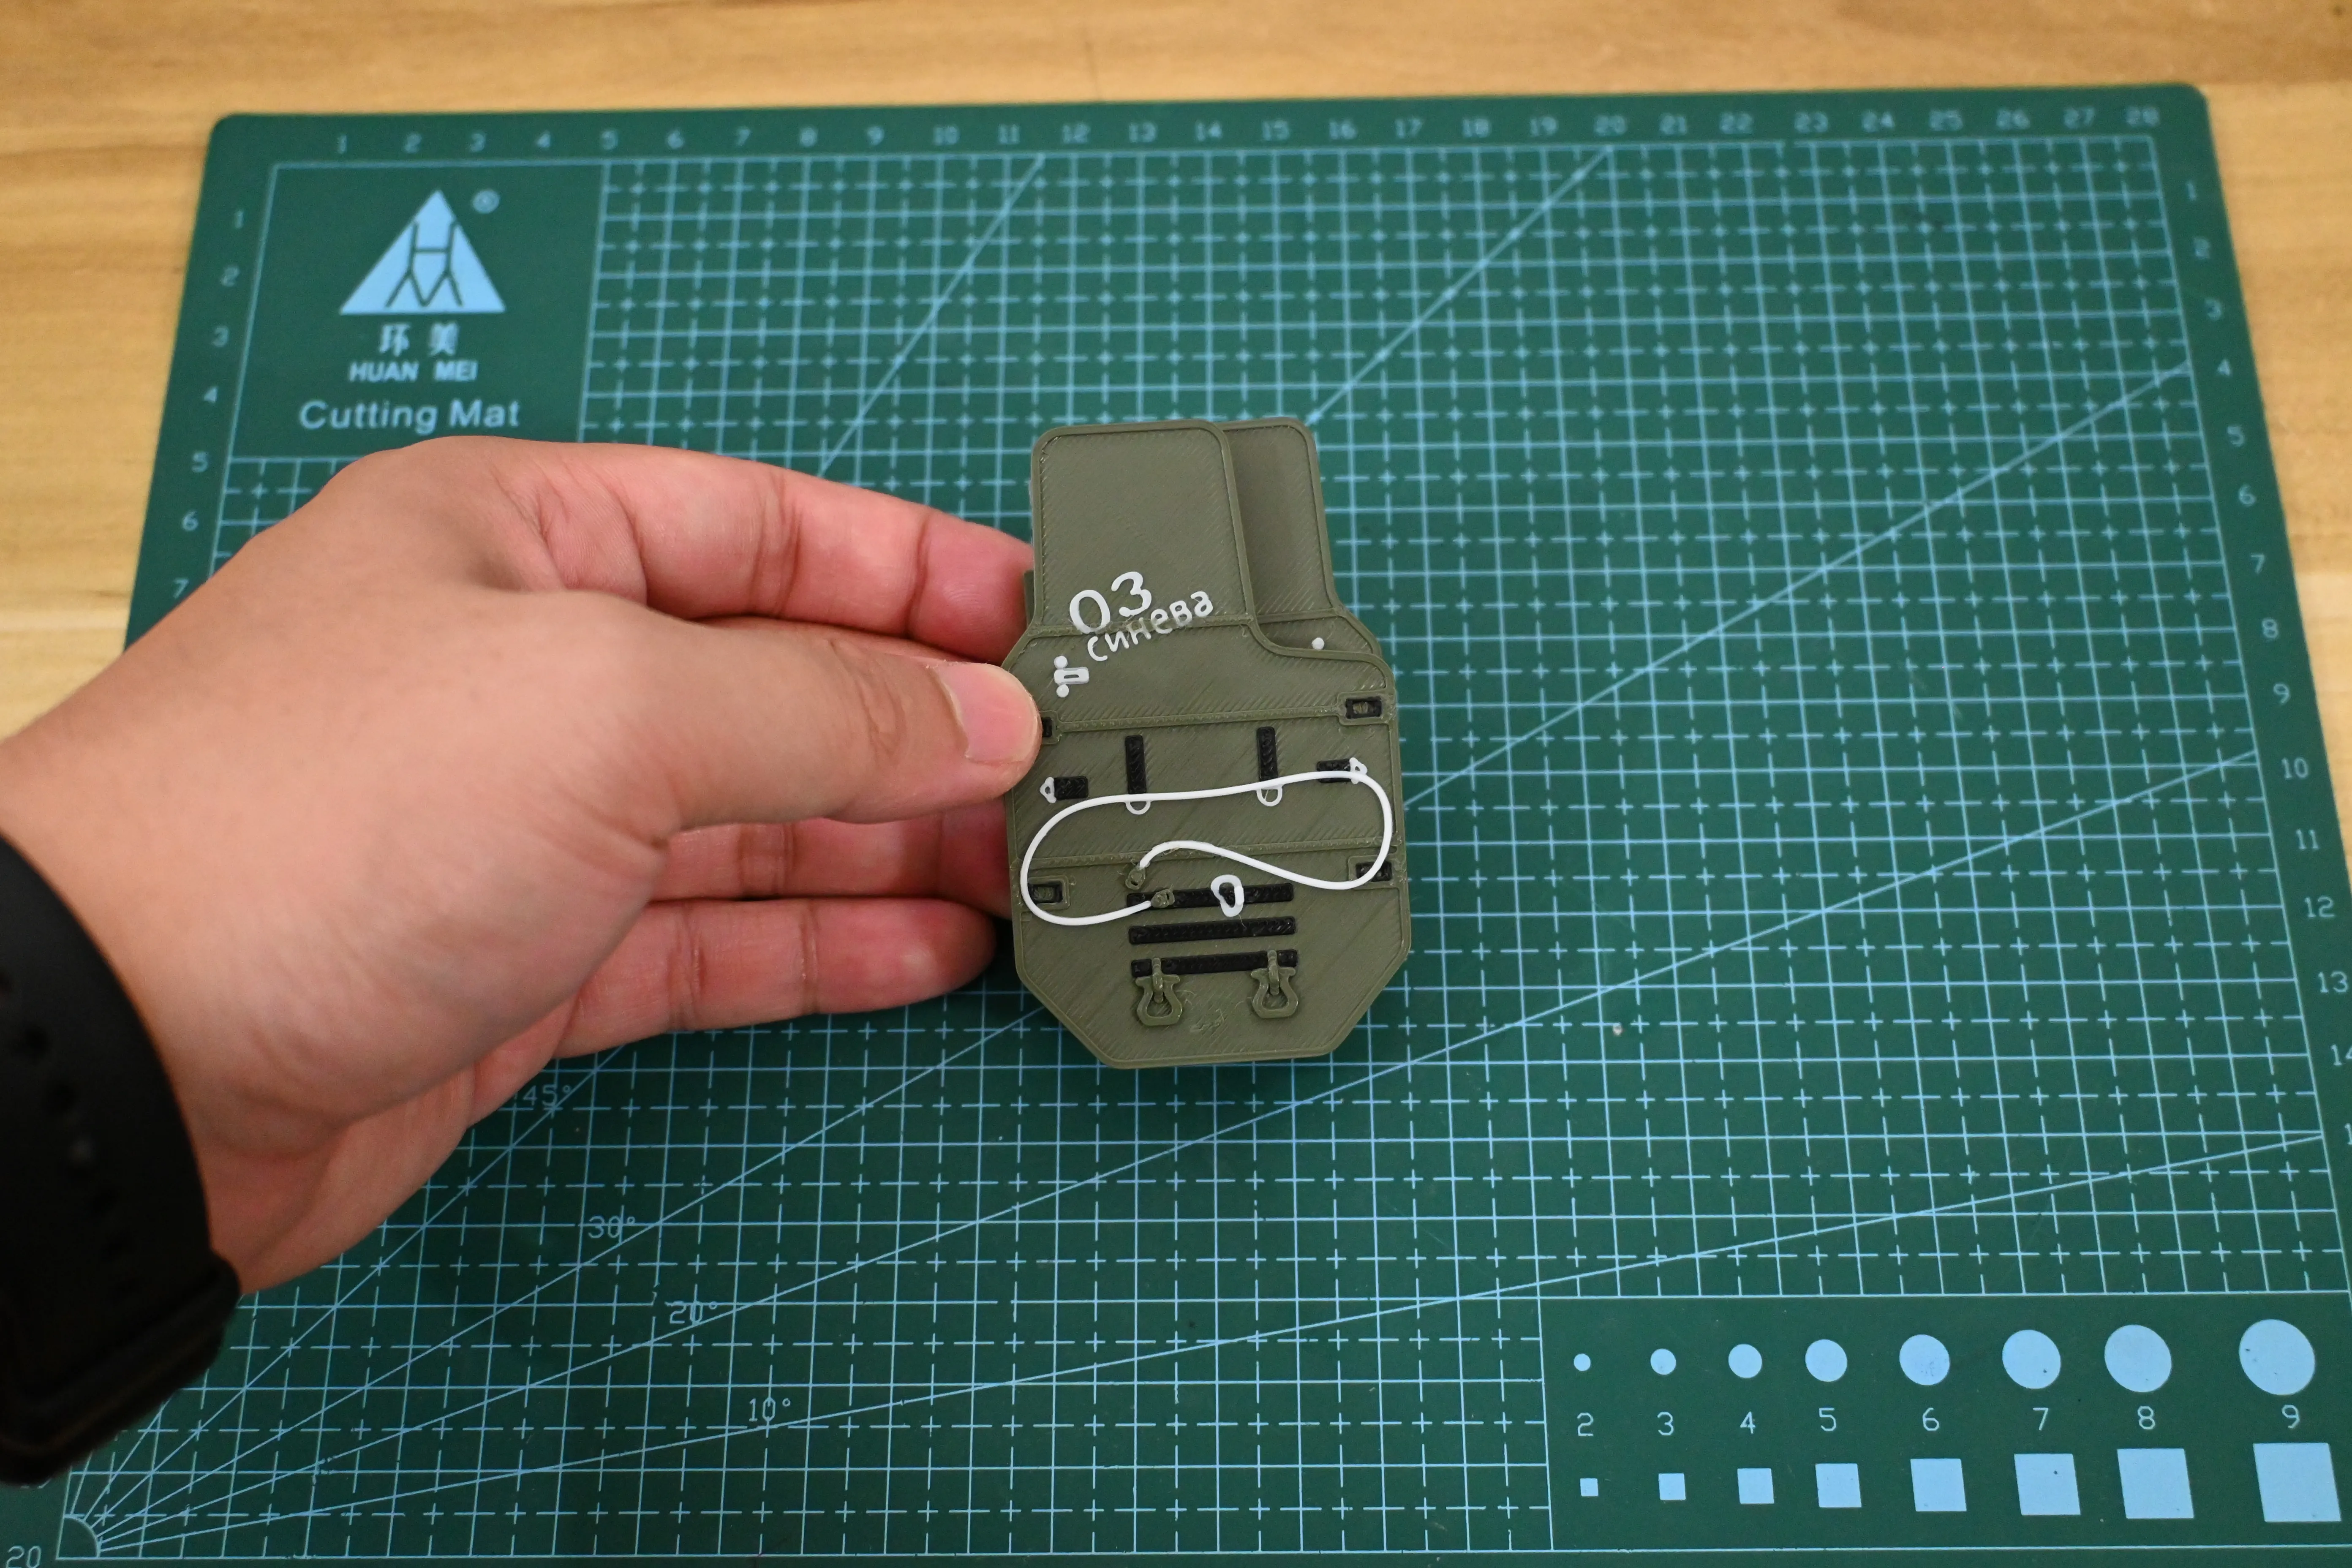
The size of this small shield is 78mm long, 48mm wide and 18.8mm high. It can be used for many purposes. It can be used as a refrigerator sticker, edc push card and ornaments. More novel uses will be discovered by you!
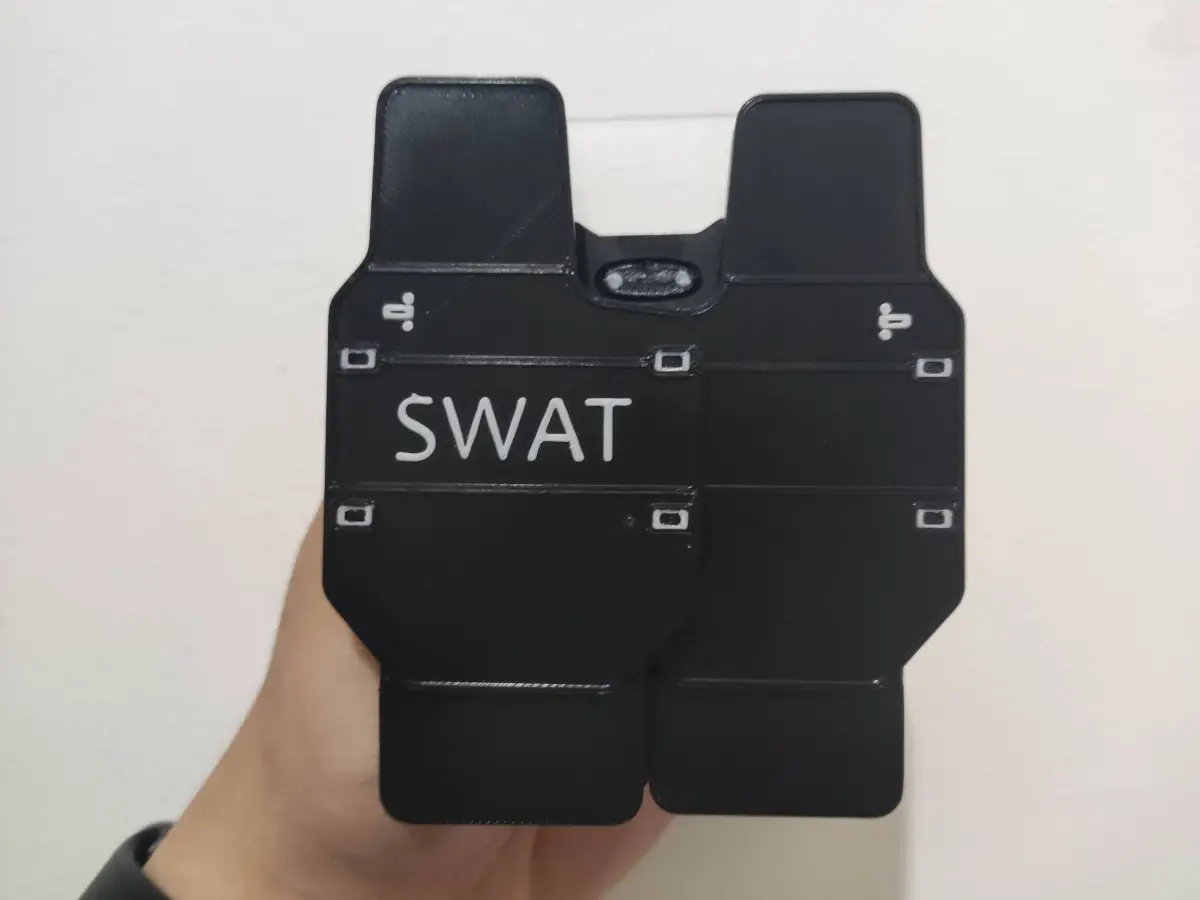
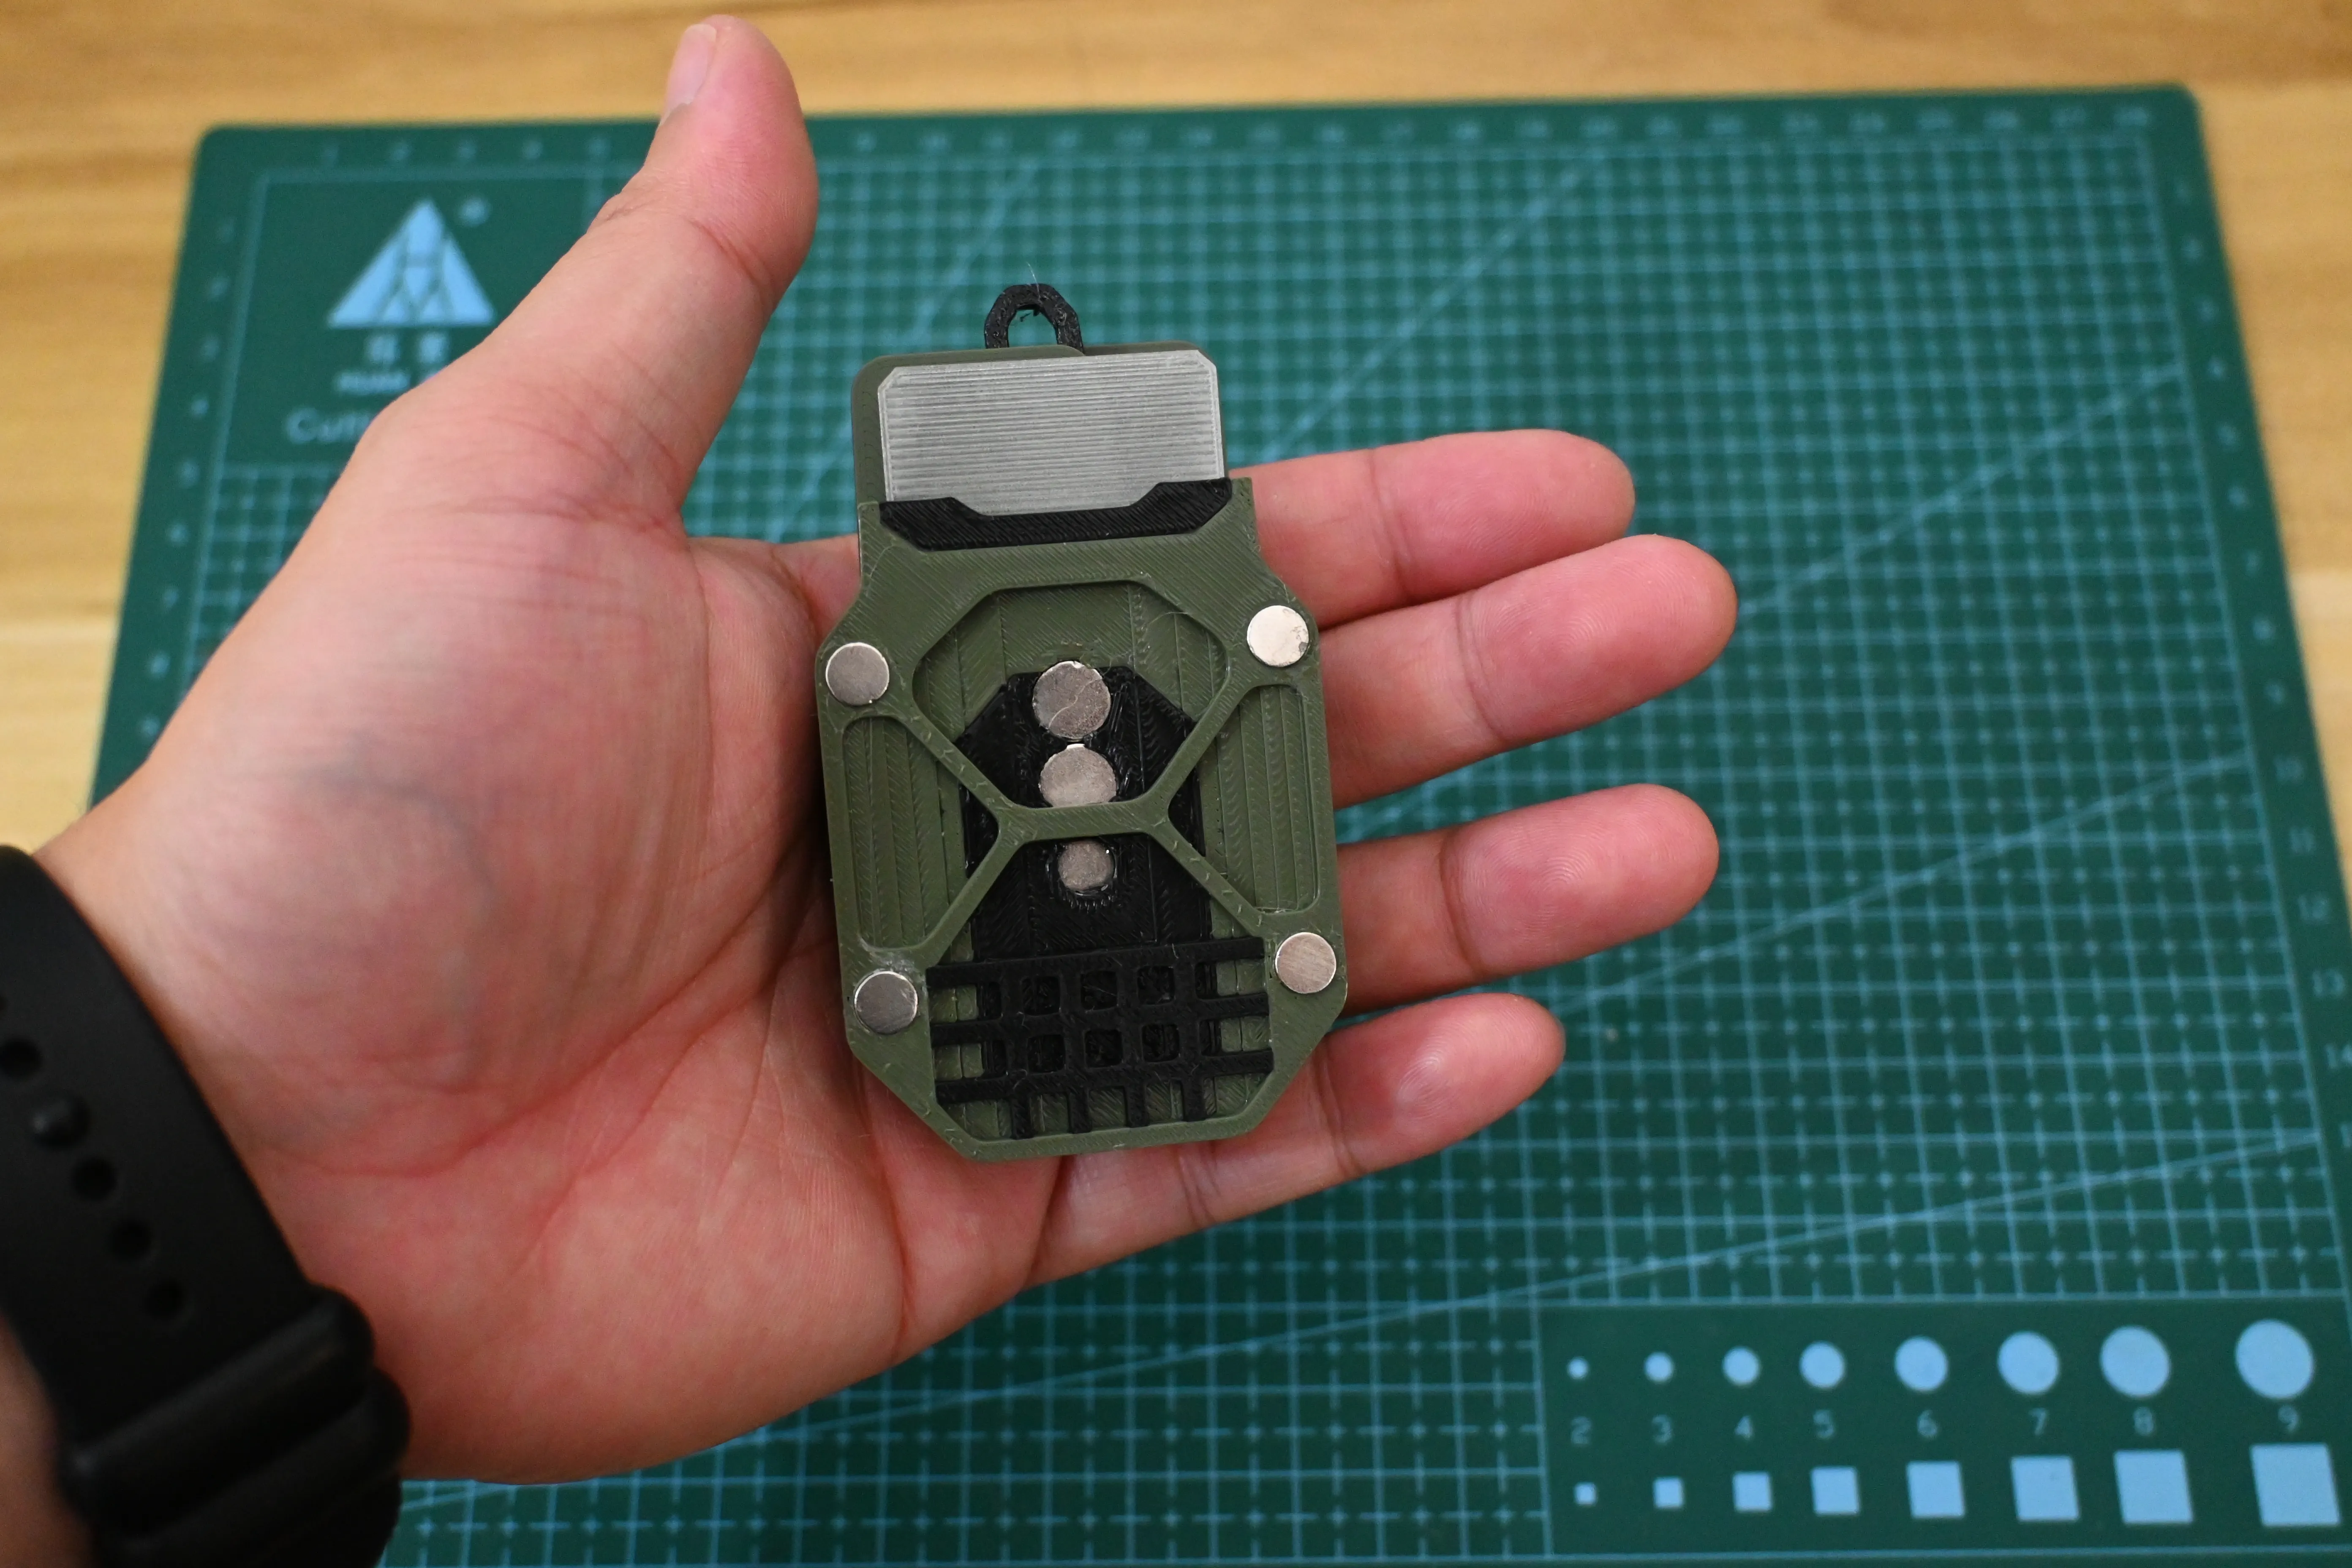
the point, this shield is perfect to restore the effect of the game! Push the shield left and right, and the lower baffle can automatically extend.
In order to achieve this effect, I thought for nearly half a month, and finally thought of using gravity, friction and magnetic attraction and repulsion. I used 25 magnets in the shield and carefully designed the guide rail. After many calculations and tests, I finally achieved perfect results!
The principle is actually very simple, but it is not easy to operate.
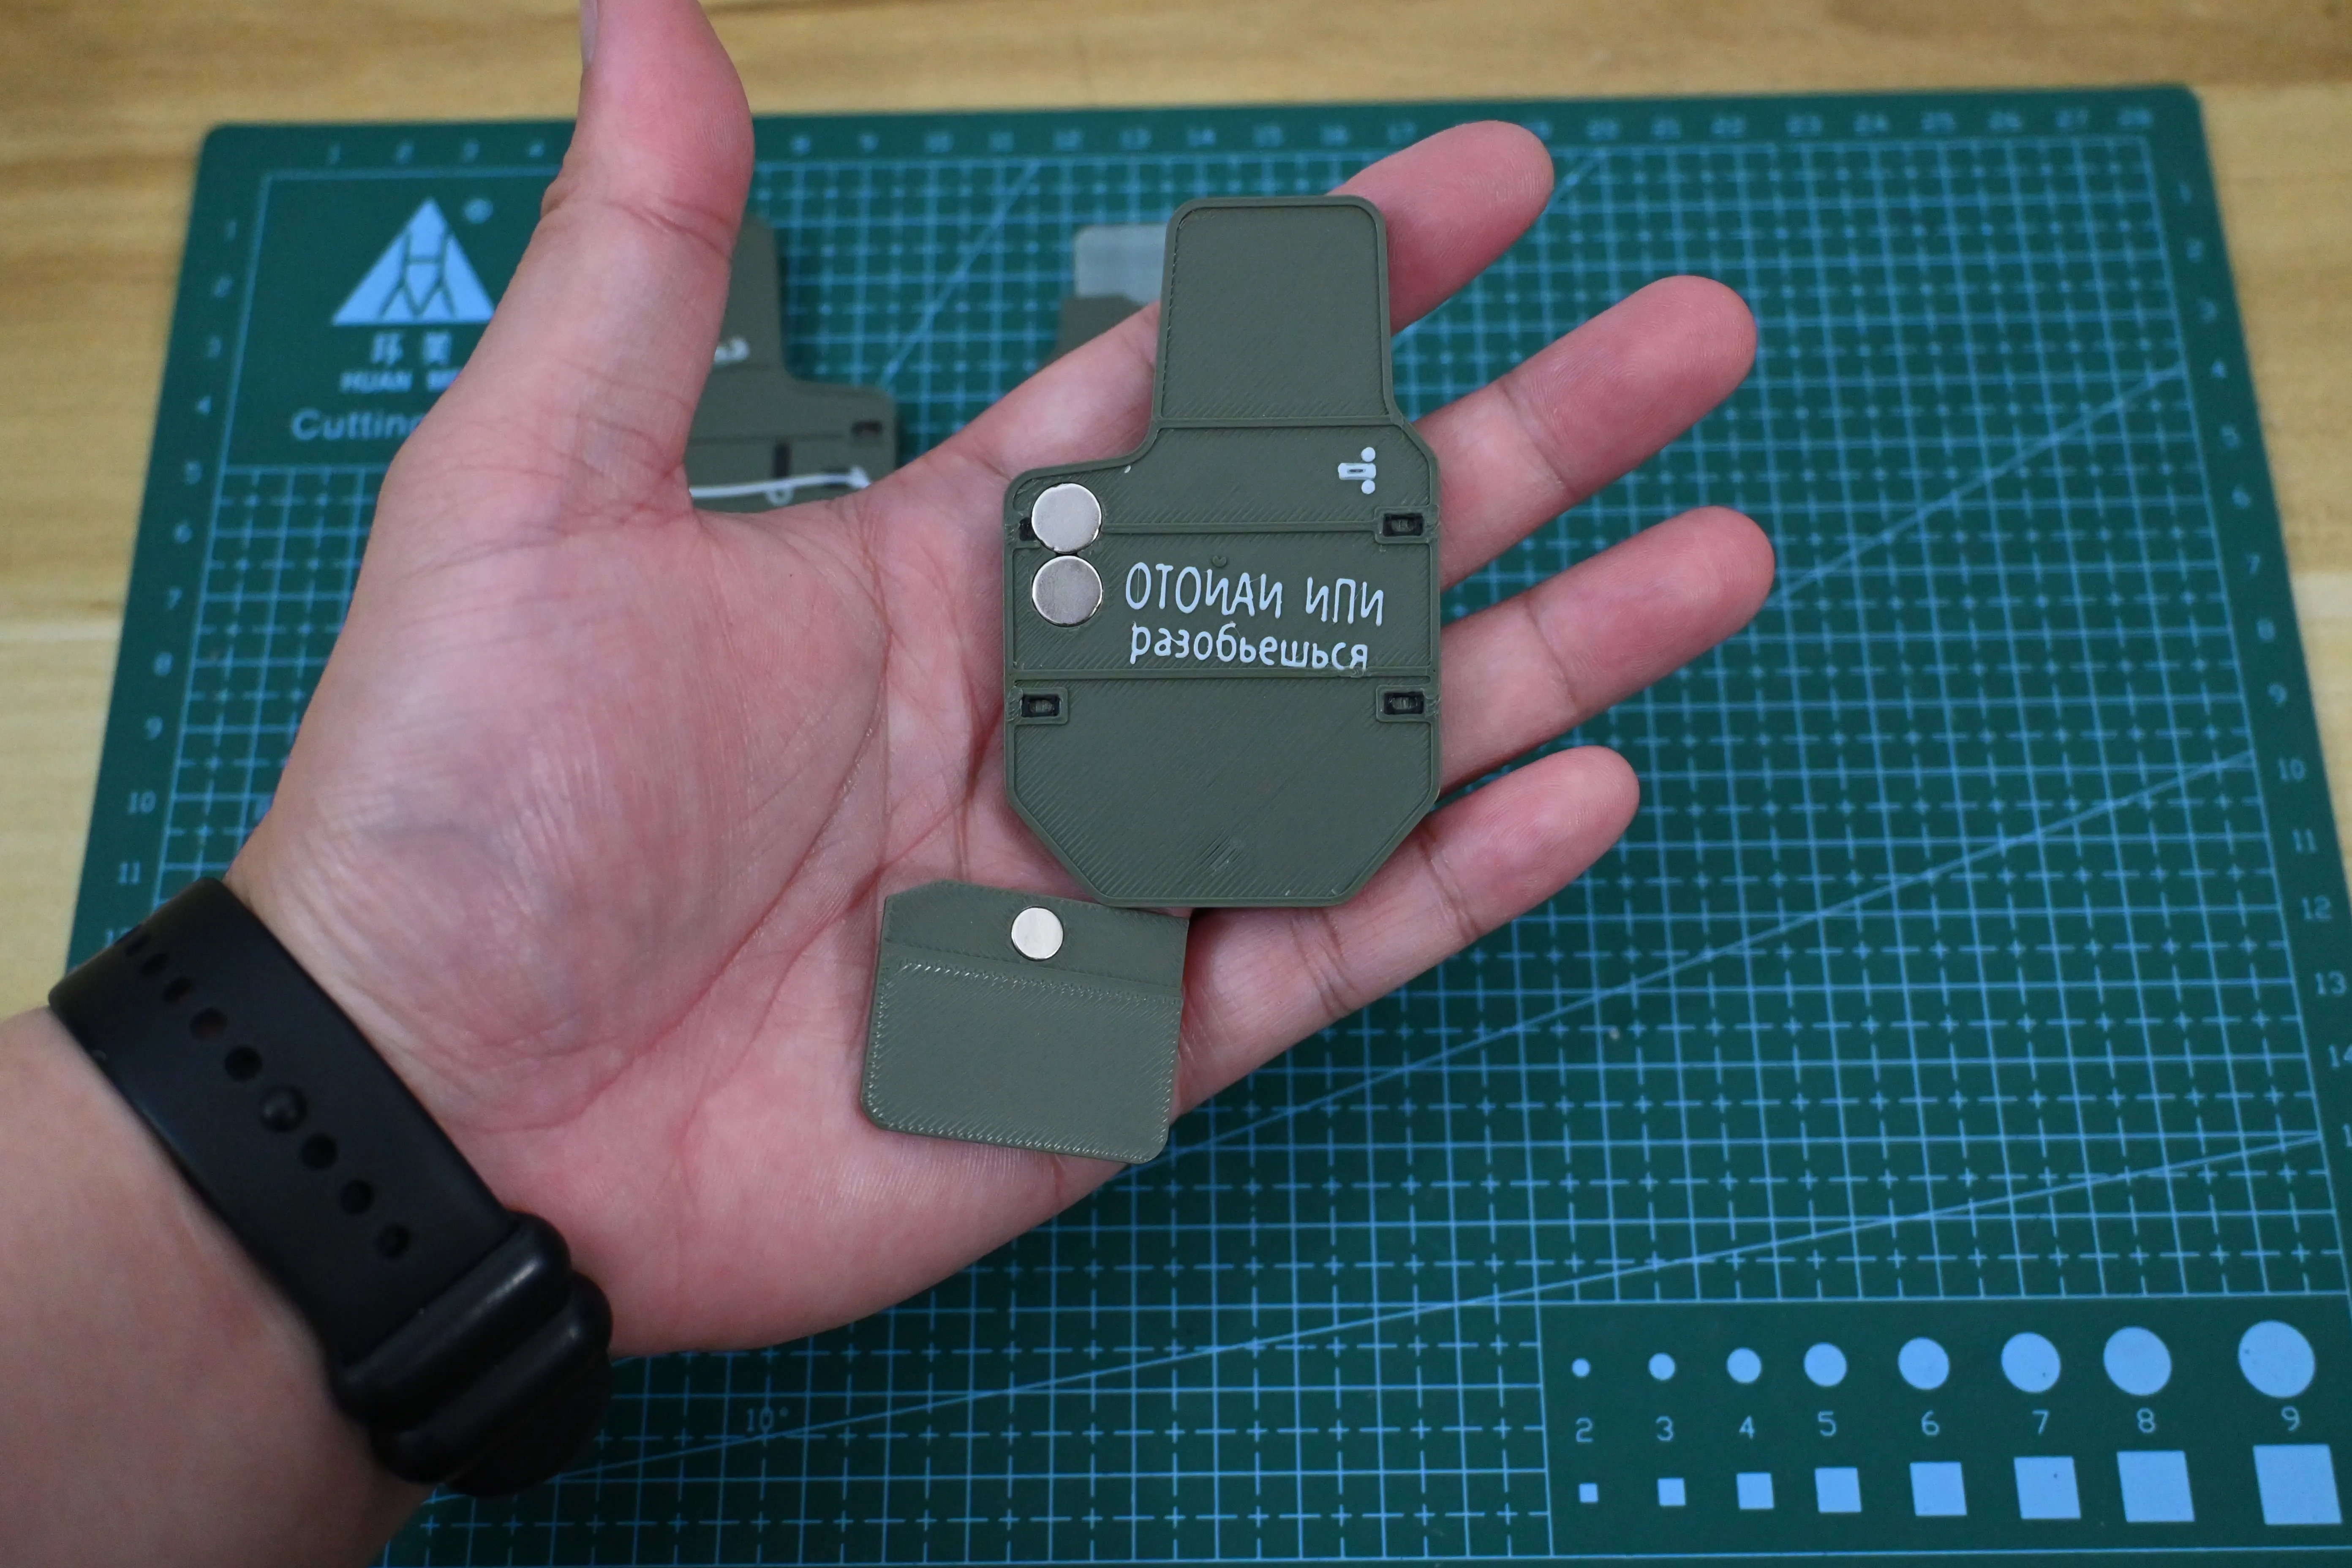
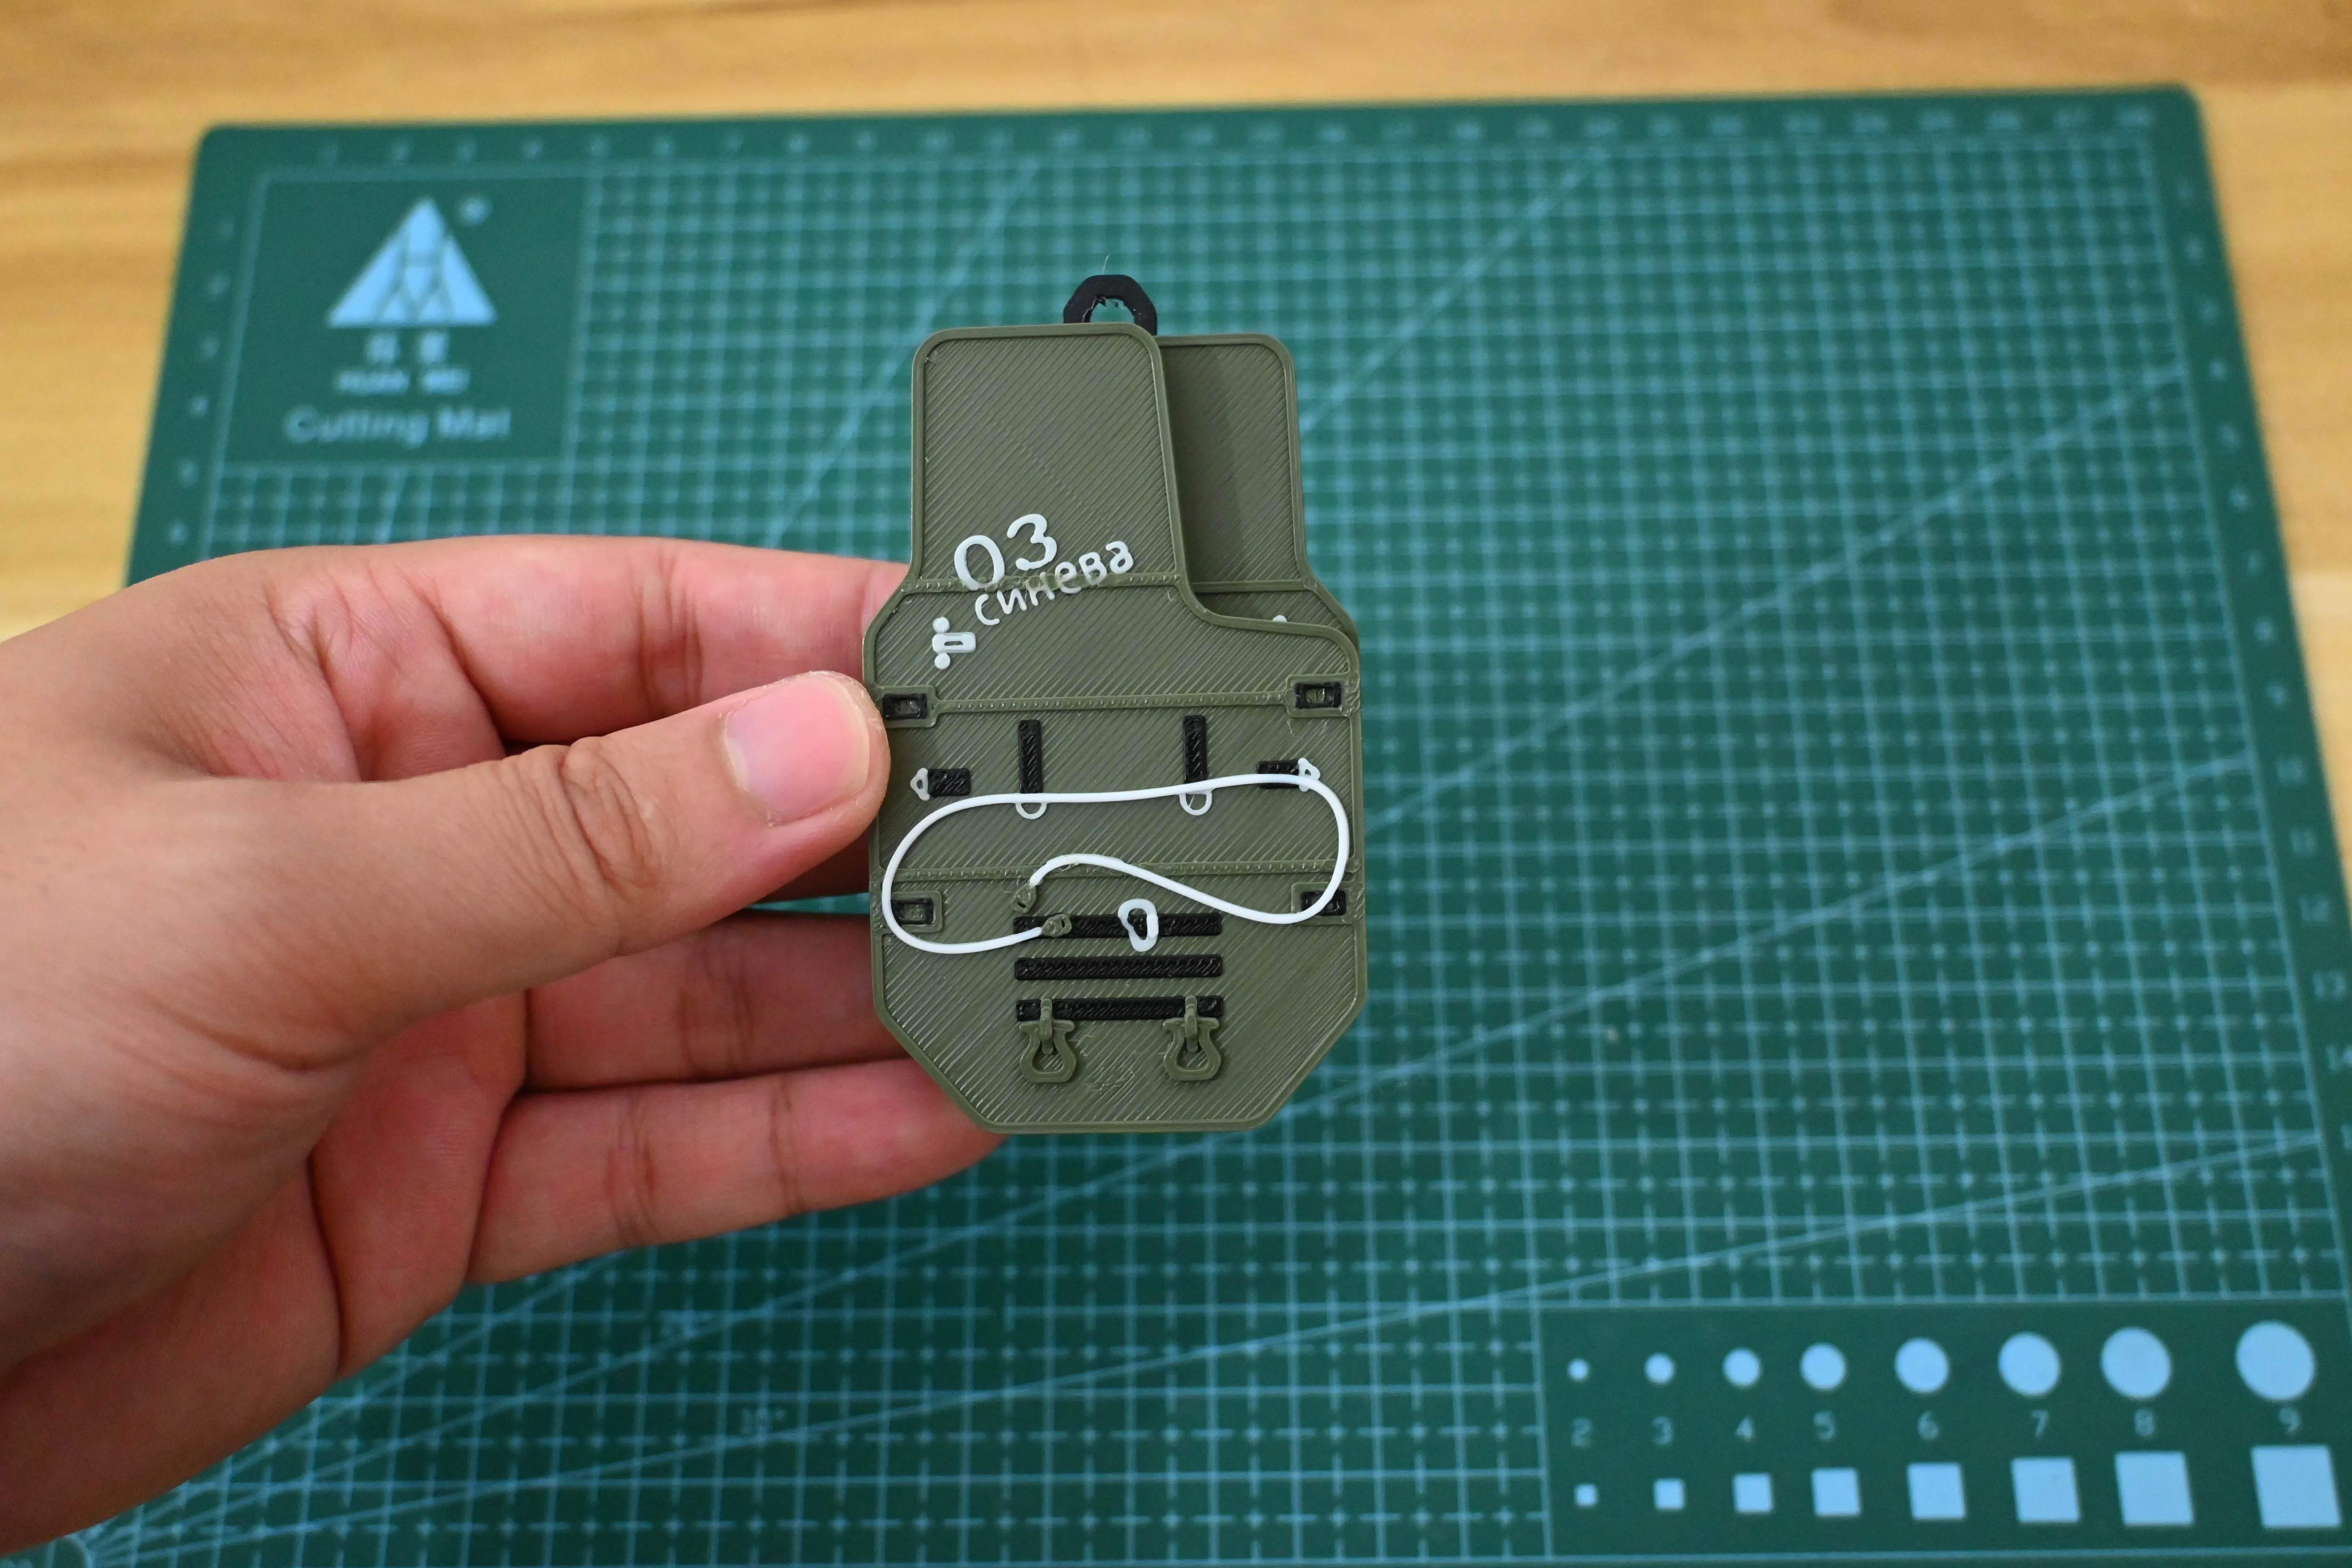
First of all, all magnets are oriented the same, this is the key, if installed backwards, it will be wasted.
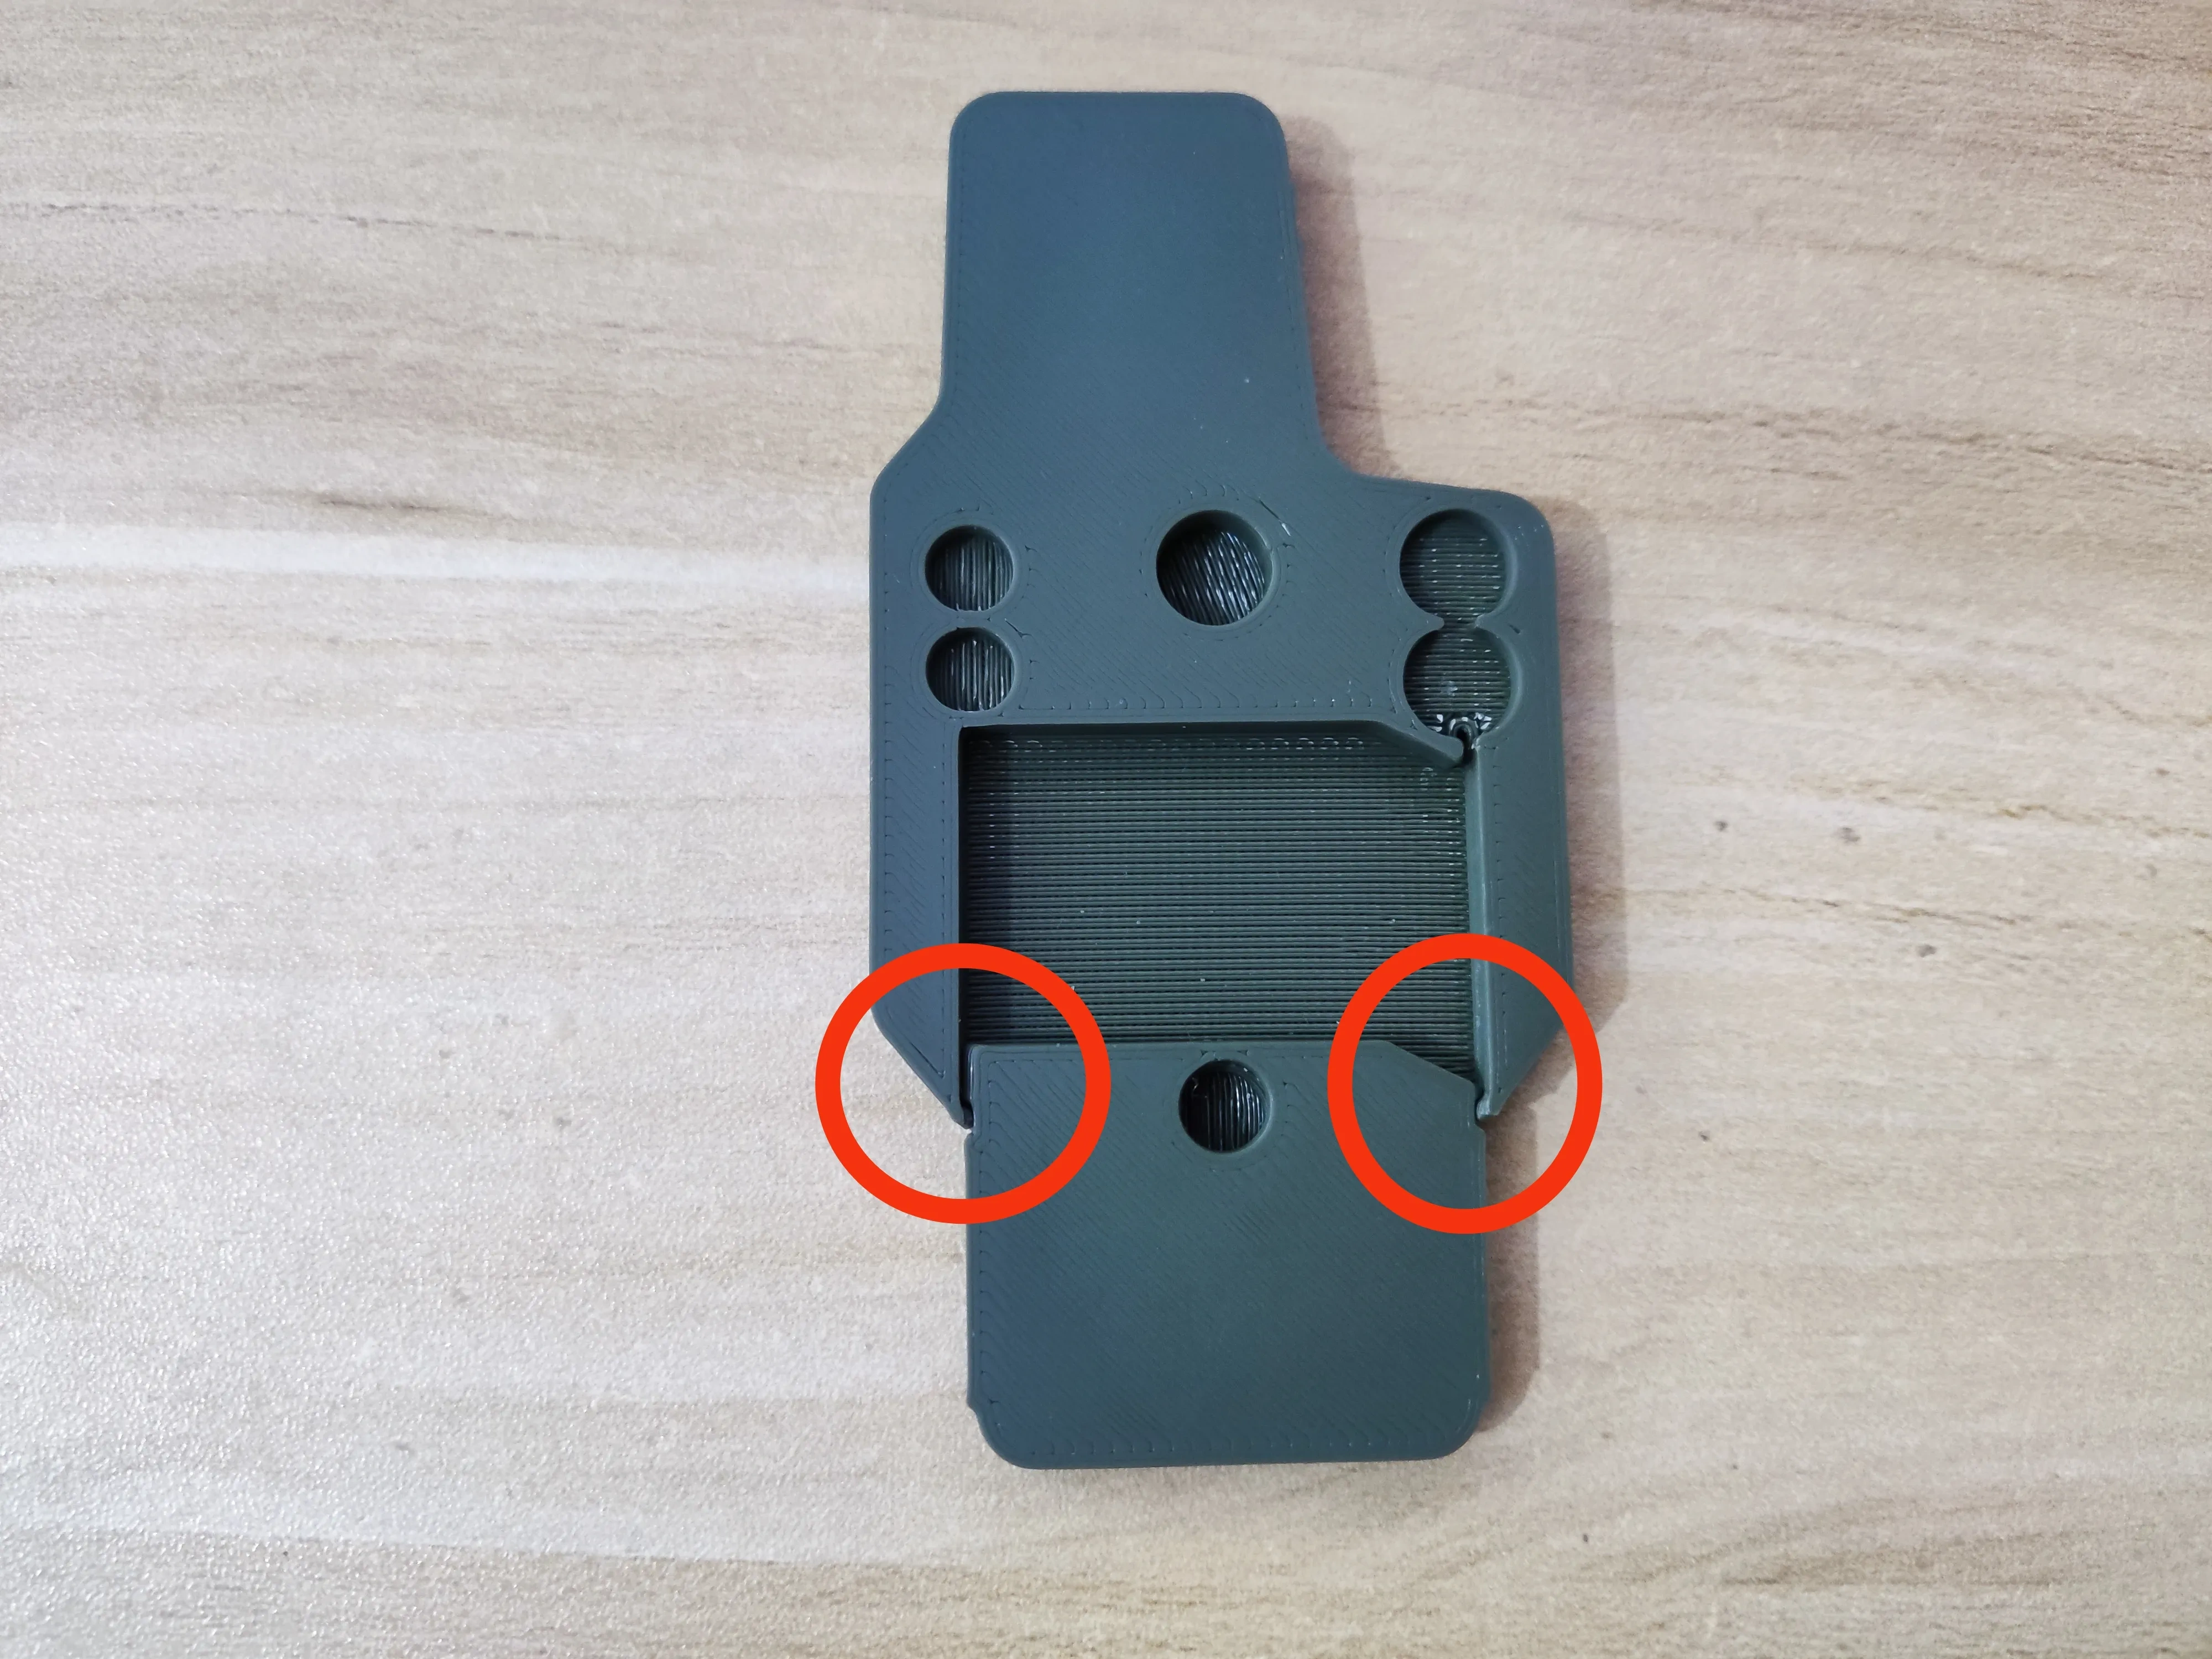
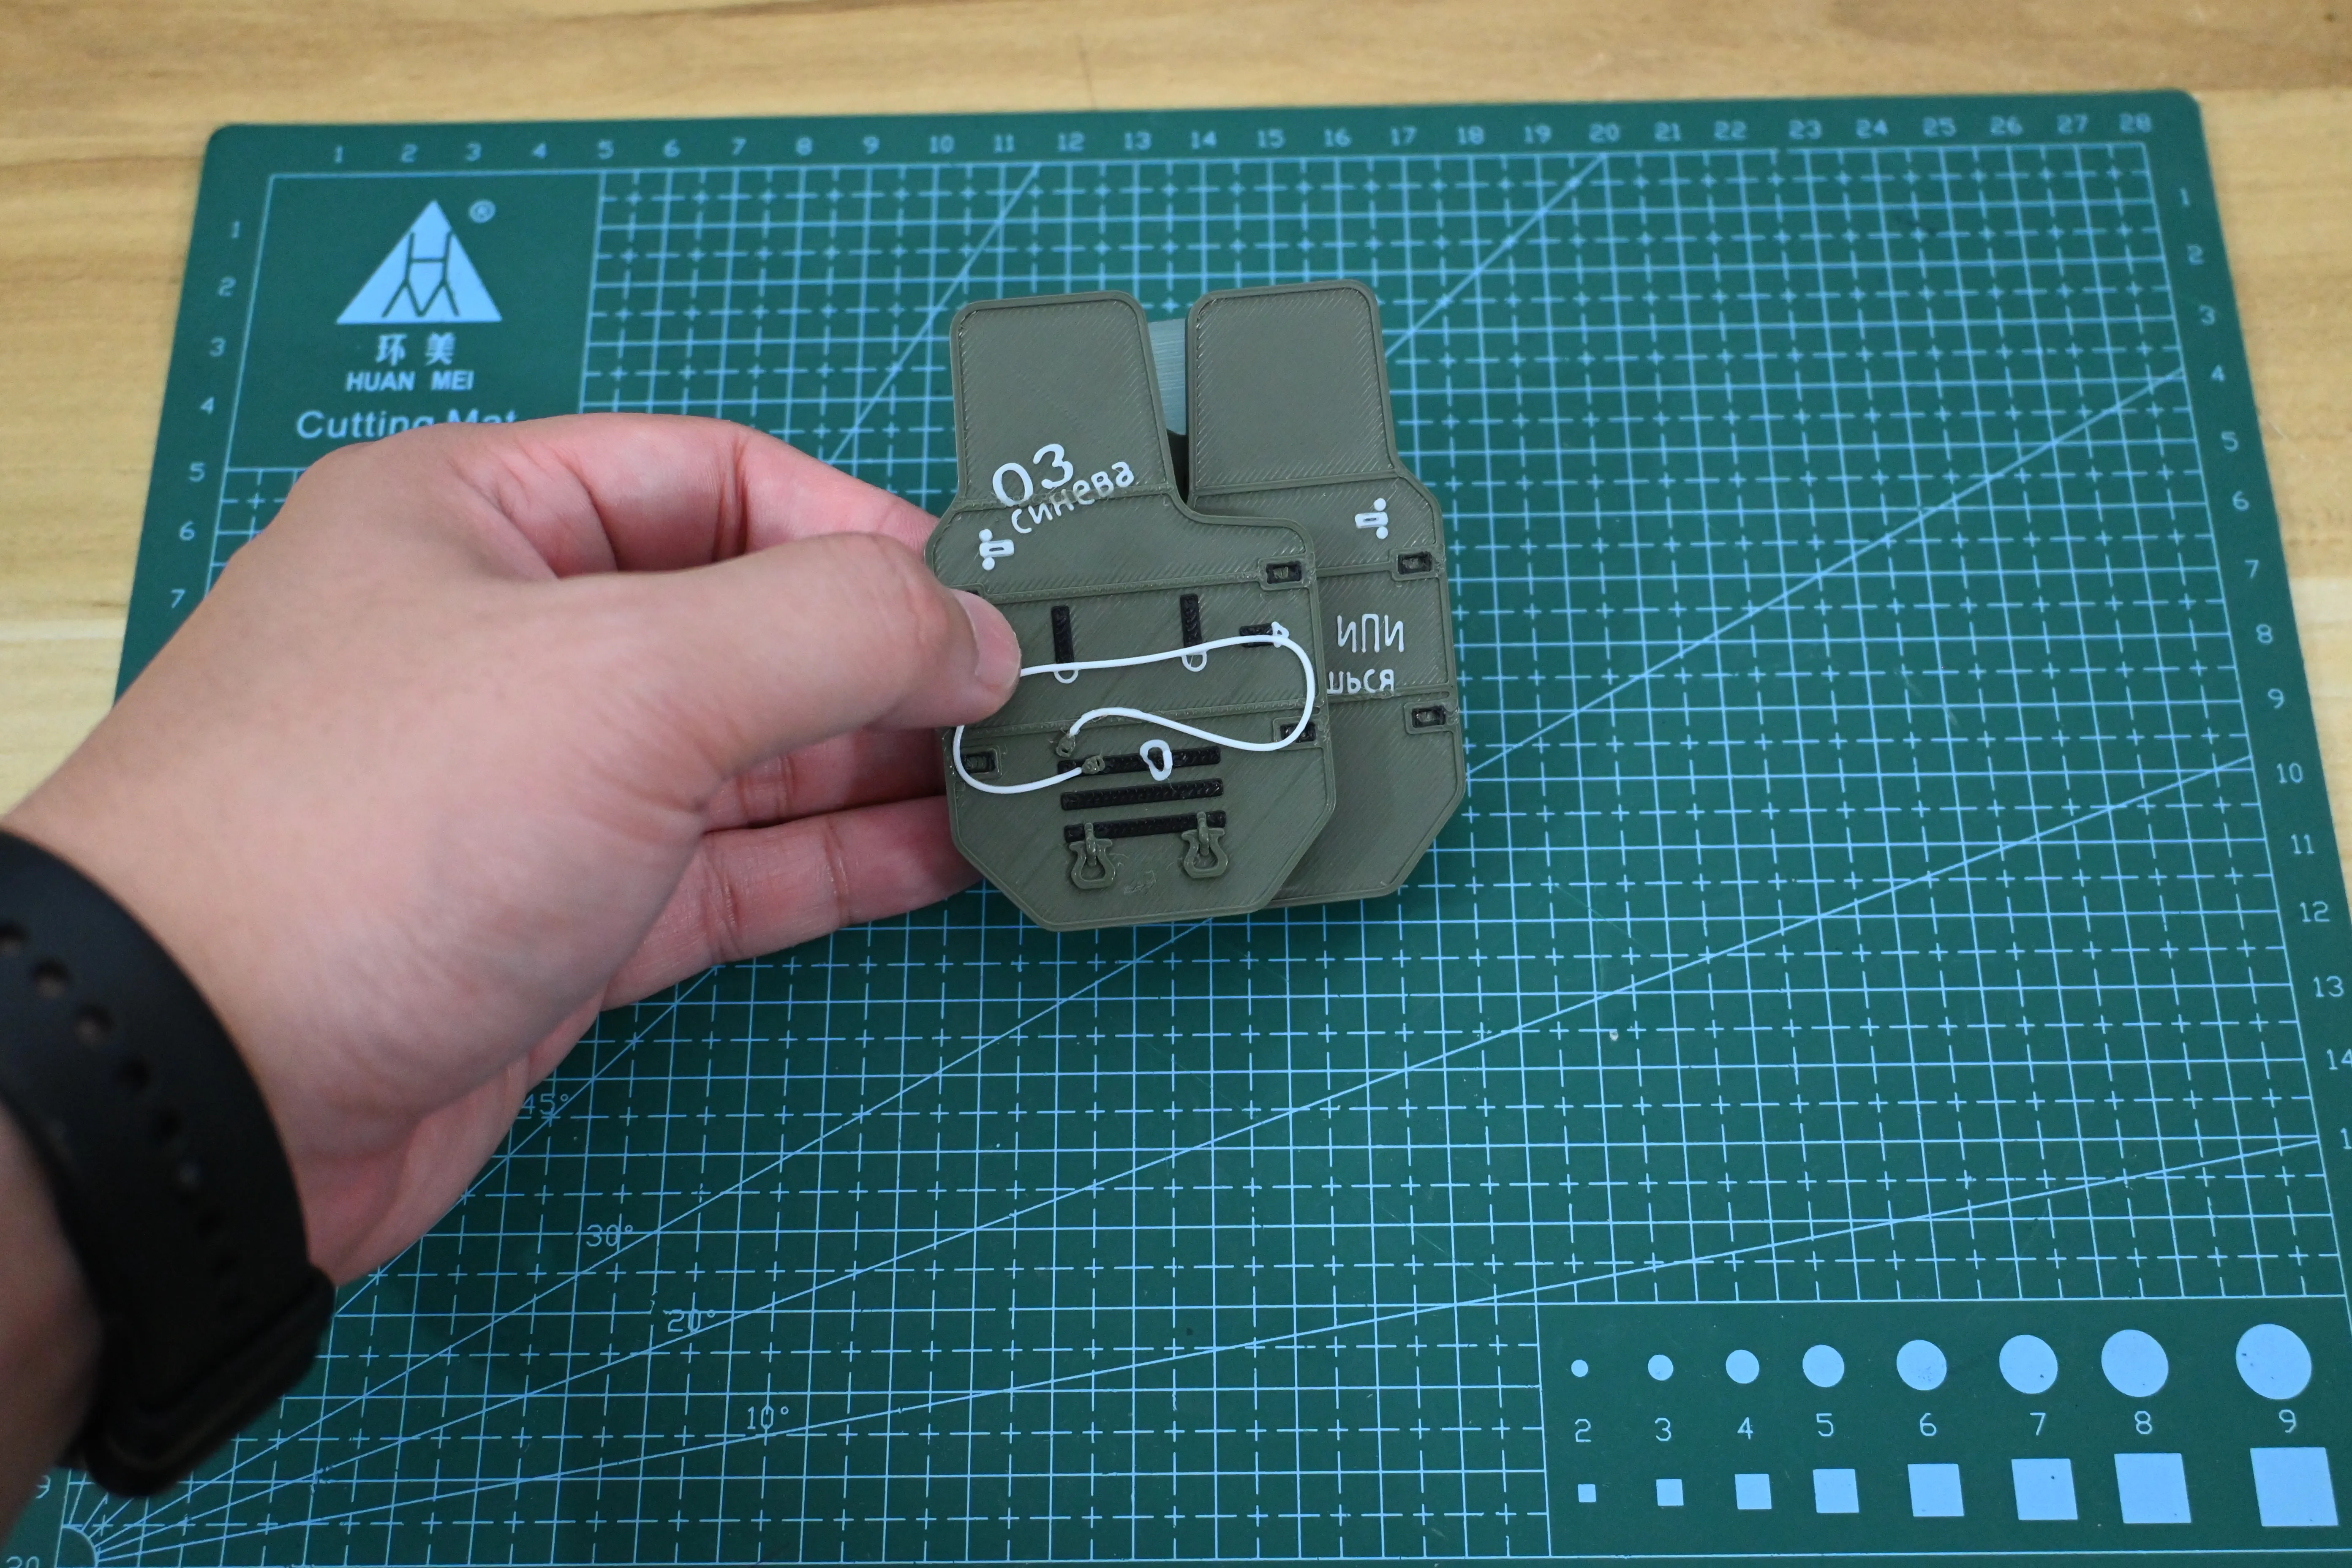
Then, look at the two magnets in the red circle in the picture. They repel each other. Coupled with the effect of gravity, the baffle will pop up automatically. Because there is a guide rail limit, it will not fall out. I also designed a magnet at the bottom. When the baffle reaches the head, it will be firmly attracted by it and will not shake easily.
Then how does it not pop up automatically when it is put away? This depends on the magnet and friction of the shield in the middle. After accurate calculation, I found the appropriate position and force, so that when I put it away, the baffle will be attracted by the magnet and will not pop up by itself.
According to this principle, you can also design different proportions and types of shields. Very good model, you can print it and try it.

Model files, I have done a lot of tests, basically no problem. But still because of the printer, consumables, printing temperature, cooling temperature and so on the difference, there will be some problems, you can in the file zoom or give me a message I will adjust oh, thank you!
Key Reminder: Need to prepare 20 8*2mm magnets and 24 6*1mm magnets, probably 6-7 yuan.
Assembly graphic tutorial (with dark blue shield as a demonstration case)
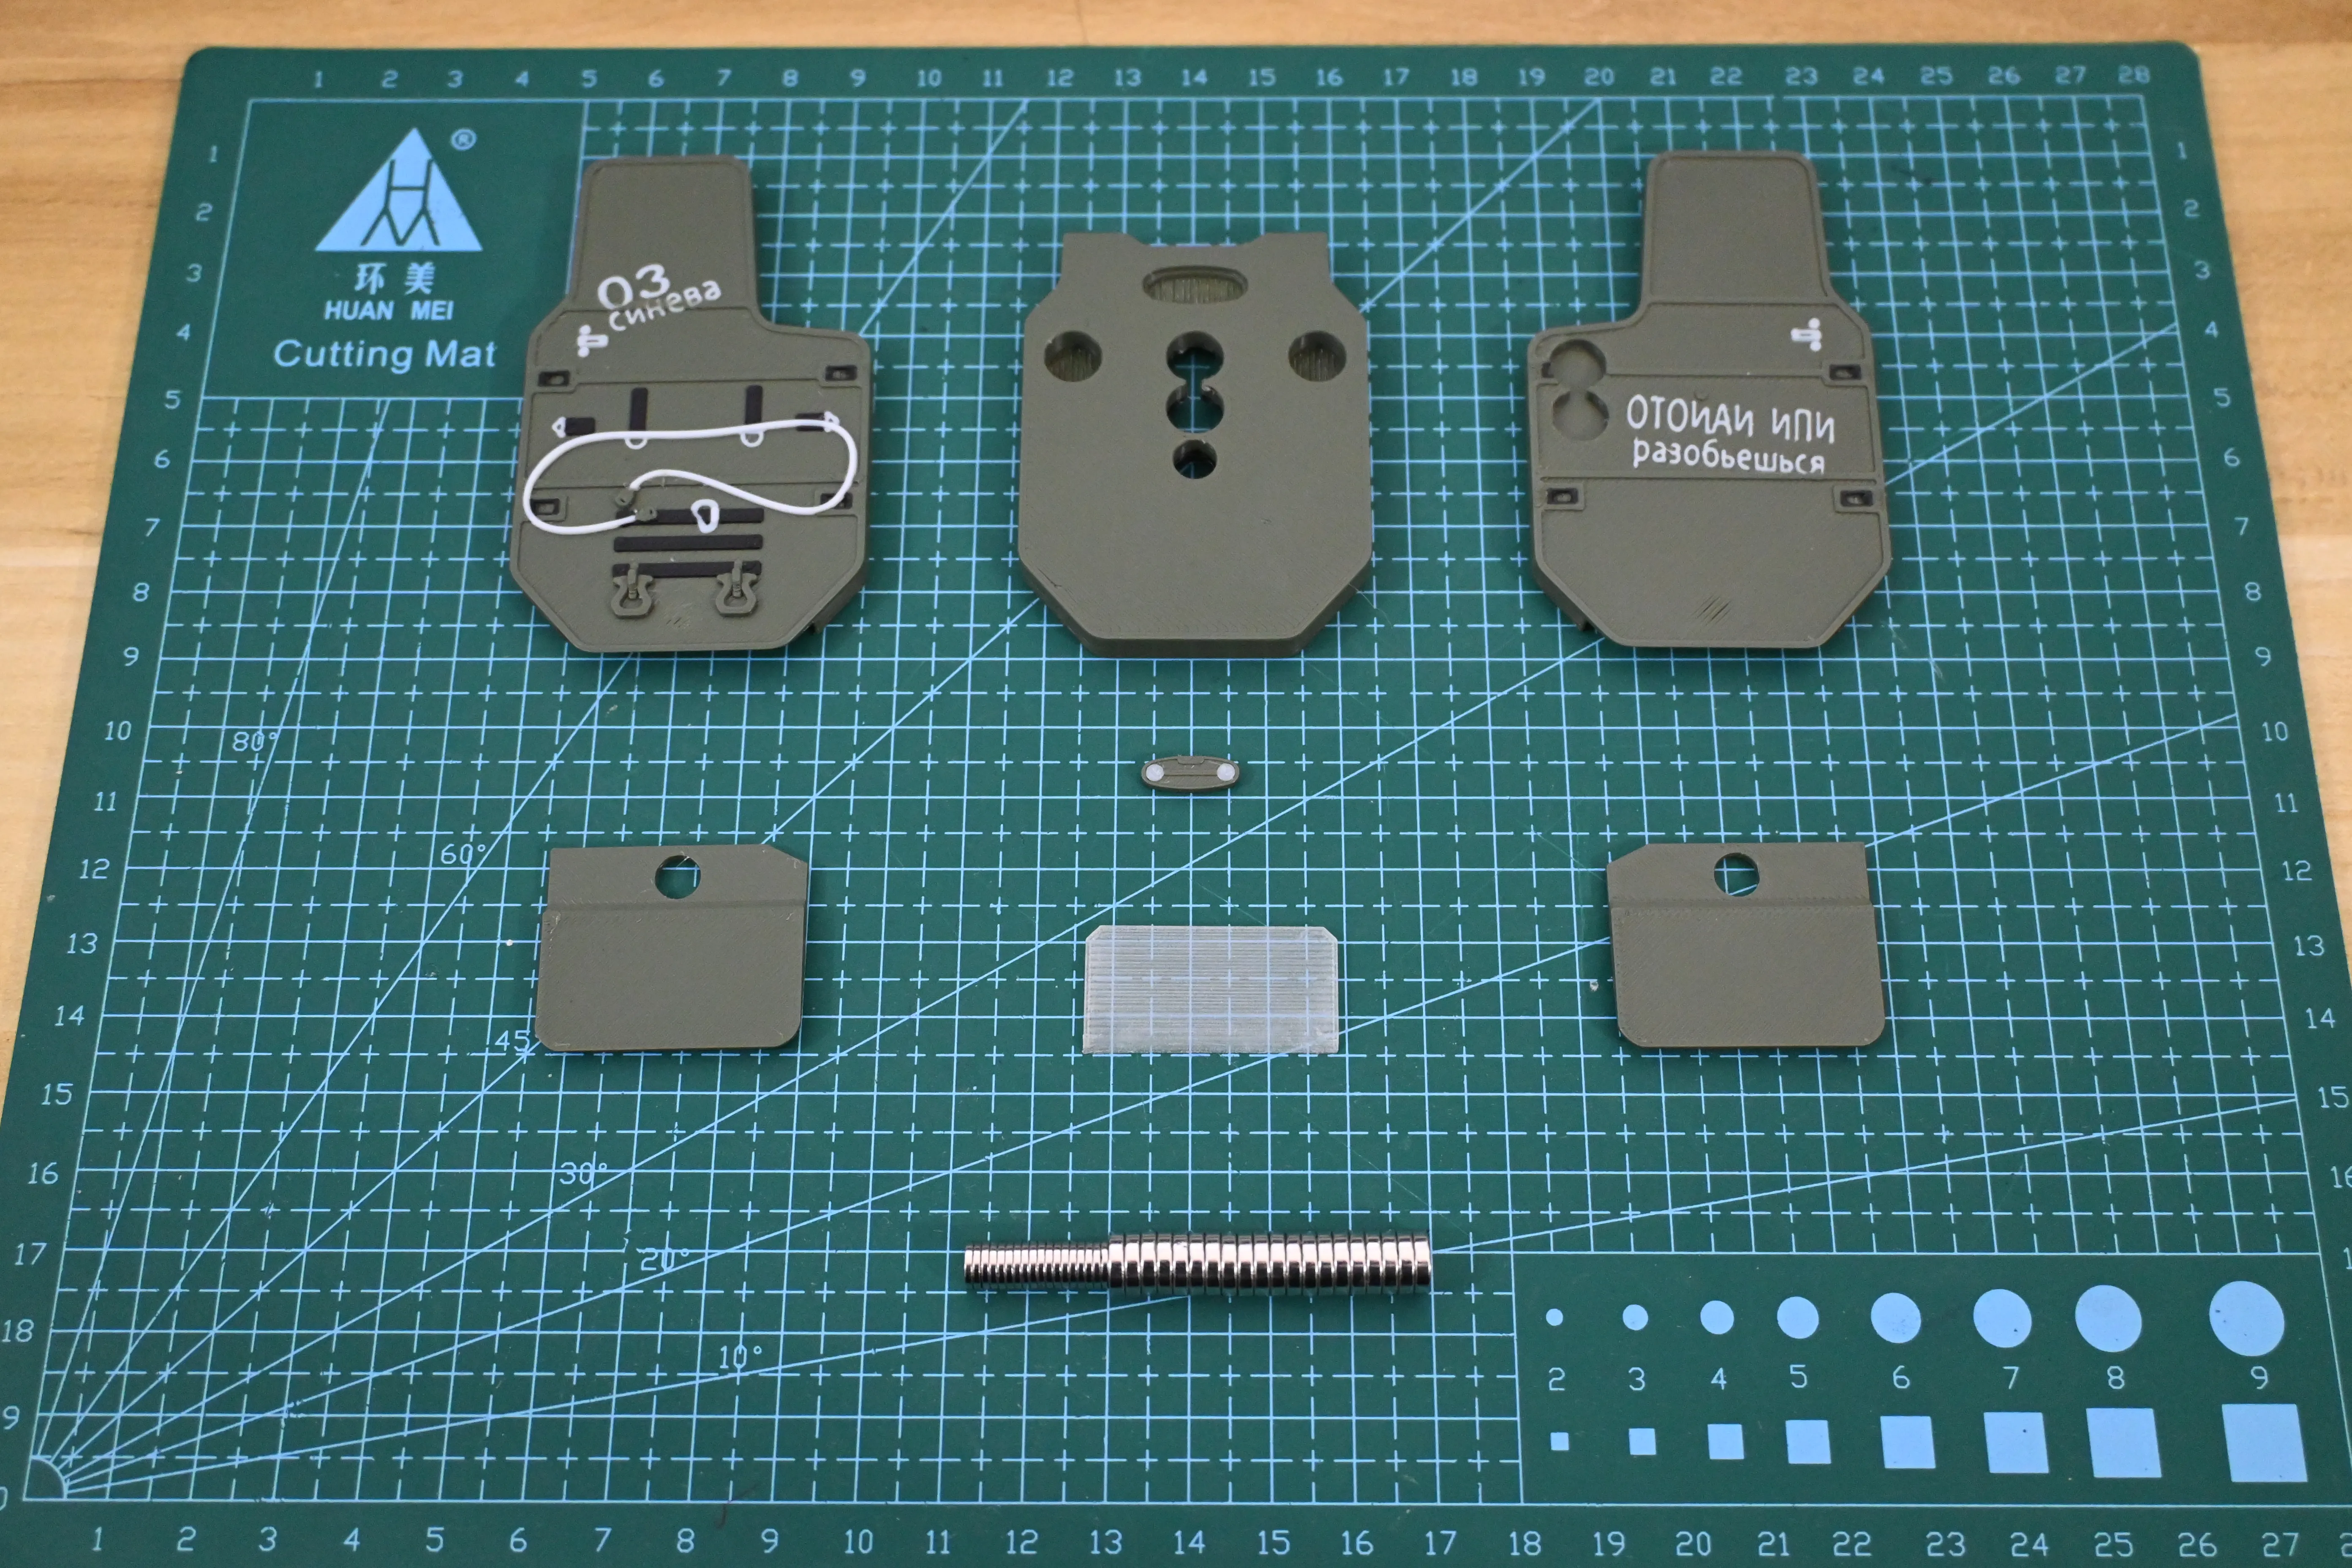
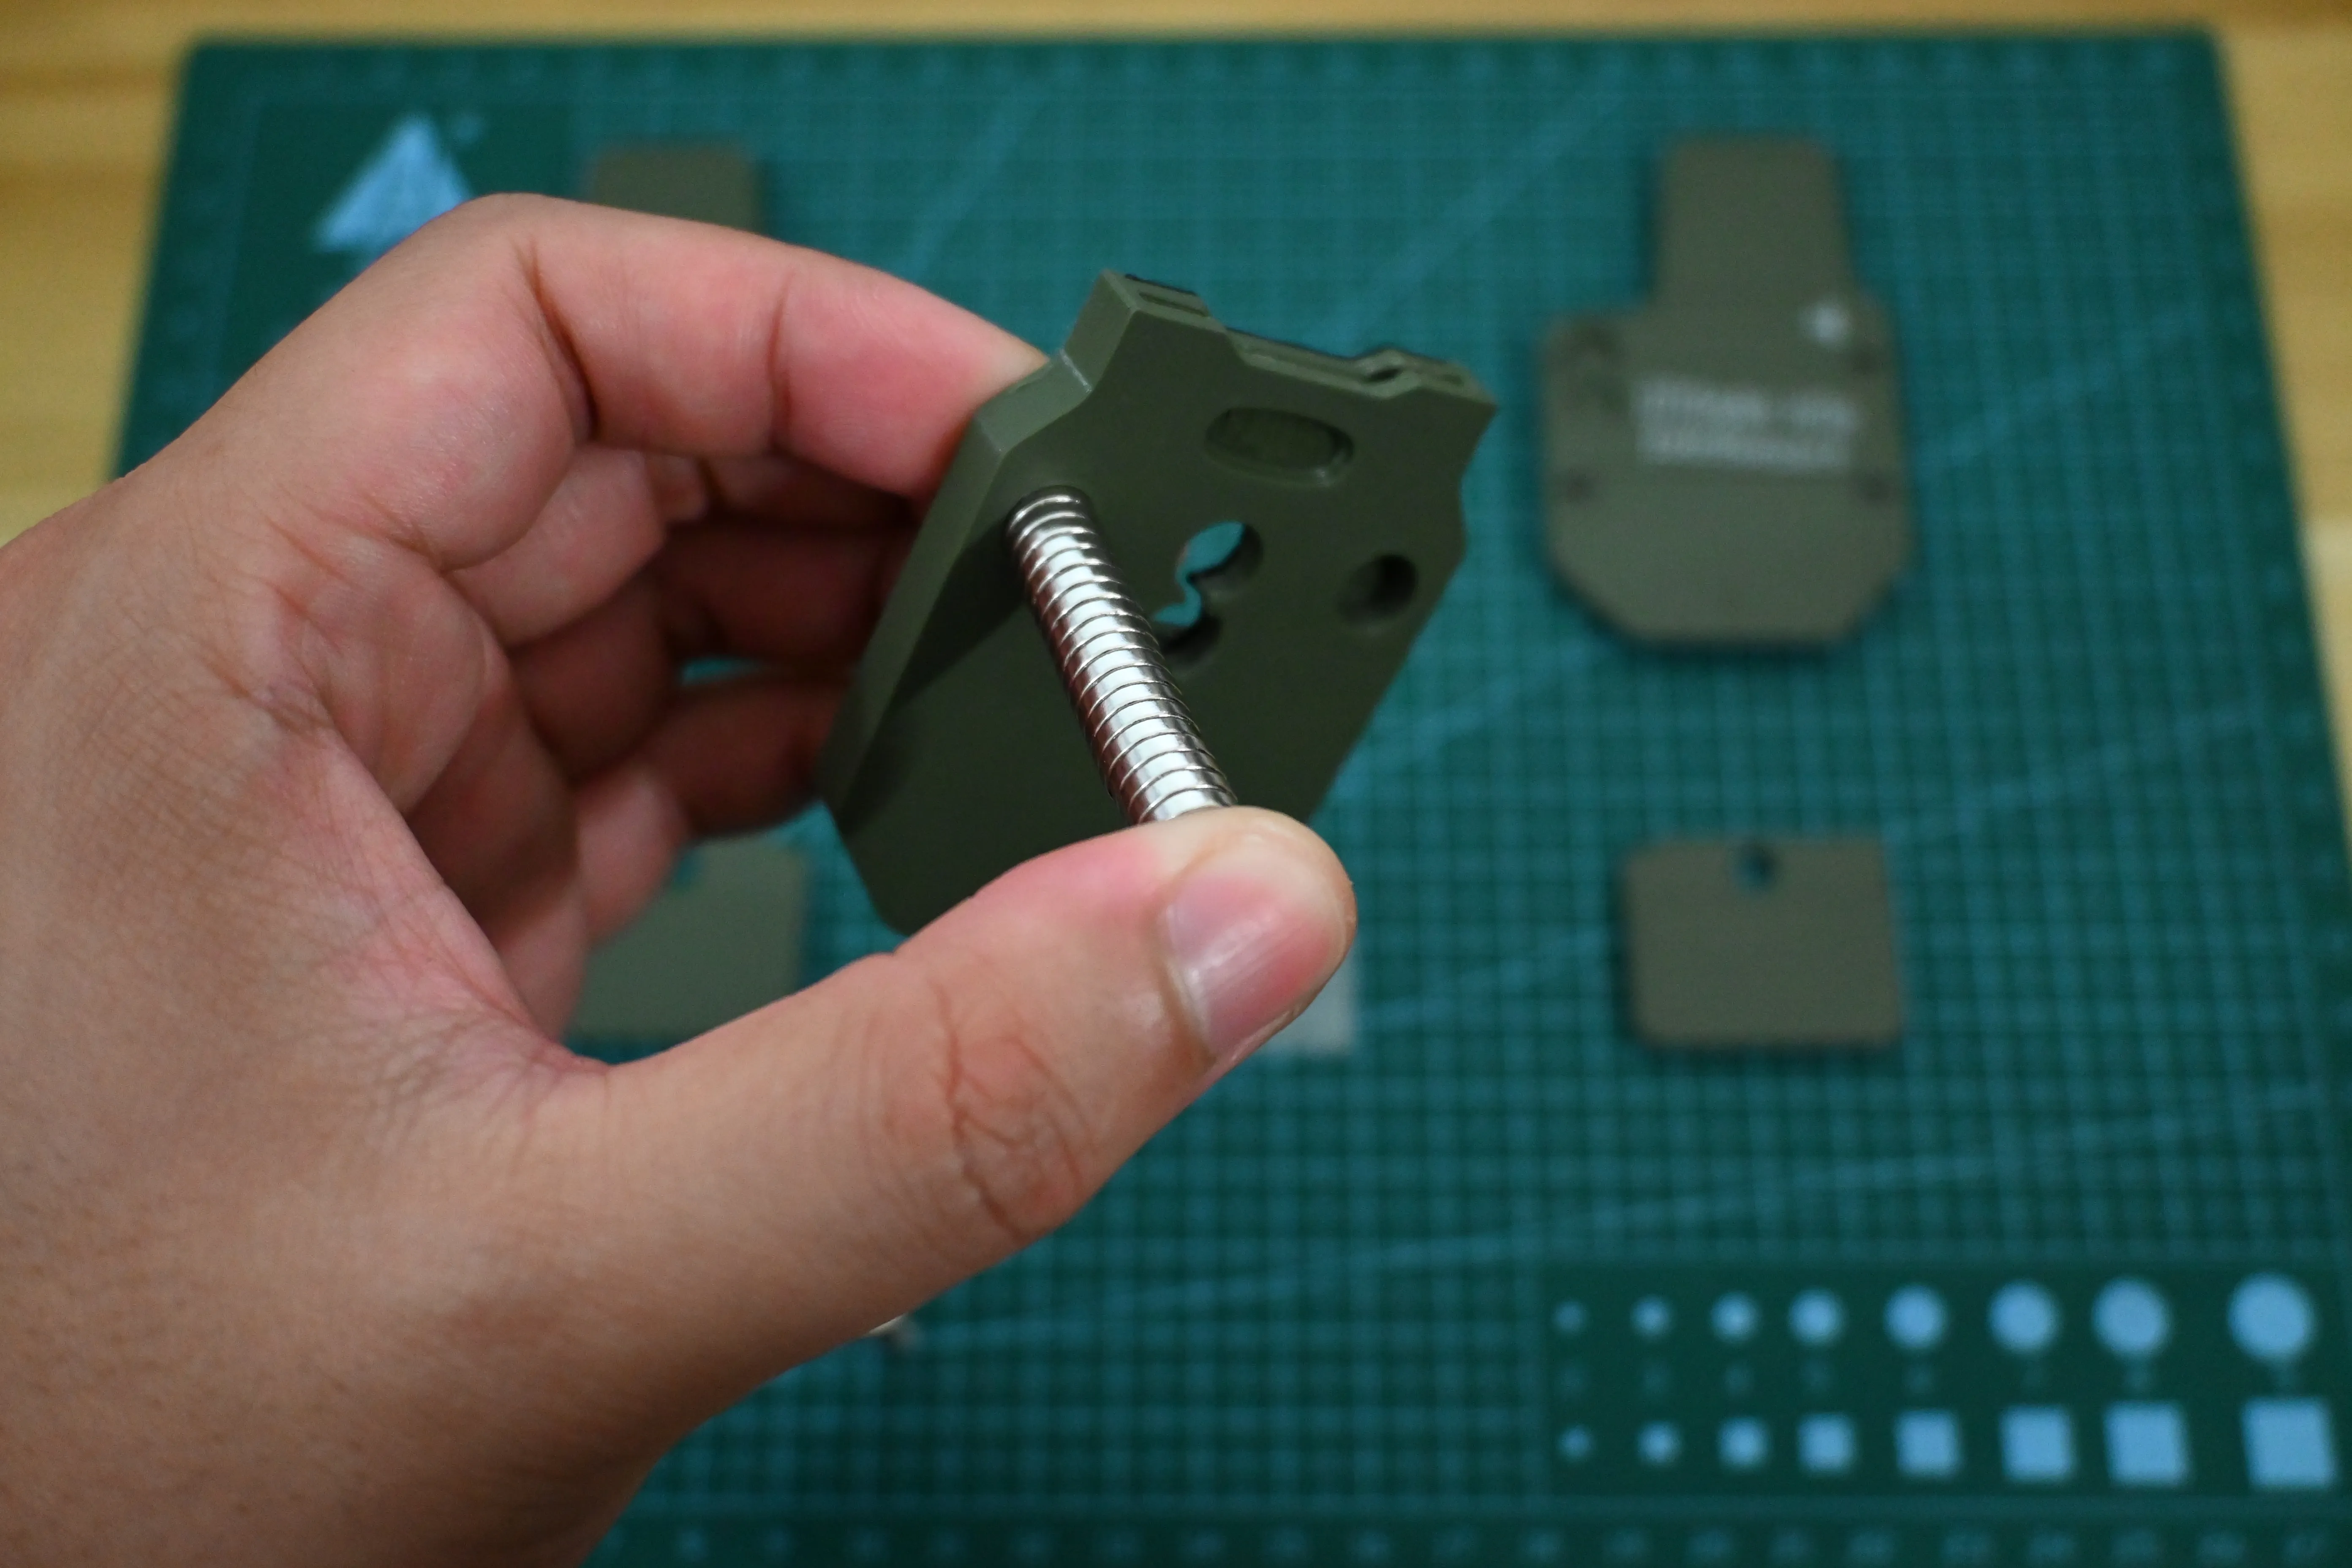
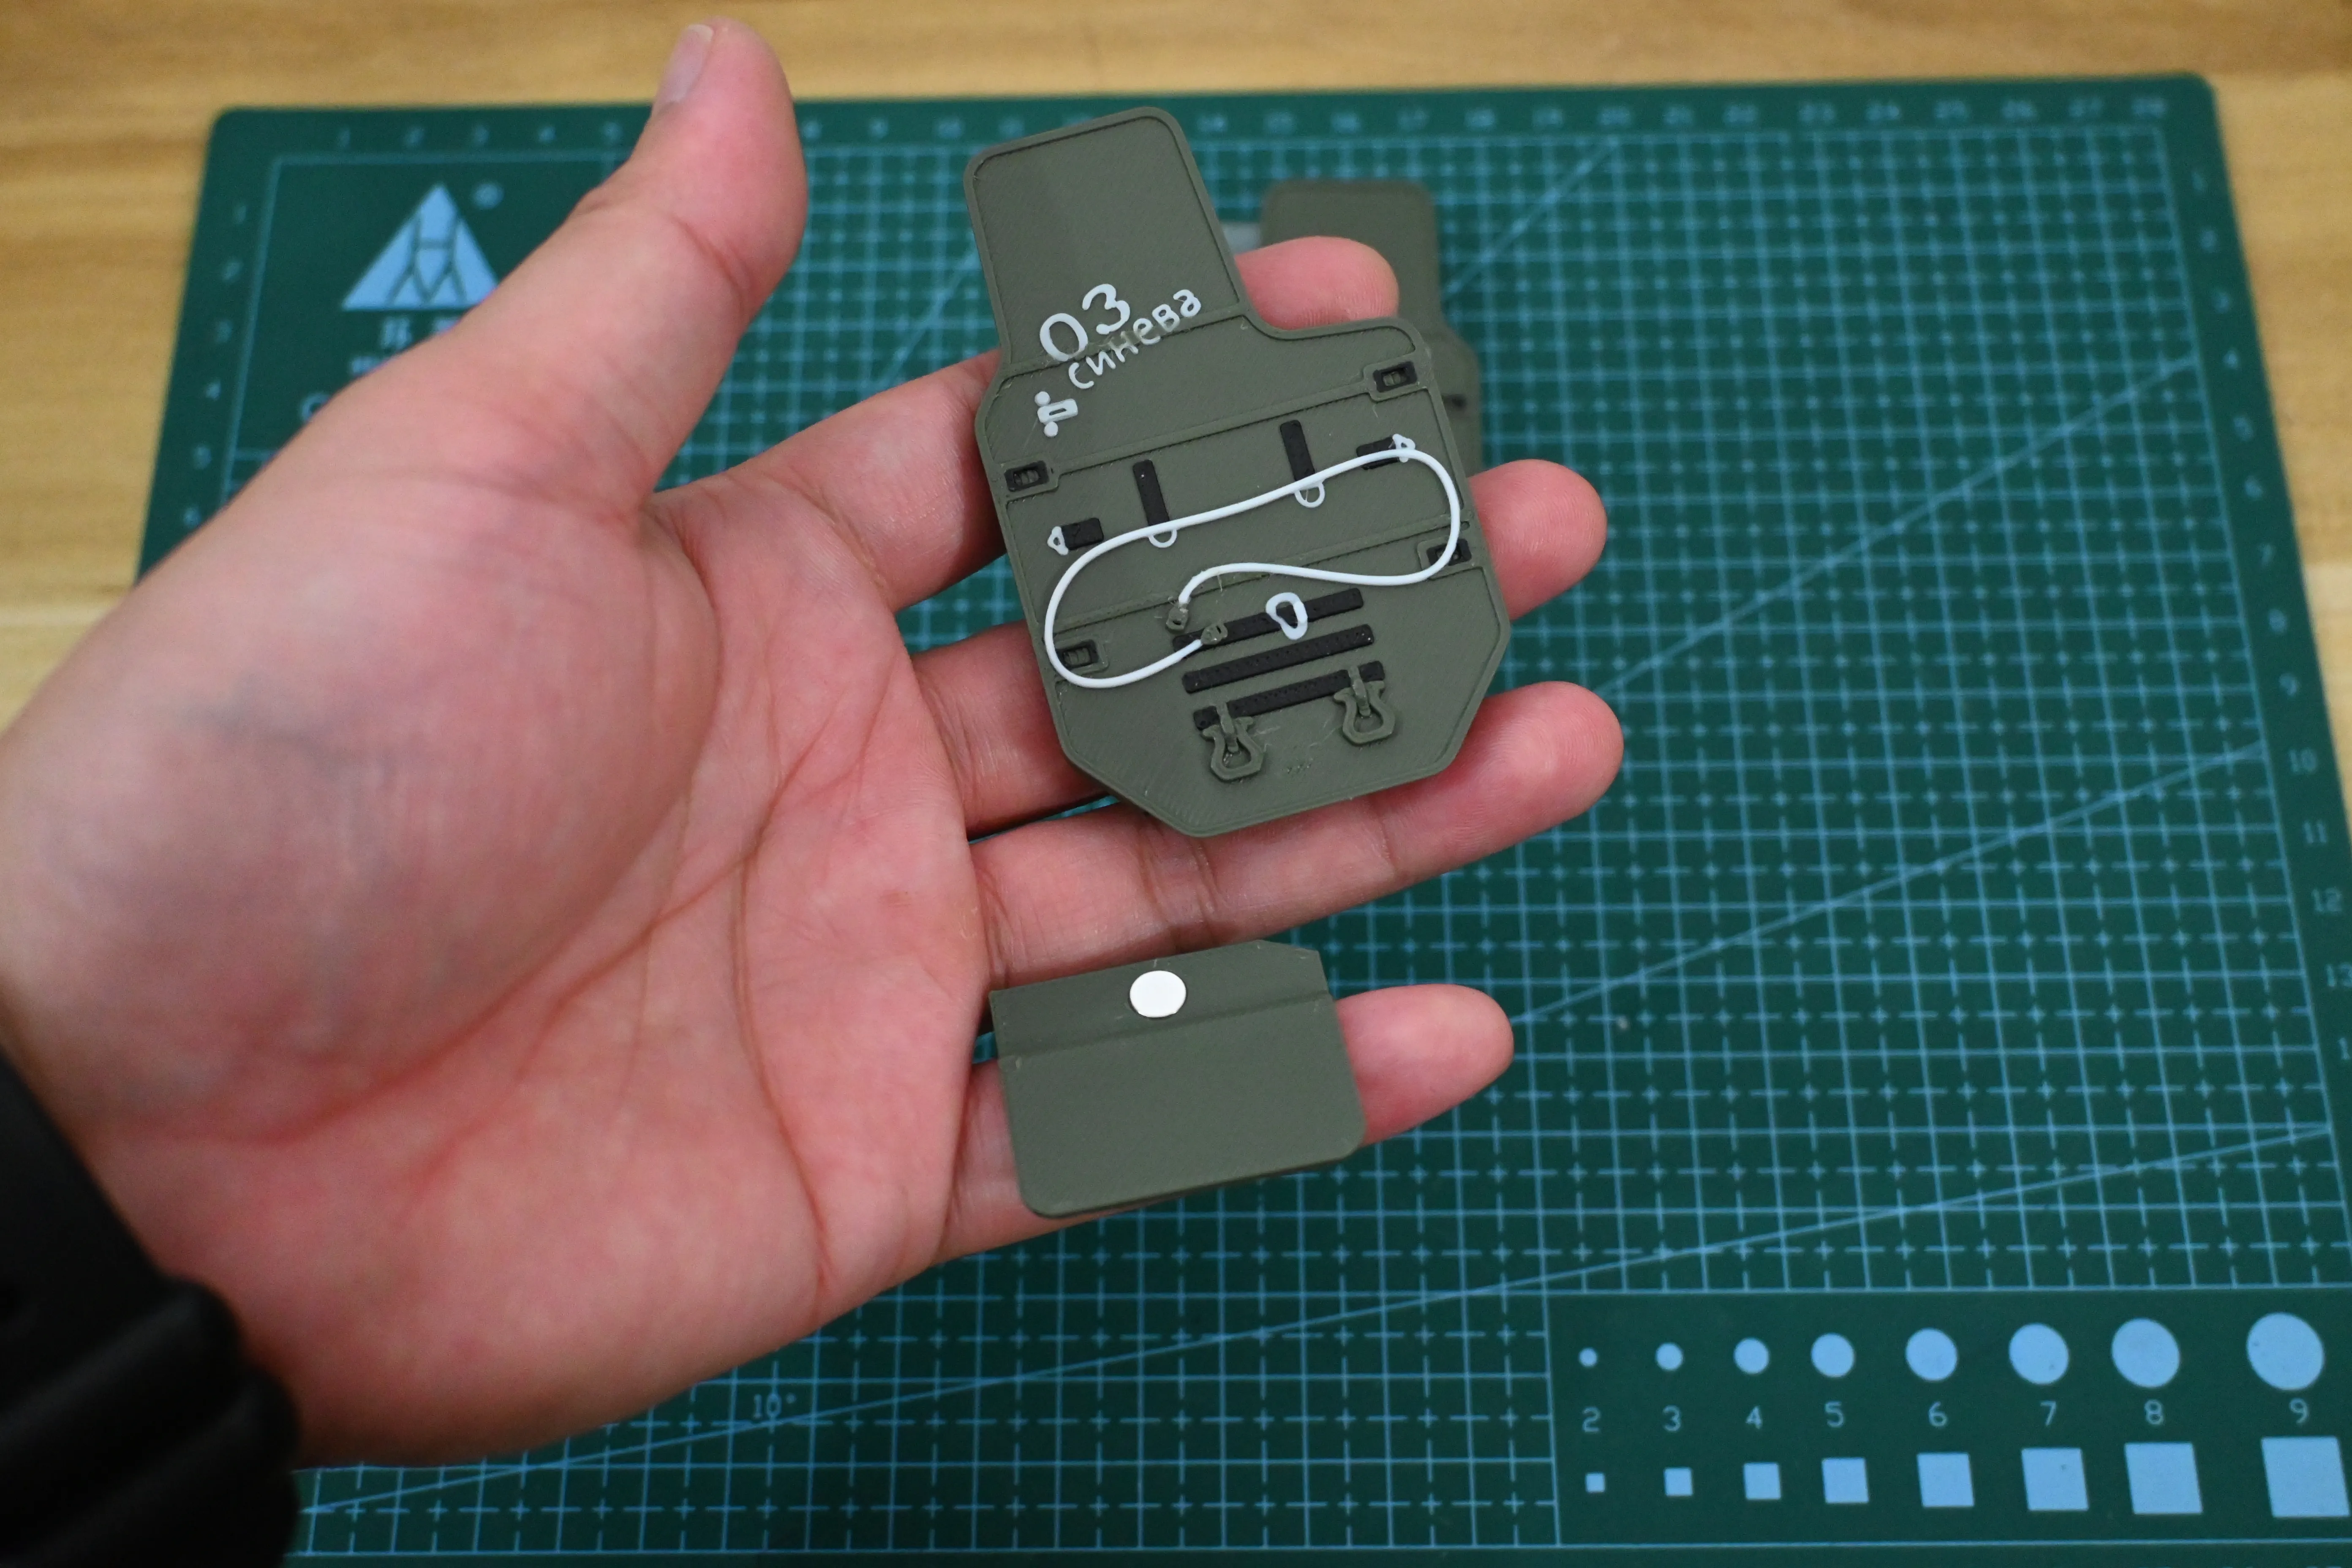
1. First print the following parts and prepare magnet and 502 glue.
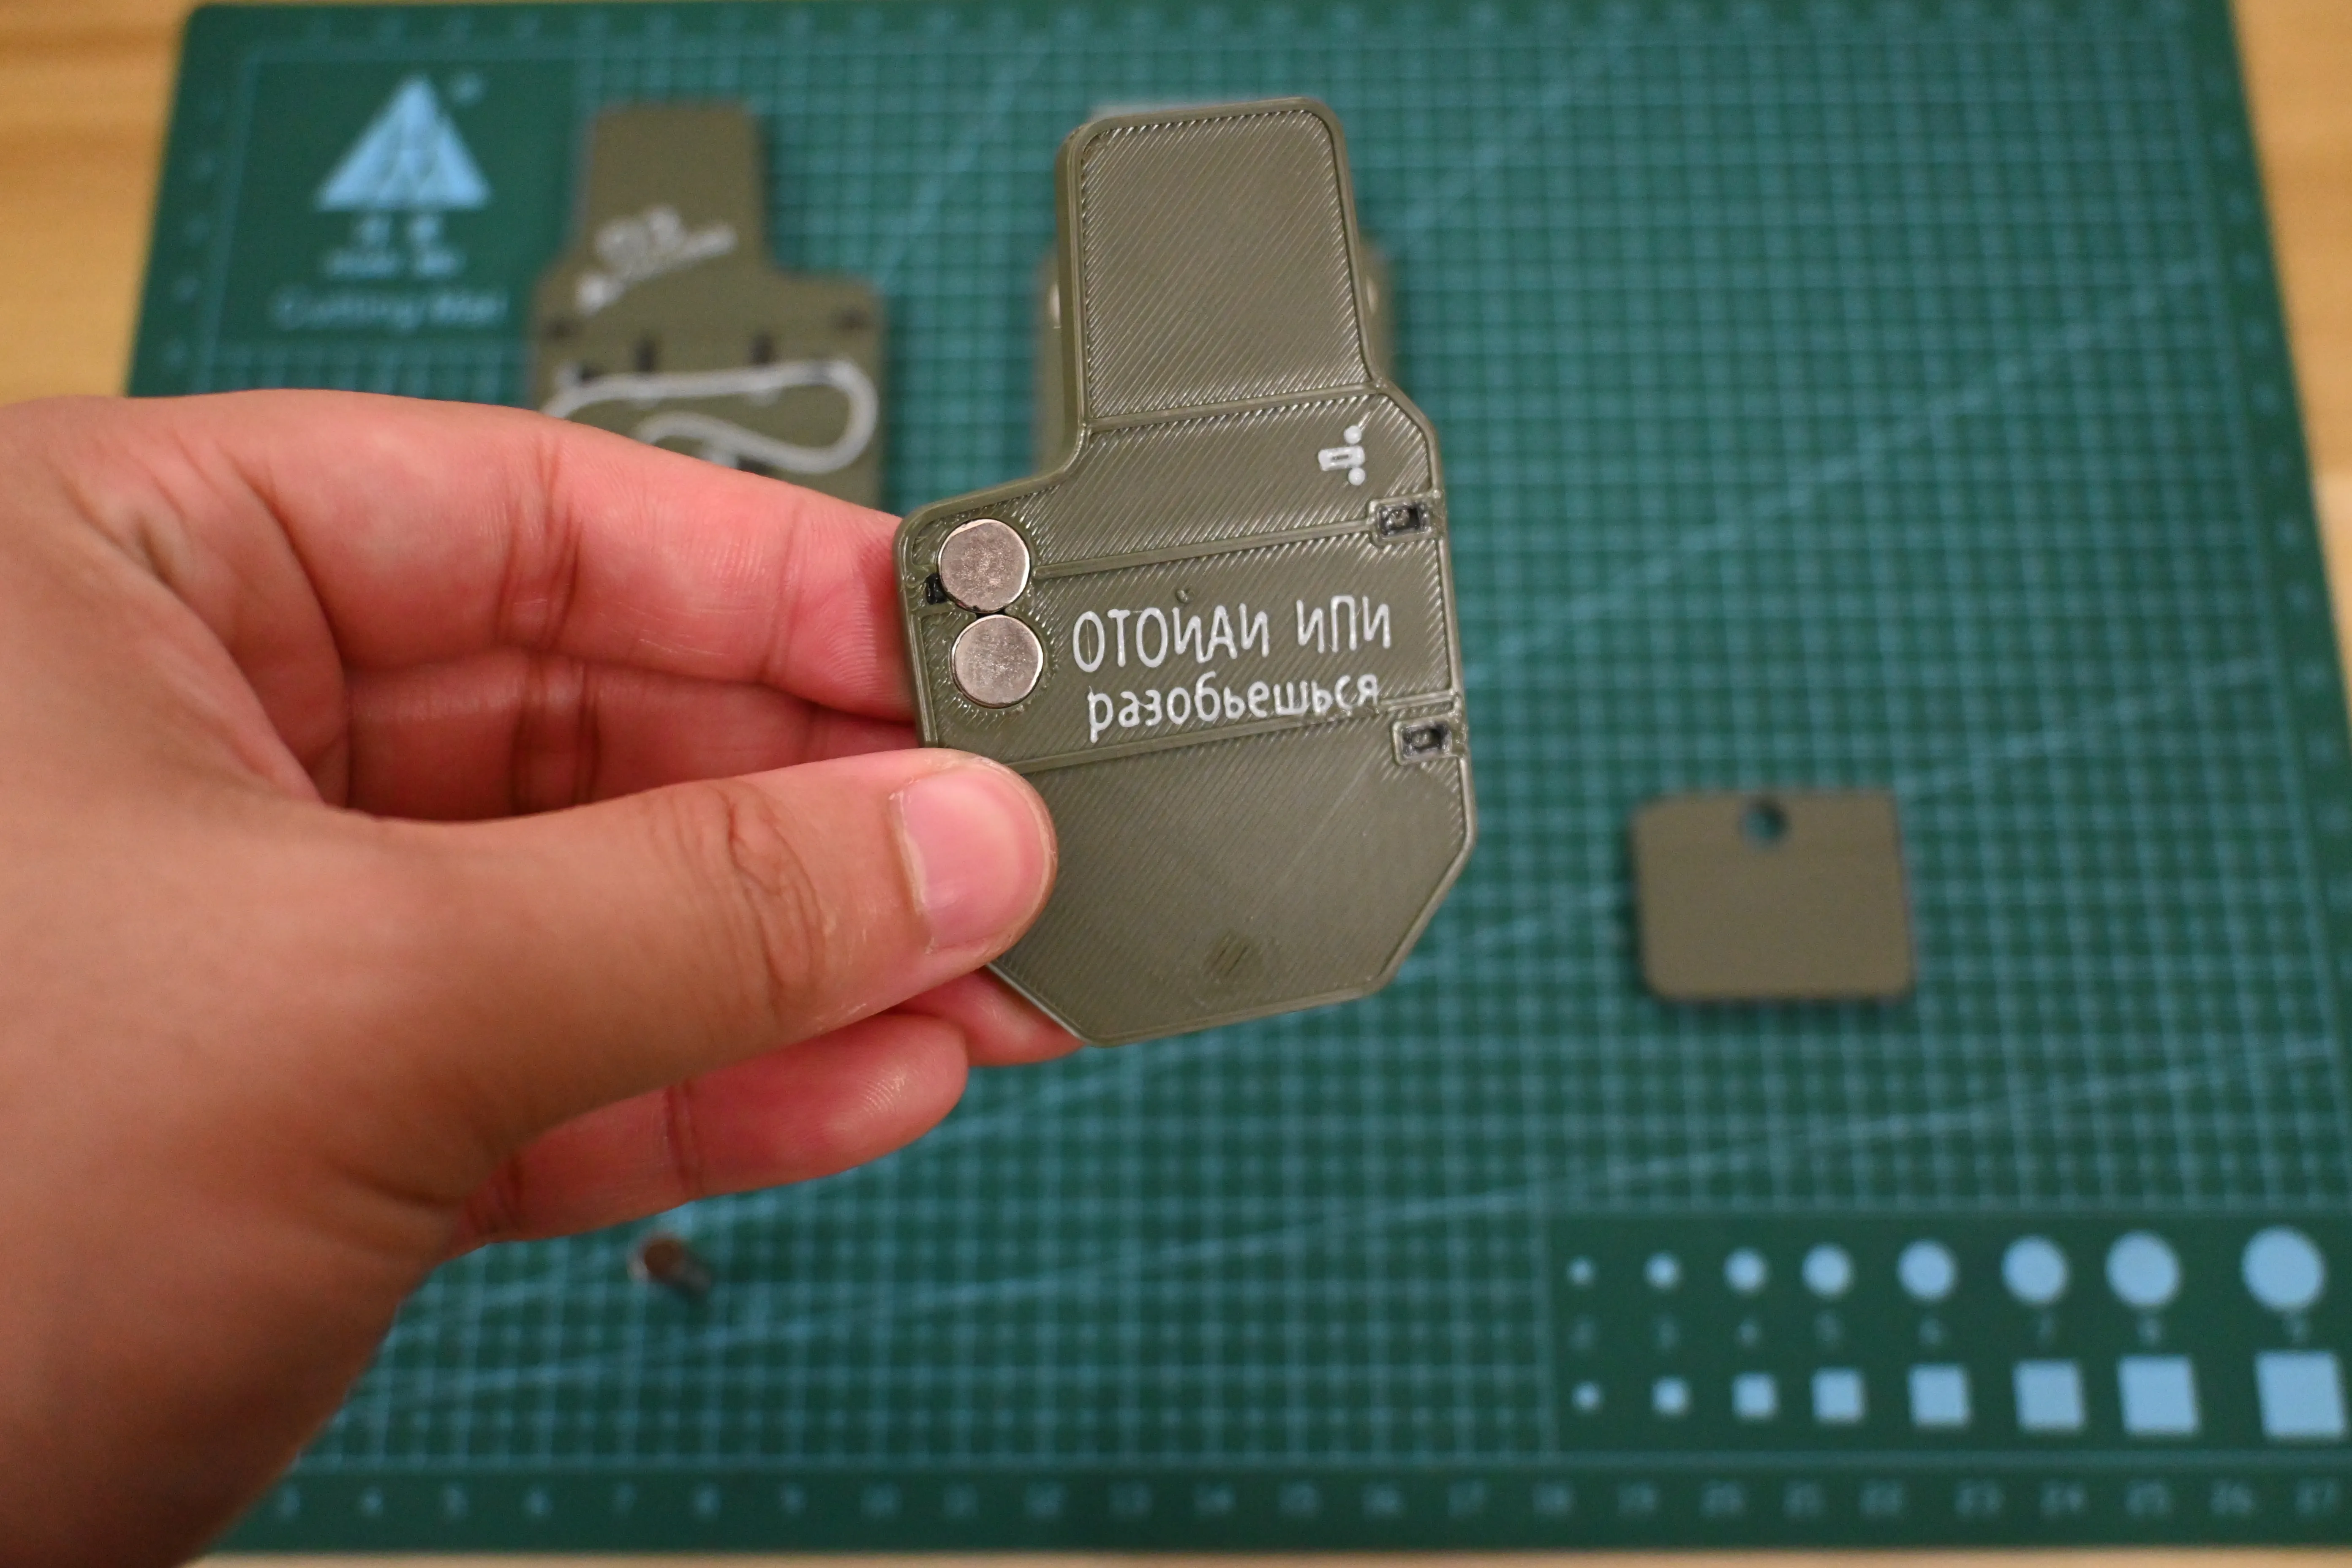
ps: What is shown now is the front of the parts, which is a very important point! Next, when installing the magnets, the poles of all the magnets are installed in the same direction. For example, after the magnet is embedded in the part, when the part is placed face up, the embedded magnet is "N" pole upward. After the installation error, will affect the opening and closing effect.
2. Take out the shield in the middle, install 2 magnets in each hole, and pay attention to the same direction of the magnetic poles!
3. Install the light assembly and glass in the middle of the shield.
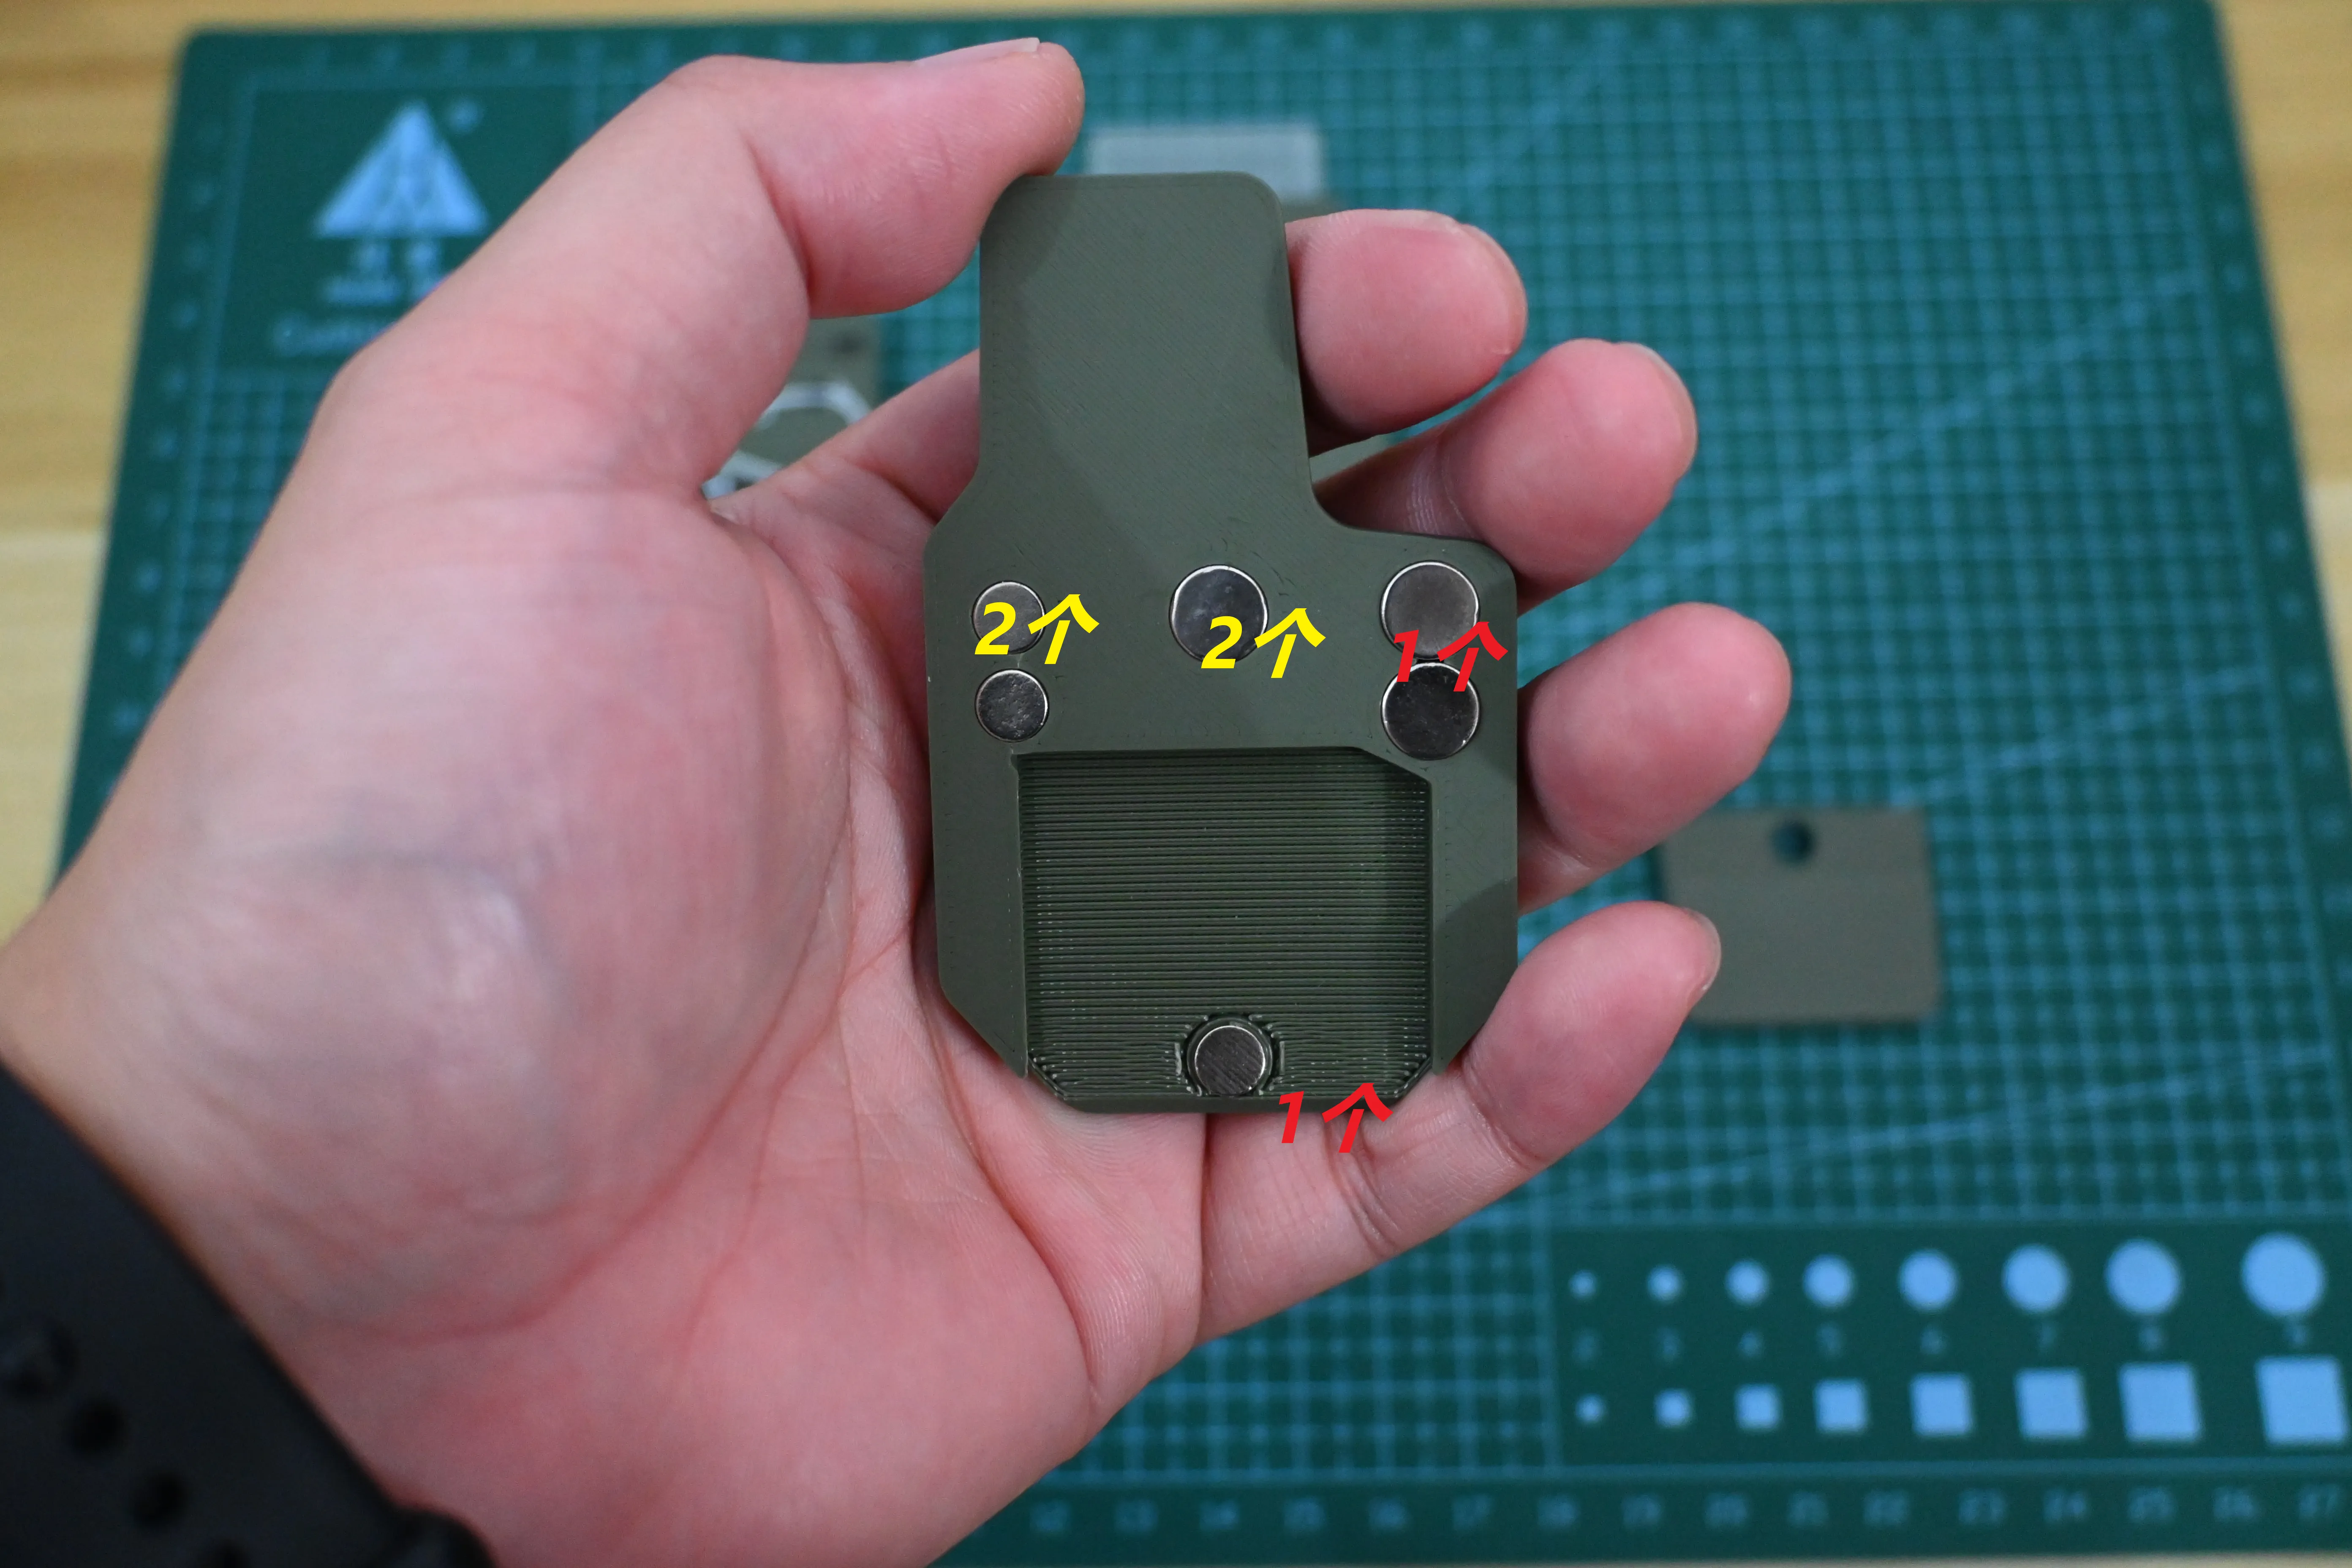
4. Take out the shield on the right. Only one magnet is installed in each hole in front of it. Note that the magnetic poles are still the same.
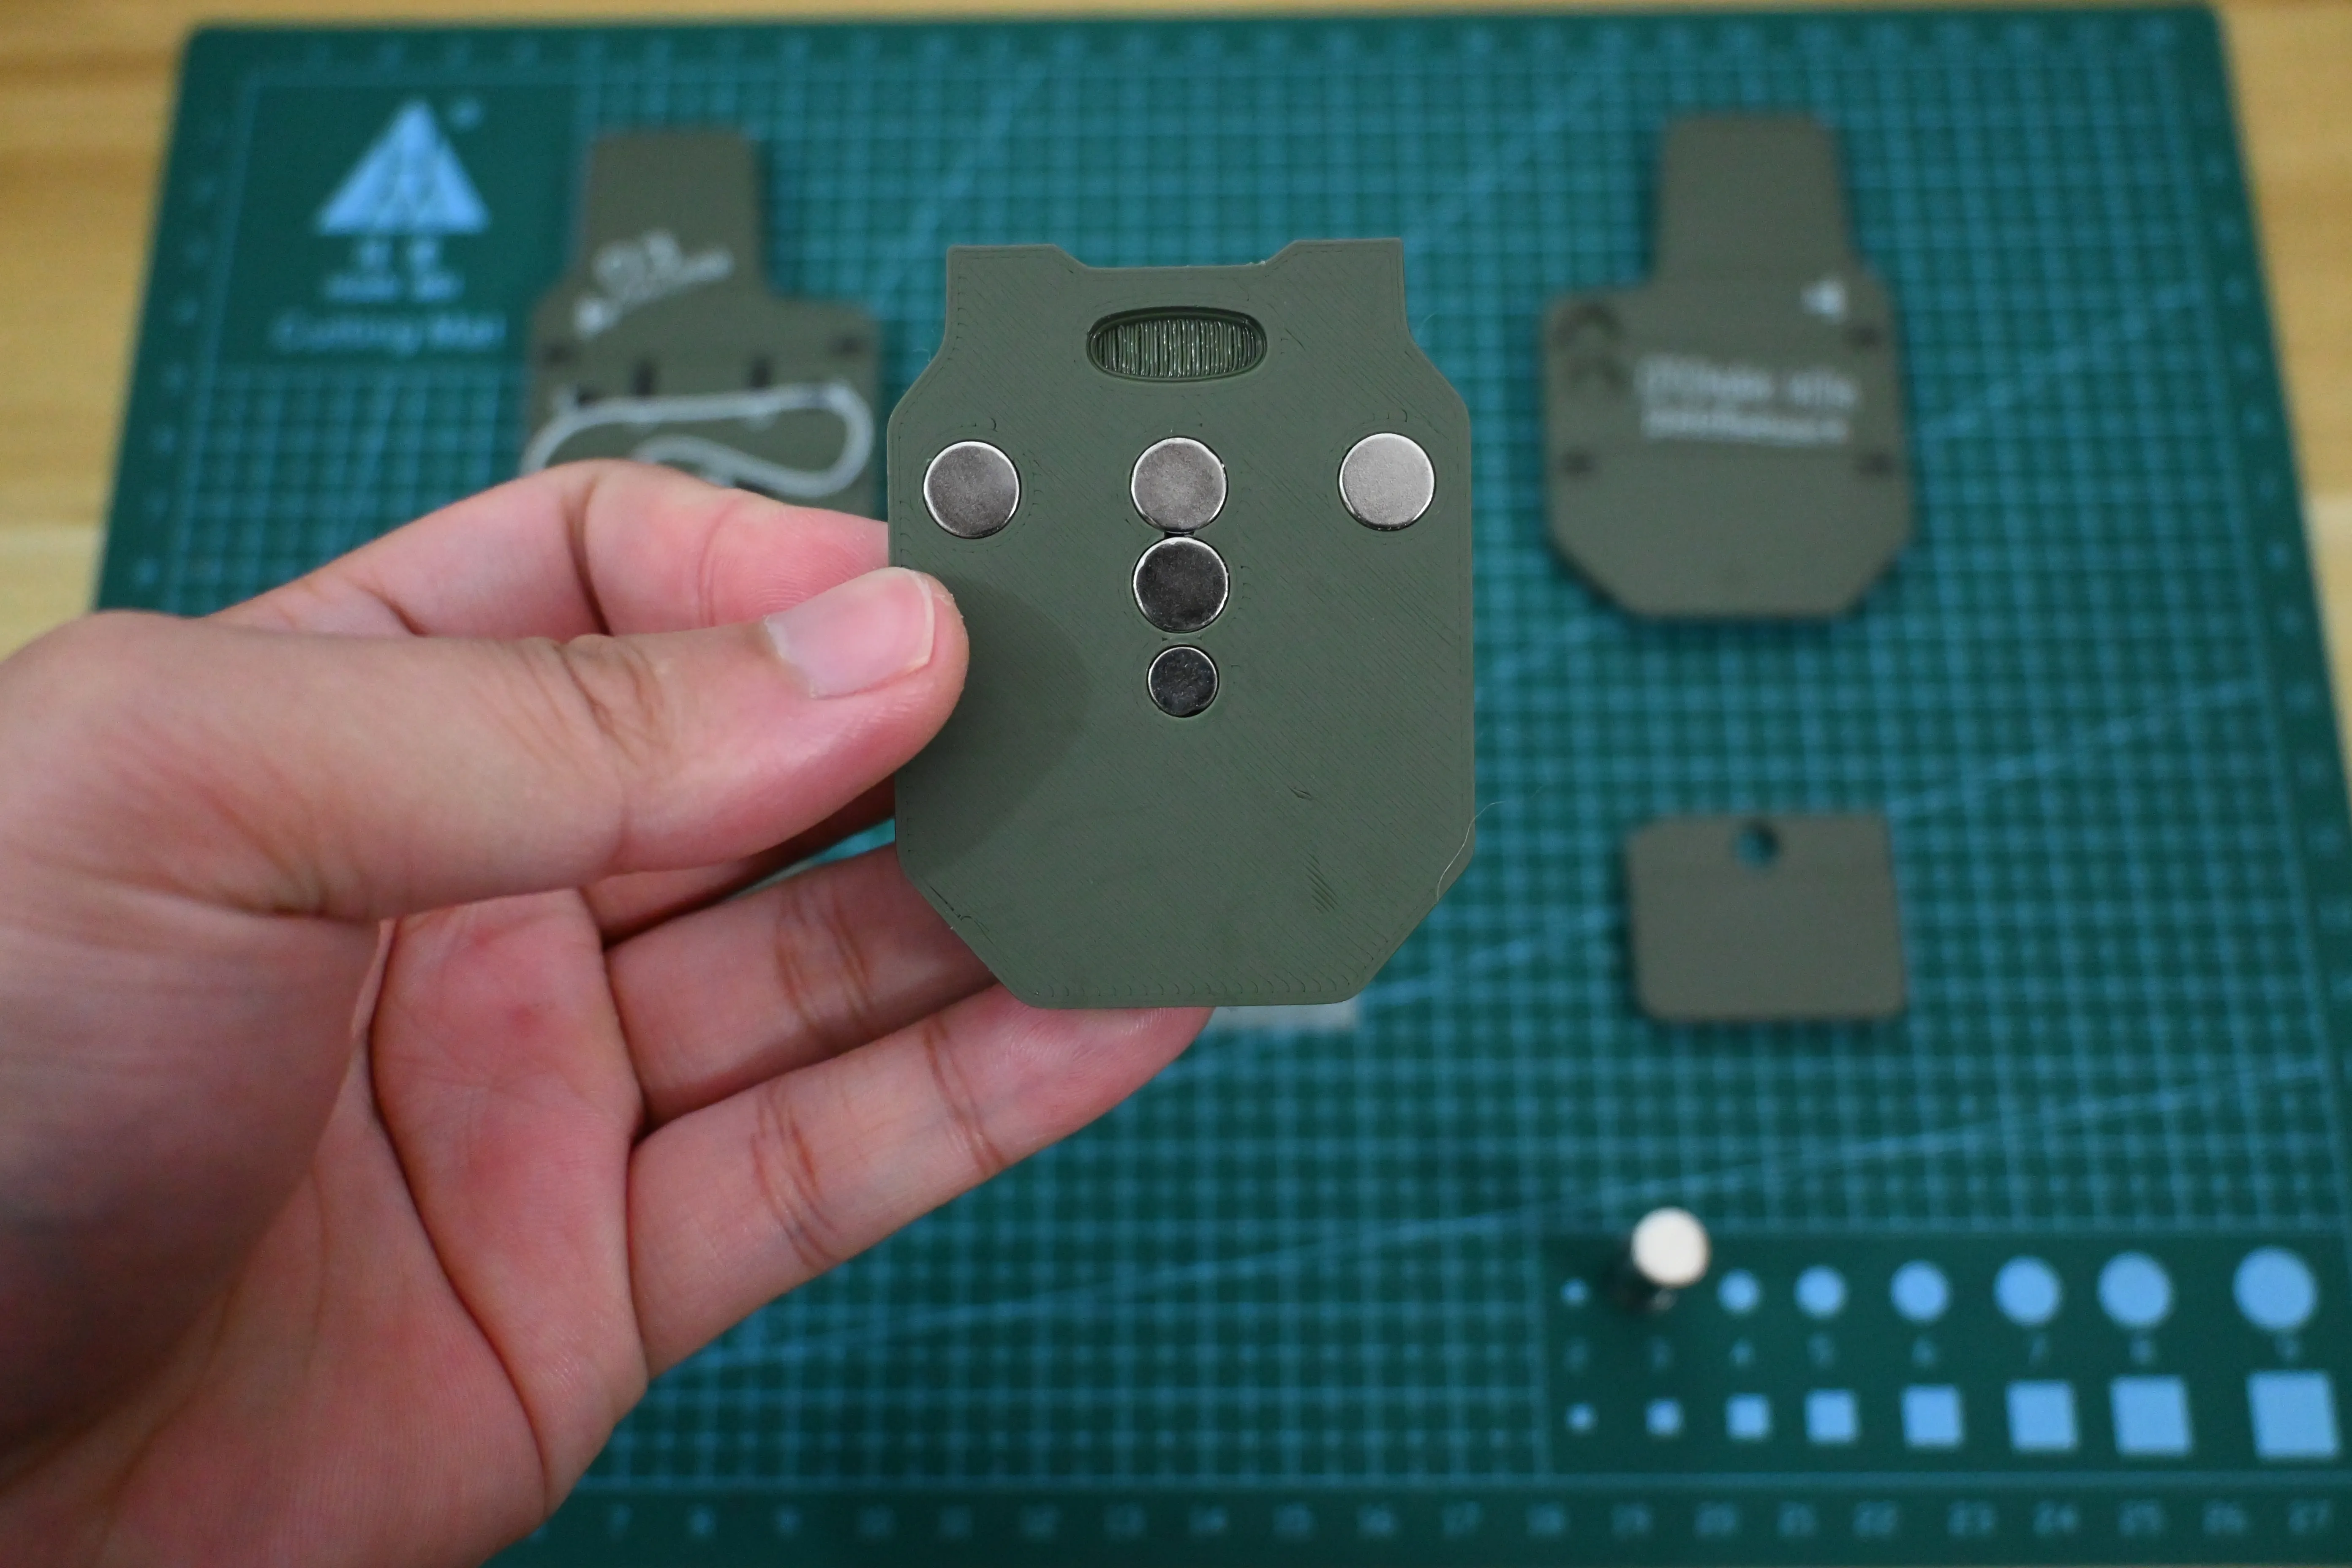
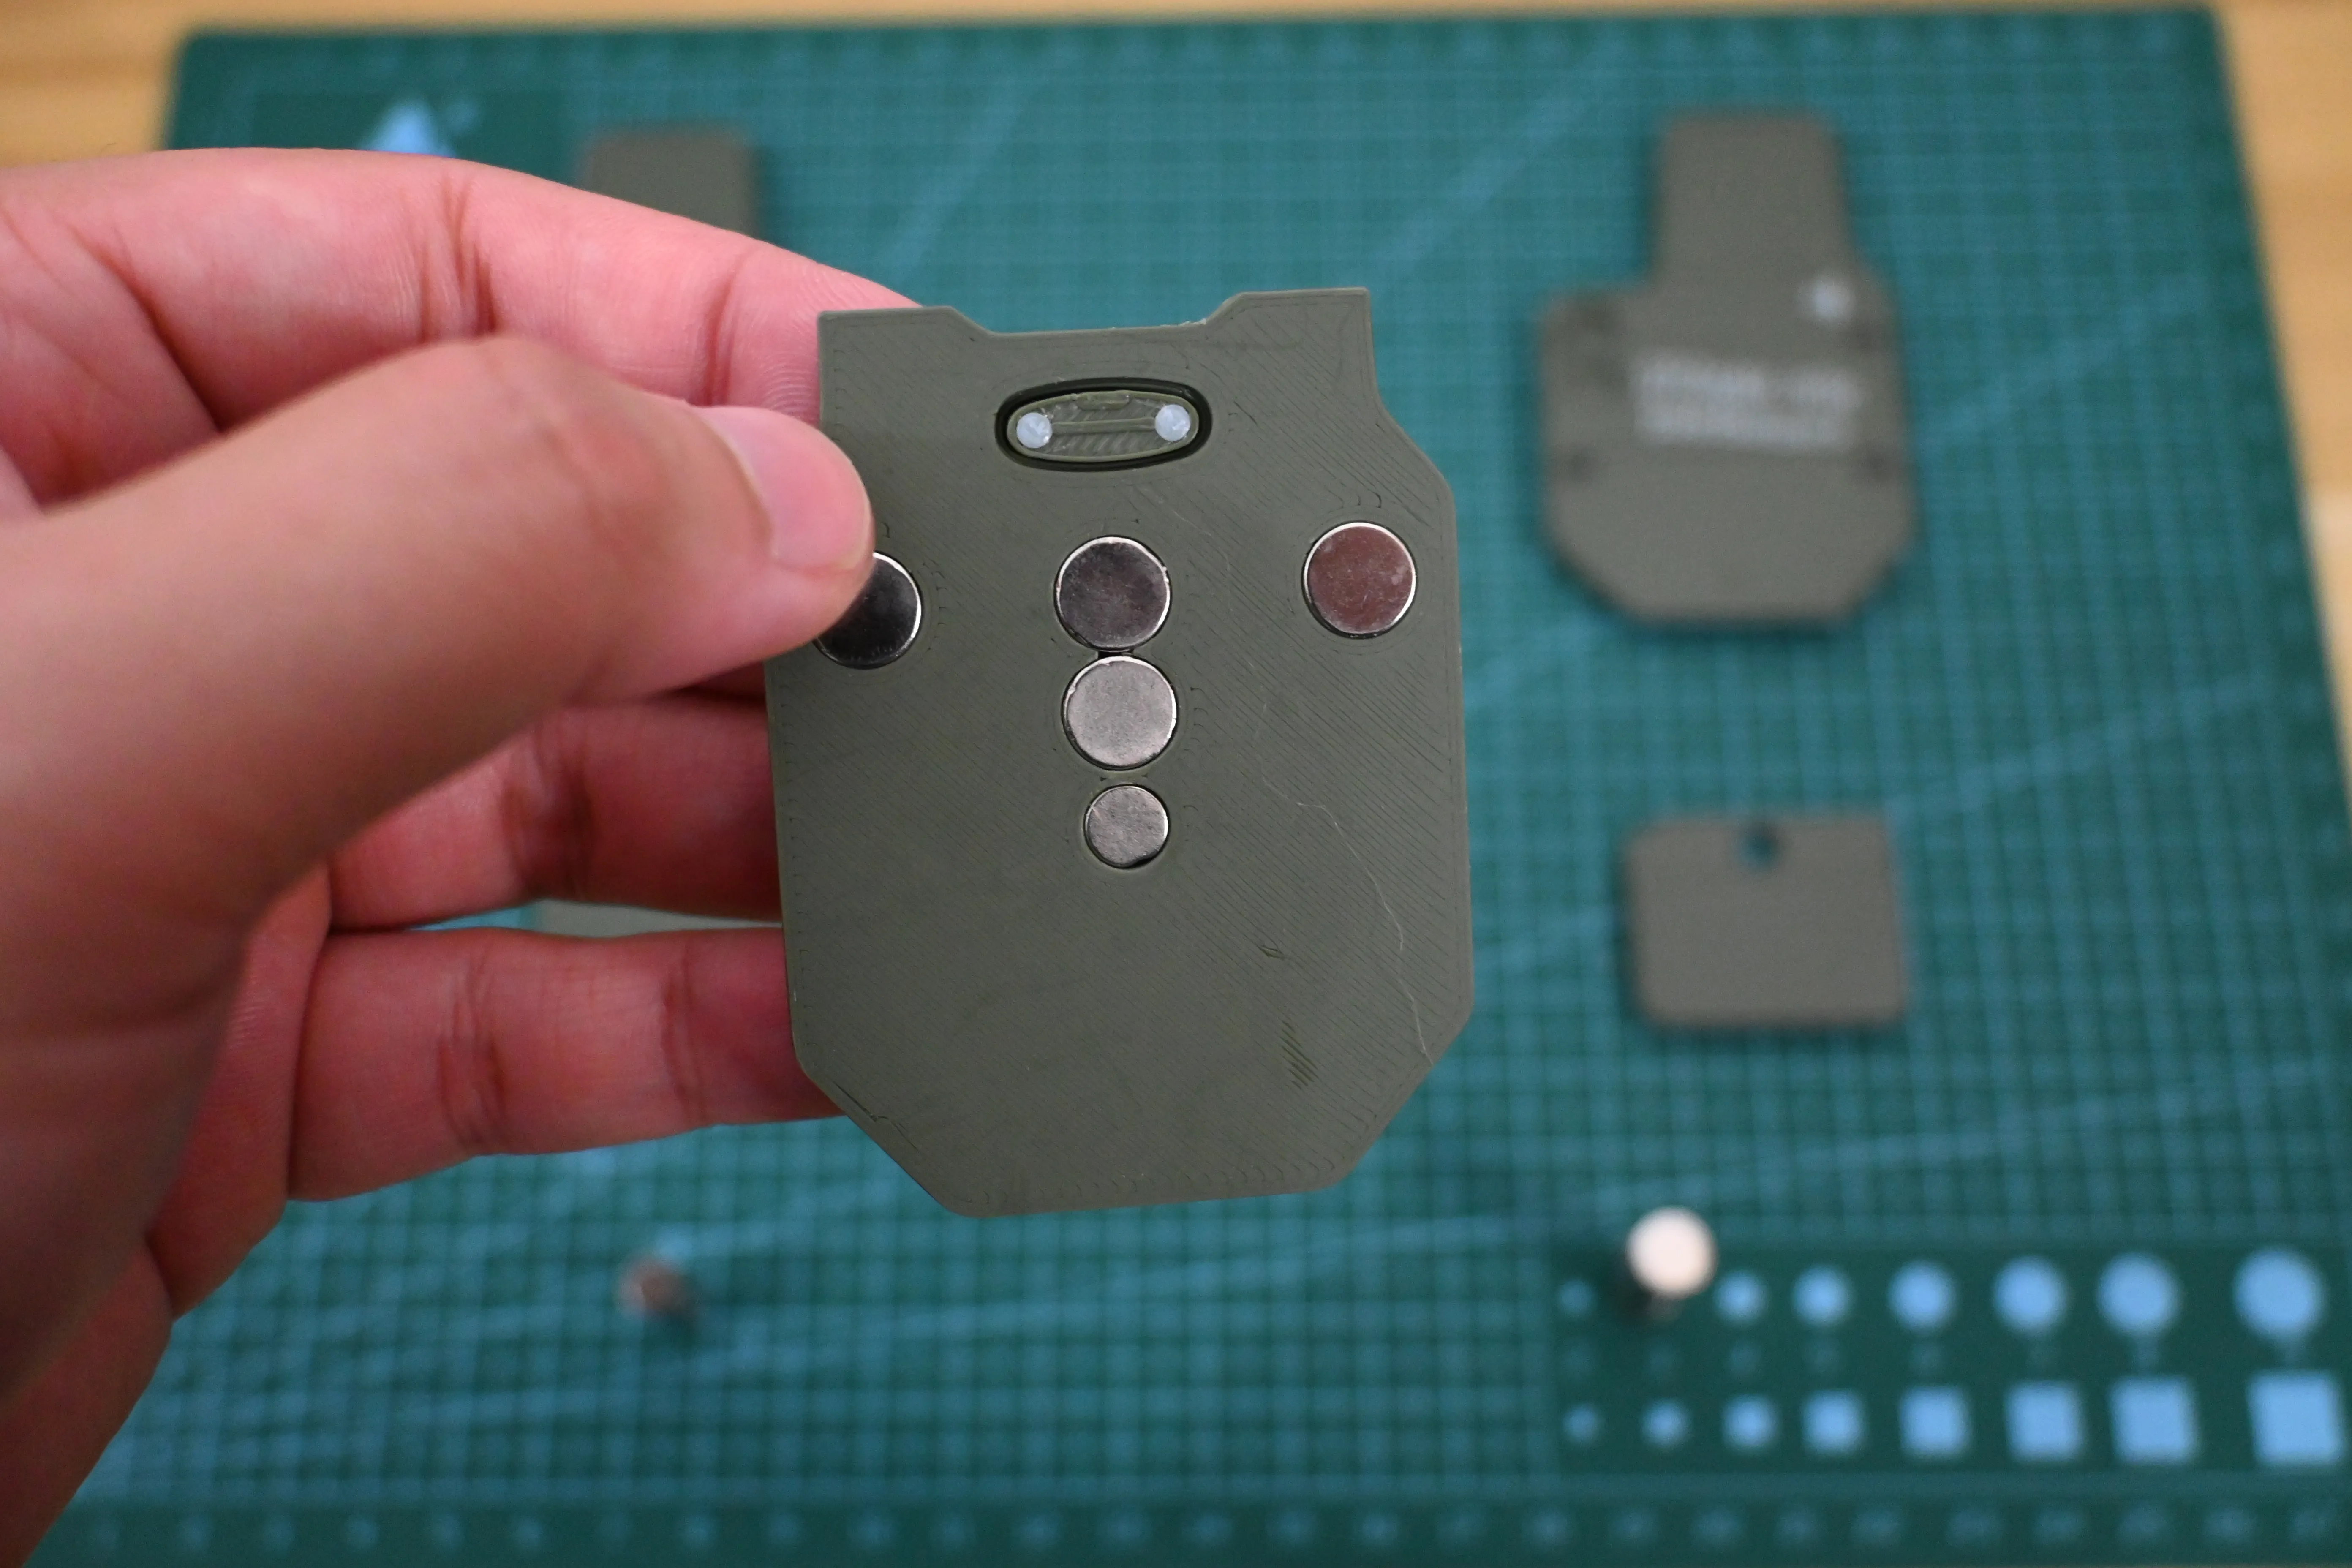
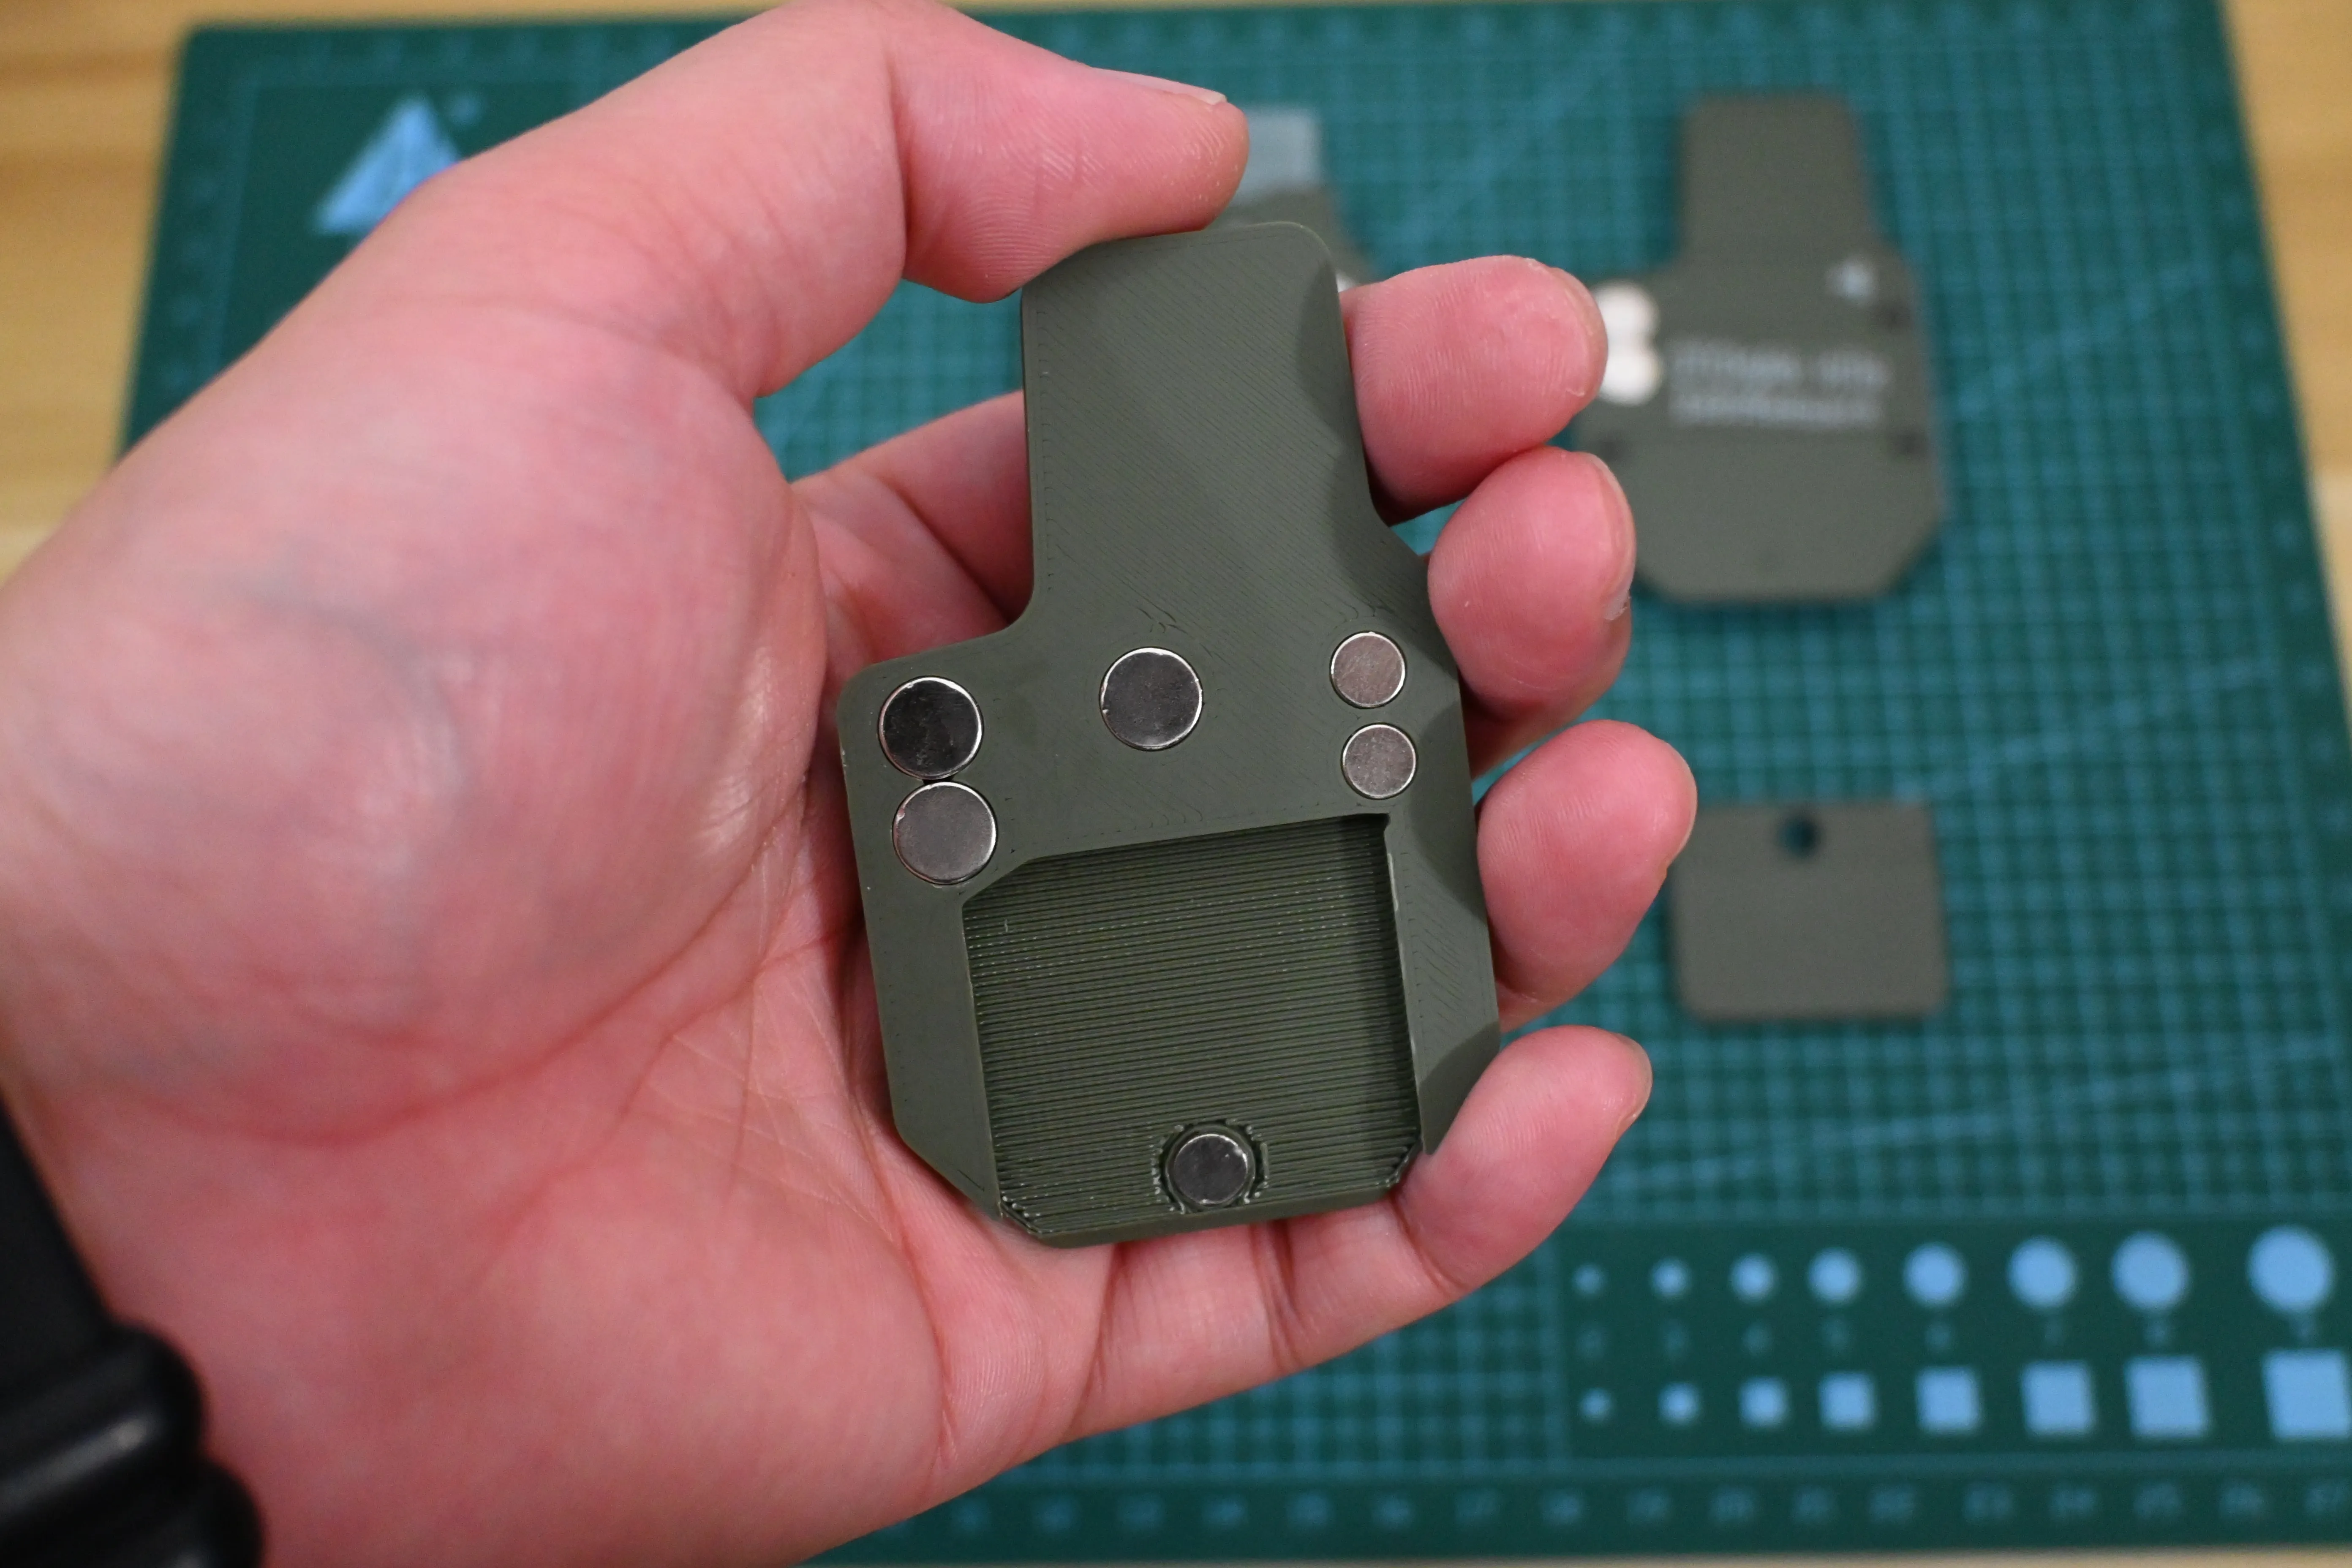
5. The shield on the right is installed with magnets in turn. The number is as follows. Pay attention to the direction of the magnetic poles!
6. The same is true of the shield on the left, as many as the back on the right.
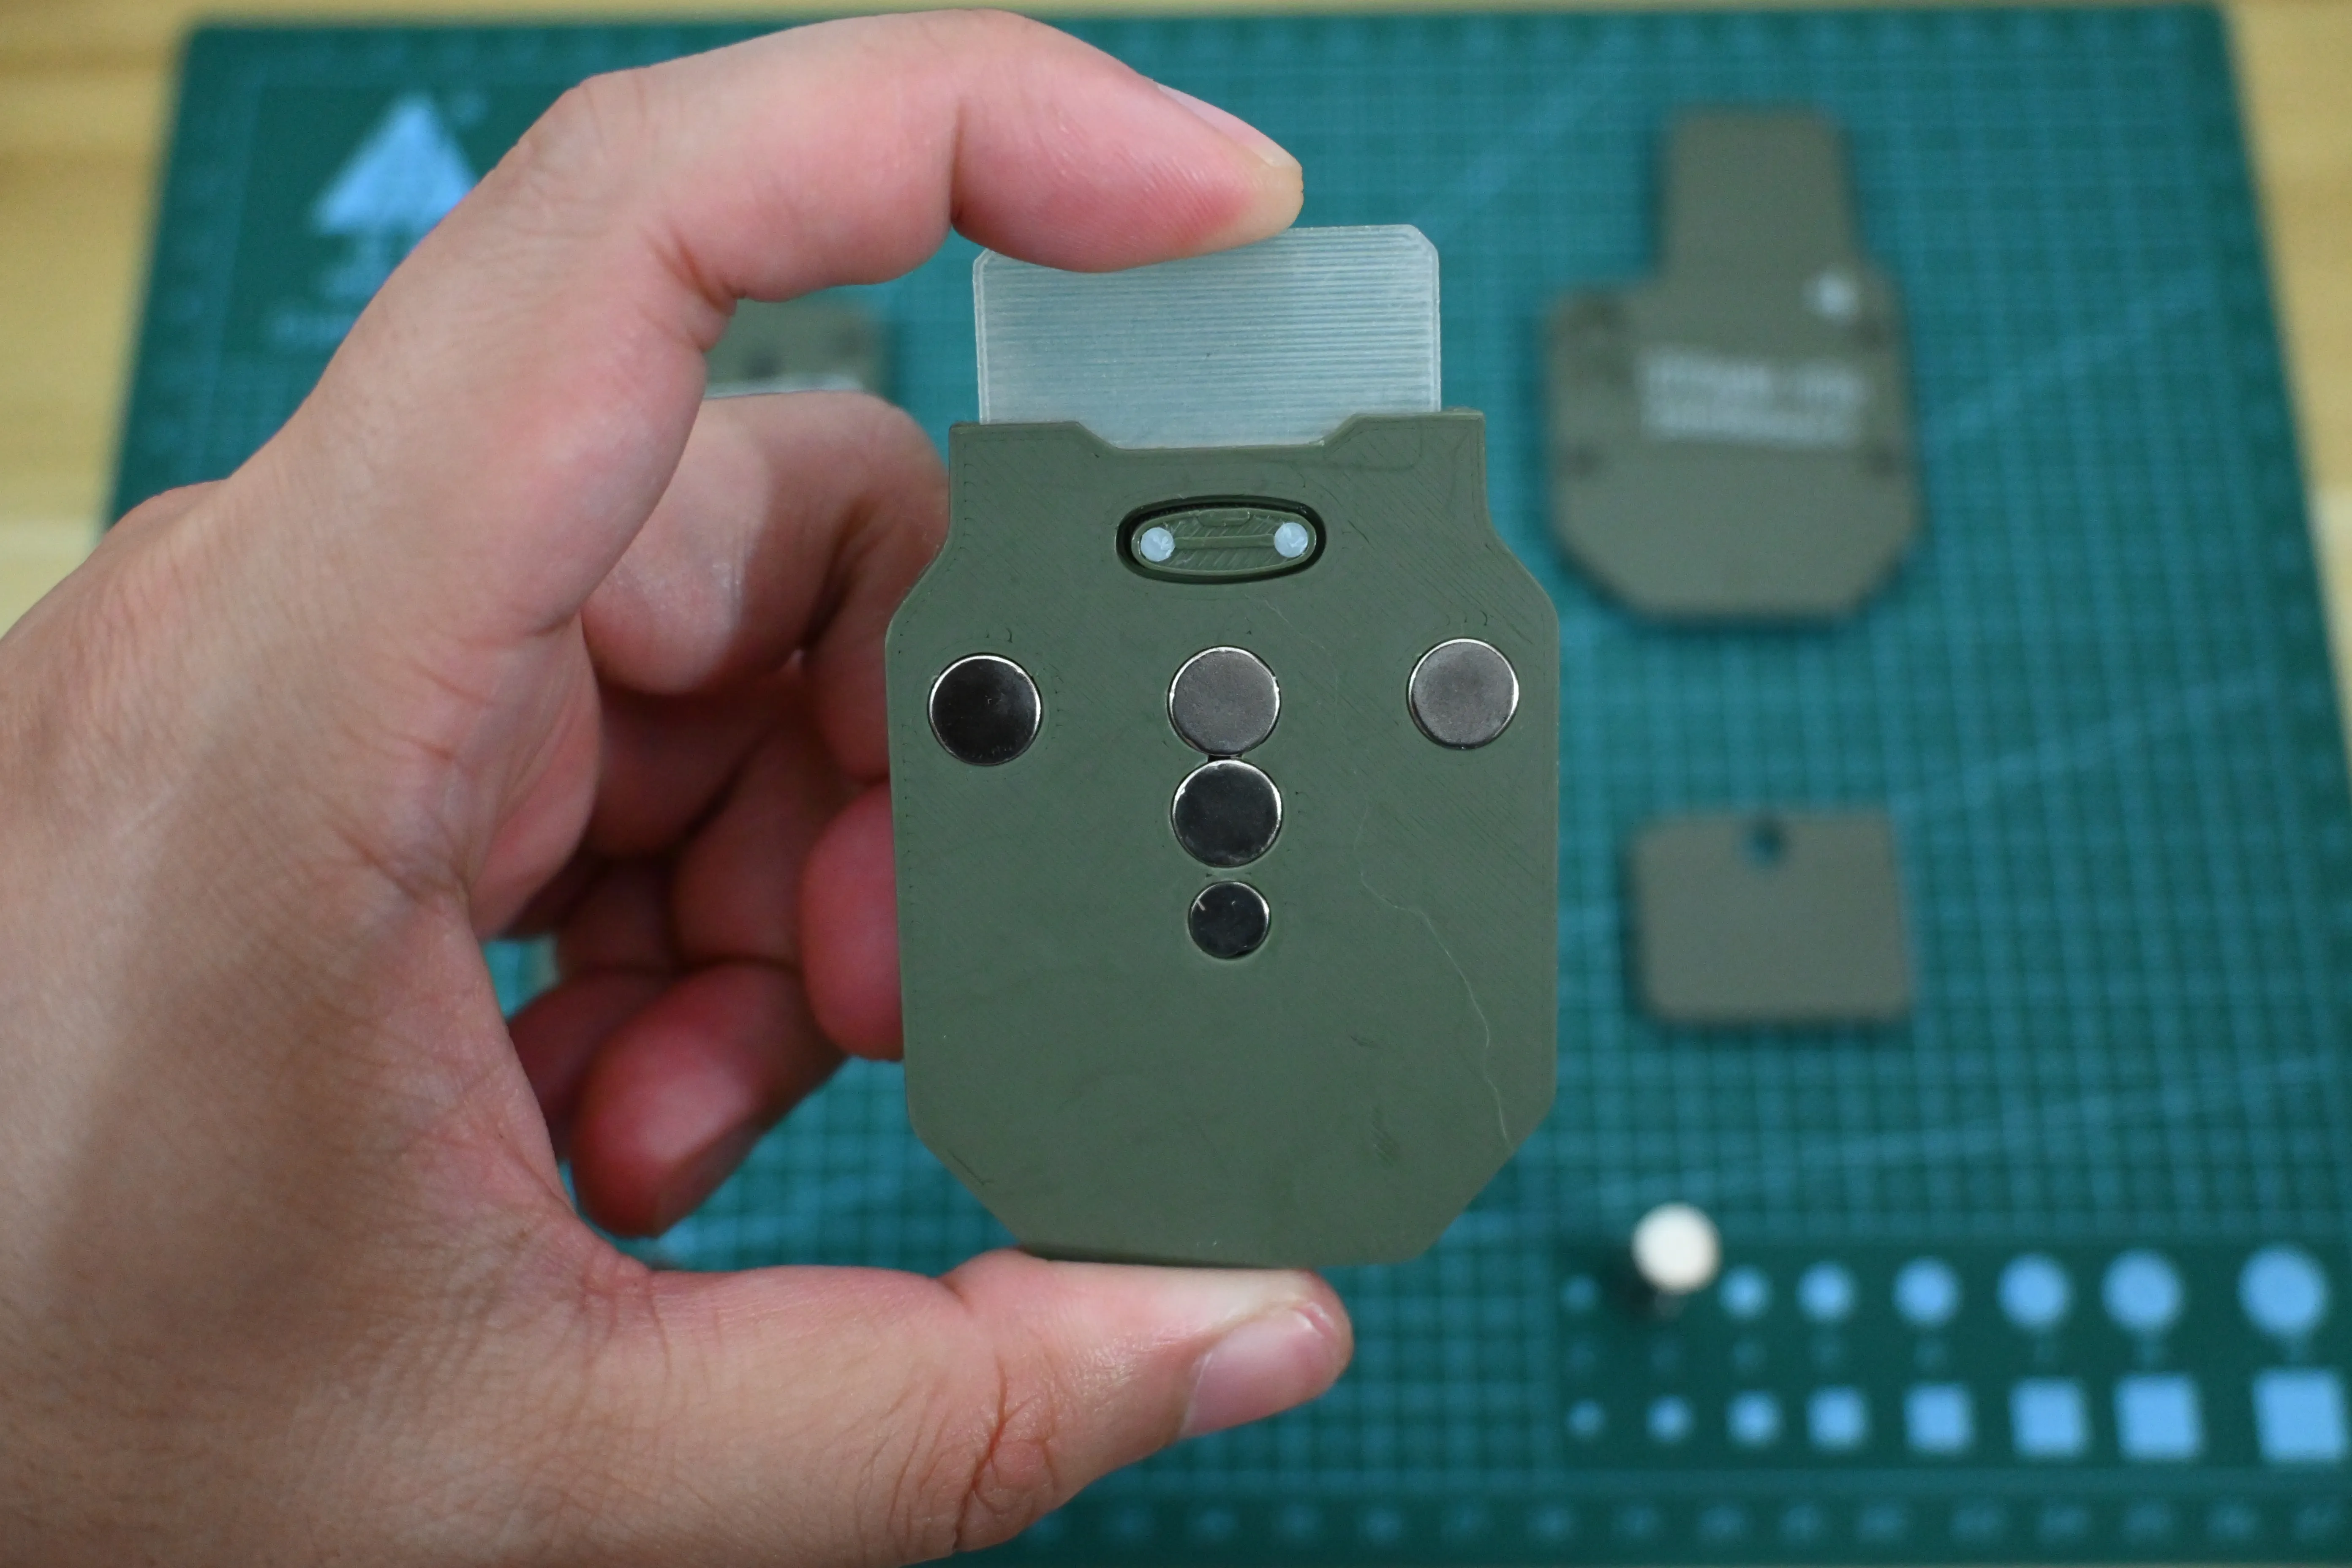
7. Take out the telescopic baffles of the left and right shields and install 2 magnets respectively.
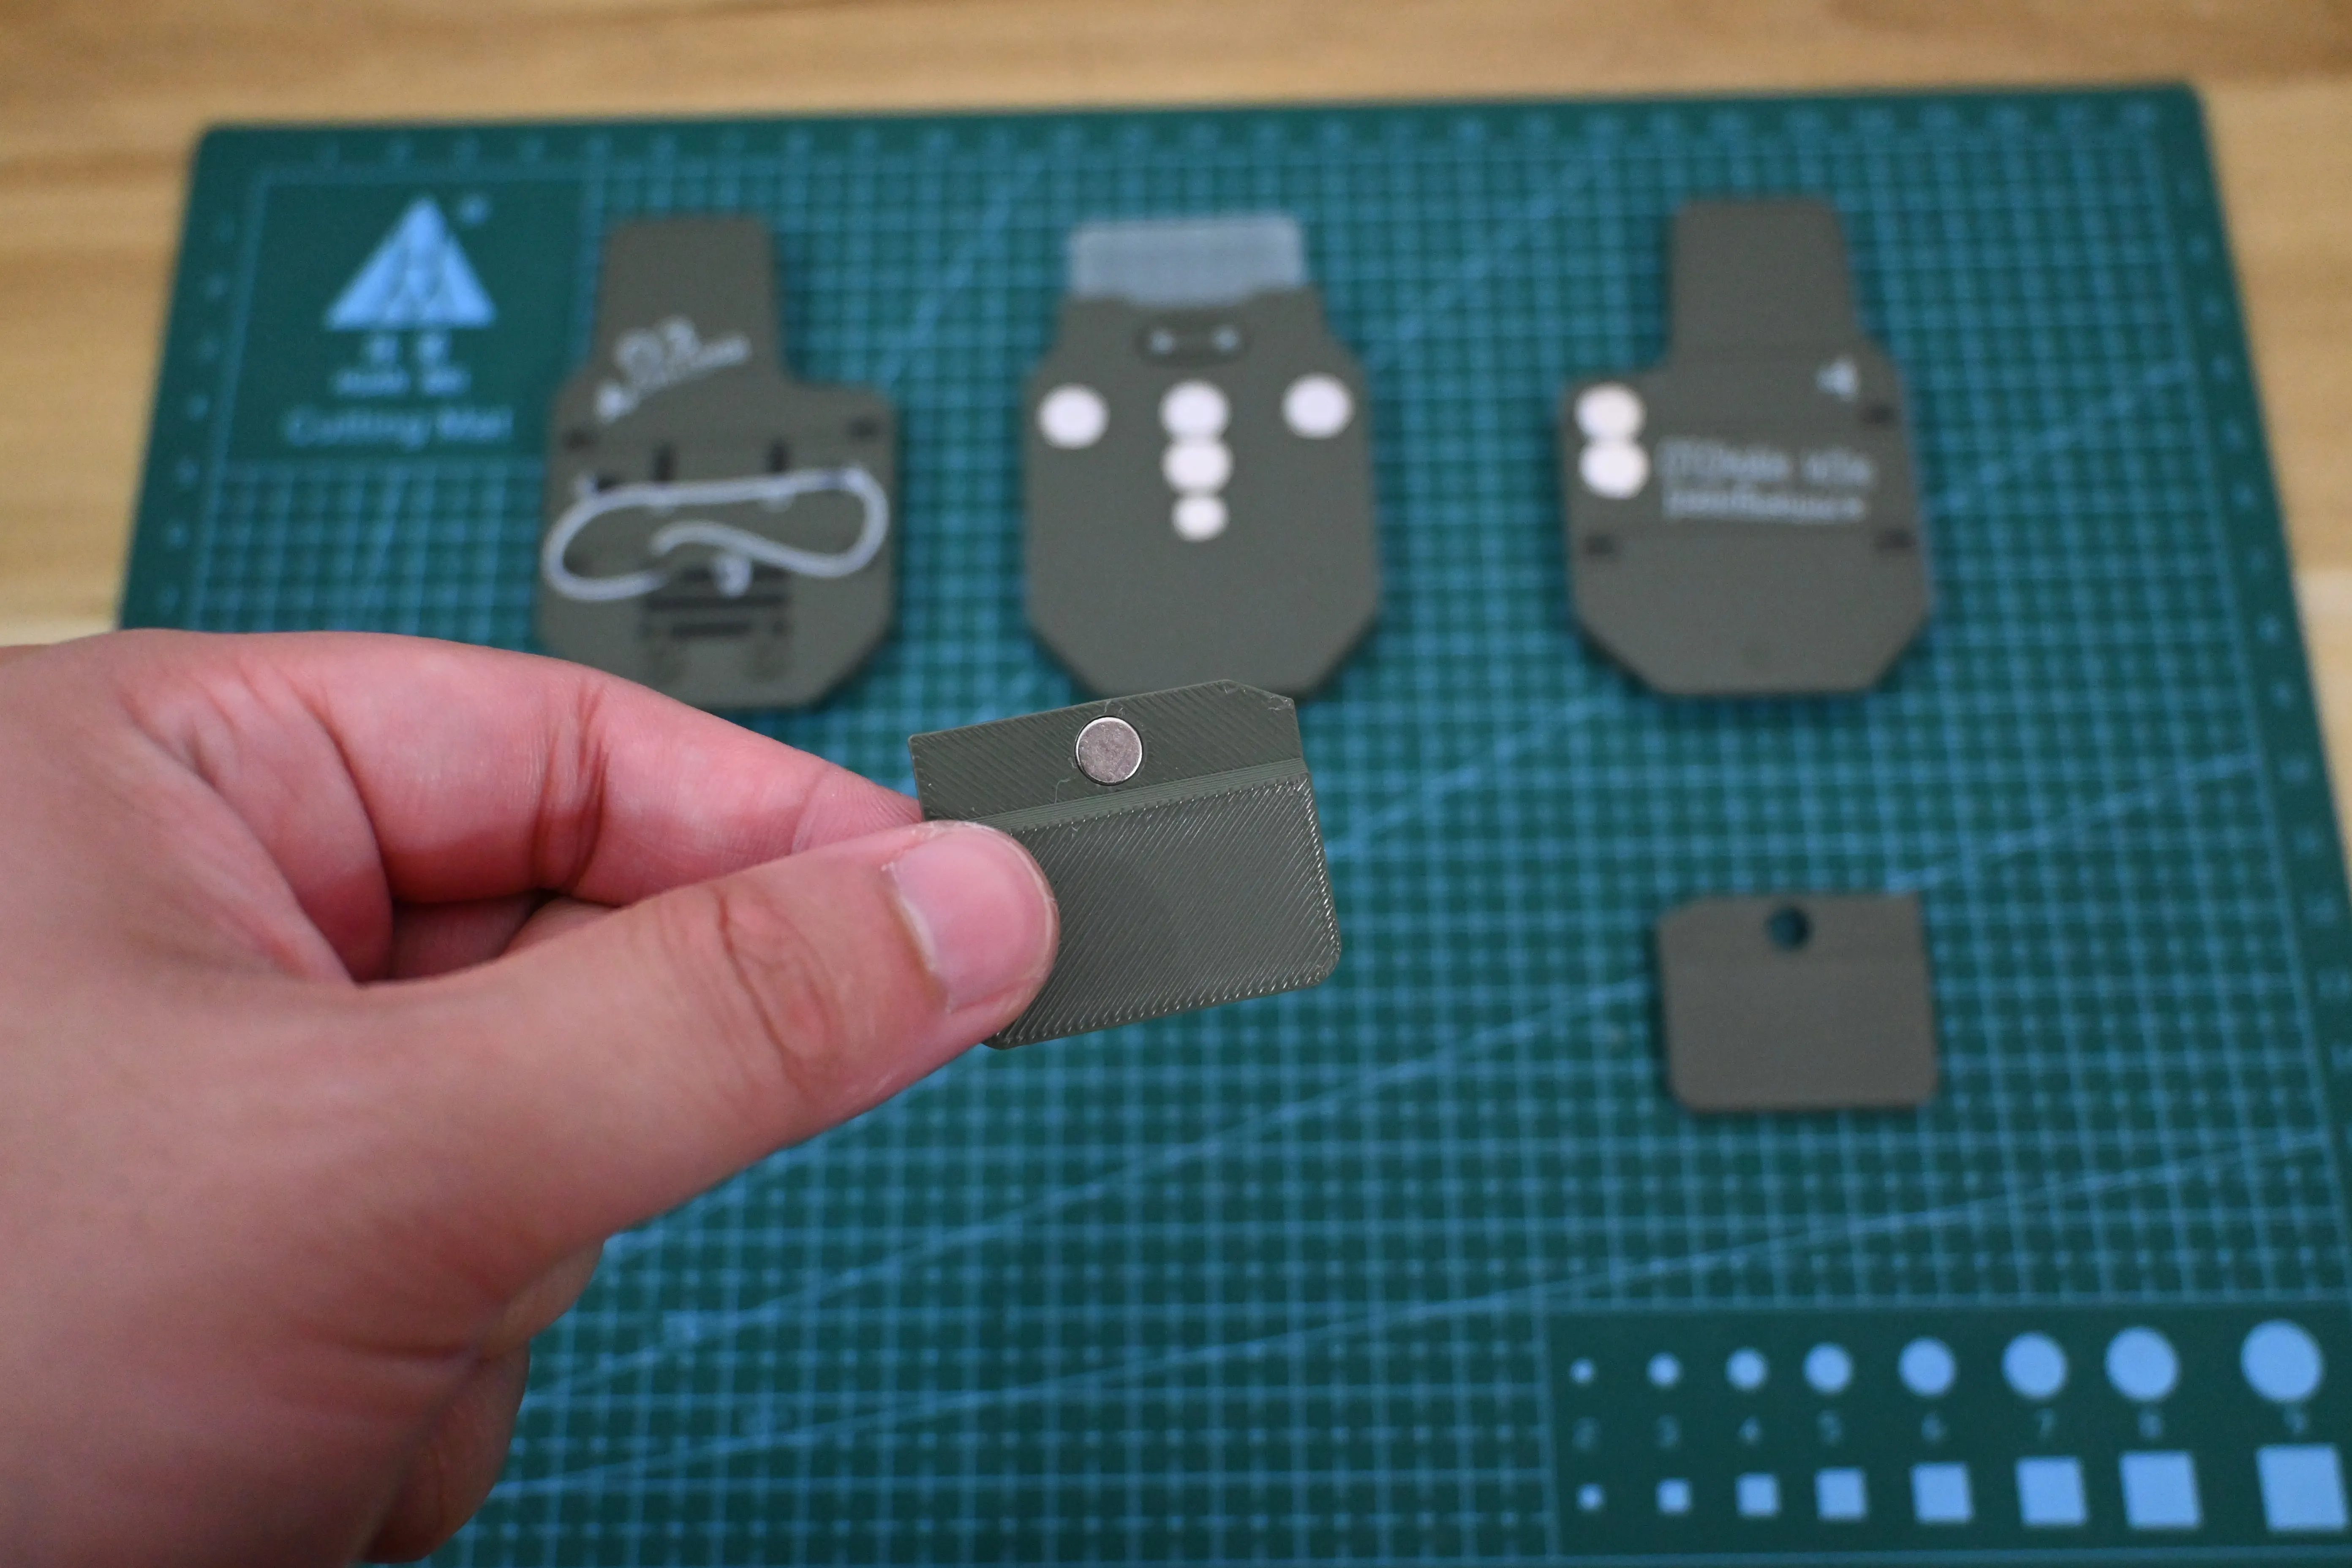
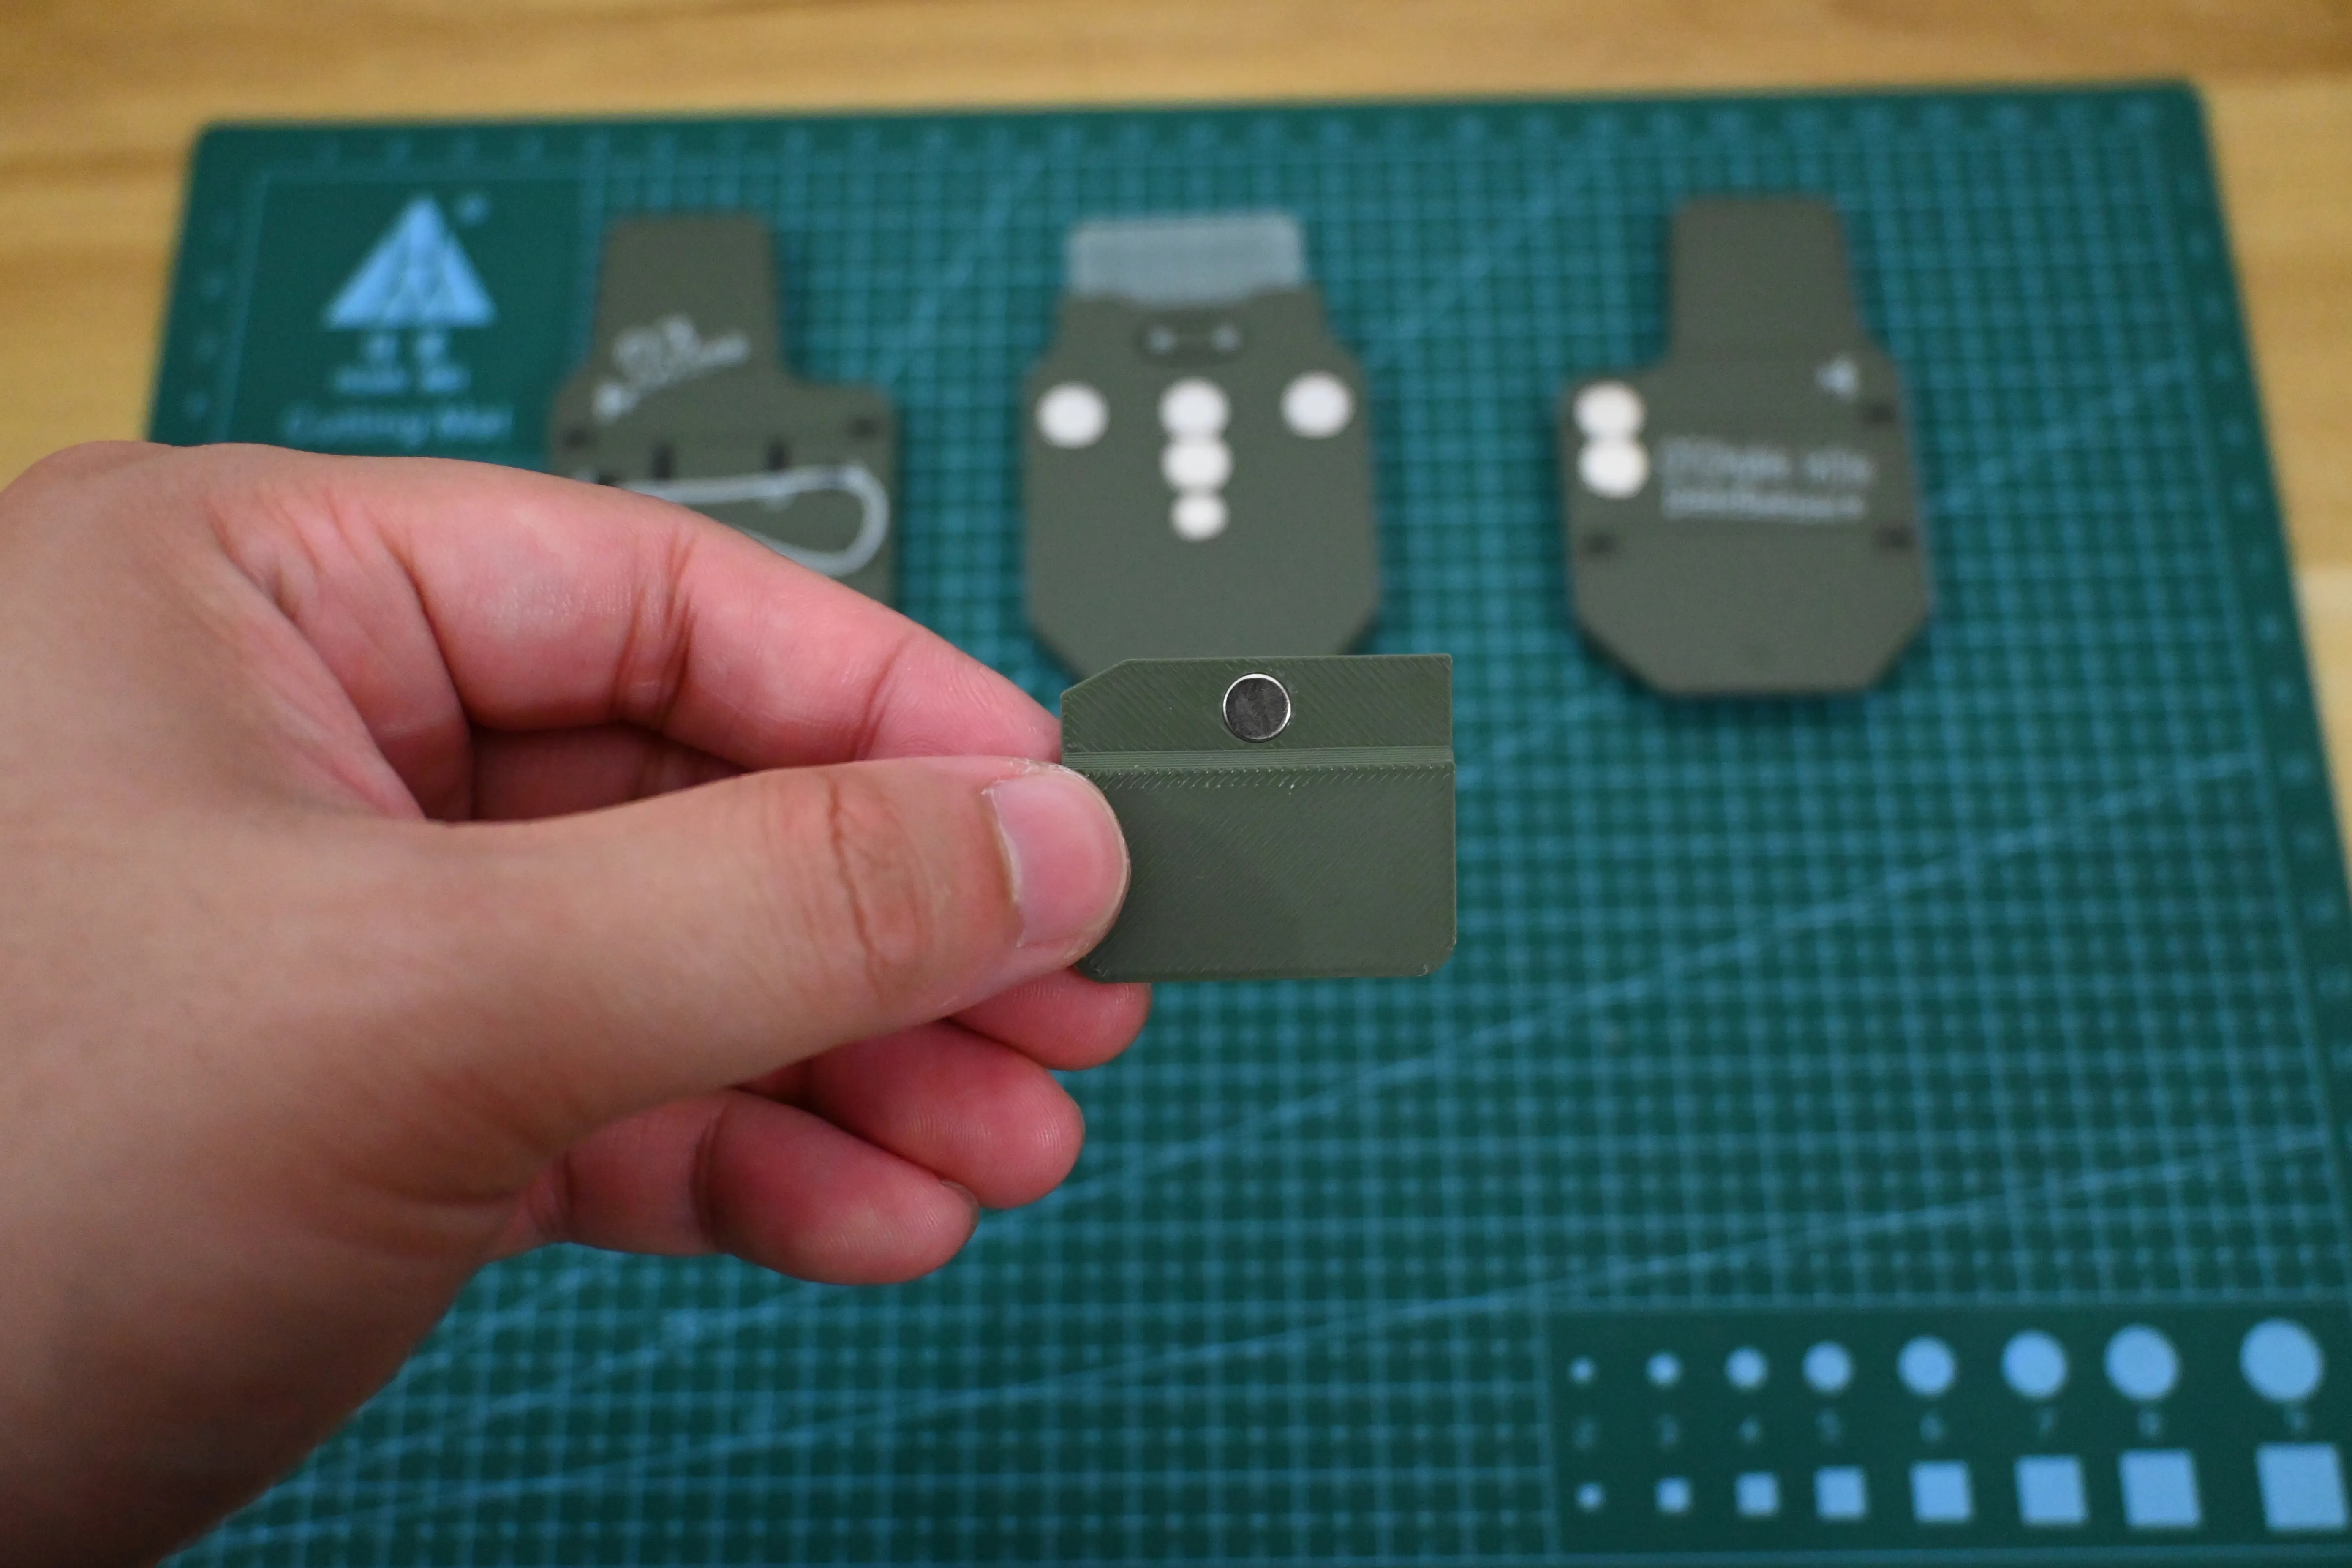
8. Face up, then the other way around.
here is a later adjustment. The shield has a gap and the baffle has a protrusion. If the two are aligned, the baffle can be pushed forward. When playing, by the dual role of gravity and magnet, you can automatically pop up.
9. Combine the shield on the right with the shield in the middle. Note that only when the magnets are installed correctly can the effect of magnetic attraction be realized.
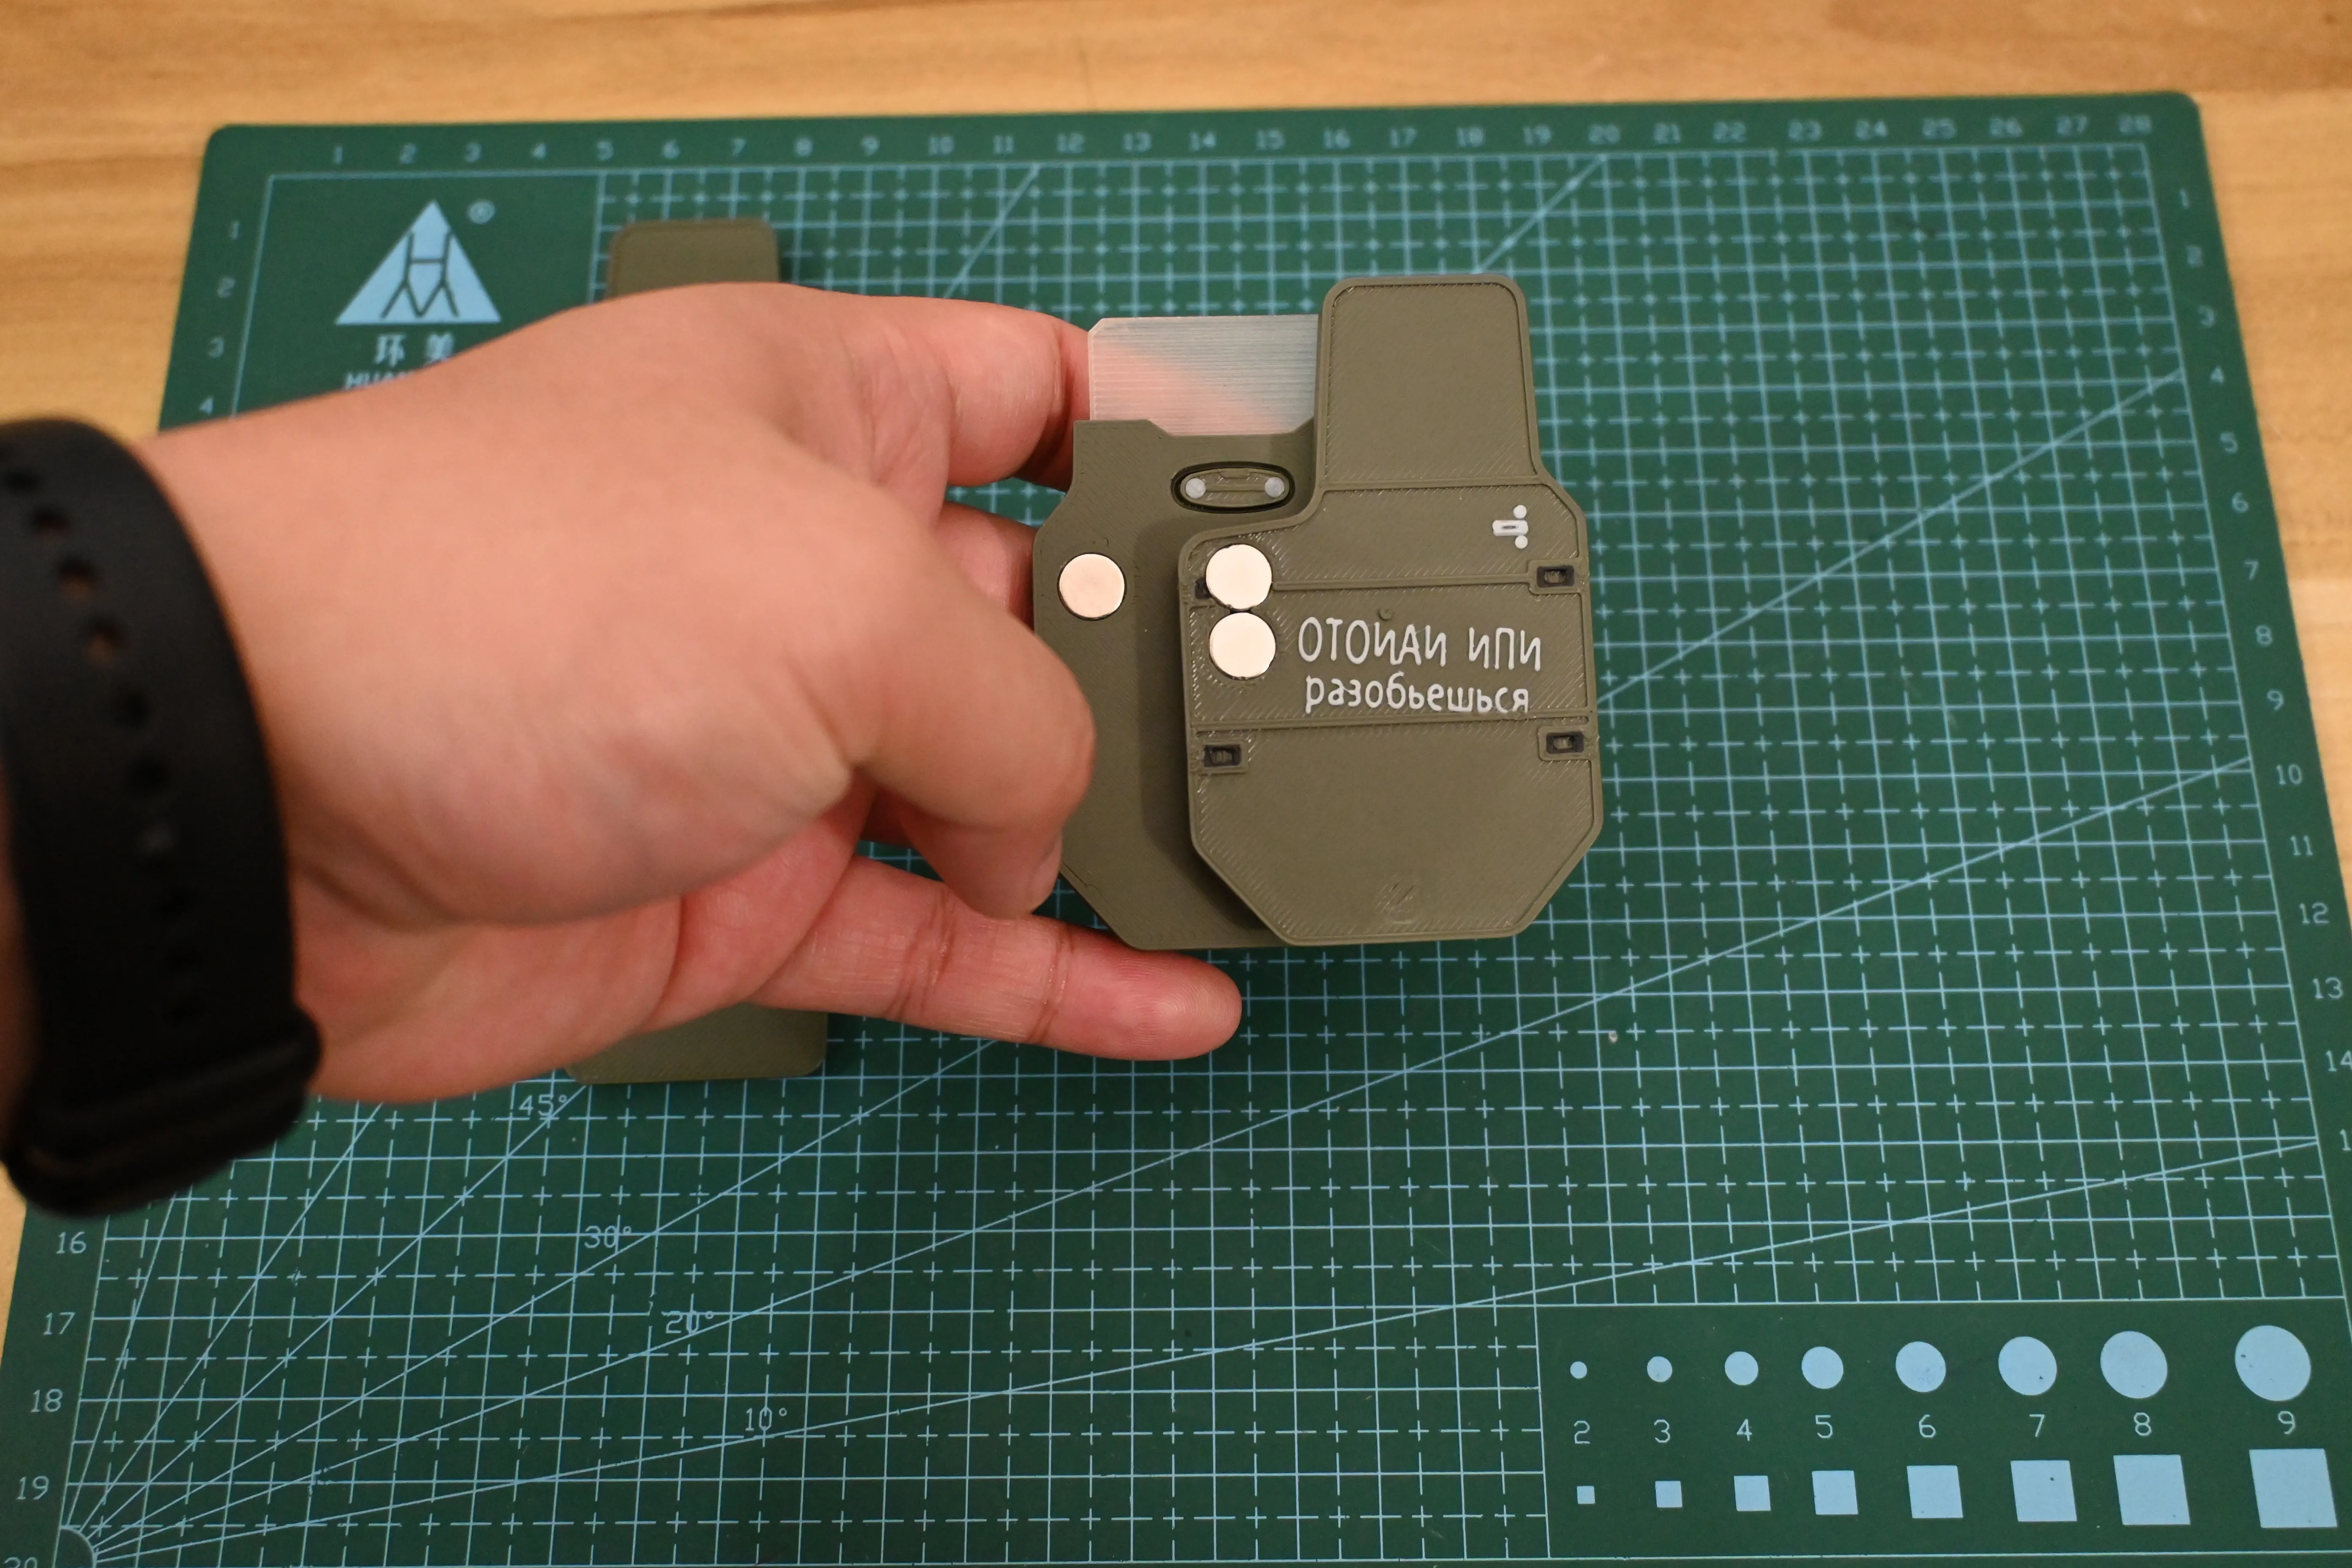

10. The shield on the left is installed in the same way.
11. Magnetically attract the left shield.
12. Turn the middle shield and install 2 magnets respectively to realize the function of refrigerator magnets.

Bill of materials
- NameQuantityNotes
- 1磁铁24见文章中
Originality of the Model
The author declares that this work is their personally original model
This model is licensed under the following terms:
This work is licensed under a Standard Digital File License. Digital files have a strict non-commercial, personal use only license.
You shall not share, sub-license, sell, rent, host, transfer, or distribute in any way the digital file or 3D printed versions of this object, nor any other derivative work of this object in its digital or physical format (including remixes of this object). You can not host these files on other digital platforms, web stores or cloud repositories. The objects may not be used in any way whatsoever in which you charge money, collect fees.
Models(1)
- 青鹿鸽作品-S.W.A.T半自动变形盾牌3mf.3mfDesigner

203.54 KB

2026-03-18