









Summer Hat-venture🧢
Bonnet hat
Summer Adventure
Customized hat
Artistic hat

- Layer height: 0.16 mm, wall thickness: 2 layers, infill density: 15%

11-disc
PETG/PLA
Designer

12

2
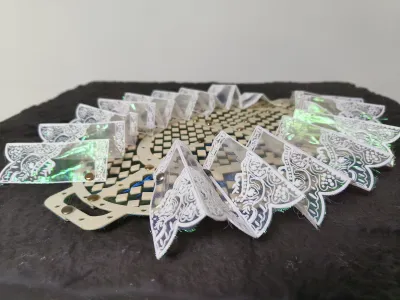
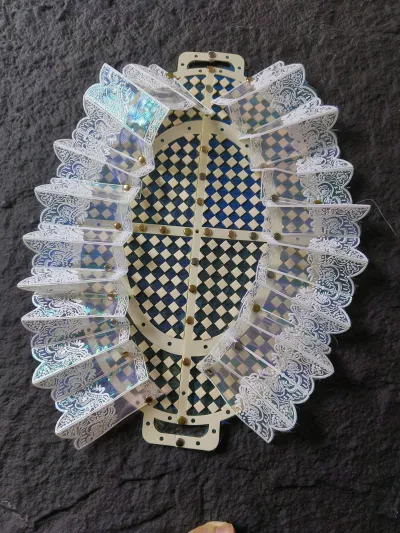
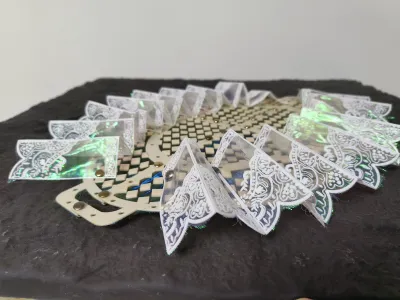
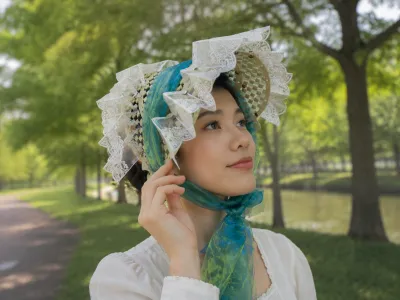
The design is inspired by the Bonnet hat,
and this should be the first 3D-printed Bonnet hat available online.
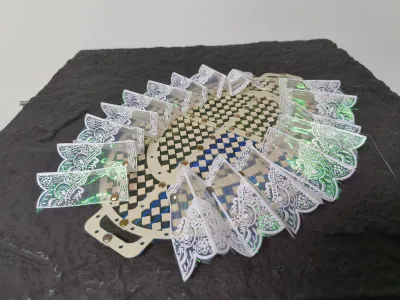
By combining 3D printing with sheer fabric, it challenges the common perception that 3D printing produces rigid, inflexible objects.
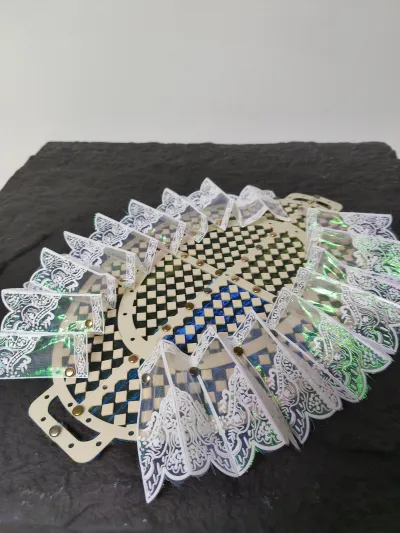
Starting from geometric shapes, moving to flat surfaces, and finally assembling into a unique, custom-designed 3D-printed Bonnet hat.
I used Elegoo’s wood‑colored filament and white filament for the print.
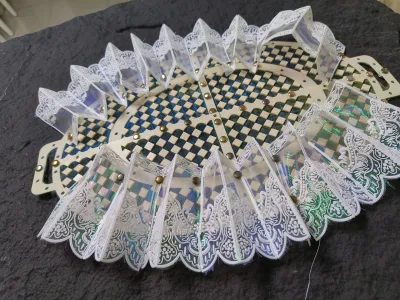
Using rivets as connectors, the entire piece was printed without supports—simple, convenient, and offering numerous structural possibilities. You can stack layers to create the lace trim and desired height of your hat.
Below are some explanations of the model files:

1. First, let’s look at the number of print layers:
① Layers 1, 2, 4, and 5 are essential—they form the base structure.
② Layer 3 represents the lace trim; you’ll need at least four layers to complete one full circle. Multiply by two if you want additional layers to achieve your desired thickness.
③ Layers 6, 7, 8, and 9 are thickening components that connect with layers 1, 2, 4, and 5, ensuring the bottom of your hat remains opaque while adding visual depth.
④ Layers 10 and 11 are designed for an opaque version—if you prefer non‑transparent construction, use these layers in combination with layers 1, 2, 4, and 5.
2. For the rivets, choose 8 mm ones; you can opt for longer lengths and select your preferred color.

3. After pausing the print, follow these steps: place the sheer fabric (similar to mosquito netting but available in many vibrant colors), then secure it around the edges using small magnets.

4. To fold the lace, simply fasten it with rivets at the designated folding points. The hollow spaces I’ve left open allow you to freely adjust the position and layering of the lace trim.
5. These are decorative elements; in the future, I plan to release additional accessories like bows and other embellishments.
6. This area is reserved for threading ribbons—feel free to choose beautiful ribbons (P.S.: Since I couldn’t find suitable ribbons, I’m temporarily using mesh instead—haha!).

Finally, thank you all! If you like it, please follow me.
Bill of materials
- NameQuantityNotes
- 1超薄网纱1颜色自选
- 28mm的铆钉50
Originality of the Model
The author declares that this work is their personally original model
This model is licensed under the following terms:
This work is licensed under a Standard Digital File License. Digital files have a strict non-commercial, personal use only license.
You shall not share, sub-license, sell, rent, host, transfer, or distribute in any way the digital file or 3D printed versions of this object, nor any other derivative work of this object in its digital or physical format (including remixes of this object). You can not host these files on other digital platforms, web stores or cloud repositories. The objects may not be used in any way whatsoever in which you charge money, collect fees.
Models(1)
- 波特帽子.3mfDesigner

14.63 MB

2026-06-15


