


 GIF
GIF GIF
GIF GIF
GIF


Year of the Horse 2026
Toy for the Year of the Horse
Spring Festival
Year of the Horse Theme
Refrigerator magnets
Celebrating the Lunar New Year


8

1
Before printing, please take a moment to review the following overview.
The “Turning Horse” refrigerator magnet is not only a practical magnetic decoration but also a charming desktop accent brimming with symbolic meaning—allowing you to keep blessings, prosperity, and the warmth of home close at hand, one gentle turn at a time.
Three Blessings in One Turn: Spreading Good Fortune
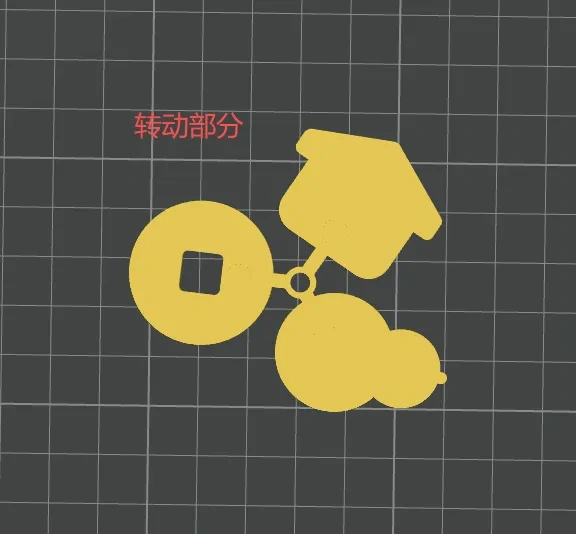
The modular components atop the little horse can rotate freely, seamlessly switching between three iconic designs: copper coins, gourds, and houses. With each turn, you’ll find yourself saying “Money Soon!”, then “Good Fortune (Gourd) Soon!”, and finally “A Home Soon!”. By personally spinning this delightful piece, you’re not just moving a decorative object—you’re actively bringing your heartfelt wishes for a prosperous and fulfilling life into your own hands.
Two Uses in One: Bring Joy Anywhere
With its built‑in strong magnets, simply stick it onto your refrigerator or metal entryway cabinet to instantly infuse even the coldest appliances with a touch of warmth and charm. Remove it and place it on your desk or windowsill—now it’s a playful, endearing little red horse figurine. No matter where you put it, it becomes a cheerful, heartwarming addition to your space.
Red and Gold: A Lucky Duo That Never Fails to Delight
The vibrant red horse paired with subtle golden accents creates a traditional yet irresistibly auspicious color combination. Beyond being a beautiful decorative piece, it’s also a thoughtful gift that conveys heartfelt sentiments—perfect for New Year celebrations, housewarmings, or everyday gestures of goodwill. Let the person who receives it experience the joy of “Turning Horse for Good Fortune” as they spin the piece and embrace the good luck it brings.

Assembly Instructions
1. Materials and Accessories Needed
- Hardware: 4 round magnets (5 mm diameter, 2 mm thickness)
- Adhesive: Choose either 502 glue or oil-based adhesive—either works perfectly.
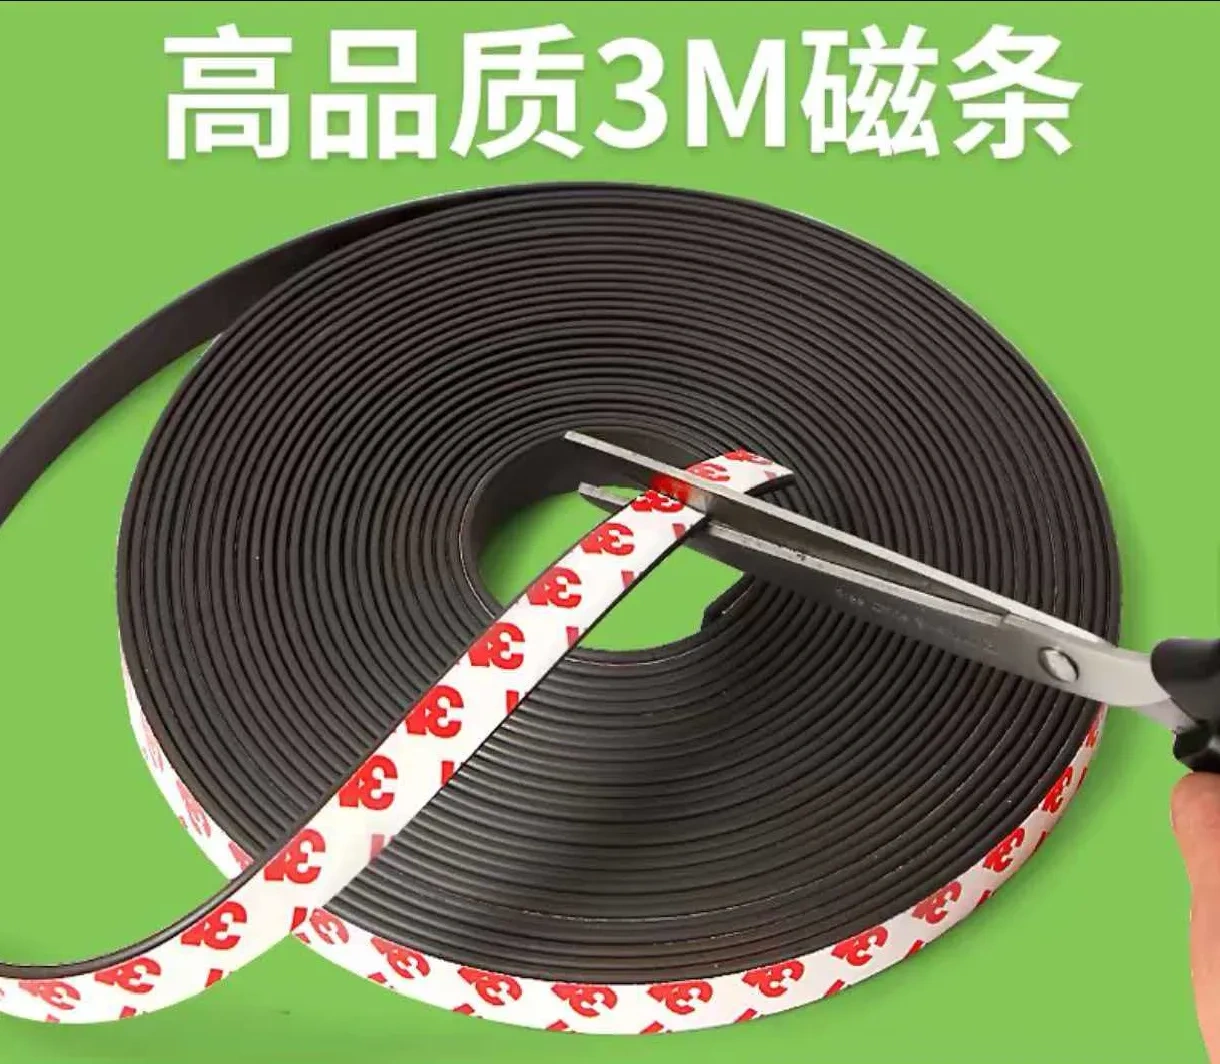
- Optional Accessories: 2 strips of soft magnetic tape (for refrigerator magnet functionality)
Print File: A specially configured file with pre‑set pause commands.
Print File Overview: The file is divided into three main sections—Rotating Component, Base Layer, and Top Layer.

2. Instructions for Embedding the Magnets
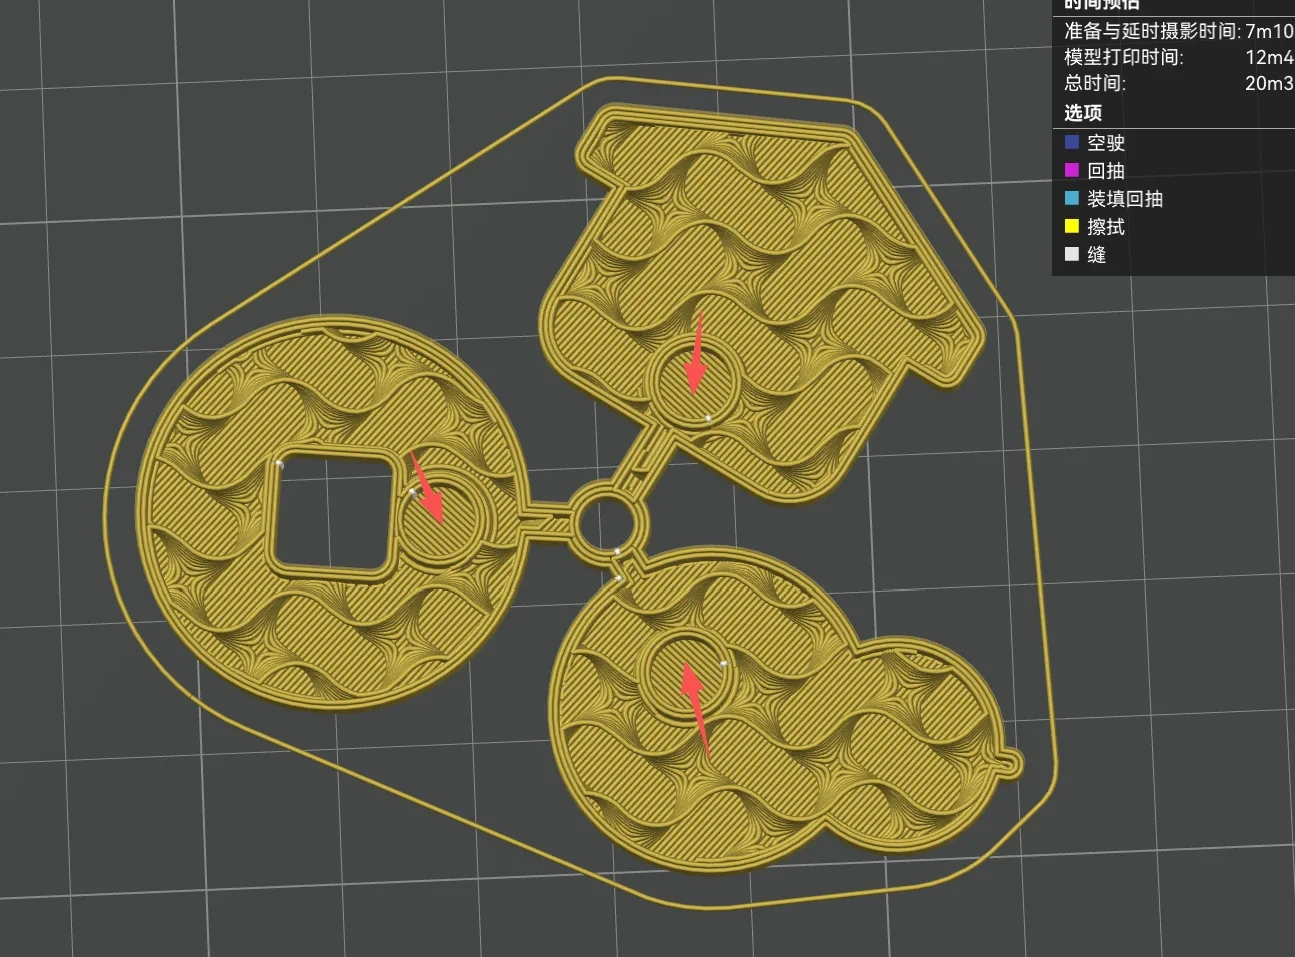
The magnets must be embedded in the four holes marked by arrows in the design. These holes are specifically tailored for the A1 printer model, ensuring a perfect fit while preventing the magnets from sticking to the print head—a feature that eliminates the need to adjust hole sizes manually.
3. Printing and Magnet Embedding Steps
- Slicing and Printing: Simply use the provided specialized configuration file to slice the model. The file already includes pre‑set print‑pause points—no manual adjustments are required. Once slicing is complete, just start the print job.
Embedding the Magnets: When the print reaches the pre‑set pause point, the printer will automatically pause. At this stage, carefully insert each magnet into its corresponding hole. After placing the magnets, ensure they’re securely positioned and aligned—no shifting or misalignment should occur—then resume printing to complete the embedding process.
 Automatic Pause
 After the Magnets Are Embedded
Important Note: Pay Close Attention to Magnet Polarity!!! Pay Close Attention to Magnet Polarity!!! Pay Close Attention to Magnet Polarity!!!
- Personal Recommendation:
- Start by printing the Rotating Component—this module requires embedding three magnets, and all three must have the same magnetic polarity (pointing in the same direction).
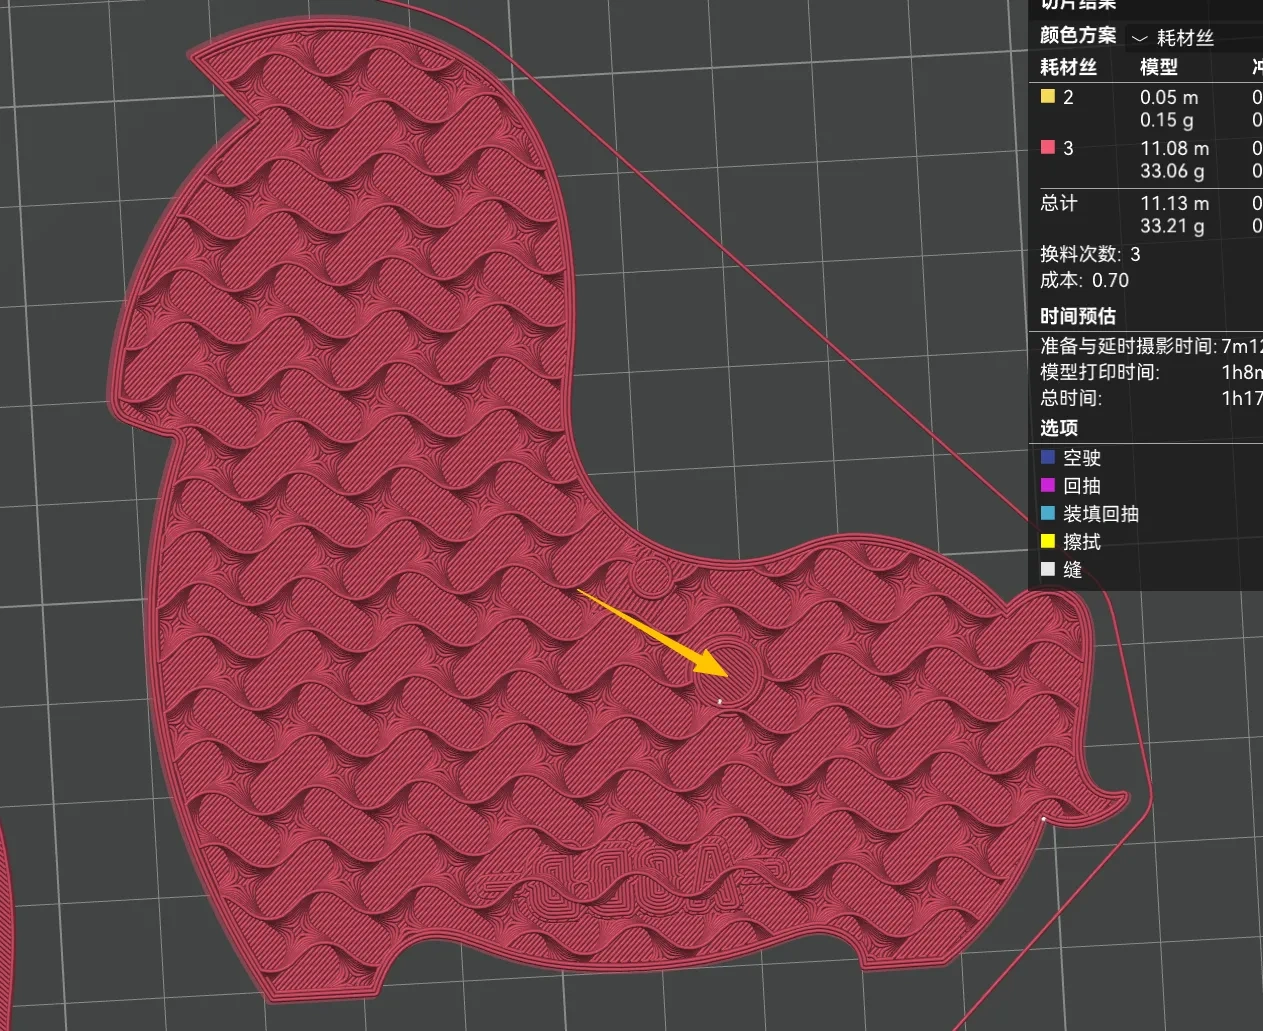
Once the magnetic polarity of the Rotating Component has been determined, proceed to embed the single magnet in the Base Layer: Place the Rotating Component in the orientation shown in the design, position the magnet behind the component, and let the magnetic attraction guide the magnet into place. At this stage, the surface indicated by the arrow is the contact surface between the Rotating Component and the Base Layer—align the Base Layer magnet with this surface and insert it into the hole, ensuring proper polarity alignment for smooth rotation later on.
 The Surface Indicated by the Arrow Is the Contact Surface with the Base Layer
4. Final Assembly Steps
- Rotation Test: First, verify that the Base Layer and Rotating Component fit together snugly and rotate smoothly—ensure there’s no jamming or misalignment before proceeding to the next step.
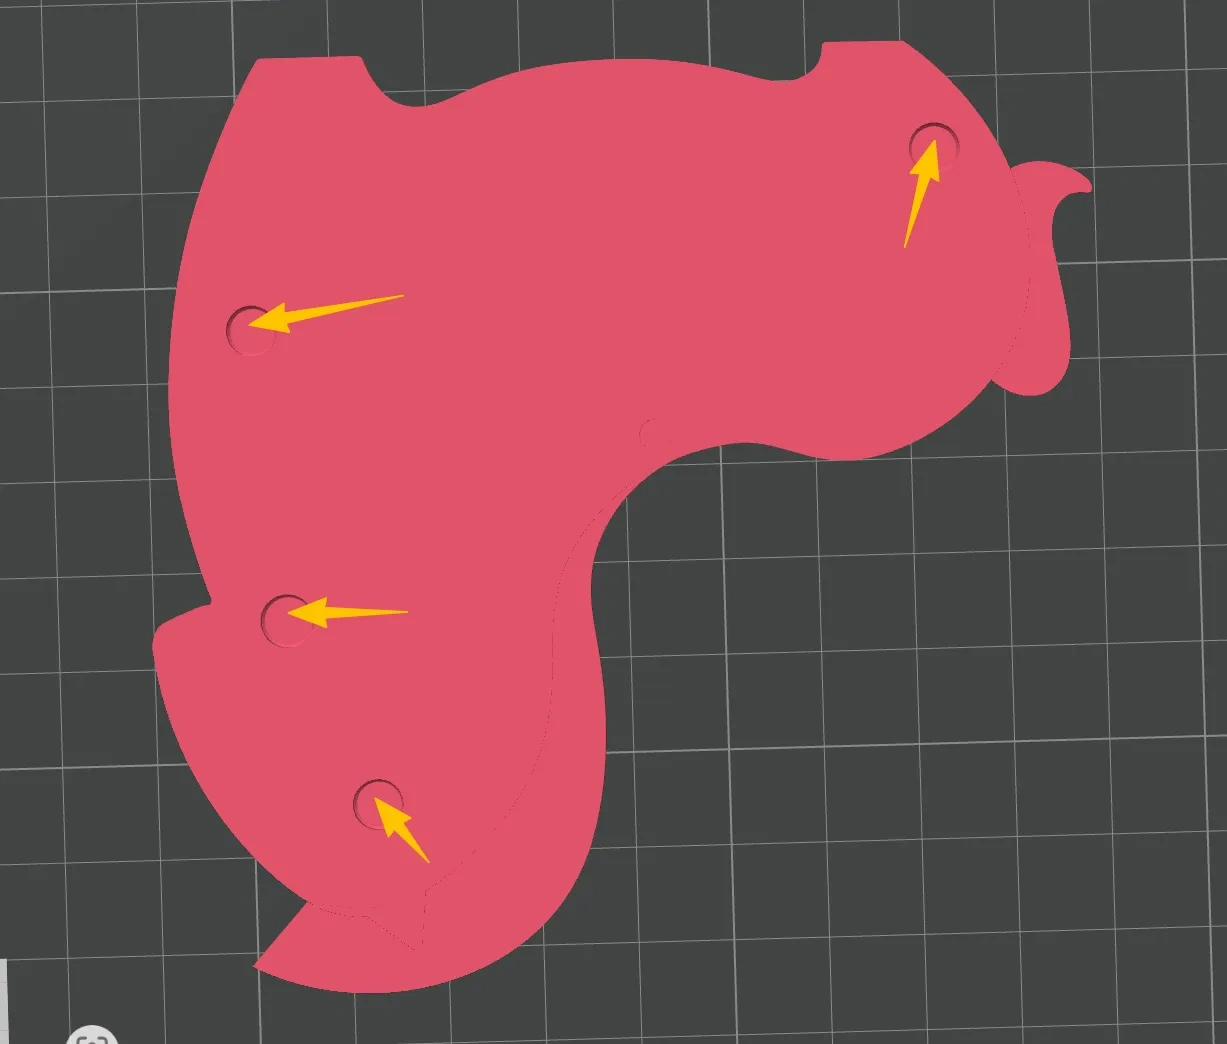
Top Layer Bonding: Apply a small amount of adhesive to the four corresponding holes on the Top Layer (as shown in the diagram). Avoid using too much adhesive—excess glue could overflow and affect the appearance or cause binding issues. Quickly align the holes on the Top Layer with those on the Base Layer, press firmly to secure the bond, and let the adhesive cure for a few moments to complete the main assembly.
Upgrade for Refrigerator Magnet Functionality (Optional): If you’d like to use the piece as a refrigerator magnet, simply attach two strips of soft magnetic tape to the back of the finished product (as shown in the diagram), pressing them firmly into place.
Once assembly is complete, you’re ready to enjoy the fun interactions and auspicious good fortune brought by “Turning Horse for Good Fortune”!
Bill of materials
- NameQuantityNotes
- 1磁铁(直径5mm,厚度2mm)4
Originality of the Model
The author declares that this work is their personally original model
This model is licensed under the following terms:
Credit must be given to the creator
Models(3)
 马年玩具设计底层.stlDesigner
310.82 KB

2026-02-02
 马年玩具设计旋转.stlDesigner
77.43 KB
2026-02-02
 马年玩具设计顶层.stlDesigner
227.33 KB
2026-02-02
View all(3)